Getting Started with Microsoft Azure Blob Storage
Metadata Configuration
The first step is to create a Microsoft Azure Blob Storage Metadata.
Launch the Metadata creation wizard, select the appropriate Metadata in the list and follow the wizard.
Next step is to set the connection properties on the root node, as in the below example:
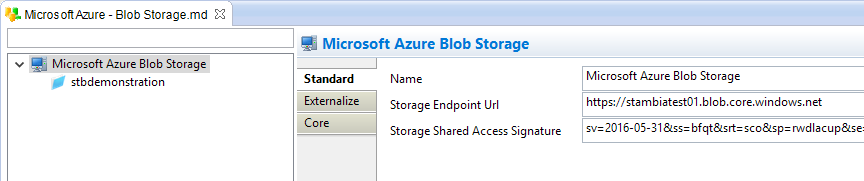
The following properties are available:
| Property | Description | Example |
|---|---|---|
Name |
A label for the Blob Storage |
Microsoft Azure Blob Storage |
Storage Endpoint Url |
URL of the Microsoft Azure Blob Storage Account endpoint. |
|
Storage Shared Access Signature |
The Shared Access Signature (SAS) of the Azure Storage account. |
sv=2015-07-08&sig=<sig>&spr=https&st=2016-04-12T03%3A24%3A31Z&se=2016-04-13T03%3A29%3A31Z&srt=s&ss=bf&sp=rwl |
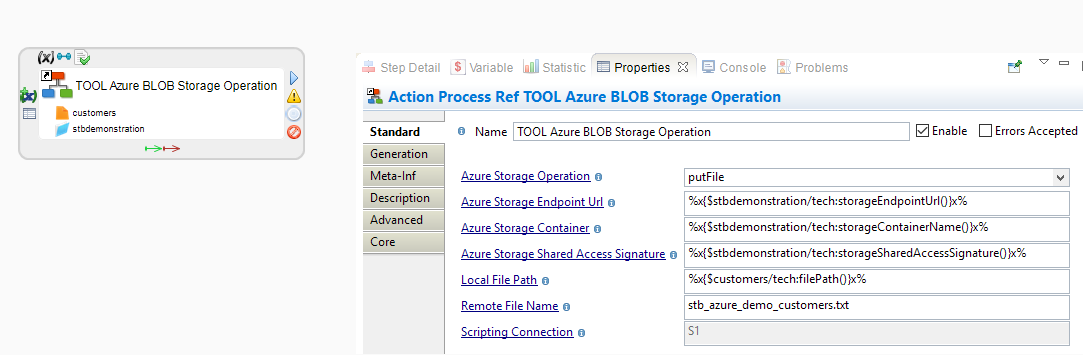
Perform storage operations
To perform operations on a container:
-
Create a Process
-
From the Process Palette, add the "TOOL Azure Storage Operation"
-
Define the parameters accordingly to your requirements
The complete documentation of each parameter can be found directly on the tool, in its description.
Below, an example with the put file operation:
Sample Project
The Microsoft Azure Component ships sample project(s) that contain various examples and use cases.
You can have a look at these projects to find samples and examples describing how to use it.
Refer to Install Components to learn how to import sample projects.