In this tutorial, you will learn how to build your first data authoring application. This application mimics an Employee (i.e., HR) domain where employees and contractors will be authored, as well as the department to which they belong and their education credentials.
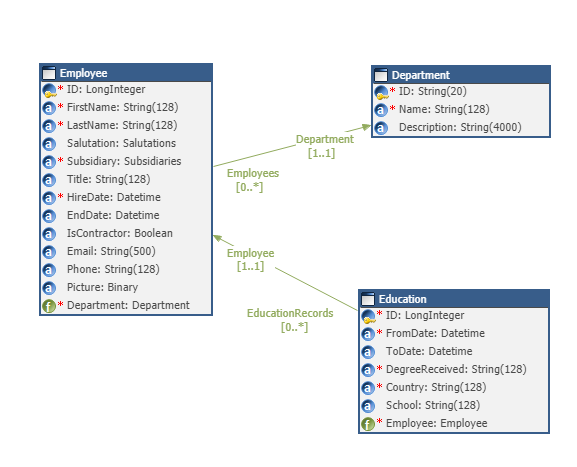
The overall data model for the application you are about to build looks like this:
Learning outcomes
- Designing a logical model in xDM.
- Creating the user experience.
- Deploying the application.
- Using the application.
Learning track
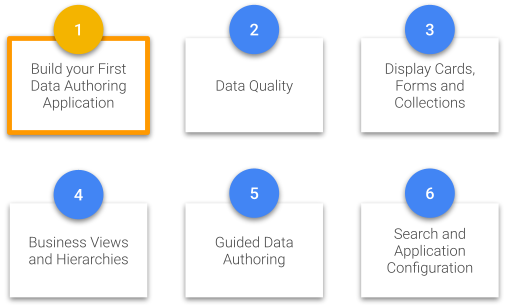
This tutorial is the first of a series of six units that will guide you through designing a complete data management application.
This tutorial assumes that you have already set up a functional Semarchy xDM environment and you have design-time privileges to connect to the Application Builder.
If you have not set up Semarchy xDM yet, you can complete the Quick Install tutorials from the Tutorials menu. Additional setup information can also be found in the Semarchy xDM documentation.
If you have not already done so, click the button below to download all the images and data sets that will be used in this tutorial.
Semarchy xDM uses an entity-relationship (ER) approach to help you create the logical model of your application.
To get started, you need to create a new logical model. The logical model will hold all your entities, attributes, rules, forms, collections, and application definitions.
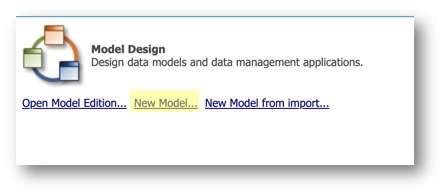
- Open the Application Builder.
- Click on New Model.
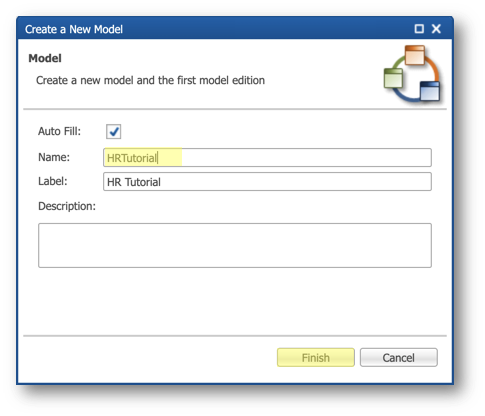
- The Create a New Model wizard opens. Enter
HRTutorialin the Name field and then click Finish.
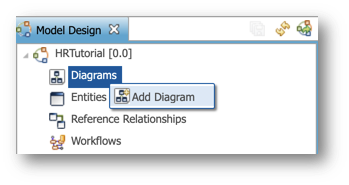
- In the context menu, right-click on Diagrams and then select Add Diagram.
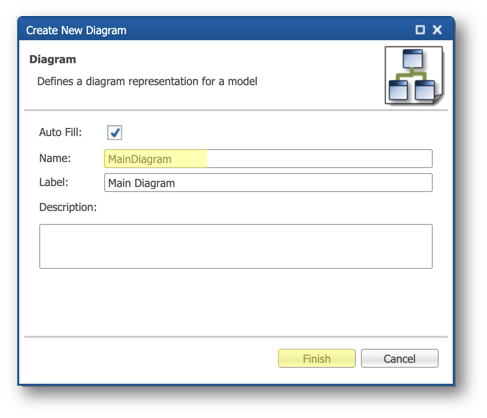
The Create New Diagram wizard opens.
- In the Name field type
MainDiagramand click Finish.
Congratulations!
You have successfully created a logical model for your application.
Next, you will add the first entity of your model.
You are now ready to create the Employee entity. Once fully set up, it should look as follows:
Attribute | Datatype | Mandatory | Notes |
ID | Number | Yes | Auto-numbered ID |
FirstName | String(128) | Yes | |
LastName | String(128) | Yes | |
Salutation | List of values | No | Refers to the Salutations LOV |
Subsidiary | List of values | Yes | Refers to the Subsidiaries LOV |
Title | String(128) | No | - |
HireDate | Date (Built-in Type) | Yes | - |
EndDate | Date (Built-in Type) | No | - |
IsContractor | Boolean | No | - |
String(500) | No | - | |
Phone | String(128) | No | - |
Picture | Binary | No | Will hold the employee picture |
To create this entity, you will:
- Create the entity and add the FirstName and LastName attributes.
- Create two lists of values (LOVs): Salutations and Subsidiaries.
- Add the Salutation and Subsidiary attributes to your entity and refer to the LOVs you previously created.
- Add all the remaining attributes.
Add the Employee entity to the model
The fastest way to add a new entity to your model is using the diagram.
The entity you will create is a basic entity, which is best suited for data authoring use cases.
- Select Add Entity in the diagram Palette.

- Click anywhere on the diagram.
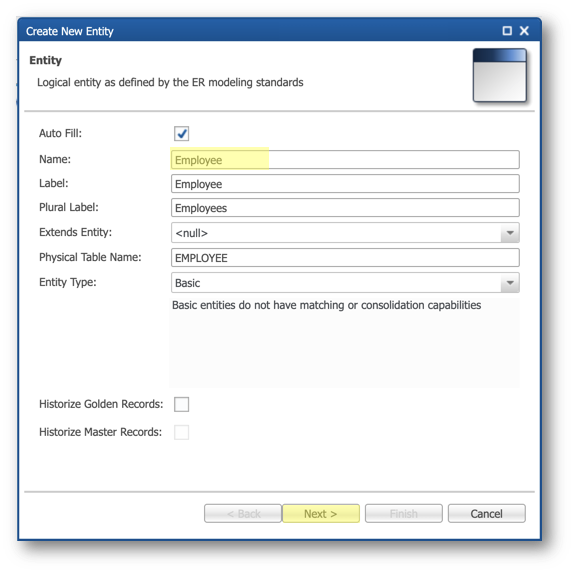
The Entity wizard opens.
- Enter
Employeein the Name field and then click Next.
- On the next page, set the Name attribute to
ID. - Keep the Sequence option selected for ID Generation. This means that the ID generation will use a sequence number instead of a manual or calculated value.
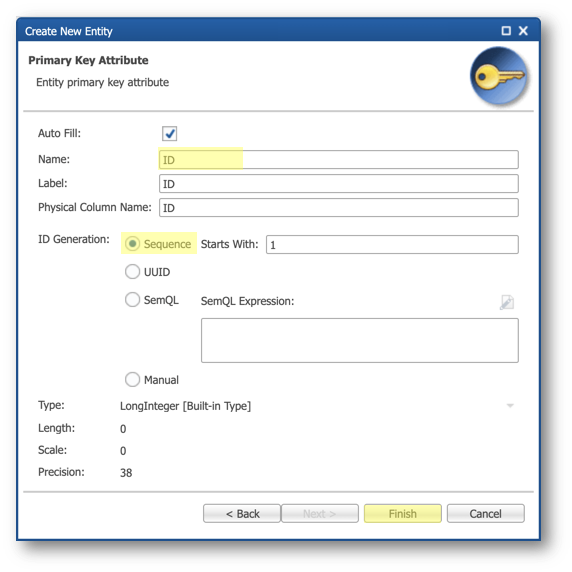
- Click Finish.
The new Employee entity appears on the diagram.
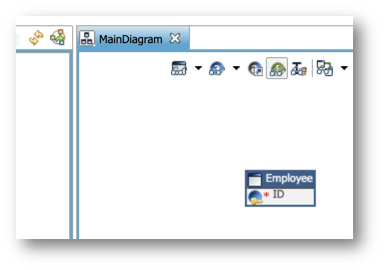
You have successfully added the Employee entity.
Next, you will add its first attributes.
Add the FirstName and LastName attributes
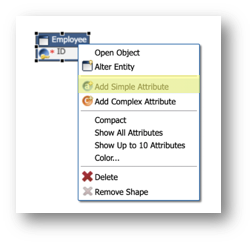
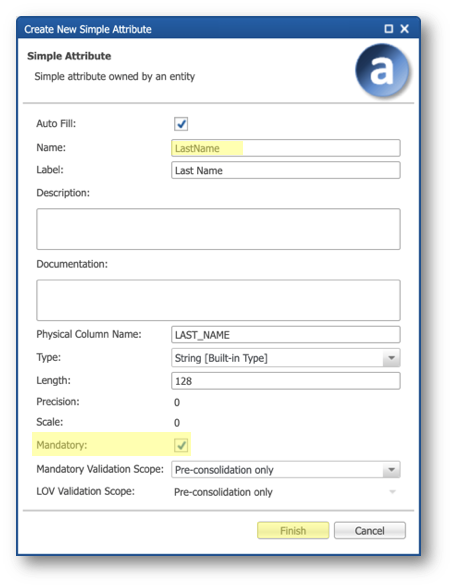
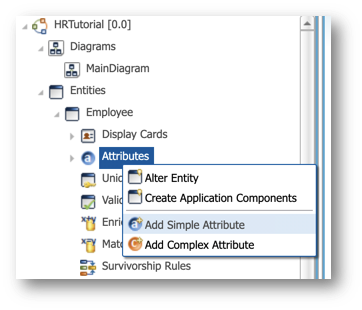
- Right-click the Employee entity in the diagram and select Add Simple Attribute.
The Simple Attribute wizard opens.
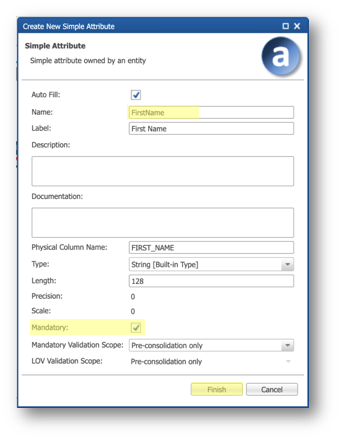
- Enter the following values:
- Name:
FirstName - Type: String (Built-in Type)
- Select Mandatory.
- Click Finish
- Right-click again the Employee entity on the diagram and select Add Simple Attribute to create another attribute.
The Simple Attribute wizard opens.
4. Enter the following values, and then click Finish:
- Name:
LastName - Type: String (Built-in Type)
- Select Mandatory.
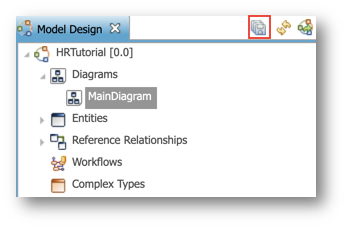
- Save all your work. To do so, click the Save all current contents button at the top of the Model Design view.
Congratulations!
You have just created your first entity with three attributes. It appears on the diagram.
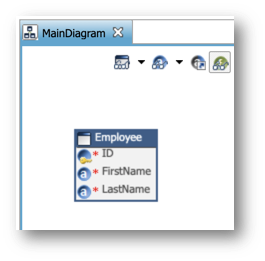
The ID of the Employee entity will be automatically set using a sequence.
Next, you will add lists of values to your model.
You will now create two lists of values (LOVs) that you will use to restrict the possible values for the Salutation and Subsidiary attributes.
Create the Salutations LOV
- In the Application Builder, right-click on Lists of Values from the Model Design view and select Add List of Values.
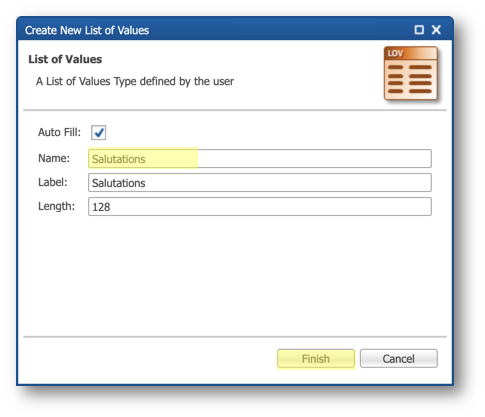
The creation wizard opens.
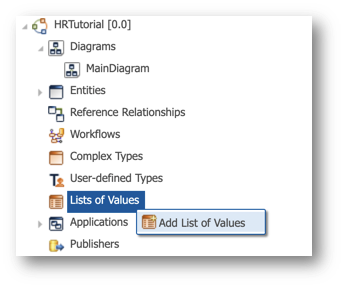
- Enter
Salutationsin the Name field, and then click Finish.
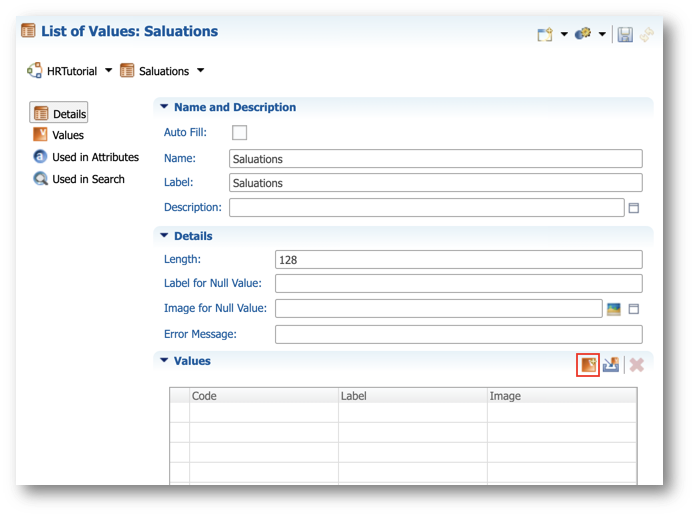
- Click on the Add Value button from the Values section.
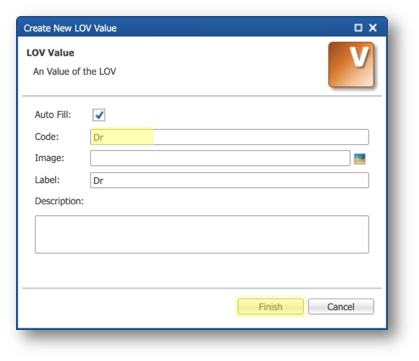
- Enter
Drin the Code field, and click Finish.
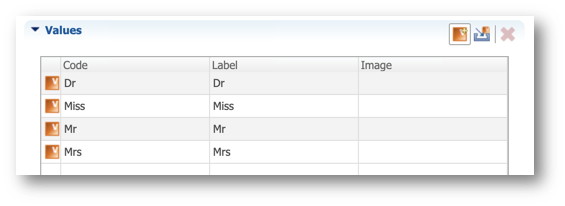
- Repeat the same operations to add the following values:
Code | Label |
Mr | Mr |
Mrs | Mrs |
Miss | Miss |
- In the end, the Values section should look like this:
- Save your work.
Add the Salutation attribute
Now it is time to add the Salutation attribute to your entity and set its datatype to the previously created Salutations list of values.
- In the Application Builder, go to Entities > Employee, right-click on Attributes and select Add Simple Attribute.
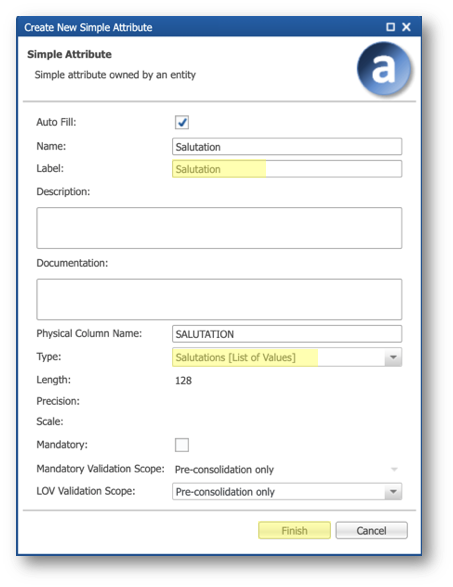
The wizard opens.
- Enter
Salutationin the Name field. - For the Type, select Salutations [List of Values], and then click Finish.
Create the Subsidiaries LOV
Create another List of Values named Subsidiaries the same way you did for Salutations, with the following values:
Code | Label |
ACME_APAC | ACME APAC |
ACME_EU | ACME EU |
ACME_US | ACME US |
Add the Subsidiaries attribute
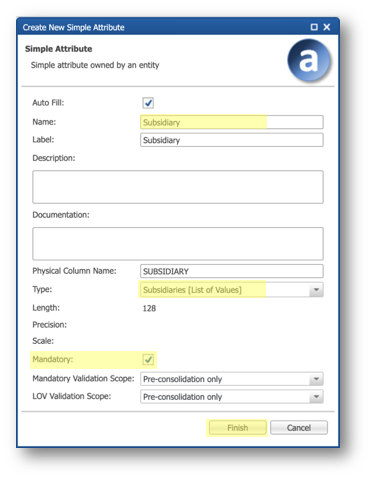
You will now add the Subsidiary attribute. Note that this attribute is mandatory.
Create another simple attribute with the following values, then click Finish:
- Name:
Subsidiary - Type: Subsidiaries [List of Values]
- Select Mandatory.
Congratulations!
You have successfully created two lists of values and added them to your model attributes.
Next, you will finalize the Employee entity by adding other attributes.
Add other attributes
It is now time to finalize the Employee entity.
- Following the instructions in ③ Create the Employee entity, add the remaining attributes of the Employee entity.
Attribute | Datatype | Mandatory | Notes |
Title | String(128) | No | - |
HireDate | Date (Built-in Type) | Yes | - |
EndDate | Date (Built-in Type) | No | - |
IsContractor | Boolean | No | - |
String(500) | No | - | |
Phone | String(128) | No | - |
Picture | Binary | No | Will hold the employee picture |
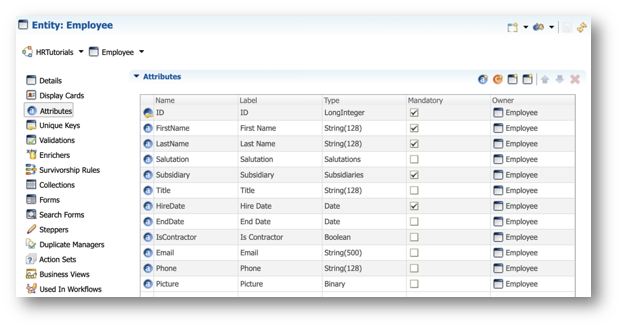
- Double-click on the Attributes node under Entities > Employee in the Model Design view to review the Employee entity. Check that all attributes have been added and that the datatypes and Mandatory checkbox are correctly configured.
- Save your work.
Congratulations!
You have successfully created the main entity of your model.
To summarize:
- You have created a model and a diagram.
- You have created an entity and added attributes.
- You have created lists of values.
Next, you will add a second entity and link it with the Employee entity.
You are now ready to create the Department entity.
Attribute | Datatype | Mandatory | Notes |
ID | String(20) | Yes | ID is set manually |
Name | String(128) | Yes | Name of the department |
Description | String(4000) | No | Description of this department |
Departments are created and maintained by business users and each employee refers to a single department.
In this section, you will:
- Create the entity and add its attributes.
- Add a reference to describe the one-to-many relationship between departments and employees.
Create the entity and its attributes
To create the Department entity, follow the same procedure as you did earlier with the Employee entity.
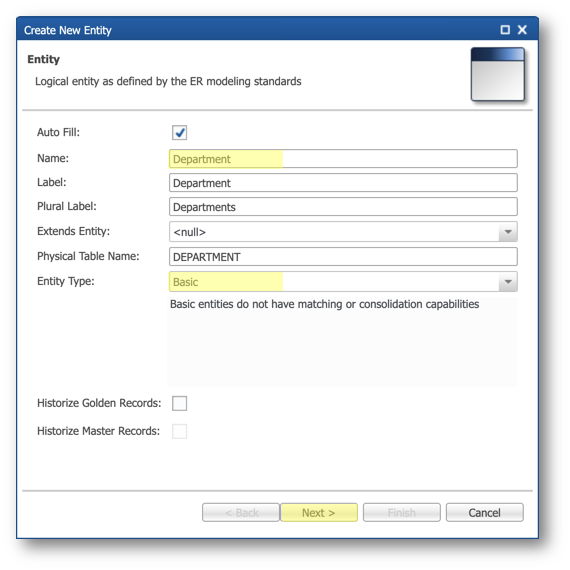
- Add a new entity to MainDiagram with the following values, and then click Next:
- Name:
Department - Entity Type: Basic
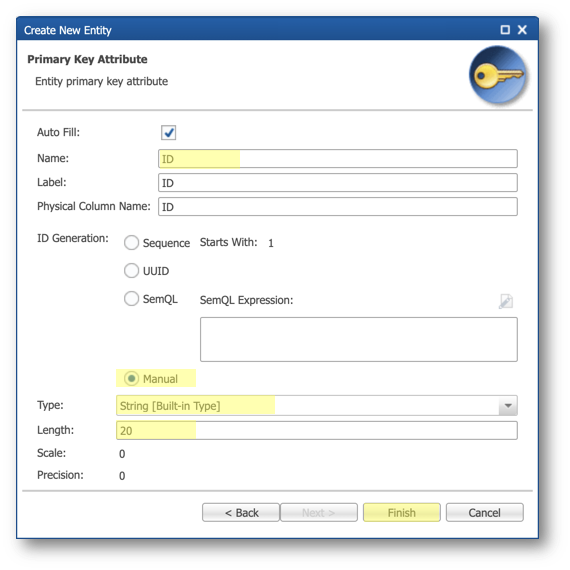
- Set the primary key attribute with the following values and then click Finish:
- Name:
ID - ID Generation: select Manual
- Type: String [Built-in Type]
- Length:
20
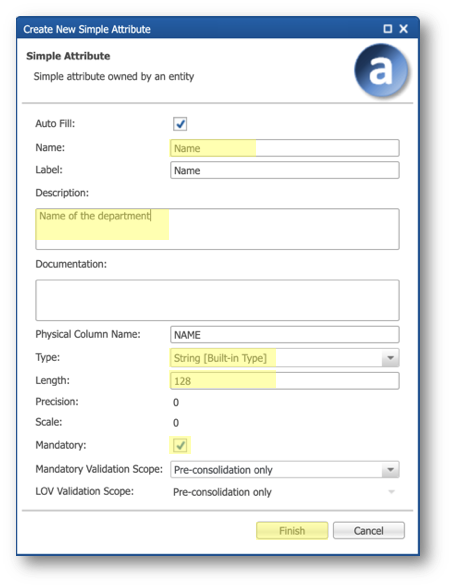
- Add the Name attribute with the following values and then click Finish:
- Name:
Name - Description:
Name of the department - Select Mandatory
- Type: String [Built-in Type]
- Length:
128
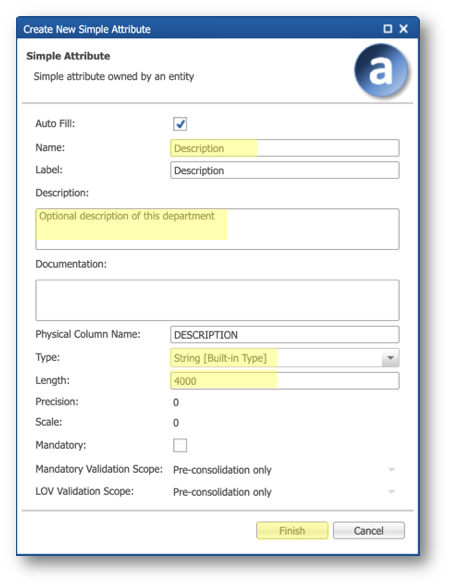
- Add the Description attribute with the following values:
- Name:
Description - Description:
Optional description of this department - Deselect Mandatory
- Type: String [Built-in Type]
- Length:
4000
Add the Employee-Department reference
On MainDiagram, create a reference relationship named EmployeeDepartment, from the Employee to the Department entity.
- Click Add Reference in the Palette.
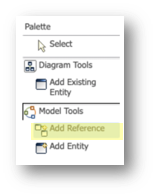
- Click on the Employee entity and drag the line to the Department entity, as shown below.
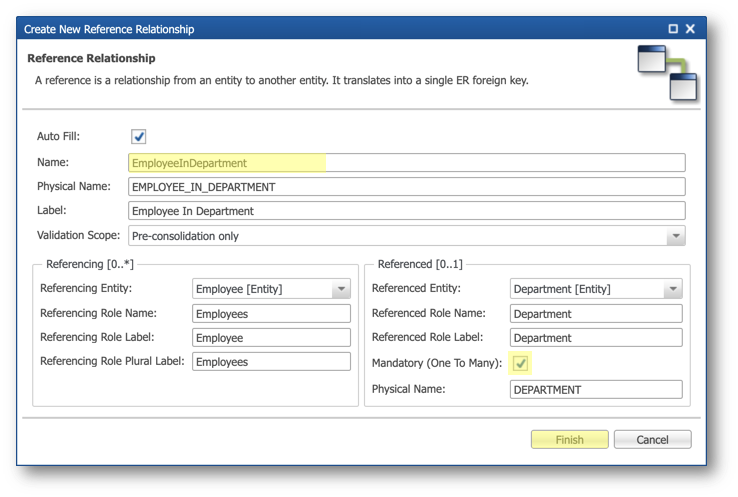
- Configure the reference with the following values and then click Finish:
- Name:
EmployeeInDepartment - Select Mandatory (One To Many).
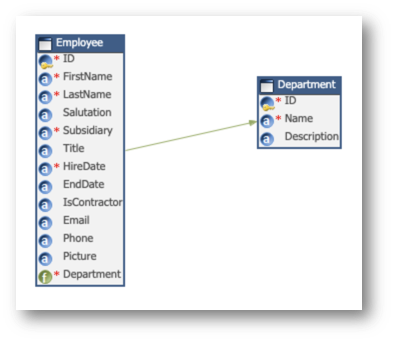
- Review MainDiagram.
Note that the Department foreign attribute has been added to the Employee entity.
- Save your work.
Congratulations!
You have successfully added the Department entity and enforced referential integrity by creating a reference.
Next, you will add the Education entity.
You are now ready to create the Education entity. At the end of the creation process, it should be configured as follows:
Attribute | Datatype | Mandatory | Description | Notes |
ID | Sequence | Yes | Automatically generated | |
FromDate | Date | Yes | Start date of curriculum | |
ToDate | Date | No | End date of curriculum | |
DegreeReceived | String(128) | Yes | Freeform name of degree received | |
Country | String(128) | No | Freeform name of country | |
School | String(128) | No | Free form text for the school name |
This entity tracks an employee's educational background, including dates and attained degrees from schools across various countries. Each employee will possess multiple education records.
In this section you will:
- Create the entity and add its attributes.
- Add a reference to describe the one-to-many relationship between education records and employees.
Create the entity and its attributes
- Create the Education entity the same way you did for Department. Add a new entity to MainDiagram with the following values and then click Next:
- Name:
Education - Entity Type: Basic
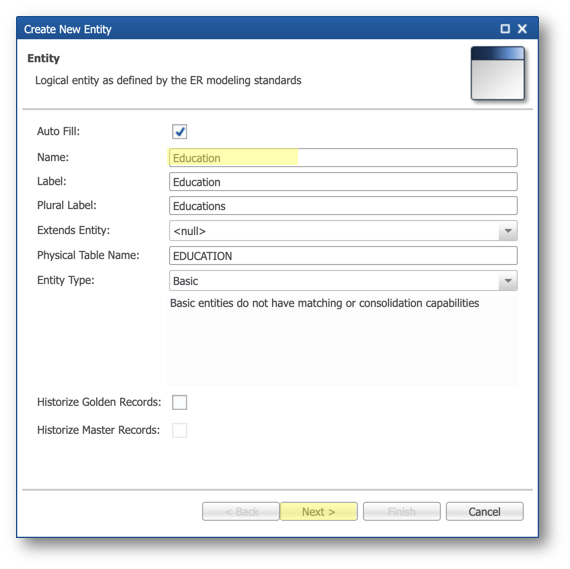
- Set the primary key attribute with the following values then click Finish:
- Name:
ID - ID Generation: Sequence

- Following the instructions you used for the attributes of the Department entity, add the attributes below to the Education entity.
Attribute | Datatype | Mandatory | Description | Notes |
FromDate | Date | Yes | Start date of curriculum | |
ToDate | Date | No | End date of curriculum | |
DegreeReceived | String(128) | Yes | Freeform name of degree received | |
Country | String(128) | No | Freeform name of country | |
School | String(128) | No | Freeform text for the school name |
Add the Education-Employee reference
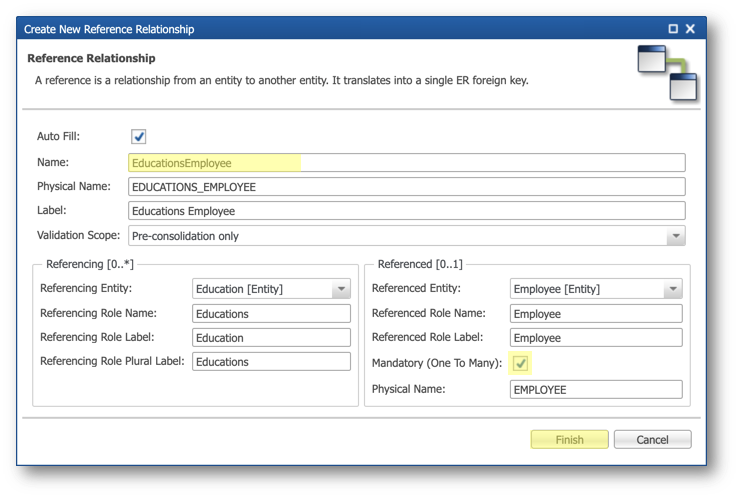
From MainDiagram, create the reference relationship named EducationsEmployee, from the Education to the Employee entity.
- Click Add Reference in the Palette.
- Draw a line from Education to Employee.
- Set the reference with the following values and then click Finish:
- Name:
EducationsEmployee - Select Mandatory (One To Many).
- Review the Main Diagram.
Note that the Employee foreign attribute has been added to the Education entity.
Your diagram should now look like this:
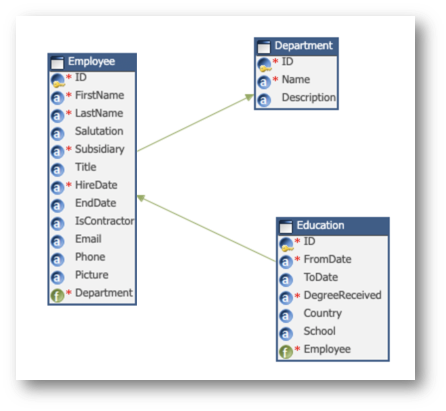
- Save your work.
Congratulations!
You have successfully added the Education entity and created a reference to the Employee entity. Your model now contains all the entities that you need.
Next, you will design the user experience for your application. You will learn how to add forms, collections, and more.
Semarchy xDM uses Material Design as the design language for defining a business user interface. The user interface uses multiple application components that you will define in the next sections.
Application components
In Semarchy xDM, data applications rely on several components that you can directly generate and configure in the Application Builder. The following examples are taken from the application created using the Product Retail demo tutorial.
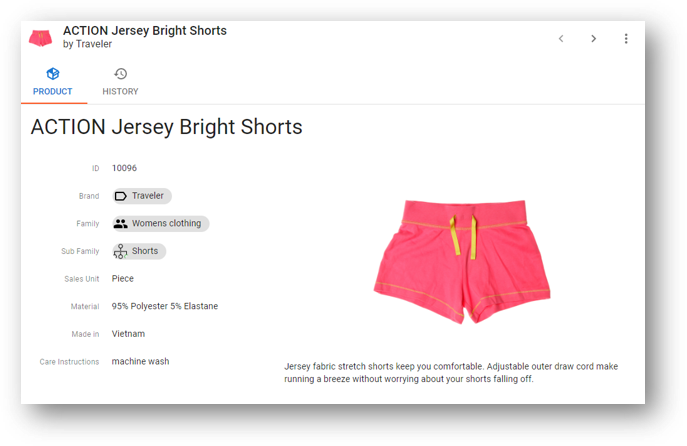
- Display cards provide a compact and visual representation of a record.

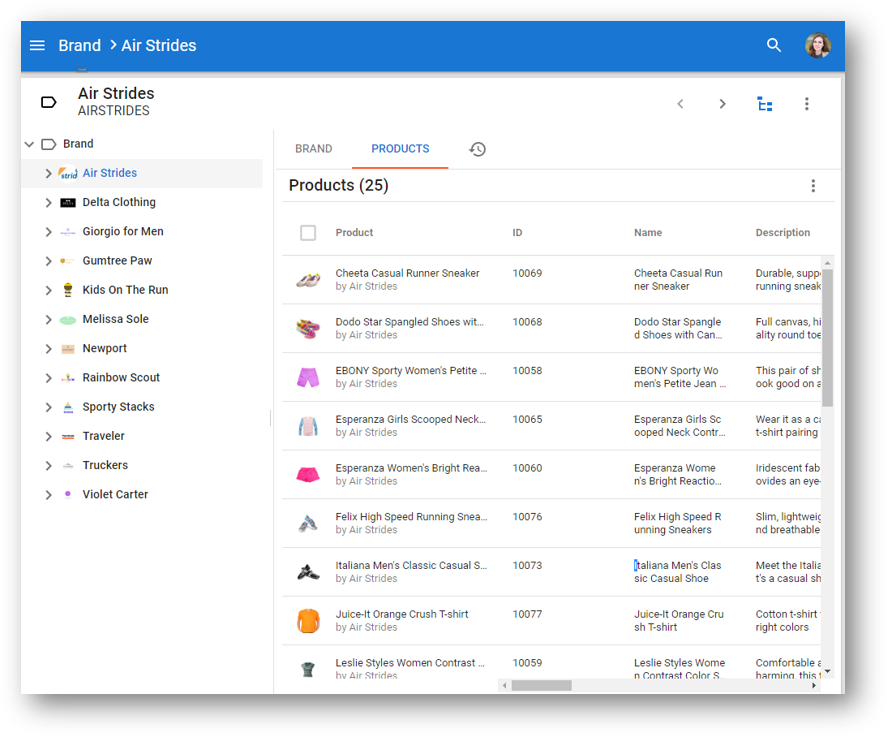
- Collections configure how multiple records are displayed in a table or list or grid.
- Forms define how one record is displayed in a form to browse or author the data.
- Steppers determine the guided data authoring experience.
- Action Sets are data actions available for one or multiple records.
- Business views tie all of the above together to form a consumable view.
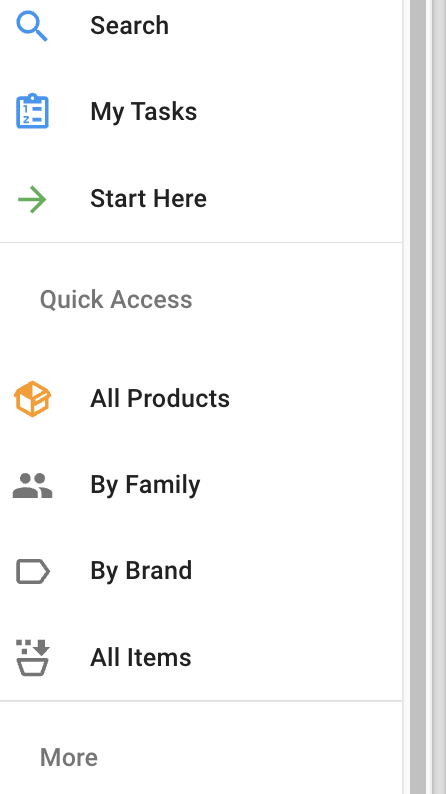
- The navigation drawer allows navigation to business views.
Generate application components
Once you have completed the initial configuration of your data model, you can quickly use the Generate Application Components wizard to automatically generate most of the components you will need to enable user interaction with your data.
To generate application components:
- Right-click on the Department entity and select Create Application Components.
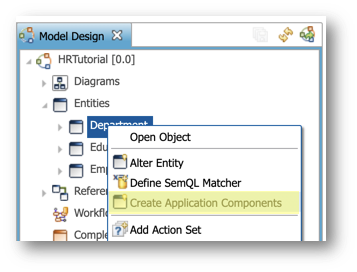
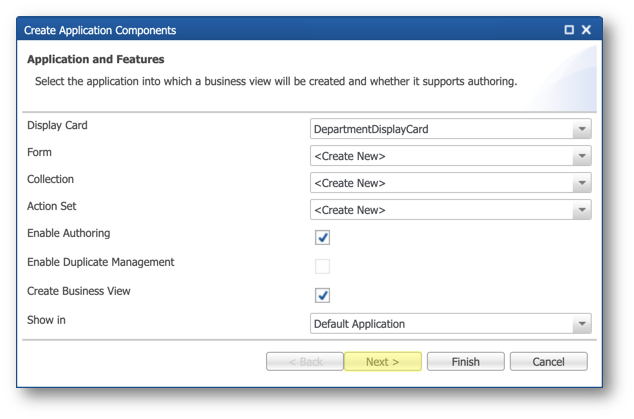
- Click Next.
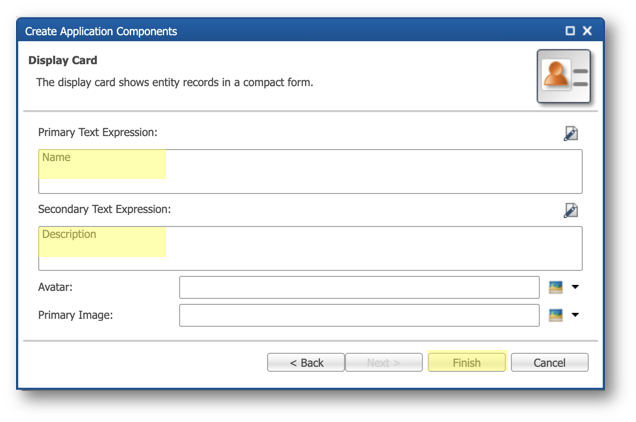
- Set the following values for the entity's Display Card text expressions, and then click Finish:
- Primary Text Expression:
Name - Secondary Text Expression:
Description
- Repeat the steps above for the Education entity with the following values:
- Primary Text Expression:
DegreeReceived || ' (' || Country || ')' - Secondary Text Expression:
to_char(coalesce(ToDate, FromDate), 'YYYY') || ' - ' || School
- Repeat the steps above for the Employee entity with the following values:
- Primary Text Expression:
FirstName || ' ' || LastName - Secondary Text Expression:
Title || ' (' || Subsidiary || ')'
- Save your work.
Explore what was generated
The wizard has generated the following elements for each of your entities:
- Display card
- Collection
- Form
- Stepper
- Action set
- Business view
- Expand the Department entity to see the generated components.
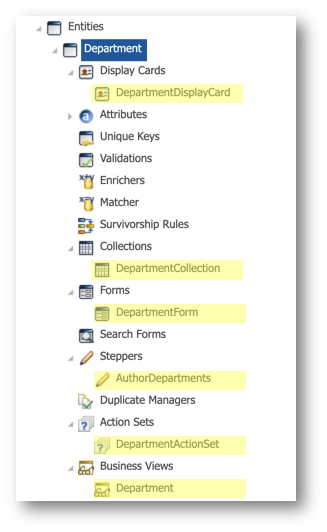
- Scroll down in the Model Design view and go to Applications > DefaultApplication.
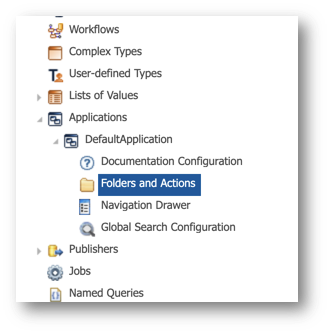
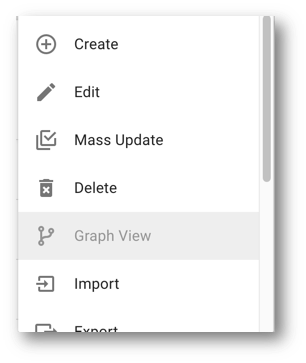
- Double-click on Folders and Actions and observe that a default list of menu items was initialized and includes the following actions to browse each entity:
- BrowseDepartment
- Browse Education
- BrowseEmployee

Assign visual icons
Assigning icons to your entities is considered a best practice. These icons will visually guide users across various areas of your application.
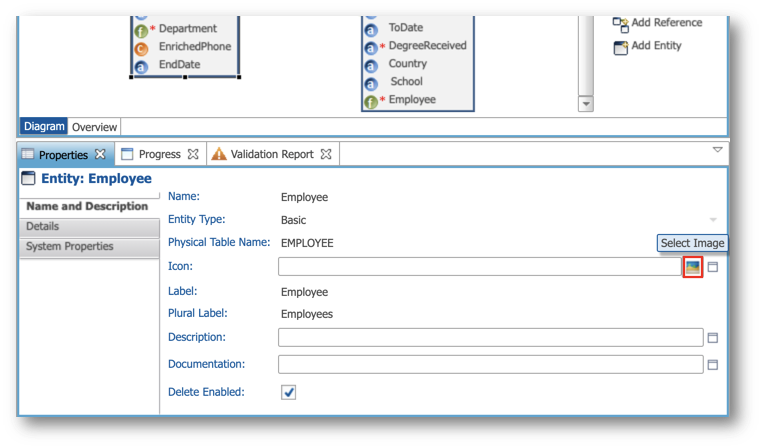
- From the MainDiagram, select the Employee entity.
- In the Properties view below the editor, identify the Icon property within the Name and Description tab, and then click Select Image.
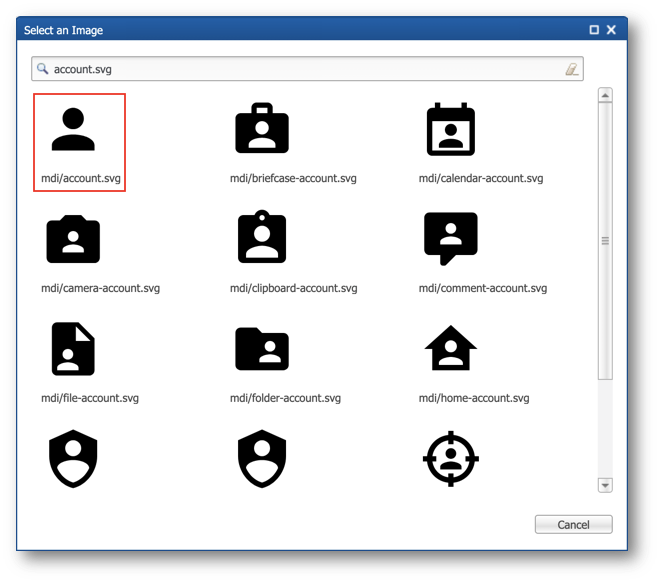
- Type
account.svgin the search bar and pressEnterto filter the images. - Select the
mdi/account.svgimage.
- Repeat the same steps for the Department entity. Search and select
domain.svg.

- Repeat the same steps for the Education entity. Search and select
school.svg.

- Save your work.
Customize forms and collections
In this section, you will open the collection and form of the Employee and Education entities and configure the date attributes to use a date picker visual component:
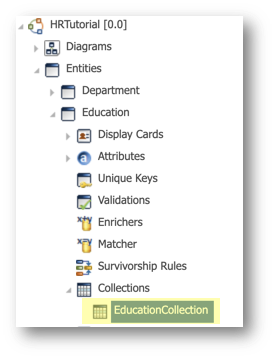
- Navigate to Entities > Education > Collections in the Model Design view and double-click on EducationCollection.
- Select the FromDate attribute and set the Component Type to Date Picker in the General section of the Properties inspector.
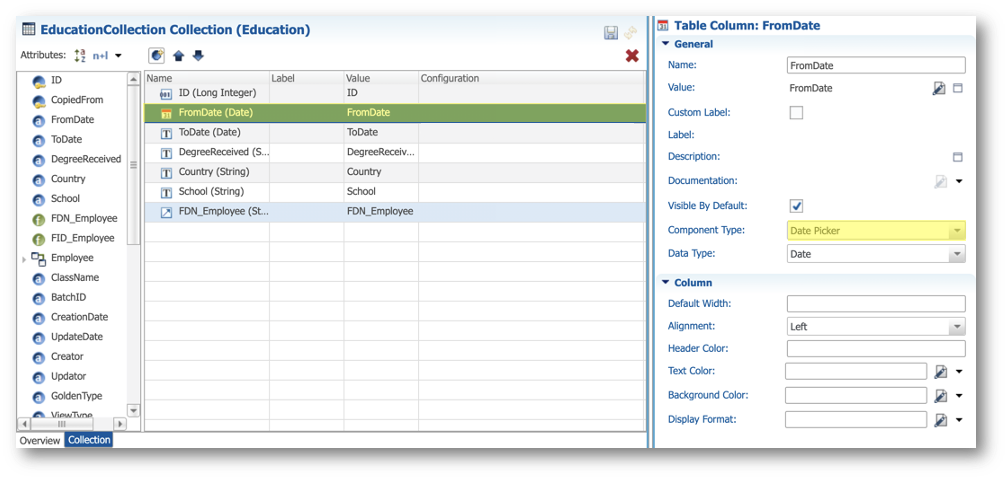
- Repeat the same operation for the ToDate attribute.
- Expand the Forms node under Entities > Education and then open the EducationForm.
- Select the FromDate attribute and make sure the Component Type in the General tab of the Properties inspector is set to Date Picker.
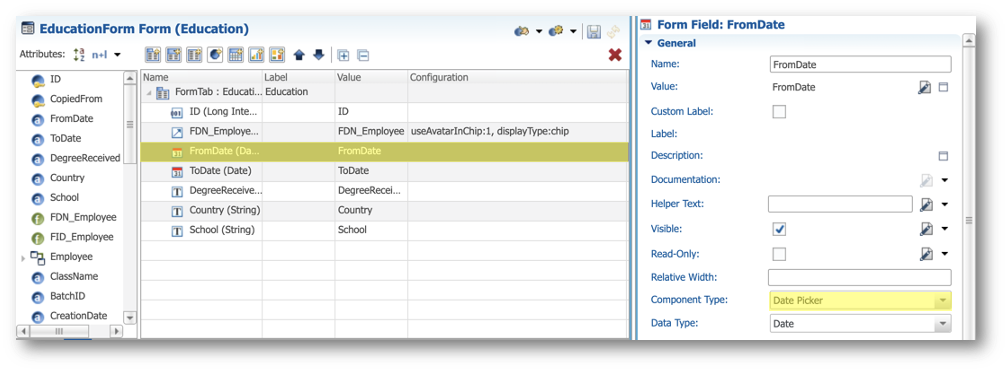
- Repeat the same operation for the ToDate attribute.
- Repeat the same process for the Employee entity with the attributes HireDate and EndDate in both the EmployeeCollection and the EmployeeForm.
- Save your work.
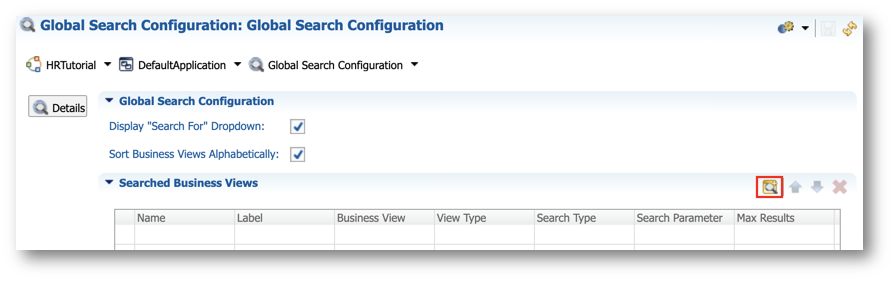
Configure the Global Search feature
The Global Search configuration defines which business views are searched when a search string is entered in the Global Search page, and how they are searched.
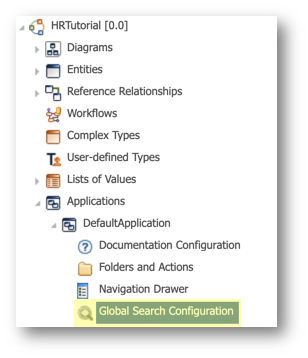
- Navigate to Applications > Default Application in the Model Design view, and double-click Global Search Configuration.
- Click the Add Business View to Search button in the Searched Business Views section.
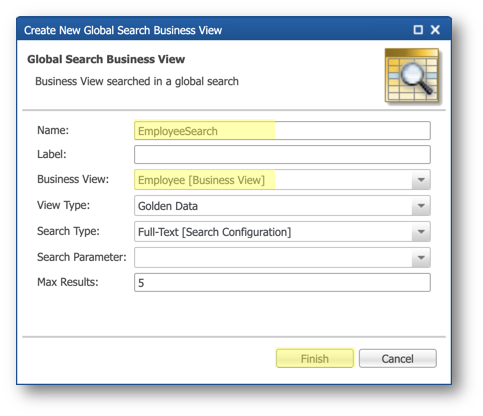
- Enter the following values and then click Finish:
- Name:
EmployeeSearch - Business View: Employee [Business View]
- Click again Add Business View to Search, enter the following values, and then click Finish:
- Name:
DepartmentSearch - Business View: Department [Business View]

Brand your application
- Double-click Applications > DefaultApplication in the Model Design view.
- Enter the following values:
- Select Auto Fill
- Name:
EmployeeTutorial - Label:
Employee Tutorial - Title:
Employee Tutorial - Avatar:
images://mdi/account.svg(copy and paste the value, or click the Select Image button and search foraccountto find that image)

- Save your work.
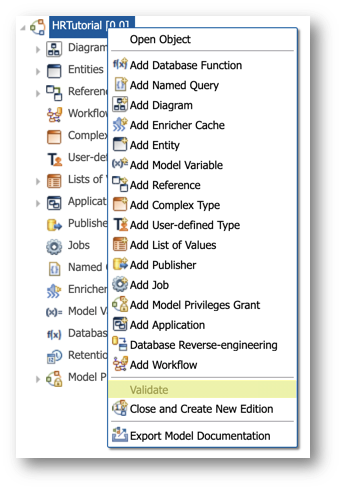
Validate your model
Before deploying your application, it is a best practice to validate your model.
- Right-click on the HRTutorial node in the Model Design view, and then select Validate.
- Your model is analyzed and the validation report is displayed in the bottom section of the Application Builder. You should have no errors.

Congratulations!
You have successfully completed the second part of this tutorial by creating a first auto-generated application.
To summarize:
- You have generated application components.
- You have added visual icons.
- You have customized display cards, collections, and forms.
- You have configured the Global Search feature.
- You have renamed your application.
- You have validated your model.
Next, you will learn how to deploy and connect to this application for the first time.
Semarchy xDM allows you to deploy your model into a data location. It creates all the tables and columns in a relational database (Oracle, SQL Server, or PostgreSQL). Additionally, it generates user interfaces for your applications, enhancing the business user experience.
Create a datasource
Before creating a data location and deploying your model, you must create a platform datasource to connect to the SEMARCHY_EMP_TUTORIAL database schema that was created in the Quick Install tutorials.
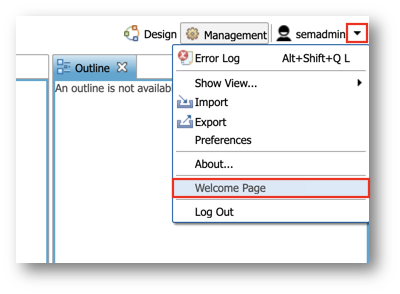
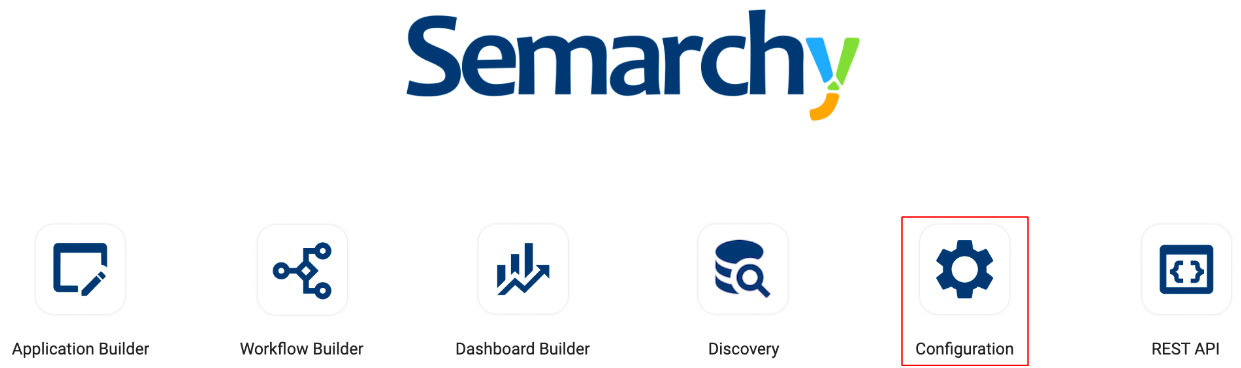
- In the Application Builder toolbar, expand the user menu, and then select Welcome page.
- Select Configuration.
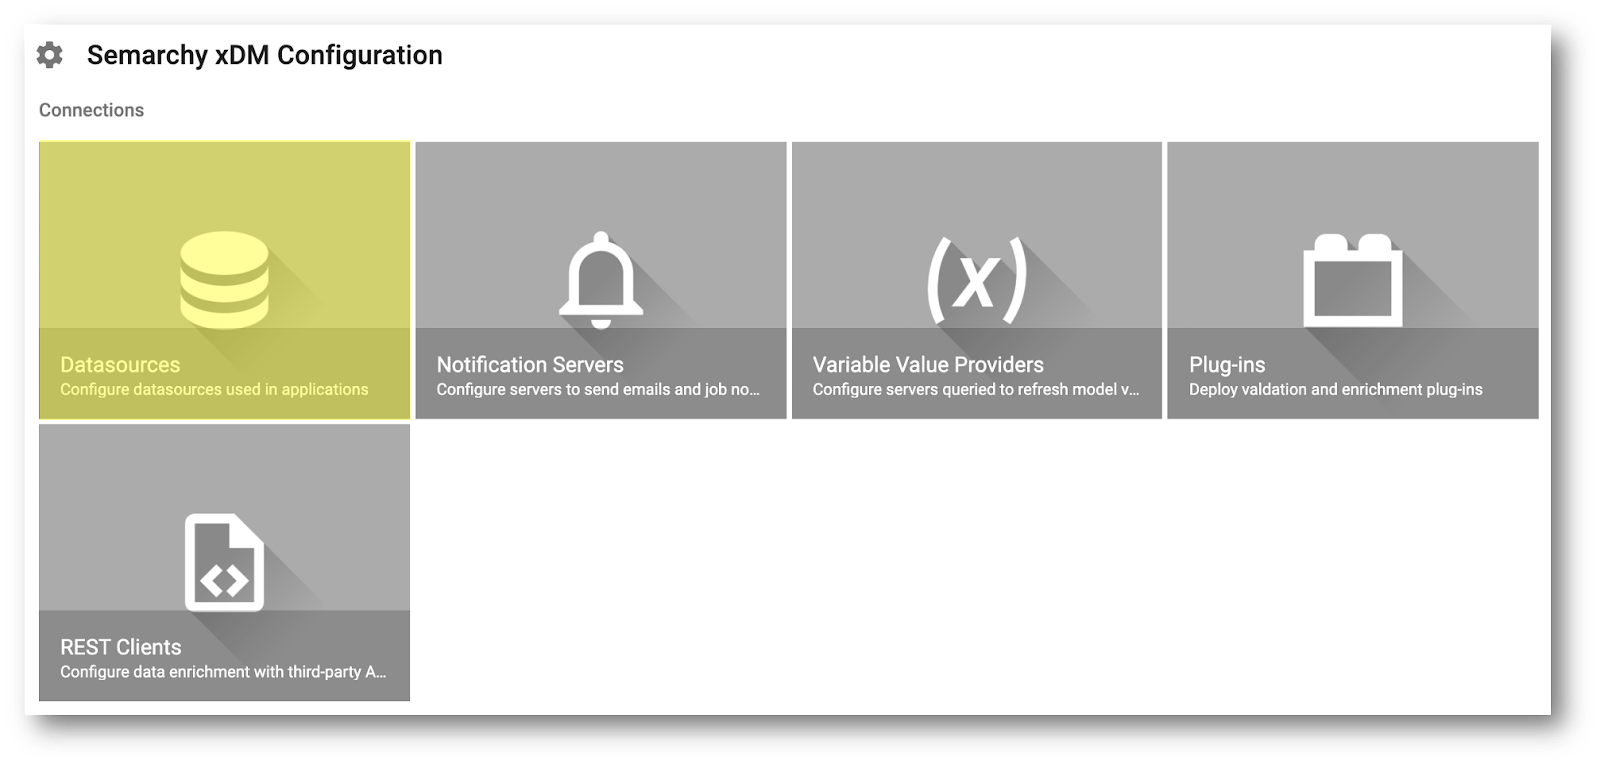
- Scroll down to the Connections section and click Datasources.
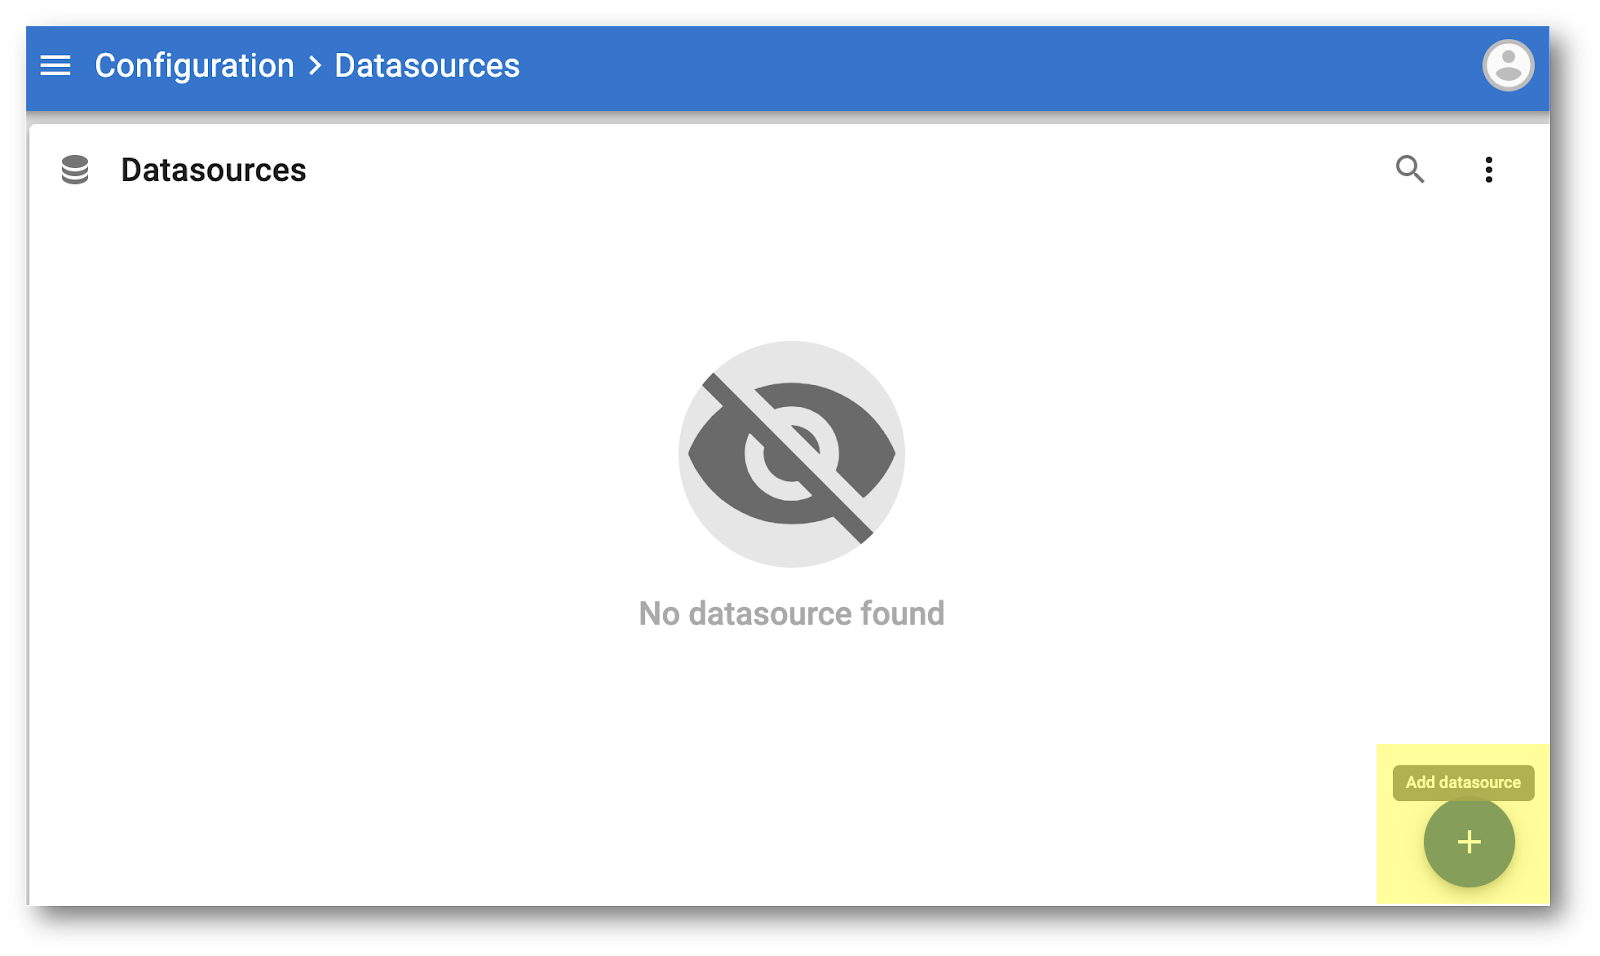
- Click the Add datasource floating action button.
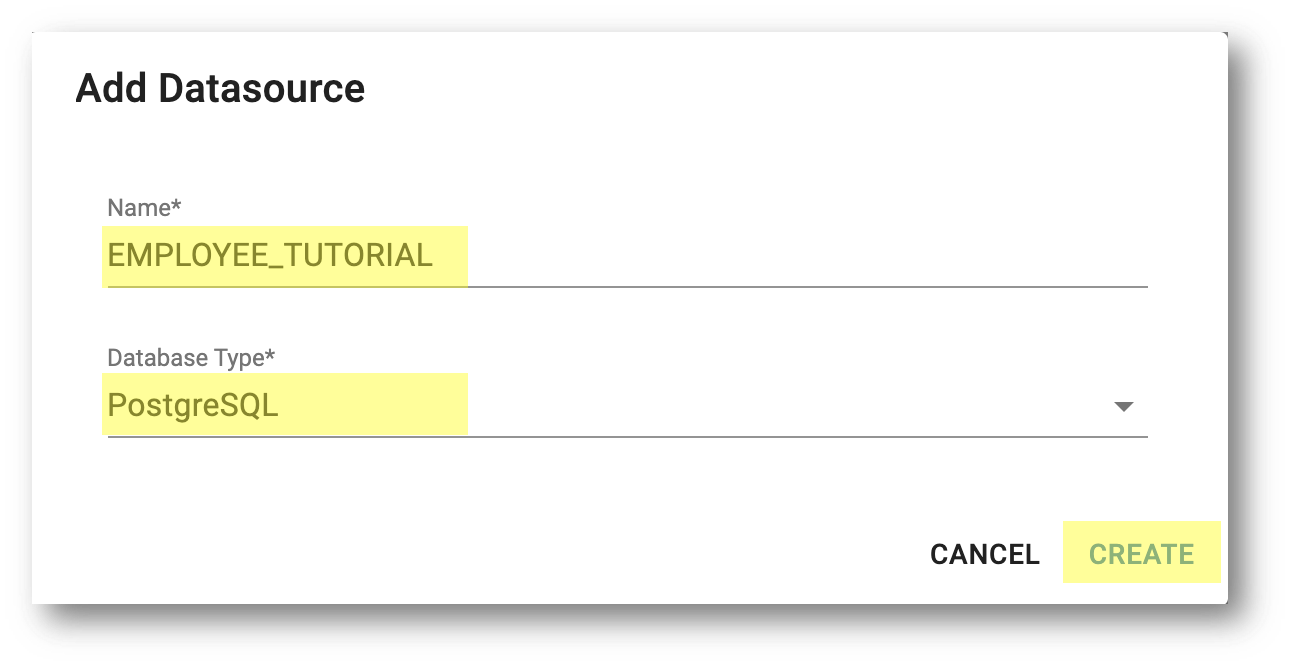
- Enter the following values and then click Create:
- Name:
EMPLOYEE_TUTORIAL - Database Type: select the value that corresponds to your database.
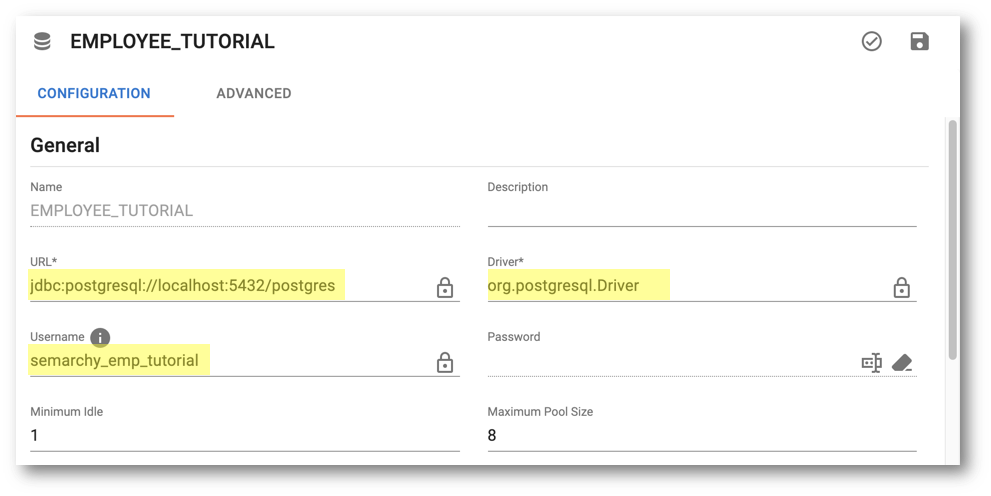
- Enter the following connection parameters in the editor:
- The URL field is populated with a default value. Check that the default host, port and database name in the connection URL are correct.
- Driver: keep the default value
- Username:
semarchy_emp_tutorial
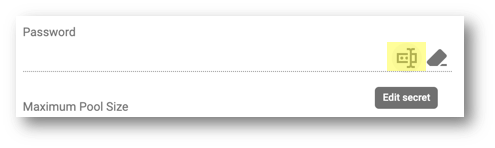
- Enter the password of the database schema:
- Click the Edit Secret button next to the Password field.
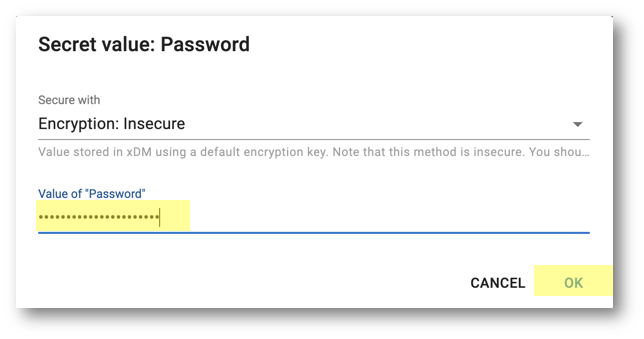
- Keep the current value of the Secure with field (or select another encryption method if you have configured any), enter
semarchy_emp_tutorialin the Value of "Password" field, and then click OK.
- Click Test this Datasource in the button bar above the editor.
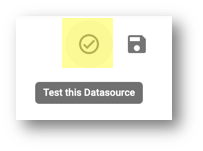
- The "Datasource test successful" message should be displayed. Click OK.

If another message is displayed, identify the error and fix the connection parameters.
- Click the Save and apply datasource modification button on the datasource editor.

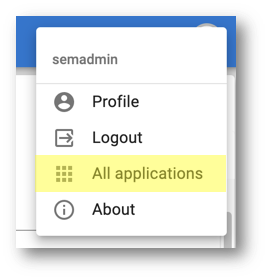
- Open the user menu on the top-right corner and then select All applications to go back to the Welcome page.
Create a data location
In this section, you will create the EmployeeTutorial data location and deploy your model into it. To do so:
- Open the Application Builder.
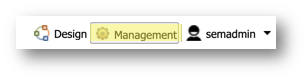
- Click the Management button in the Application Builder toolbar to access the Management perspective.
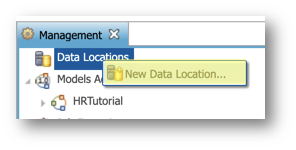
- Right-click Data Locations and select New Data Location.
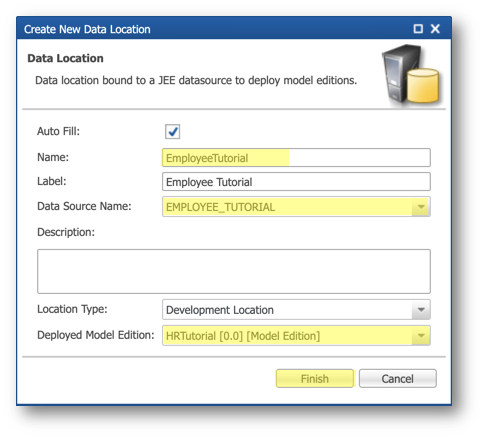
- Enter the following values, and then click Finish:
- Name:
EmployeeTutorial - Data Source Name: select EMPLOYEE_TUTORIAL
- Deployed Model Edition: select HRTutorial
Connect to the application
In this section, you will learn how to connect to the Employee Tutorial application that you have just deployed. To do so:
- In the Application Builder toolbar, expand the user menu, and then select Welcome page.
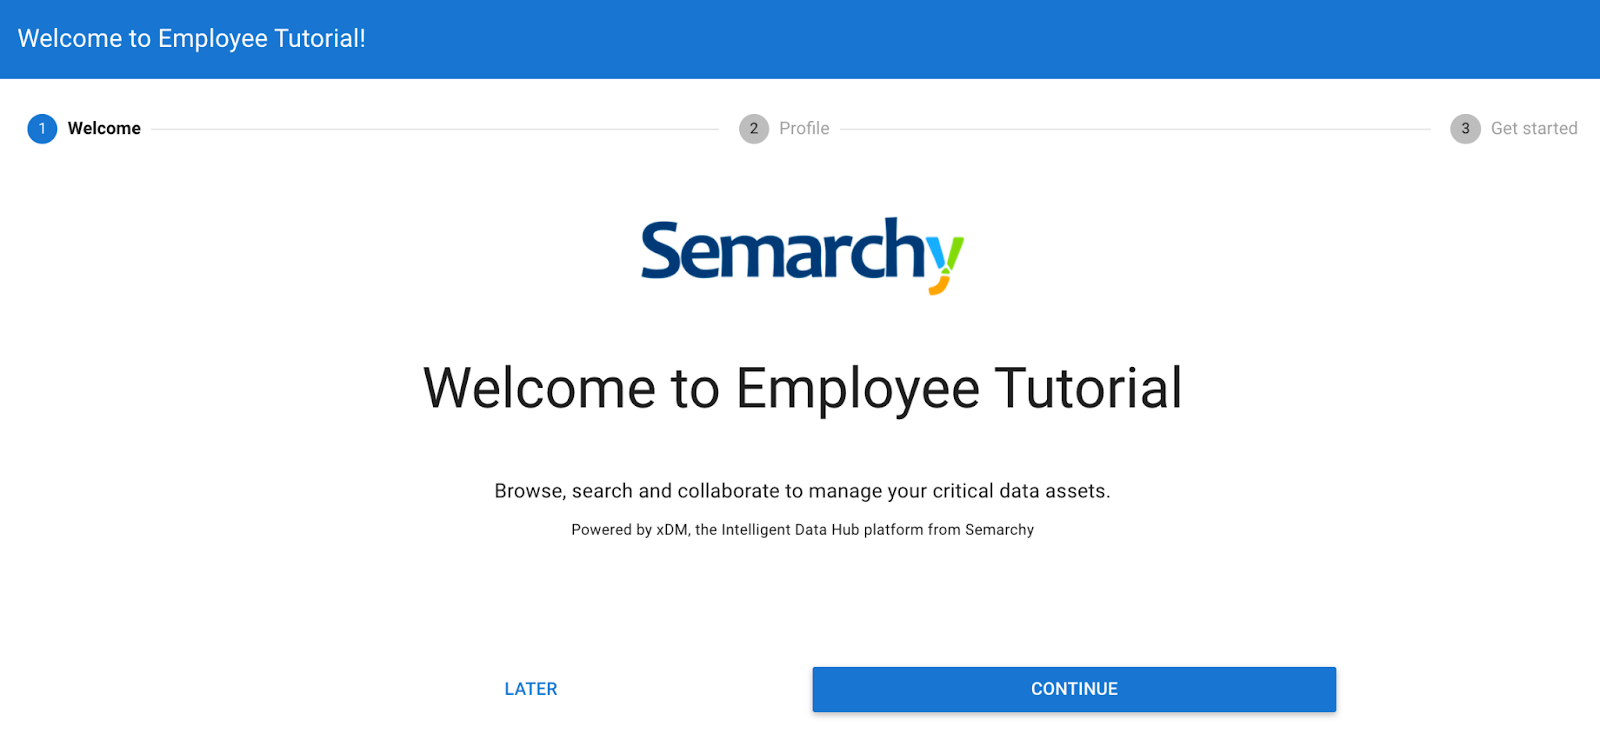
- Click the Employee Tutorial button to open the application.
- If you have not yet completed the profile for the semadmin user in a previous tutorial, a popup appears. Click Next.
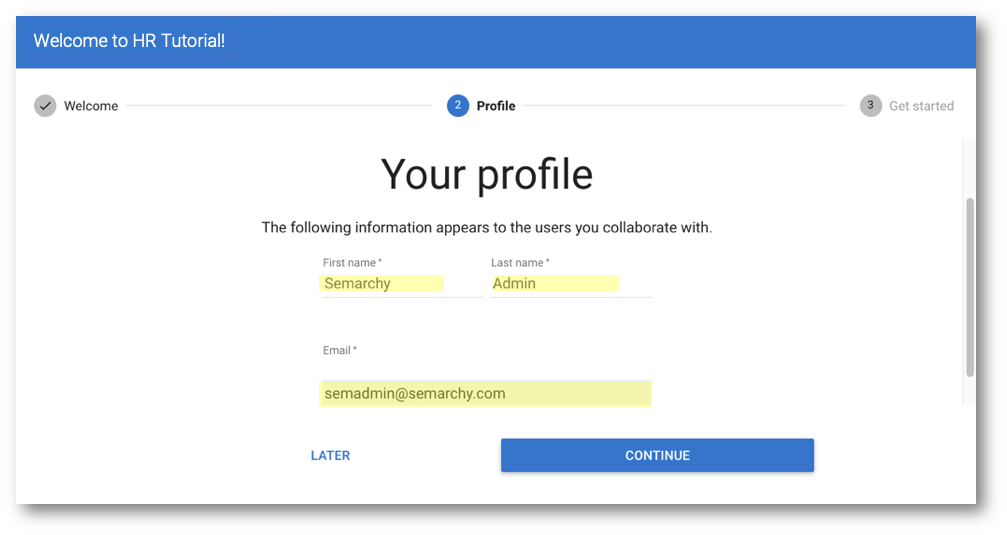
- Enter the following information for semadmin, and click Continue:
- First name:
Semarchy - Last name:
Admin - Email:
semadmin@semarchy.com
- On the next screen, click Get started.
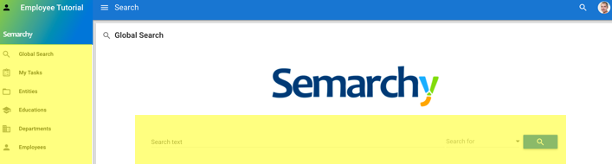
- Discover the user interface that was built for your application:
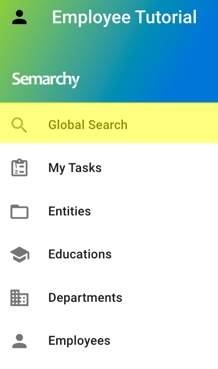
- The navigation drawer contains the actions that you configured in the Folders and Actions properties.
- The Global Search form is displayed by default.
Congratulations!
You have successfully deployed your first application into a data location.
To summarize:
- You have deployed a model and an application into a data location.
- You have established a connection with the application.
Next, you will learn how to use this application to start entering data and navigate the business user data management interface.
Now that you have deployed your model and application, it is time to start authoring data.
Semarchy xDM has generated all necessary actions and menus to facilitate data authoring, importing from spreadsheets, searching for data, and refining search results to identify data typos.
For more information on application usage, you can consult the Product Retail demo tutorial, which showcases a fully functional product data application.
User profile
As a first-time user, you will need to update your profile information and preferences. To do so:
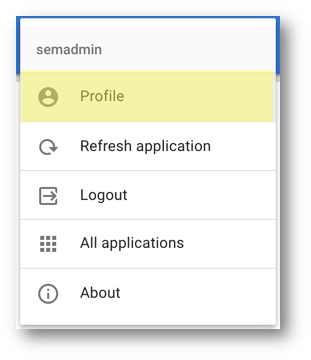
- In the Employee Tutorial application, open the user menu on the upper-right corner and select Profile from the menu.
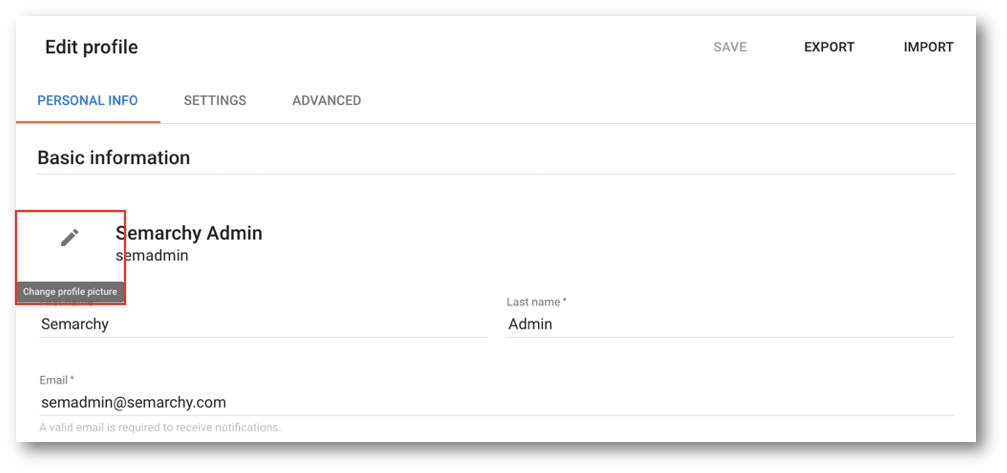
- Basic information about yourself is already set. Hover your mouse over the default profile picture and click the Change profile picture button.
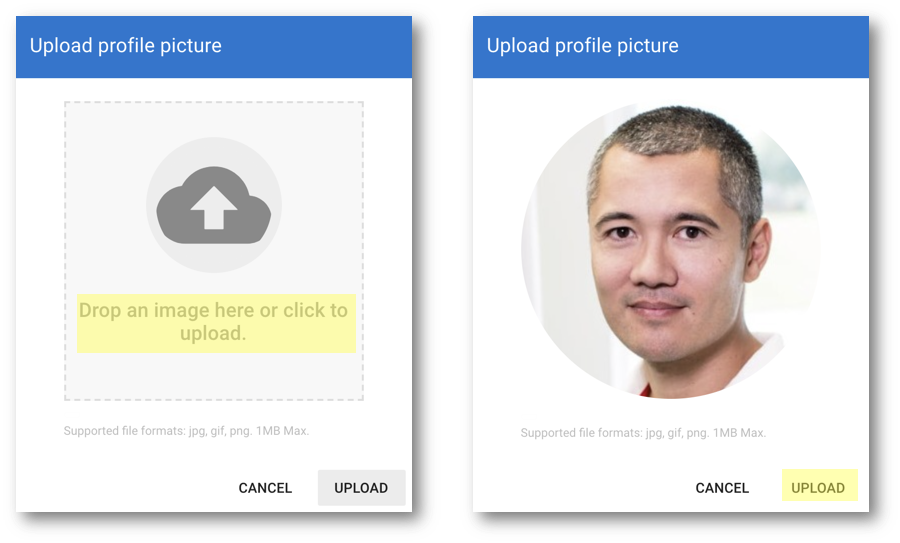
- Select on your hard drive the
semadmin.jpgpicture which is available under thedata-consolidation/picturesfolder of the tutorial resources you downloaded previously. - Click Upload.
- (Optional) Customize your user preferences like date format, language, etc. in the Settings tab, and then save.
Author or import departments' data
Learning outcomes
- Authoring new department records.
- Import the department records from an Excel spreadsheet.
- In the Employee Tutorial application, click the Departments menu item in the navigation drawer.
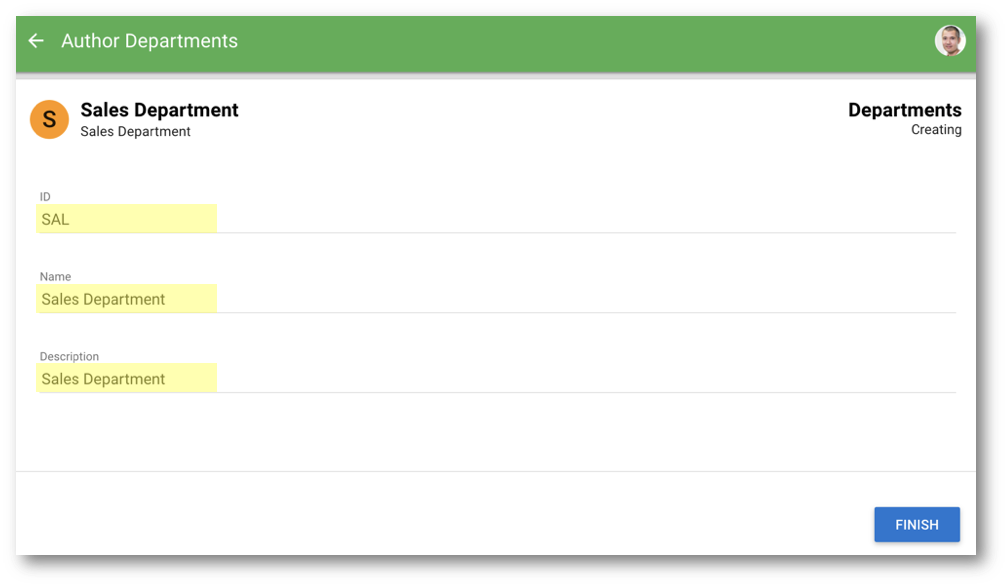
- Select Create from the actions menu above the Departments collection.
- Create the first department with the following values, then click Finish:
- ID:
SAL - Name:
Sales Department - Description:
Sales Department
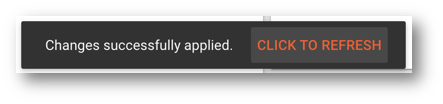
- Wait until the toaster at the bottom left corner of the screen indicates "Changes successfully applied," and then select Click to refresh to view the imported data.
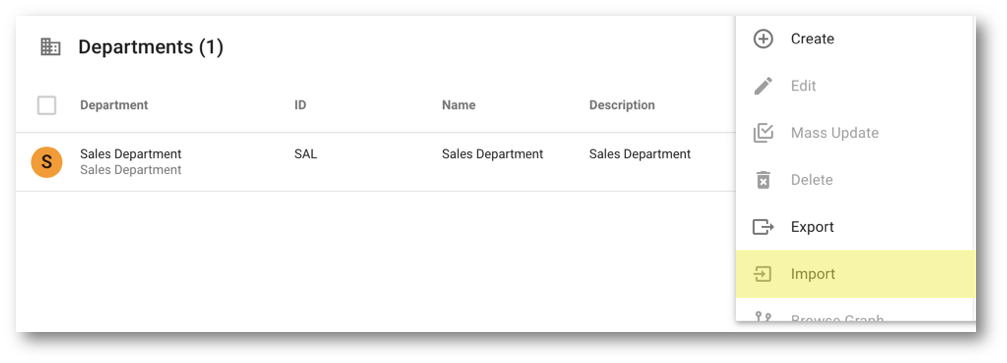
- Select Import in the actions menu to load the rest of the departments.
- Select the
data-authoring\datasets\departments-data.xlsxfile from the tutorial resources you downloaded earlier. - Review the import contents and click Continue.
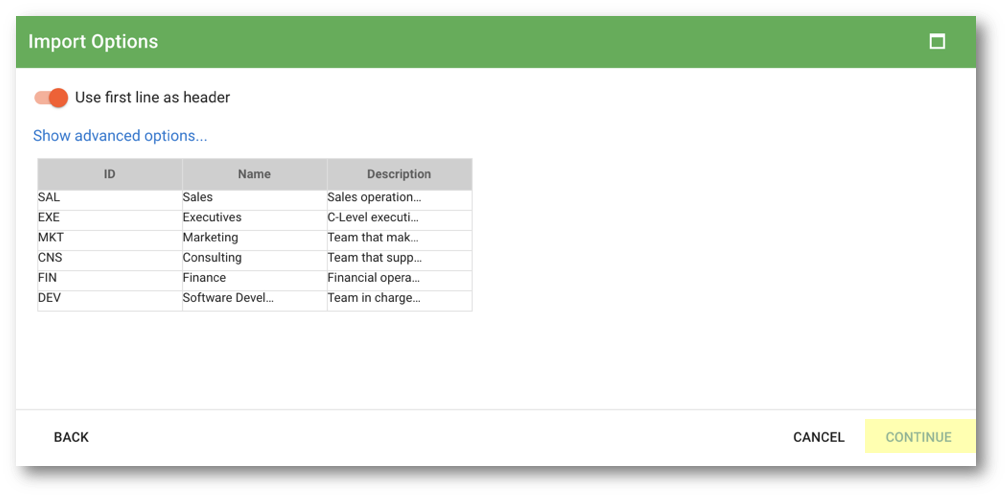
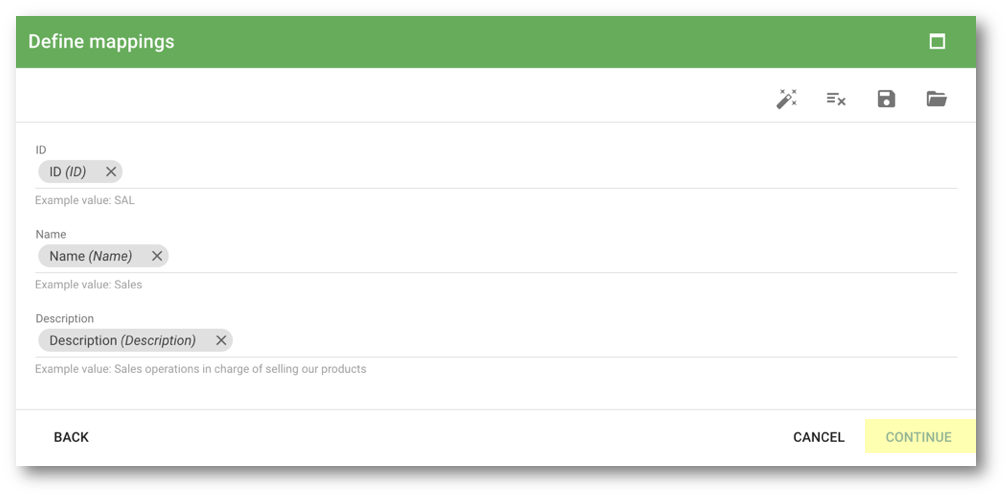
- On the Define mappings screen, keep the default mappings and click Continue.
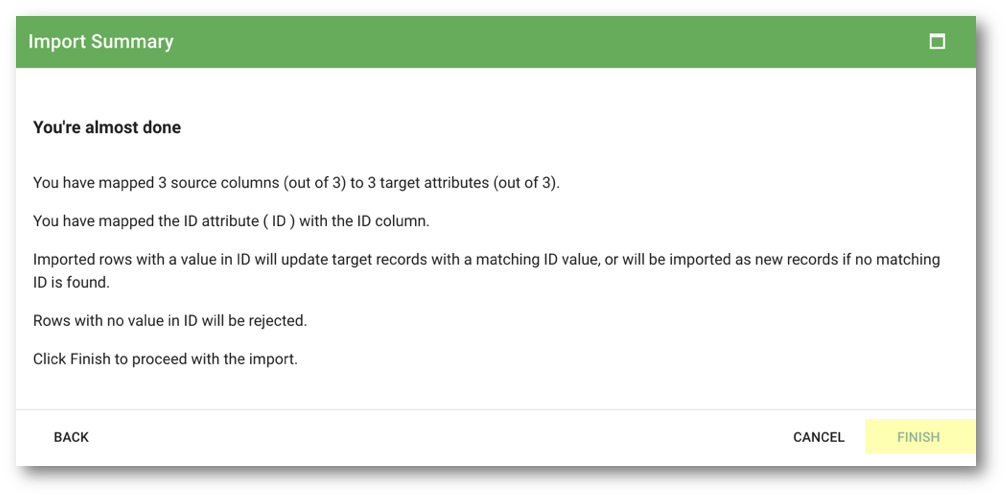
- Review the import summary, and then click Finish to import the data.
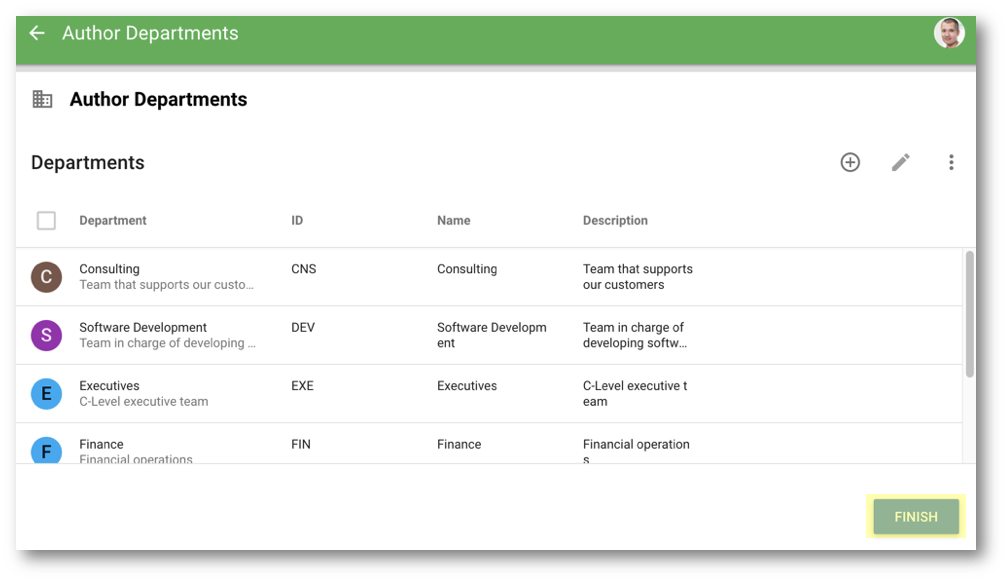
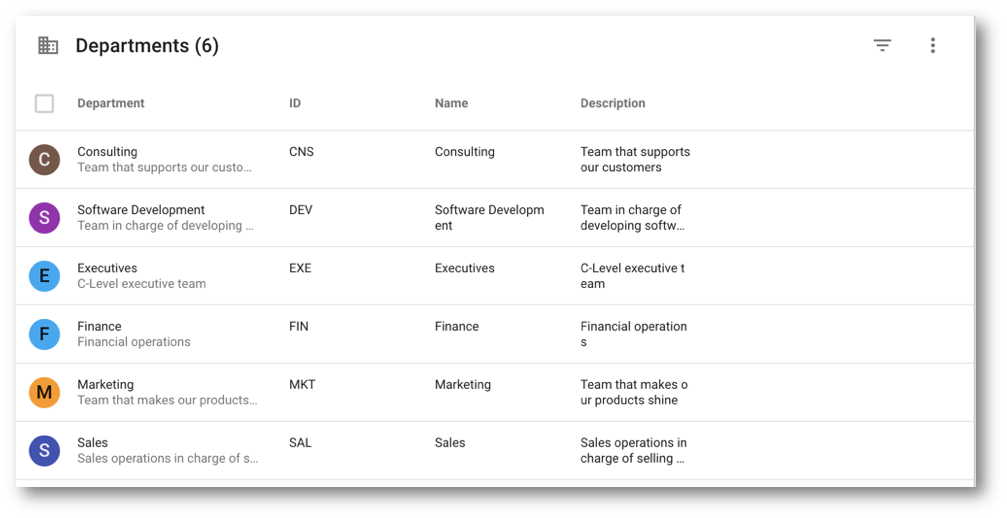
- Review the imported data and click Finish.
The data will be submitted to the certification process so that all users can access it.
- Wait until the toaster on the bottom left corner of the screen indicates "Changes successfully applied," and then select Click to refresh to see the imported data.
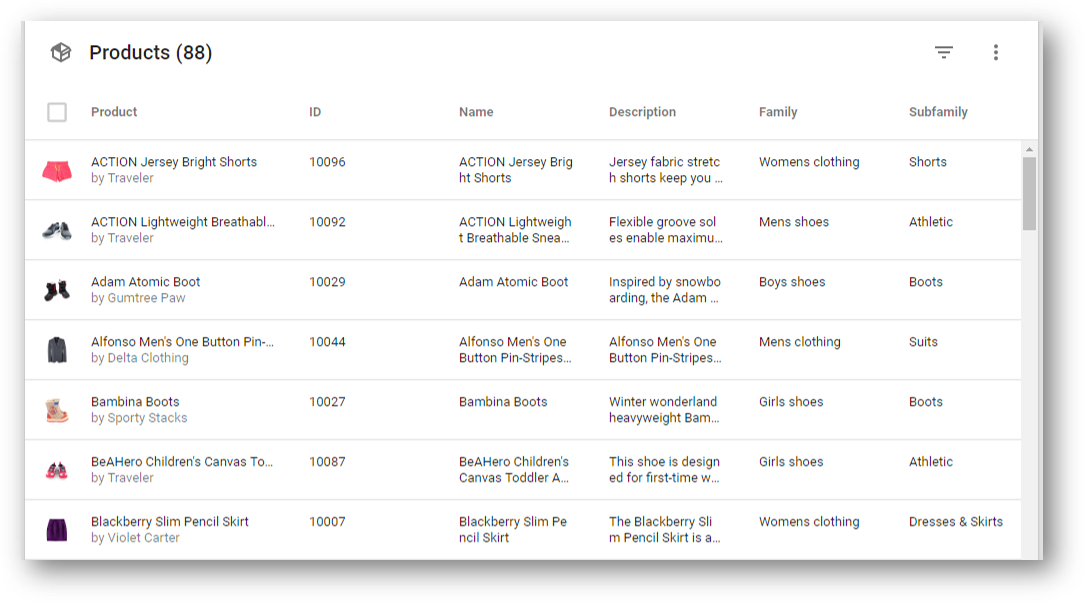
- The Departments collection is now showing six records.
Import employee records
In this section, you will import employees from an excel spreadsheet.
- Click on Employees in the navigation drawer and select Import from the actions menu.
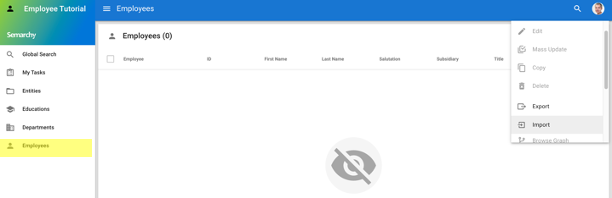
- Select the
data-authoring\datasets\employees-data.xlsxfile from the tutorial resources you downloaded. - Review the import contents and click Continue.
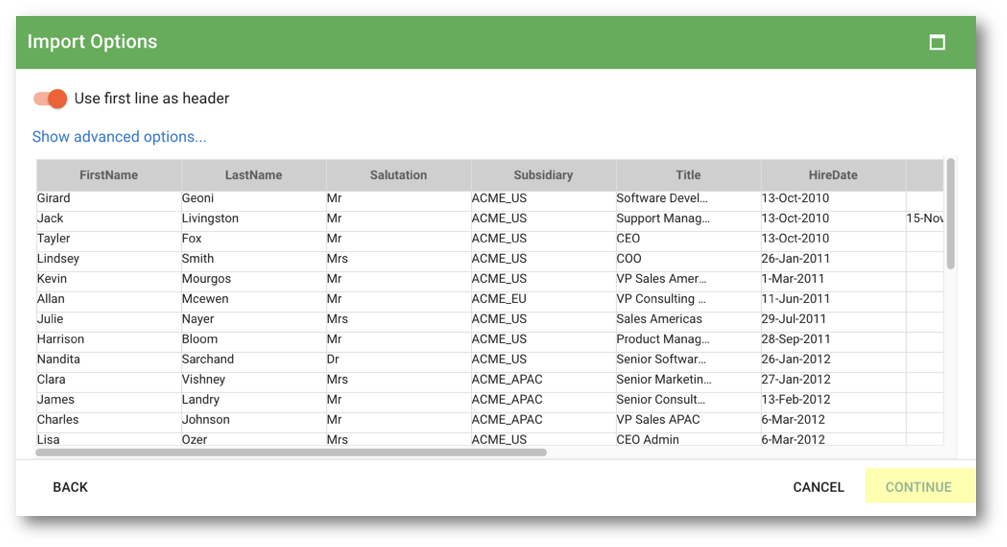
- Click Continue on the next page to confirm the mapping.
- Click Finish on the Import Summary page.
- Review the data to import and click Finish.
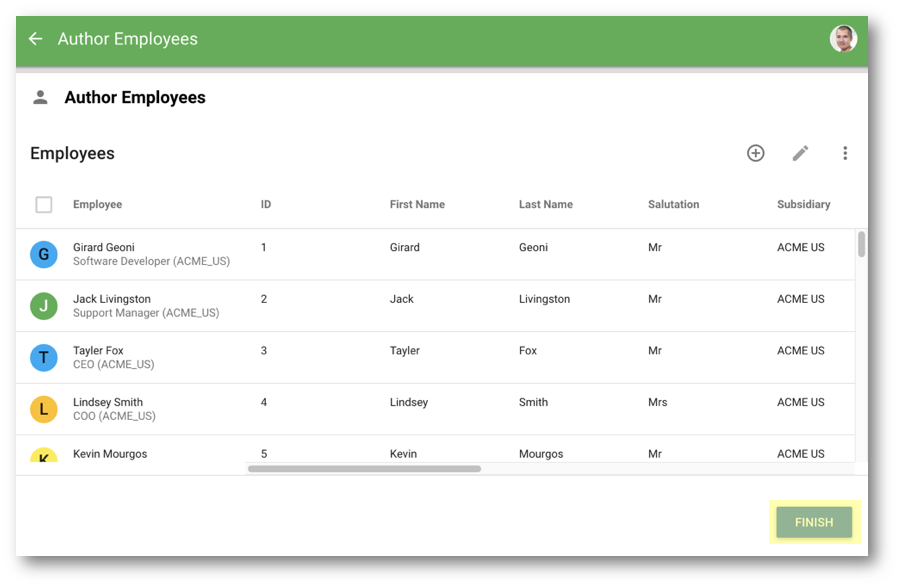
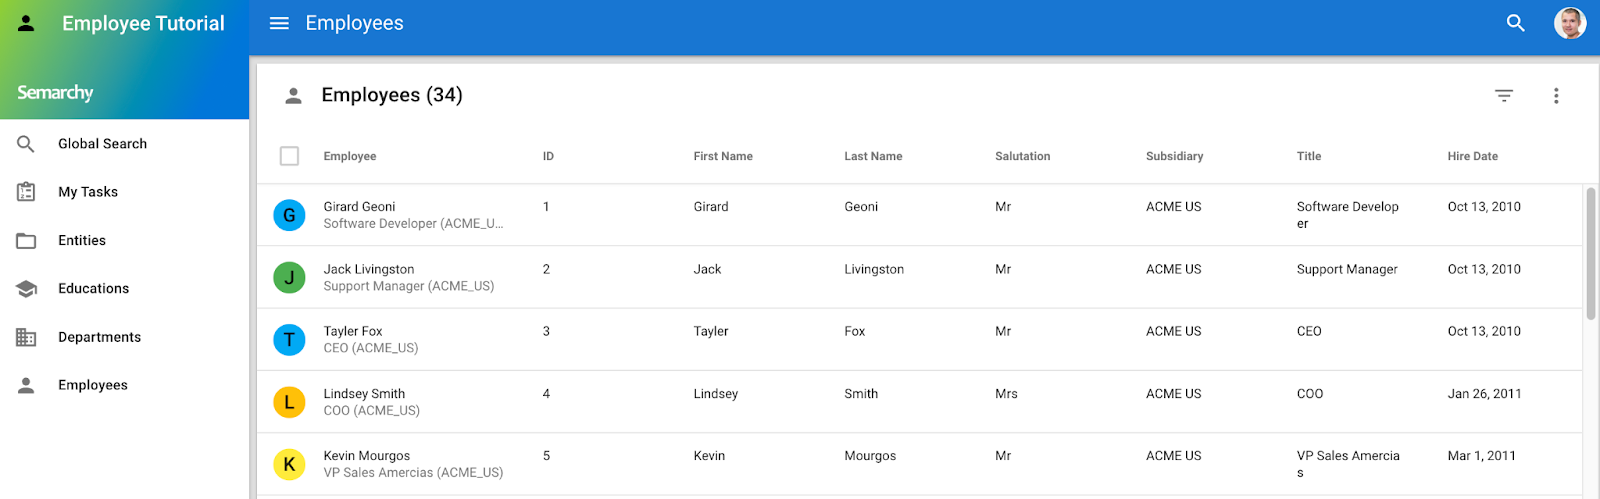
- When the toaster indicates "Changes successfully applied," select Click to refresh to view the imported data.
- Observe that 34 employee records have been imported.
Global Search
Global search allows you to search for records across multiple entities. In this tutorial, we previously configured the Global Search feature to search both the Department and Employee entities.
- Select Global Search in the navigation drawer.
- Enter
salesin the Search text field and click the Search button.
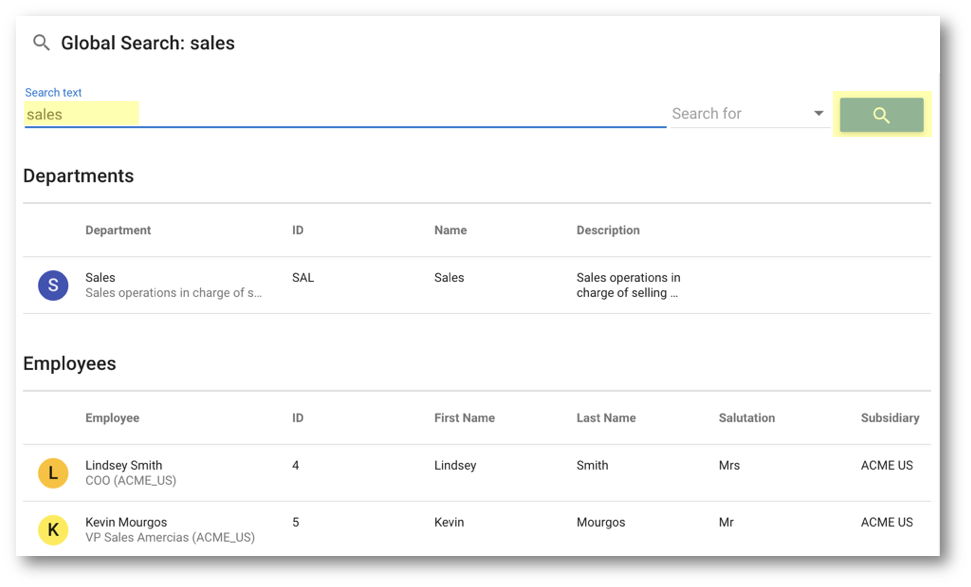
- Notice that the application found one department named Sales and several employees that contain the word sales in their title.
Search and edit an employee's data
In this section, you will learn how to use advanced search to refine your results.
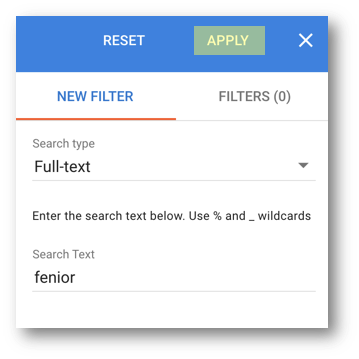
Within the employee data supplied by Semarchy, a title is misspelled as Fenior Consultant instead of Senior Consultant. You will now locate this employee record and correct the error.
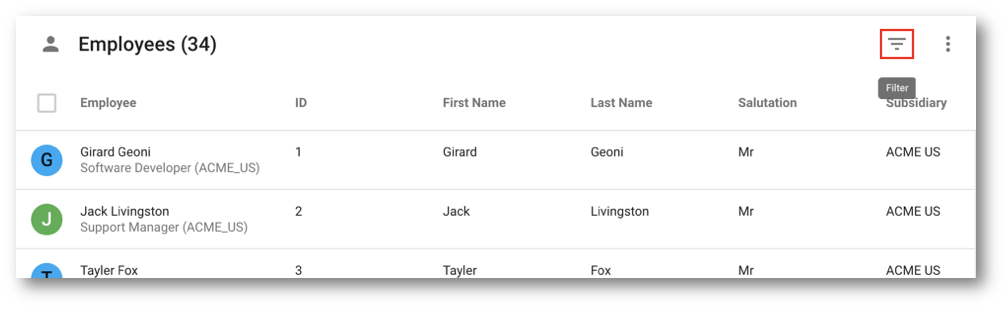
- Select Employees in the navigation drawer and click the Filter button located above the Employees collection.
- Enter
feniorin the Search Text field, and then click Apply or pressEnterto search for the misspelled record.
The search returns one record.
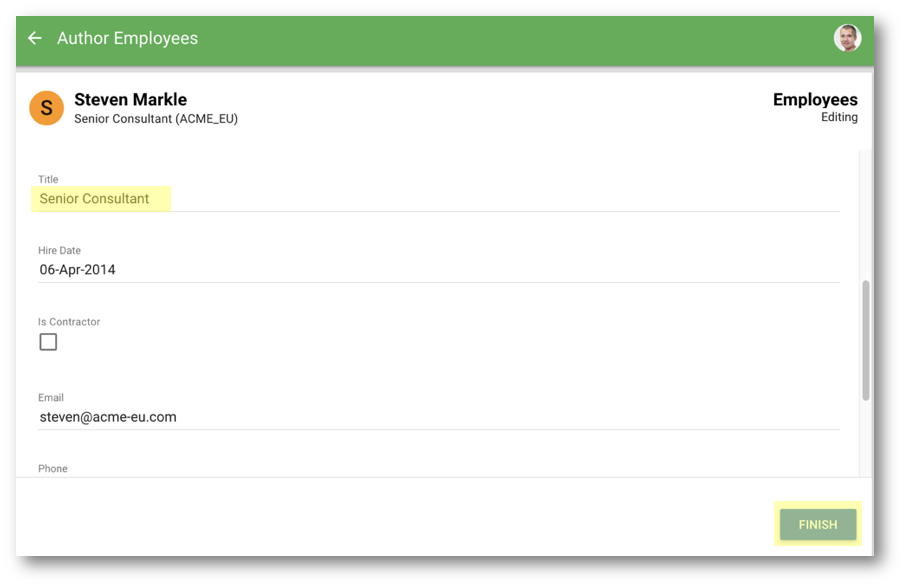
- Click the checkbox next to this record to select it. Open the Options menu and then select Edit.
- Fix the Title value by setting it to
Senior Consultant, and then click Finish.
- Wait for the toaster to display "Changes successfully applied," and then select Click to refresh.
- Observe that the search does not return any results.

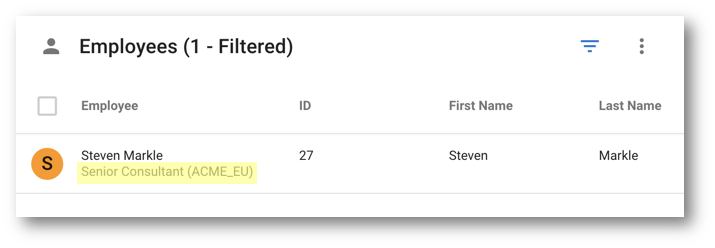
- Click the Filter button again to display the filter panel.
- Enter
marklein the Search Text field and click Apply to retrieve the record you modified.
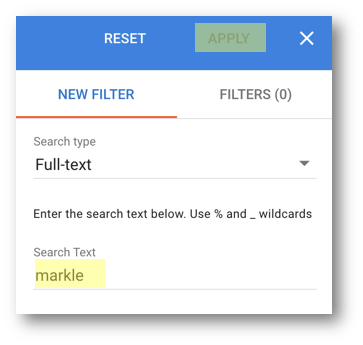
- On the employee's display card, notice that the title is now correct.
Well done! You have built your first data authoring application with Semarchy xDM.
Learning recap
- You have created the Employee Tutorial model with entities, attributes, and relationships.
- You have added forms, collections, and display cards to customize the user experience.
- You have deployed your model and application to a data location.
- You have learned how to use your application to author, edit, import, and filter data.
Next steps
In the next unit, Data quality, you will learn how to enforce data quality within your Employee Tutorial application with enrichers, data validation, and duplicate detection rules.
Thank you for completing this tutorial.