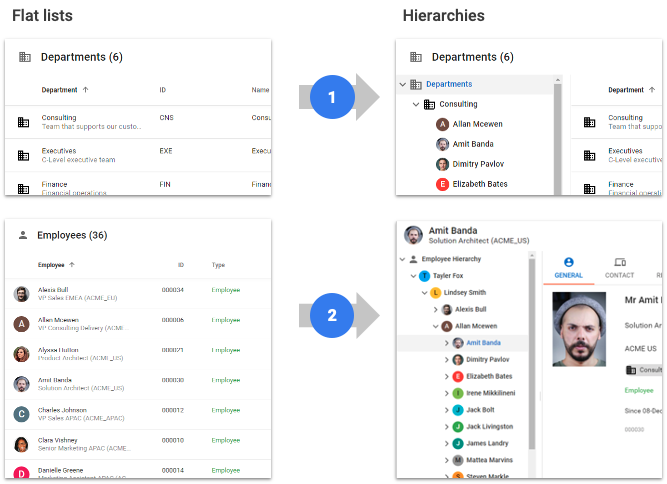
In this tutorial, you will learn how to customize business views and hierarchies to provide a better navigation experience to your business users.
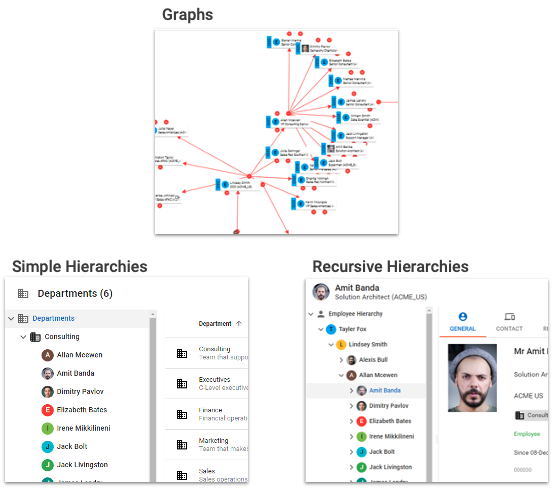
Business views
Hierarchies
Graphs
Learning outcomes
- Modifying business views and forms to add the ability to navigate to child records.
- Enhancing your application by adding hierarchies and configuring business views to render those hierarchies.
- Navigating the data using graphs.
Learning track
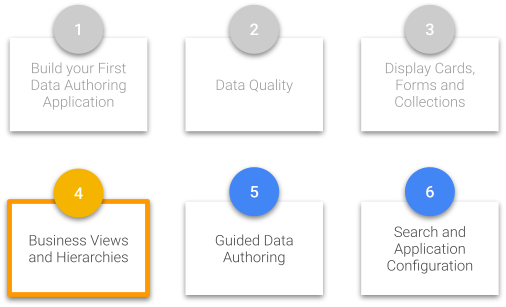
This tutorial is the fourth unit of the Data Authoring track. Make sure to complete the first three units before starting this tutorial:
If you have not completed these prerequisites, return to the Tutorials menu.
Also, if you have not already done so, click the button below to download resources such as the images and data sets that will be used in this tutorial.
Business views are the primary design elements for browsing data in an application. They focus on a set of related business entities that are displayed together within the same parent/child browsing experience.
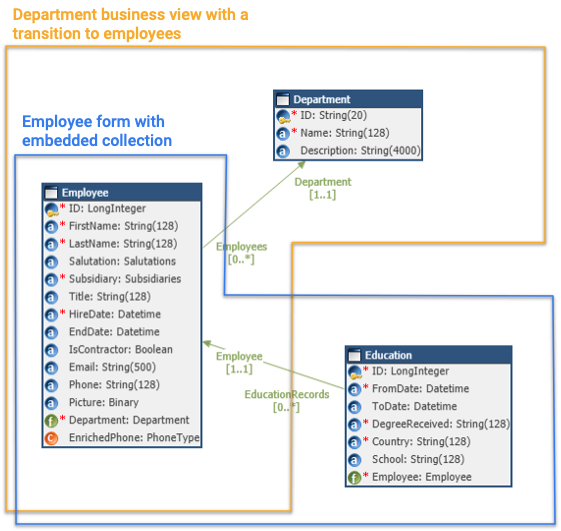
In the next sections, you will be guided to enhance the business views of the Department and Employee entities.
Learning outcomes
- Adding the ability to browse the list of employees that belong to a department.
- Adding an embedded collection to the employee browsing form to manage education records.
In this section, you will modify the Department business view in order to display the employees belonging to a department.
Modify the Department business view
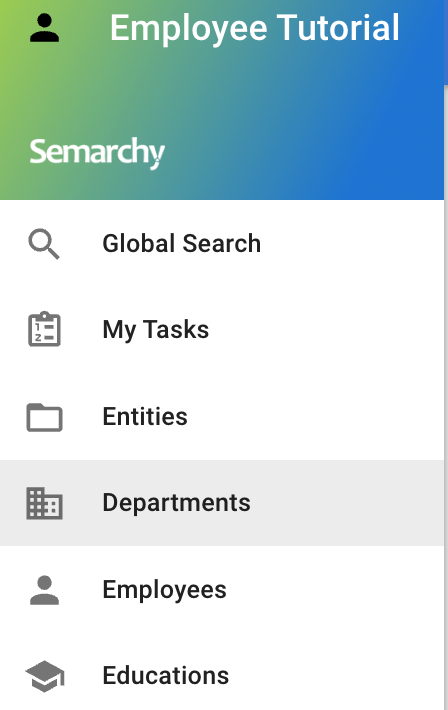
- In the HR Tutorial application, from the navigation drawer, select the Departments business view.
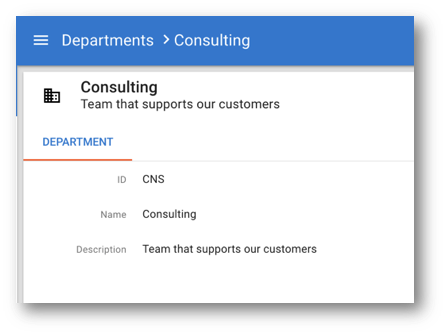
- Click the Consulting record. You will notice that the employees of this department are not displayed.
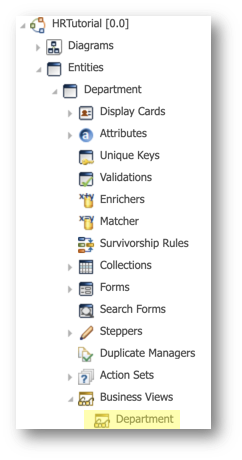
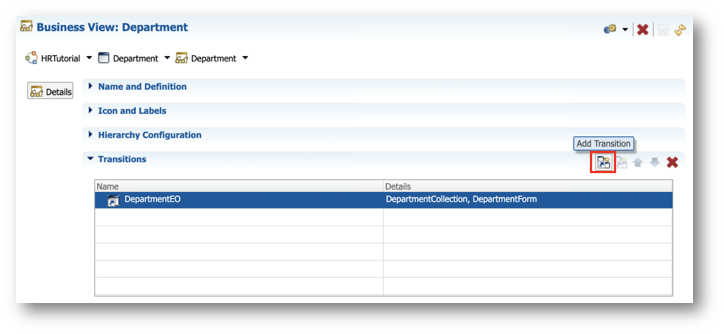
- To change this, go to Application Builder, expand the Entities > Department > Business Views node and open the Department business view.
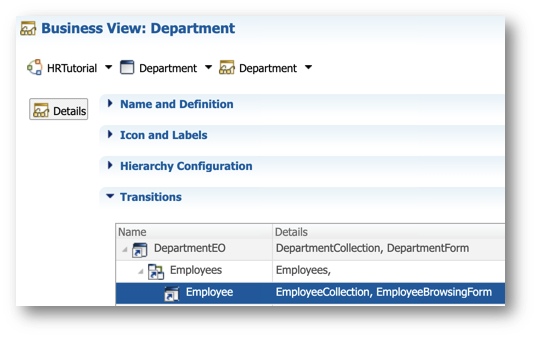
- In the Transitions section, select DepartmentEO, and click Add Transition.
- In the dialog, click the Edit Expression button.

- Select Employees in the Attributes list, and click OK.
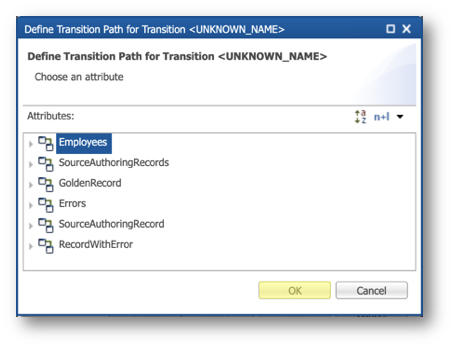
- Click Finish to close the dialog.
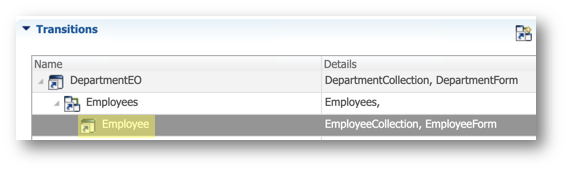
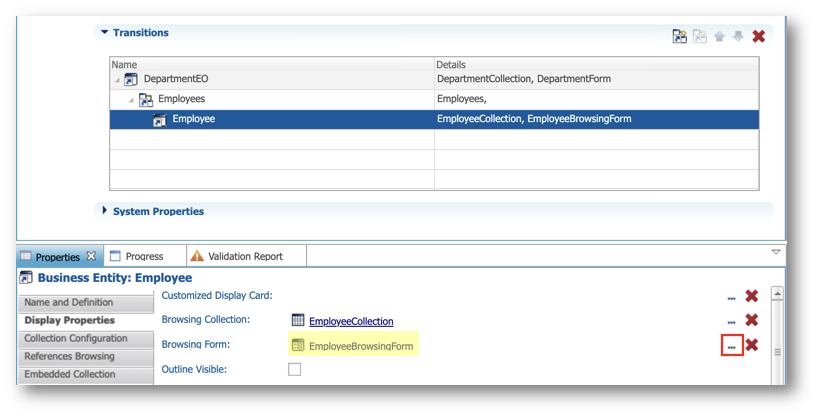
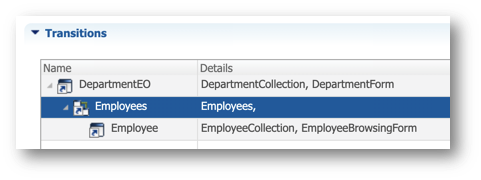
- Expand the transitions DepartmentEO > Employees and select the third line: Employee.
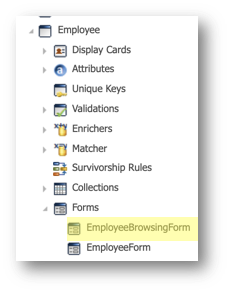
- In the Display Properties finger tab, next to the Browsing Form property, click the Select a value button, and select EmployeeBrowsingForm.
- Click OK.
- Save your work.
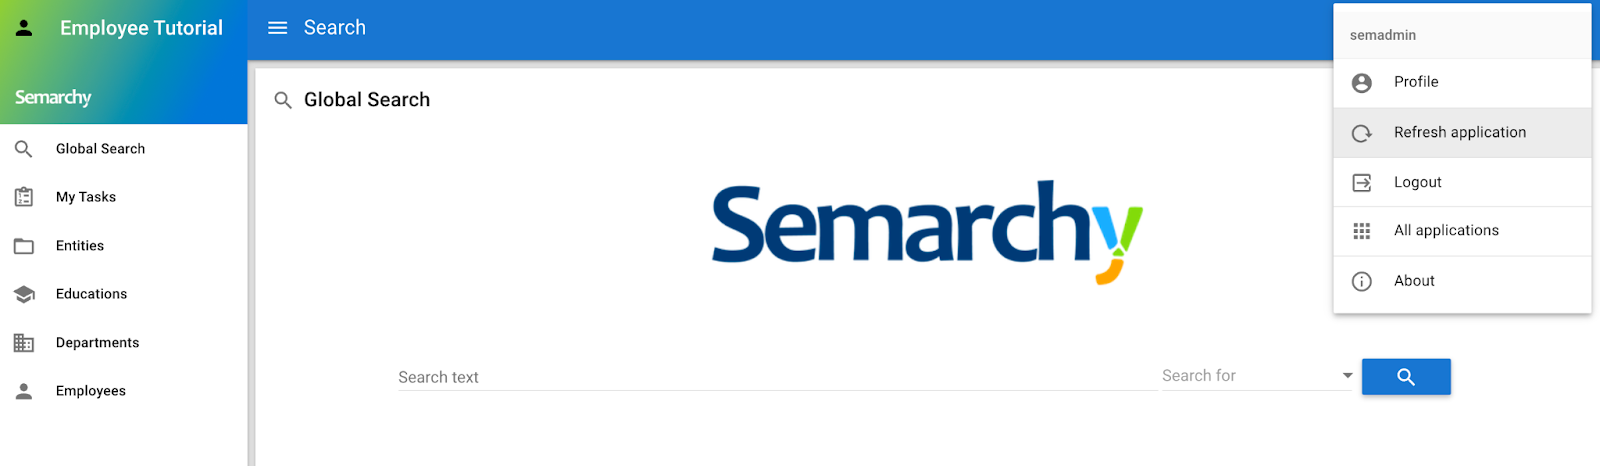
- Go back to the Welcome page and open the Employee Tutorial application.
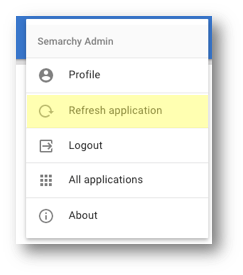
- Open the user profile menu and select Refresh application.
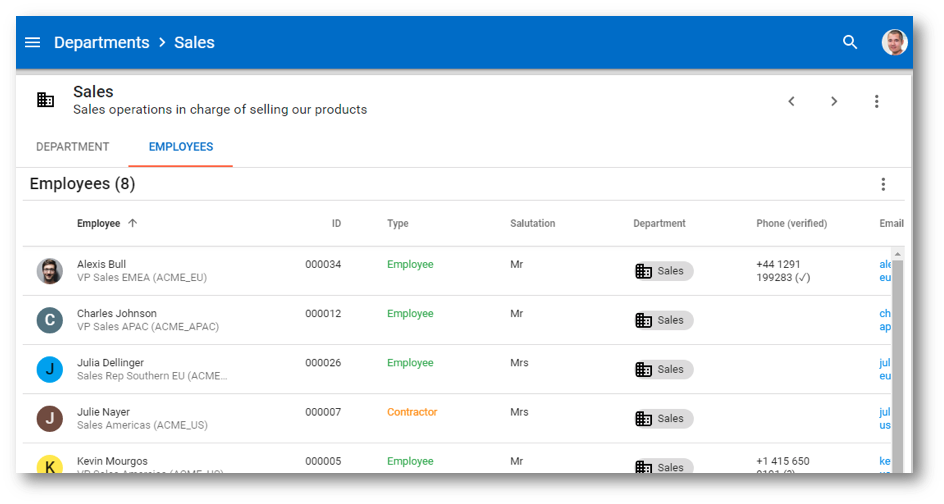
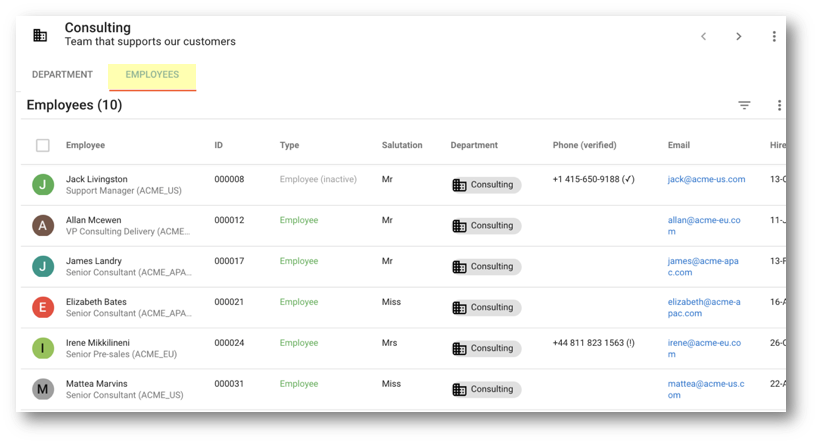
- Open the Consulting department and notice the new tab that displays the list of employees of this department.
Congratulations!
You have added the list of employees that belong to a department.
To summarize:
- You have added a transition to the Department business view and configured the browsing form to use for this transition.
- You have refreshed the application and saw your changes in action.
Next, you will add an embedded collection to the employee browsing form.
You will now learn how to add the Education embedded collection to your Employee browsing form and allow the creation of multiple education records.
Modify the employee browsing form
Let us start by adding the Education embedded collection to the Employee browsing form.
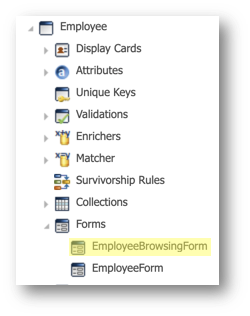
- In the Application Builder, expand the Entities > Employee > Forms node and double-click EmployeeBrowsingForm.
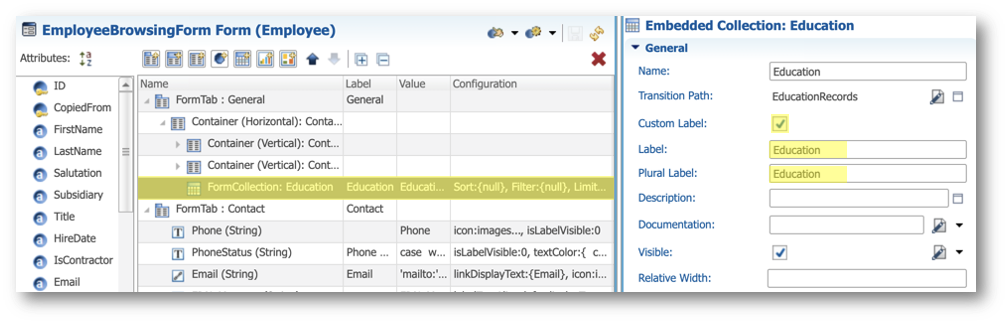
- Drag and drop the Add Embedded Collection button into the first container of the General tab and enter the following values:
- Name:
Education - Value:
EducationRecords
 e
e
- Select the Education collection you just added.
- In the General section of the Properties view, enter the following values:
- Select Custom Label
- Label:
Education - Plural Label:
Education
- In the Component section, deselect Allow Grid.
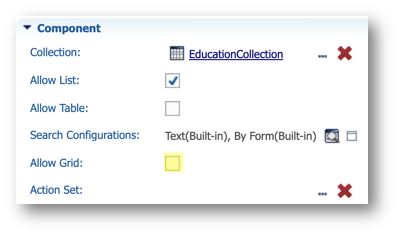
- Save your work.
- Validate your model: In the Model Design view, right-click on the root node corresponding to the HRTutorial [0.0] model, and then select Validate.
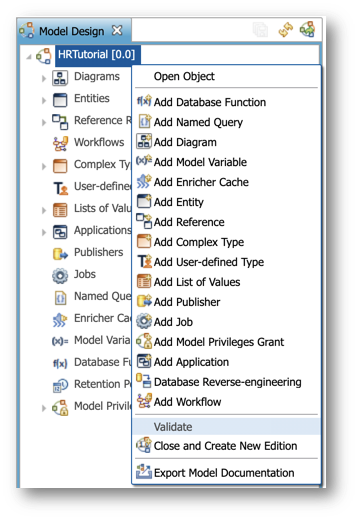
- You should have two warnings in the Validation Report view.
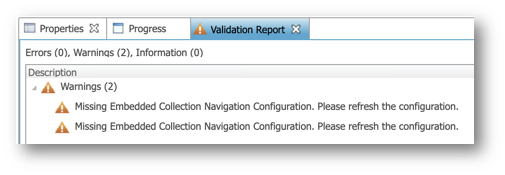
- Double-click the first warning. The Department business view opens.
- Select the Embedded Collection finger tab.
- Click Refresh Configuration.
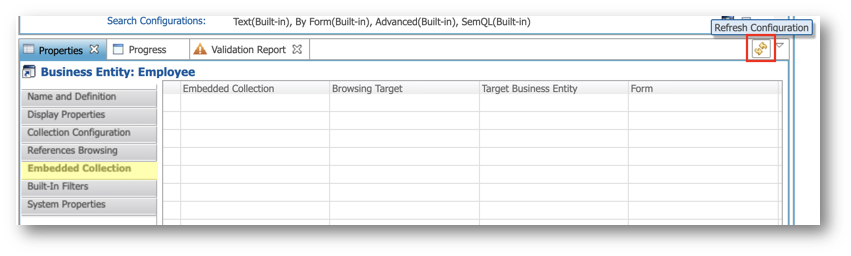
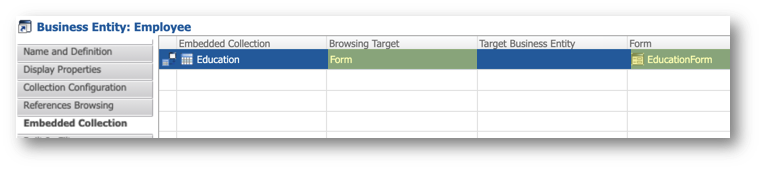
- Set the following values for the Education embedded collection:
- Browsing Target: Form
- Form:
EducationForm
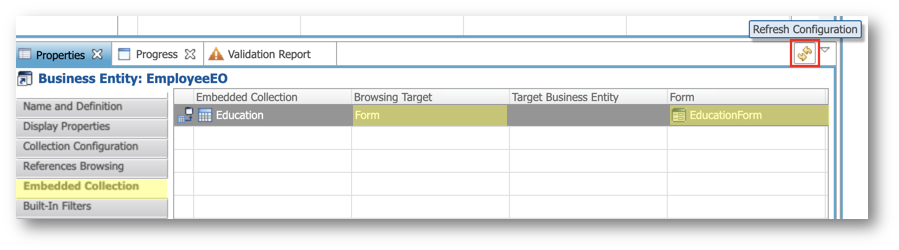
- Go back to the Validation Report view and double-click the second warning. The Employee business view opens.
- Select the Embedded Collection finger tab.
- Click Refresh Configuration.
- Set the following values for the Education embedded collection:
- Browsing Target: Form
- Form: EducationForm
- Save your work and validate your model again. There should be no warnings.
- Go back to the Welcome page and open the Employee Tutorial application.
- In the user profile menu, click Refresh application.
- Select the Employee business view and open the Alexis Bull record.
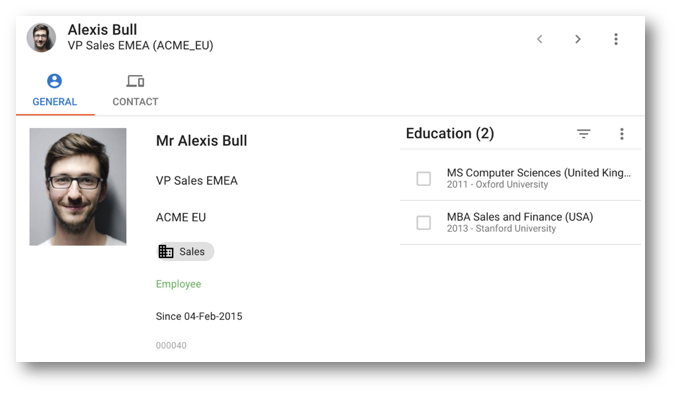
- Observe that the form now includes a list of education records.
This list is currently empty for Alexis Bull.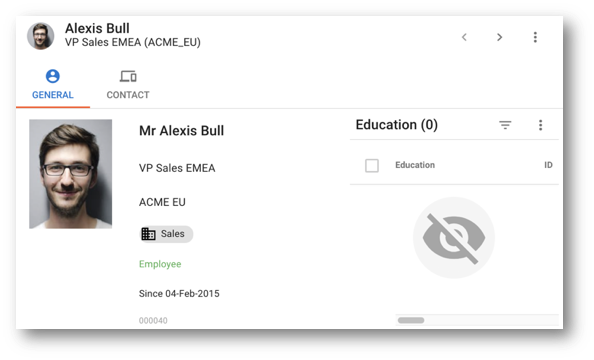
Customize the Education form
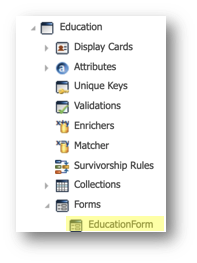
- In the Application Builder, expand the Entities > Education > Forms node, and double-click EducationForm.
- Select the ID field of the form and deselect the Visible checkbox in the Label section of the Properties view.

- Move FDN_Employee just below the ID.
- In the Component section of the Properties view, enter the following values:
- Display Type: Chip
- Select Avatar
- Save your work.
Enable the creation of multiple Education records
You will now change the behavior of the Create action to allow creating multiple education records.
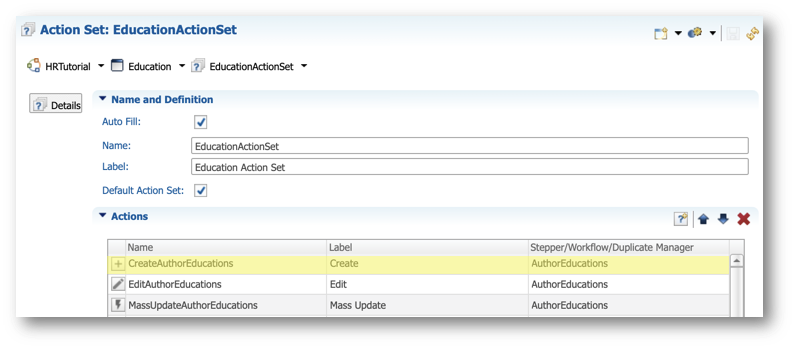
- In the Application Builder, expand the Entities > Education > Action Sets node, and double-click EducationActionSet.

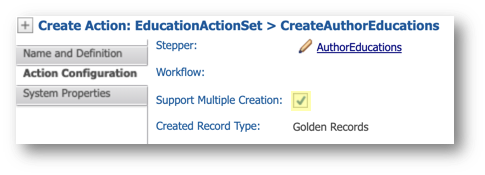
- In the Actions section, select CreateAuthorEducation.
- In the Action Configuration finger tab of the Properties view, select Support Multiple Creation.
- Save your work and validate your model.
Create some education records
You will now add some education records.
- Go to the Welcome page and open the Employee Tutorial application.
- In the user profile menu, click Refresh application.
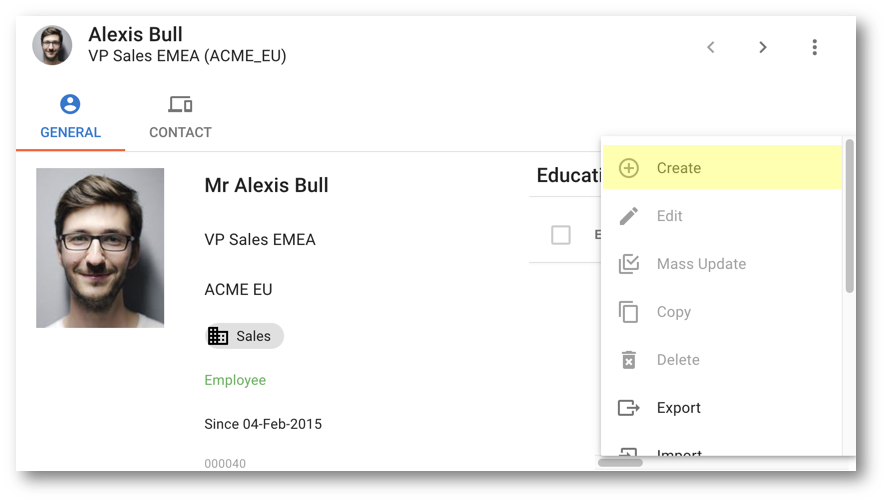
- In the navigation drawer, select the Employee business view and open the Alexis Bull record.
- Open the Actions menu from the Education column, and click Create.
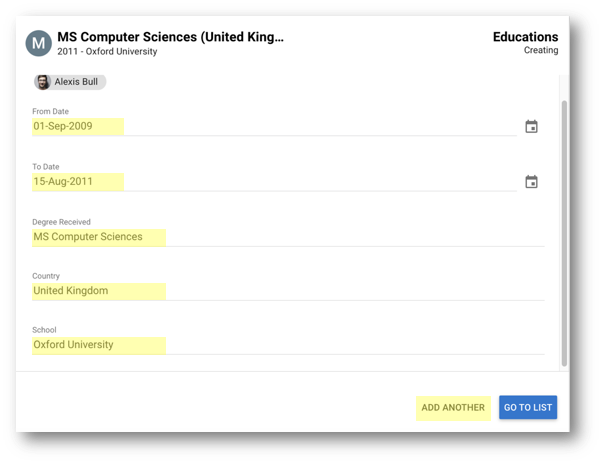
- In the stepper, enter the following values, and then click Add another:
- From Date:
01-Sep-2009 - To Date:
15-Aug-2011 - Degree Received:
MS Computer Sciences - Country:
United Kingdom - School:
Oxford University
- In the stepper, enter the following values, and then click Go to list:
- From Date:
01-Sep-2011 - To Date:
15-Jul-2013 - Degree Received:
MBA Sales and Finance - Country:
USA - School:
Stanford University
- Finally, click Finish and wait for the new records to be processed.
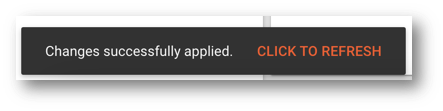
- Click Click to refresh when prompted.
- Education records are now displayed directly in the employee form.
Congratulations!
You have enhanced user experience by customizing business views and embedded collections.
To summarize:
- You have created an embedded collection to manage education records within the employee form.
- You have refreshed and saw your changes in action.
Next, you will learn how to configure business views and display hierarchies.
Hierarchies are useful in any data-driven application. In Semarchy xDM, hierarchies follow the parent-child relationships you have defined in your data model.
In the next sections, you will be guided to create hierarchy views for Department and Employee records.
Learning outcomes
- Changing the Department business view to showcase employees within their respective department in a hierarchy.
- Adjusting both the model and data to establish a comprehensive employee hierarchy mirroring the organizational chart.
You will now modify the Department business view to display employees in their department in a hierarchy.
Modify the Department business view
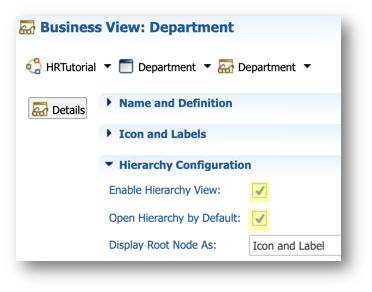
- In the Application Builder, expand the Entities > Department > Business Views node and double-click the Department business view.
- In the Hierarchy Configuration section, select Enable Hierarchy View and Open Hierarchy by Default.
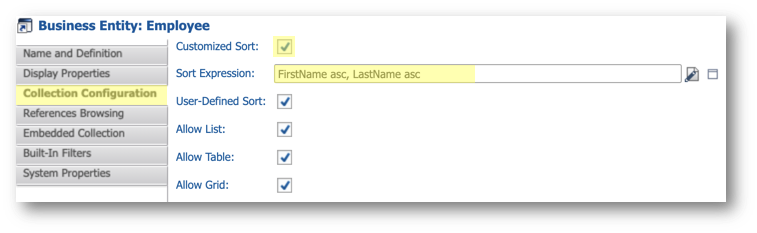
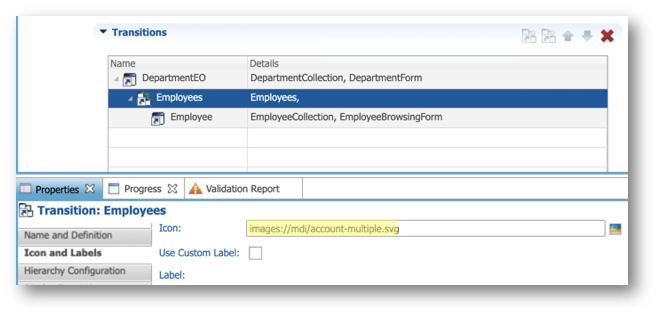
- In the Transitions section, select the third line: Employee.
- In the Collection Configuration finger tab of the Properties view, enter the following values:
- Select Customized Sort
- Sort Expression:
FirstName asc, LastName asc
- In the Transitions section of the editor, select the second line: Employees.
- In the Icon and Labels finger tab of the Properties view, set the Icon to
images://mdi/account-multiple.svg.
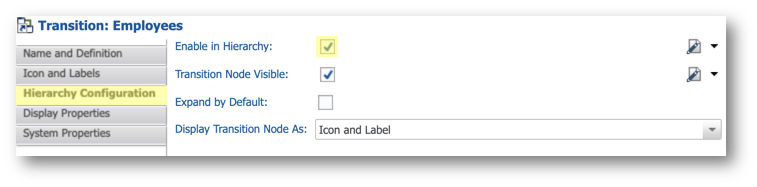
- In the Hierarchy Configuration finger tab, select Enable in Hierarchy.
- Save your work and validate your model. No errors or warnings should be returned.
Test the hierarchy view
Let us check the result in the application.
- Go to the Welcome page and open the Employee Tutorial application.
- In the user profile menu, click Refresh application.
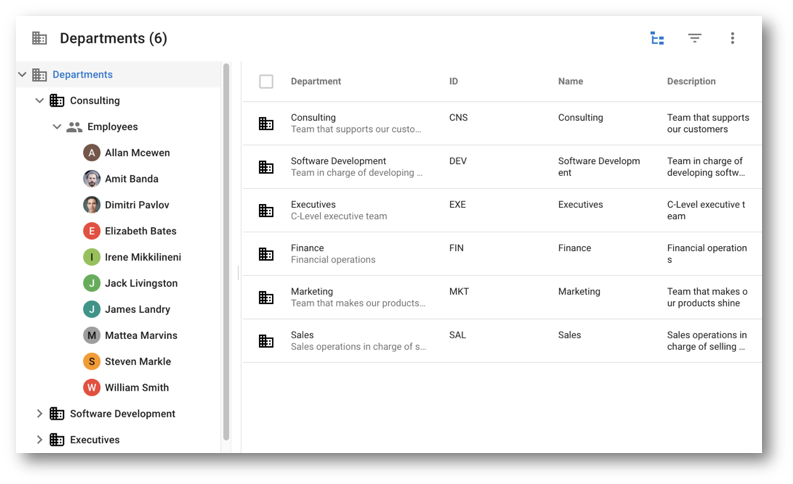
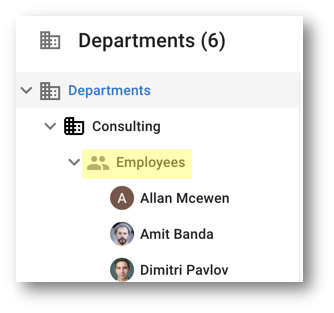
- Select the Departments business view. Employees and Departments are now displayed in a hierarchy.
Customize the hierarchy view
You will now remove the Employee label from the hierarchy view to streamline the user interface.
- In the Application Builder, expand the Department node and open the Department business view.
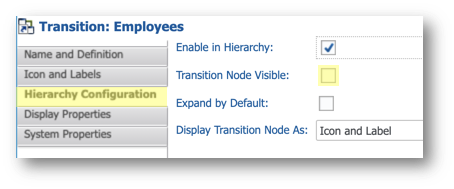
- In the Transitions section, select the second line: Employee.
- In the Hierarchy Configuration finger tab, deselect Transition Node Visible.
- Save your work and validate your model.
- Go to the Welcome page and open the Employee Tutorial application.
- In the user profile menu, click Refresh application.
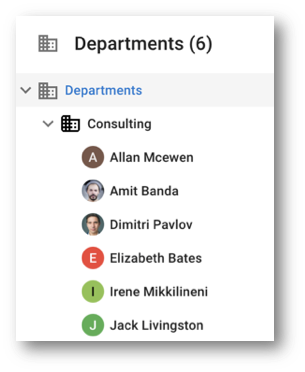
- Select the Departments business view. Employee records now directly display under their respective department.
Congratulations!
You have built your first hierarchy to display employees in their departments.
Next, you will build a hierarchy of employees.
In the next two sections, you will build a complete employee hierarchy that should reflect the organization chart.
In this section, you will start by implementing the employee hierarchy in your HR Tutorial model.
Add the Employee-Employee reference relationship
You first need to modify your data model to add a relationship between an employee and their manager.
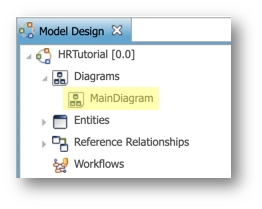
- In the Application Builder, expand the Diagram node and open the MainDiagram.
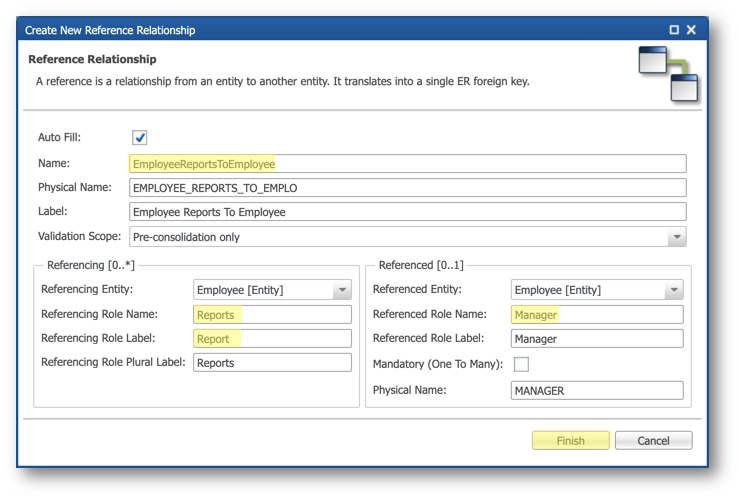
- Add a self-reference for the Employee entity as shown below:
- Enter the following values and then click Finish:
- Name:
EmployeeReportsToEmployee - Referencing [0..*] > Referencing Role Name:
Reports - Referencing [0..*] > Referencing Role Label:
Report - Referencing [0..1] > Referencing Role Name:
Manager
- Rearrange the reference link and the other entities with drag and drop.
- Select Show relationship names > Label only.

- Select Show relationships cardinalities.

- Save your work.

Add the manager to the employee collection
Now you will modify the employee collection to add the manager field.
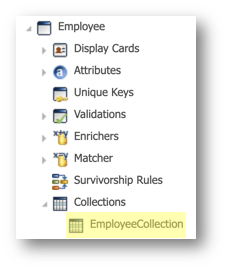
- In the Application Builder, expand the Employee > Collections node and open EmployeeCollection.
- Drag the FDN_Manager attribute and drop it between the Picture and IsContractor fields.
- In the Column section of the Properties view, enter the following values:
- Display Type: Chip
- Select Avatar
- Save your work.
Add the Manager field to the Employee browsing and authoring forms
Now, you will modify the employee browsing form to add the Manager field.
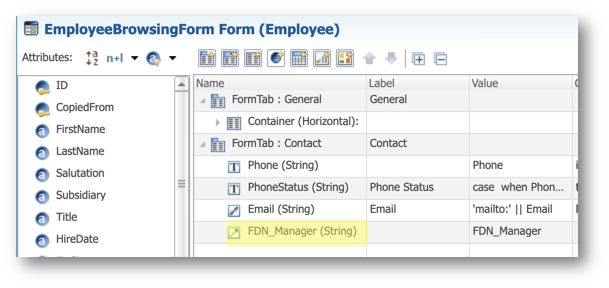
- In the Application Builder, expand the Employee > Forms node and open EmployeeBrowsingForm.
- Drag the FDN_Manager attribute and drop it in the Contact tab.
- In the Component section of the Properties view, enter the following values:
- Display Type: Chip
- Select Avatar
- In the Label section, enter the following values:
- Alignment: Left
- Position: Top
- Save your work.
Now you will modify the Employee authoring form to add the Manager field.
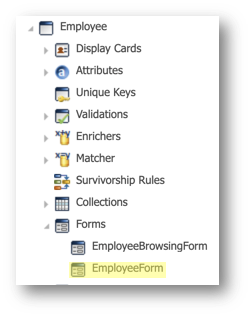
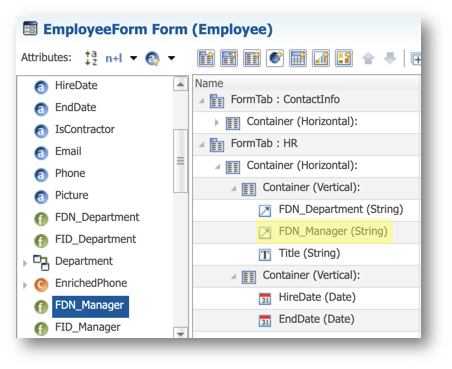
- In the Application Builder, expand the Employee > Forms node and open EmployeeForm.
- Drag the FDN_Manager attribute and drop it between the FDN_Department and Title fields.
- In the Component section of the Properties view, enter the following values:
- Display Type: Chip
- Select Avatar
- Save your work.
Modify the employee business view
You will now modify the employee business view to add a transition to the reporting employees.
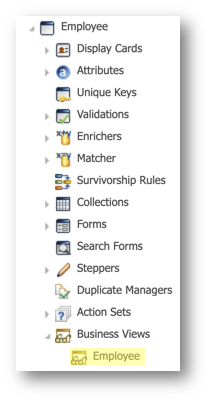
- In the Application Builder, expand the Employee > Business view node and open the Employee business view.
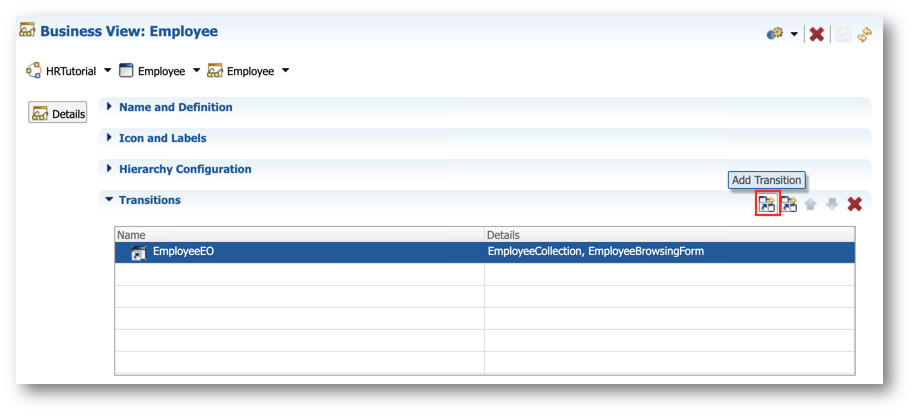
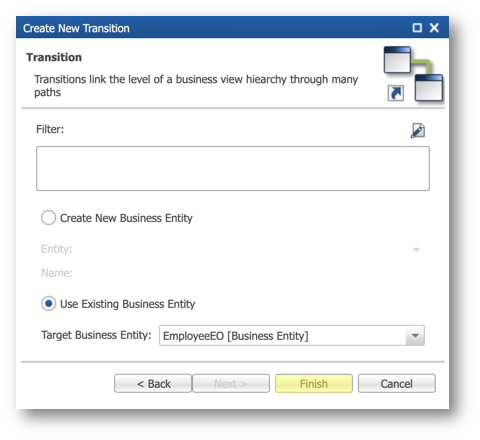
- In the Transitions section, select EmployeeEO, and click Add Transition.
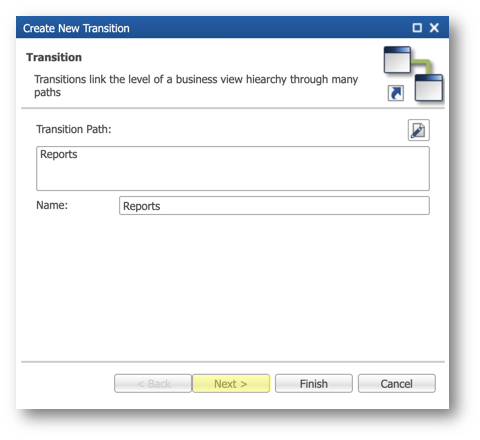
- In the dialog, click Edit Expression.

- Select Reports and click OK.

- Click Next.
- Leave all options to defaults in the second step of the wizard, and then click Finish.
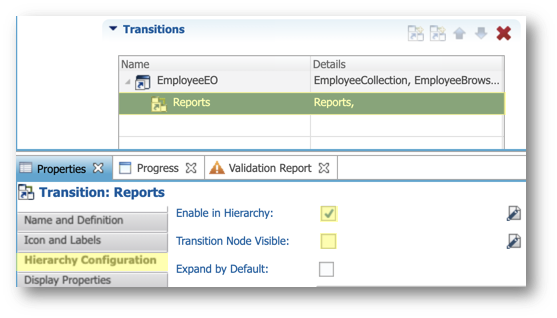
- Expand the EmployeeEO node in the tree table and select Reports.
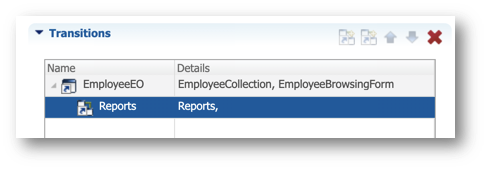
- In the Icon and Labels finger tab of the Properties view, set the Icon to
images://mdi/account-multiple.svg.
- In the Display Properties finger tab, set the Display Form Tab as property to Icon and Label.
- Save your work and validate your model.
- Go to the Management perspective of Application Builder, right-click on the EmployeeTutorial, and then click Deploy Model Edition.
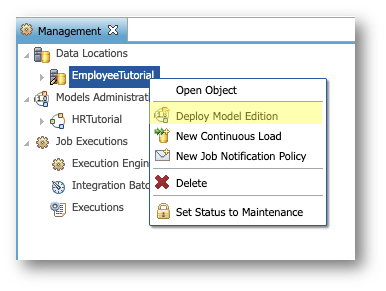
- In the Deploy Model Edition wizard, click Finish to deploy your updated model.
Congratulations!
You have added the hierarchical relationship between employees to your model. In the next section, you will populate data for this relationship, then build and test the hierarchy view.
Now that your model is updated, you will populate it to reflect the following organization chart:
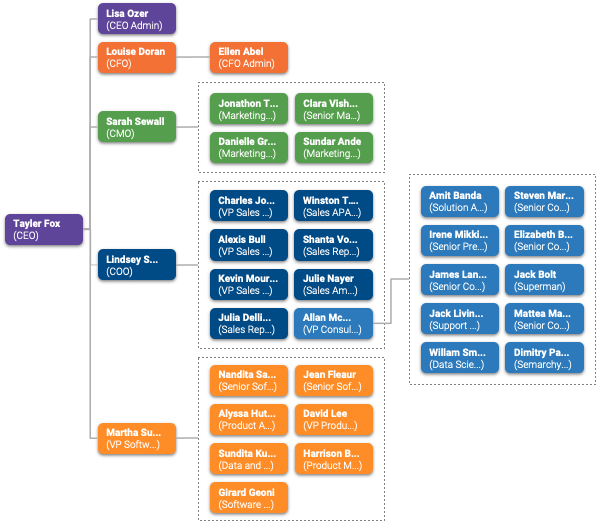
Since no hierarchical data is provided in this tutorial, you will use the mass update feature on Employee records to reflect the hierarchy.
First, you will update employees in the Consulting department to make them report to Allan Mcewen.
- Go to the Employee Tutorial application.
- In the user profile menu on the top right corner, click Refresh Application.
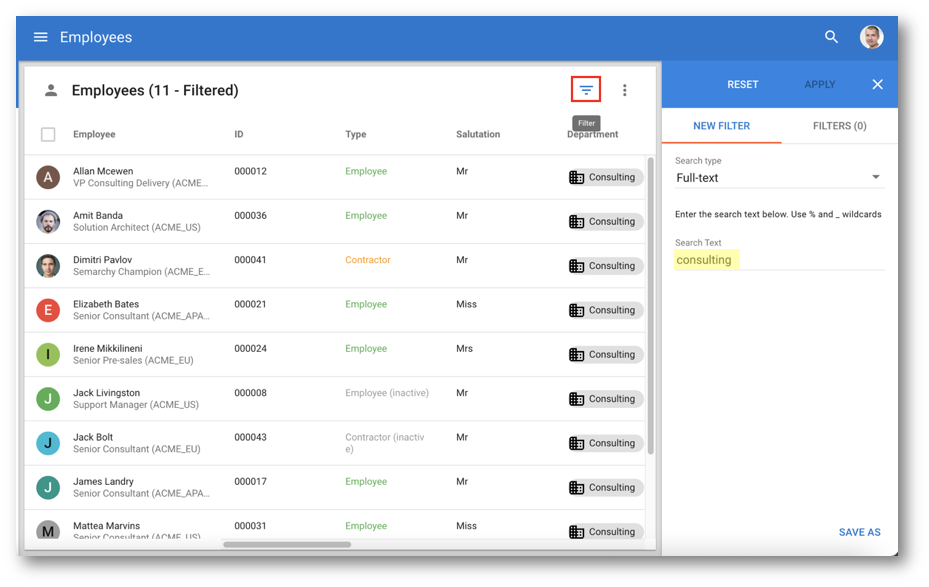
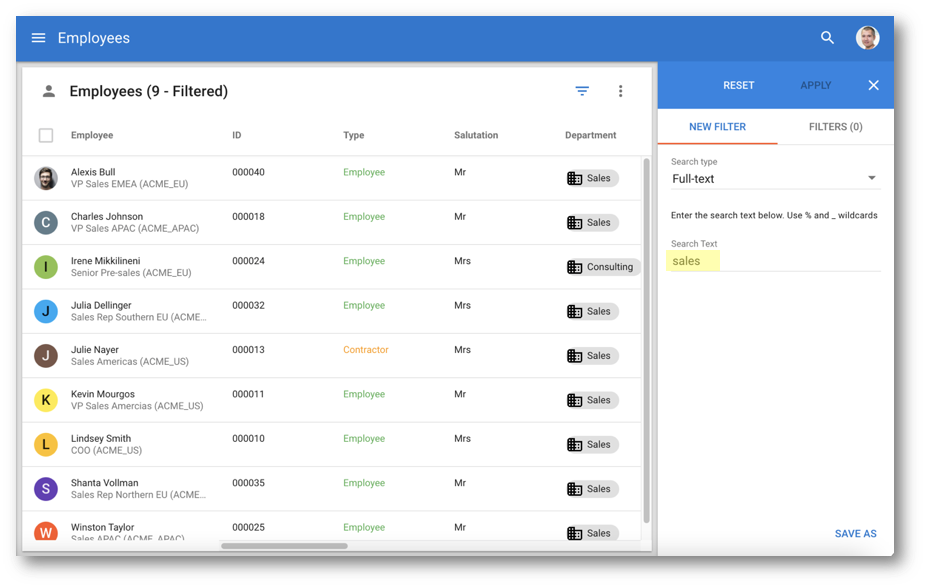
- Go to the Employees business view and filter on Consulting.
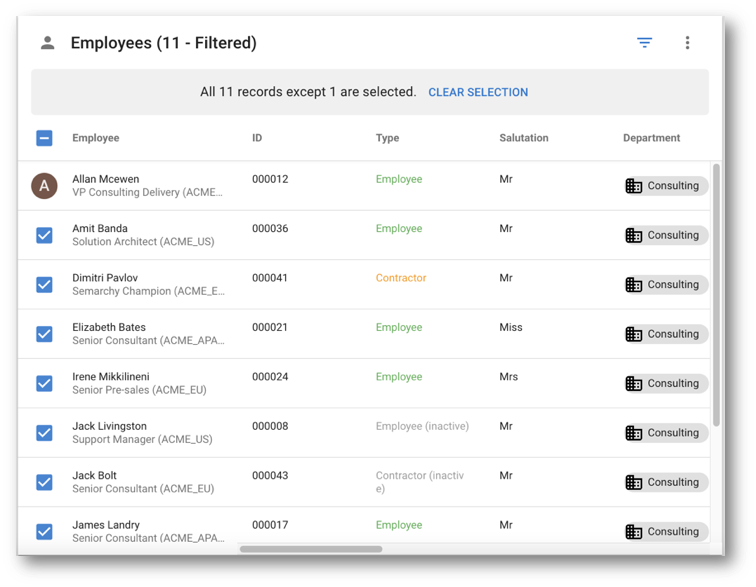
- Select all employee records except Allan Mcewen's.
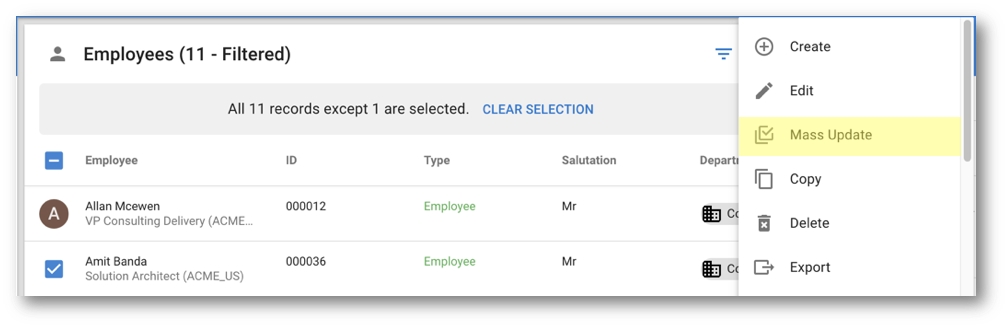
- In the Options menu, click Mass Update.
- Scroll down to the end of the form, click Update Value for the Manager, and select Allan Mcewen.
- Click Apply.
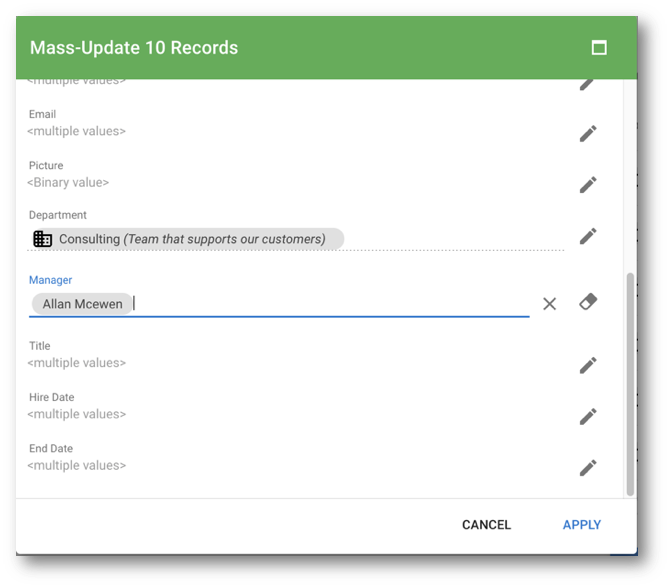
- Click Finish.
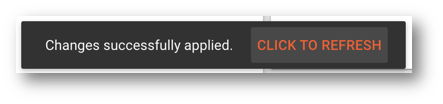
- When the toaster at the bottom left corner of the screen indicates "Changes successfully applied," click Click to refresh.
Now, you will update employees in the Development department to report to Martha Sullivan.
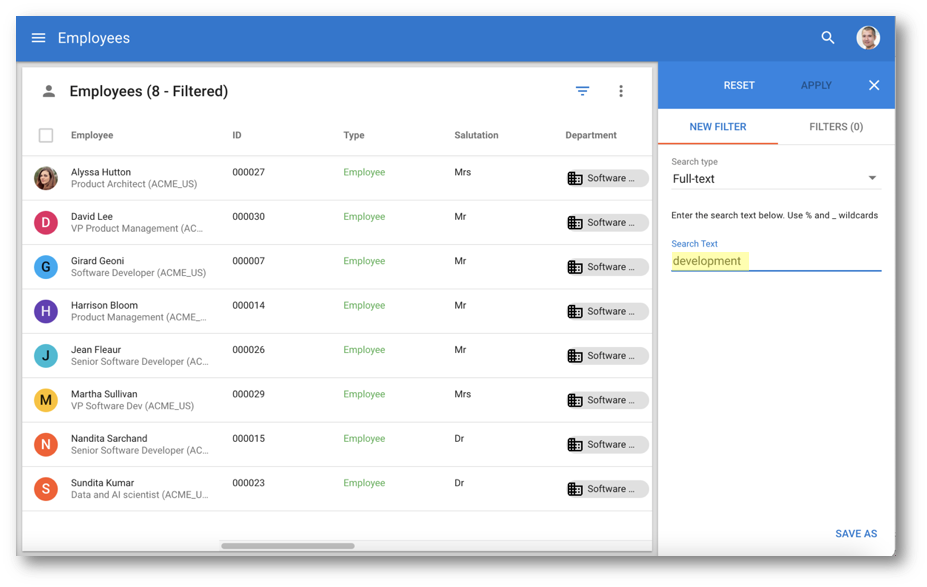
- Filter employees in the Development department.
- Select all employee records except Martha Sullivan's.
- In the Options menu, click Mass Update.
- Scroll down to the end of the form, click Update Value for the Manager, and select Martha Sullivan.
- Click Apply.
- Click Finish.
- When the toaster on the bottom left corner of the screen indicates "Changes successfully applied," click Click to refresh.
Now, you will update employees in the Marketing department to report to Sarah Sewall.
- Filter employees in the Marketing department.

- Select all employee records except Sarah Sewall's.
- In the Options menu, click Mass Update.
- Scroll down to the end of the form, click Update Value for the Manager, and select Sarah Sewall.
- Click Apply.
- Click Finish.
- When the toaster on the bottom left corner of the screen indicates "Changes successfully applied," click Click to refresh.
Now, you will update employees in the Sales department to report to Lindsey Smith.
- Filter employees in the Sales department.
- Select all employees except:
- Irene Mikkilineni
- Lindsey Smith
- In the Options menu, click Mass Update.
- Scroll down to the end of the form, click Update Value for the Manager, and select Lindsey Smith.
- Click Apply.
- Click Finish.
- When the toaster on the bottom left corner of the screen indicates "Changes successfully applied," click Click to refresh.
Now you will find the employees that do not have a manager yet.
- In the filter panel, set the Search type to Advanced and click the + button.
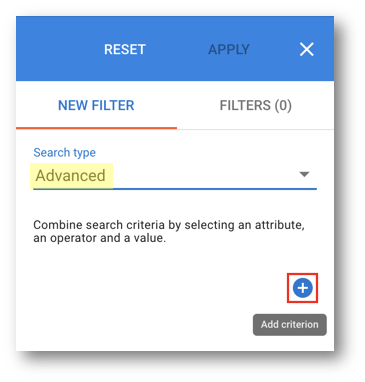
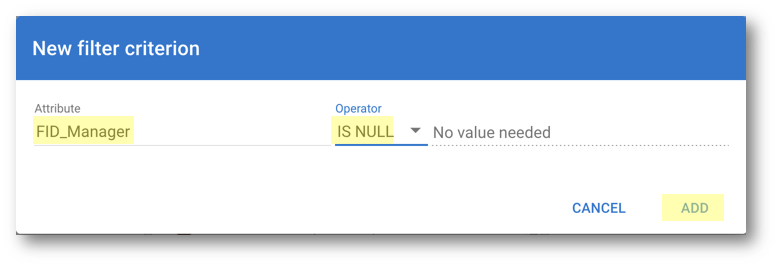
- Enter the following values and click Add:
- Attribute:
FID_Manager - Operator:
IS NULL
- Click Apply.
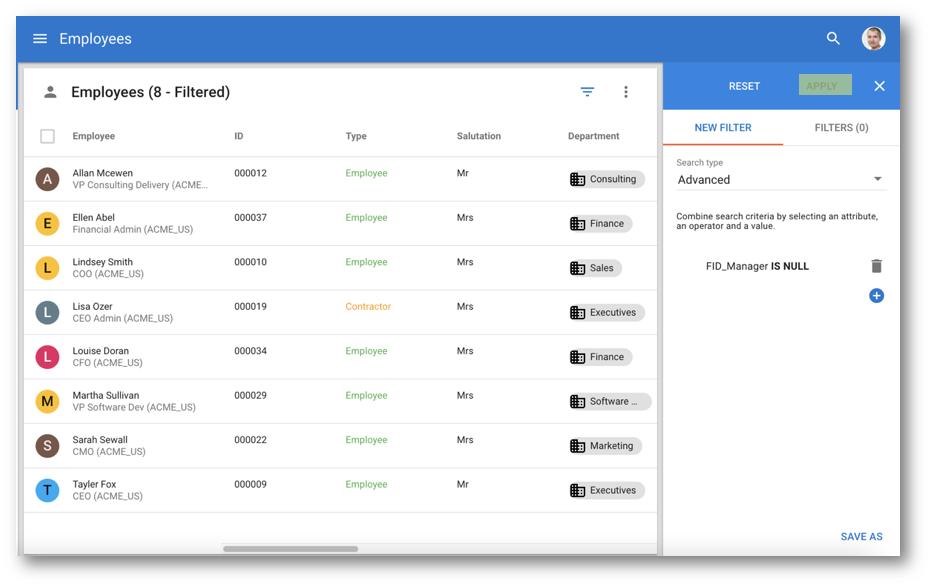
- Select all employee records except:
- Allan Mcewen
- Ellen Abel
- Tayler Fox
- In the Options menu, click Mass Update.
- Scroll down to the end of the form, click Update Value for the Manager and select Tayler Fox.
- Click Apply.
- Click Finish.
- When the toaster indicates "Changes successfully applied," click Click to refresh.
Finally, you will update the last two employees without a manager.
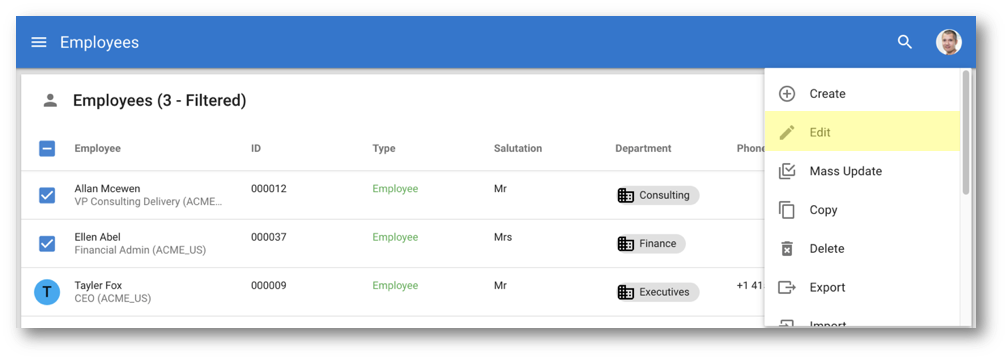
- Select all employee records except Tayler Fox's.
- In the Options menu, click Edit.
- Make Allan Mcewen report to Lindsey Smith, and click Edit Next.
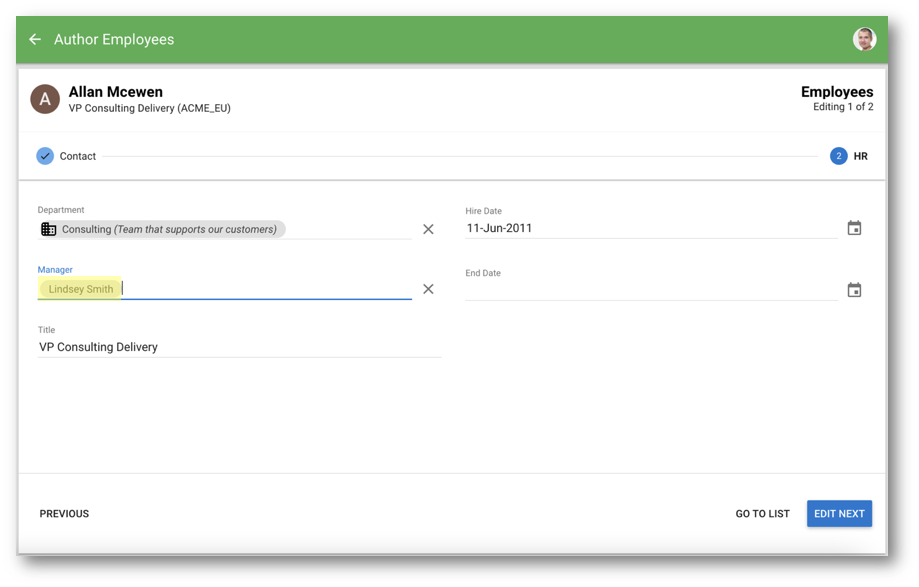
- Make Ellen Abel report to Louise Doran, and click Go to list.

- Click Finish.
Now you can browse the hierarchy starting from the CEO.
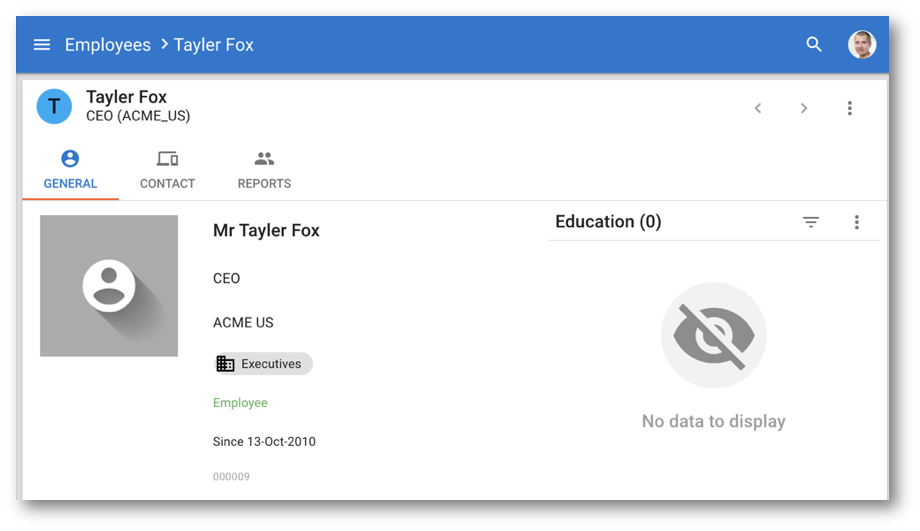
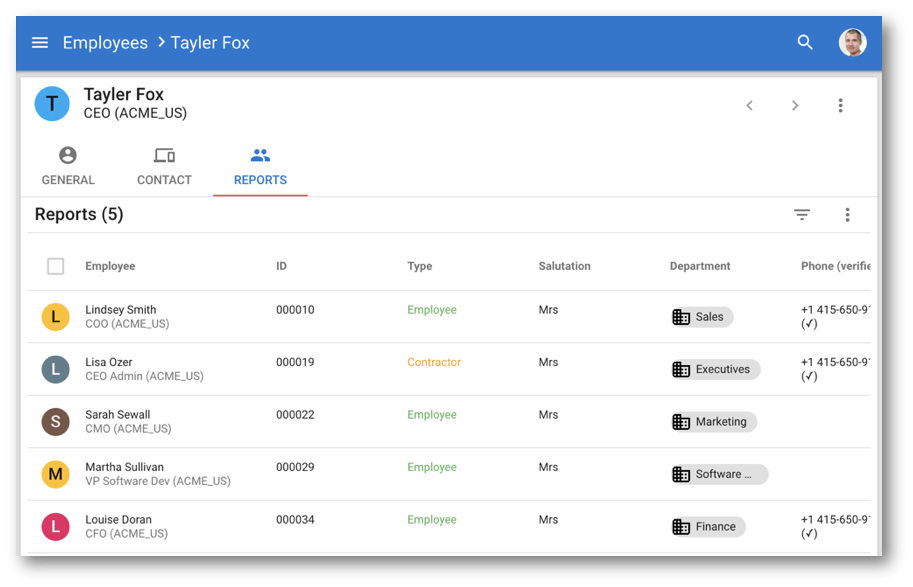
- Open the Tayler Fox employee form.
- Select the Reports tab to see who reports to Tayler.
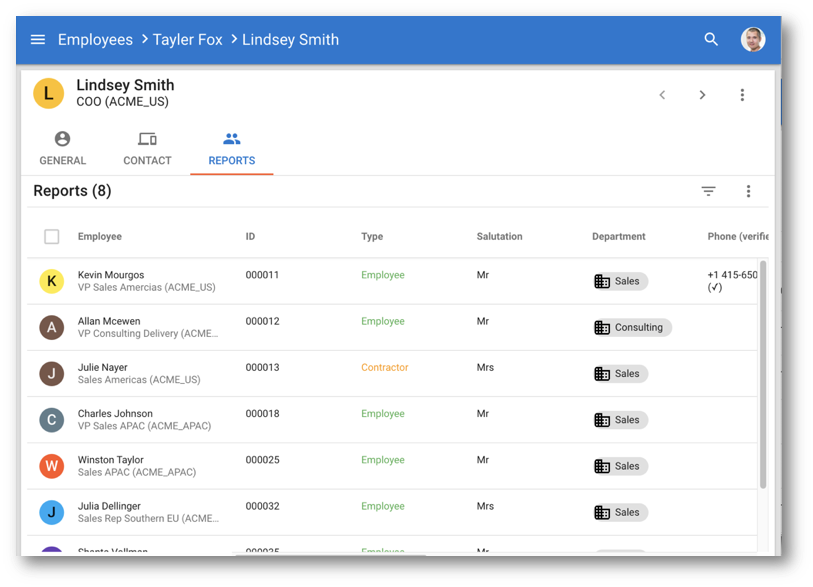
- You can browse recursively the hierarchy by opening the Lindsey Smith employee form and going to the Reports tab.
The data of your org-chart is now all set. In the next section, you will build the hierarchy view and test it.
You are now ready to create the employee hierarchy view.
Create the employee hierarchy view
Create the EmployeeHierarchy business view following these steps:
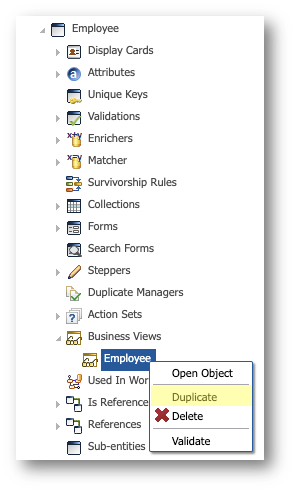
- In the Application Builder, expand the Entities > Employee > Business Views node.
- Right-click Employee and click Duplicate.
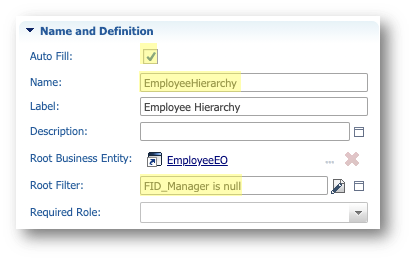
- Open the newly created Employee2 business view, select Auto Fill, and enter the following values in the Name and Definition section:
- Name:
EmployeeHierarchy - Root Filter:
FID_Manager is null
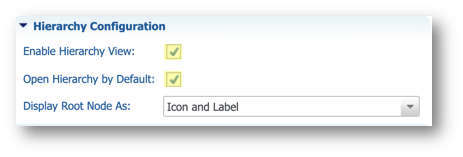
- In the Hierarchy Configuration section, enter the following values:
- Select Enable Hierarchy View
- Select Open Hierarchy View by Default
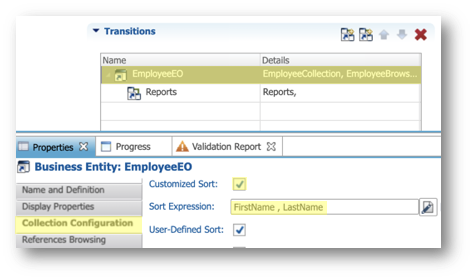
- In the Transitions section, select the first line (i.e., EmployeeEO) and enter the following values in the Collection Configuration finger tab of the Properties view:
- Select Customized Sort
- Sort Expression:
FirstName, LastName
- In the Transitions section of the editor, select the second line (i.e., Reports) and enter the following values in the Hierarchy Configuration finger tab:
- Select Enable in Hierarchy
- Deselect Transition Node Visible
- Save your work.
Create an action for the hierarchy view
Now you will add a shortcut in the application menu by creating an action to open the business view.
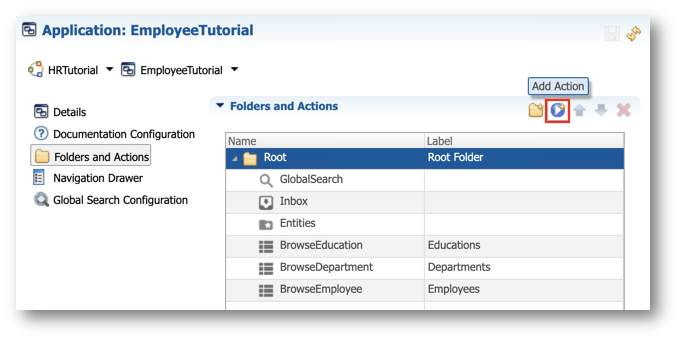
- In the Application Builder, expand the Applications > EmployeeTutorial node and open Folders and Actions.
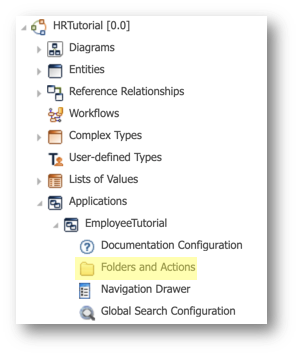
- Select the Root folder and click Add Action.
- Enter
BrowseOrgChartin the Name field, and click Next.
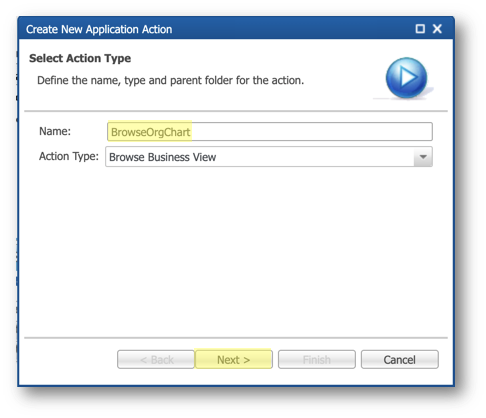
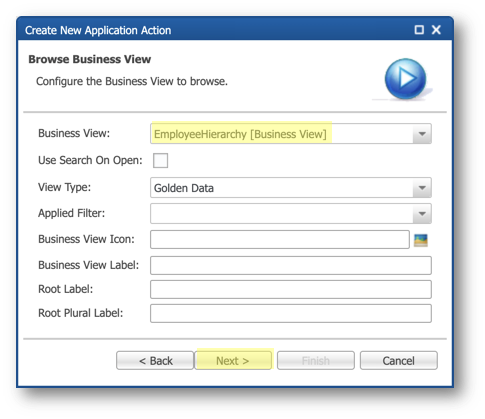
- Set the Business View to
EmployeeHierarchy, and click Next.
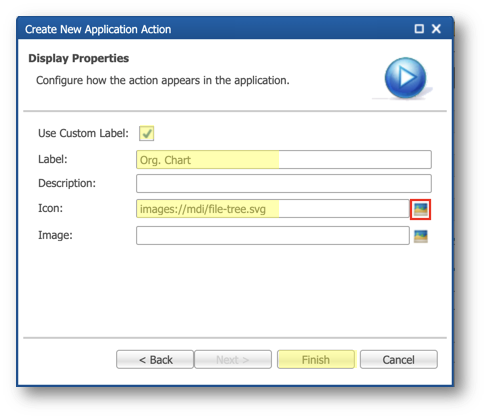
- Enter the following values and click Finish:
- Select Custom Label
- Label:
Org. Chart - Set the icon to
images://mdi/file-tree.svg

- Save your work.
- Validate your model. No error or warning should be displayed.
Refresh and test the organization chart
Now you will refresh your application and navigate the organization chart hierarchy.
- Go to the Welcome page and open the Employee Tutorial application.
- In the user profile menu, click Refresh application.
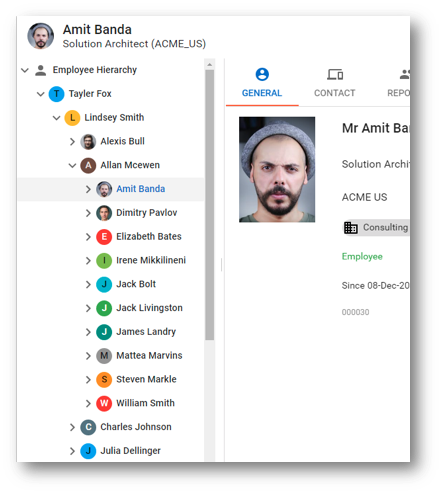
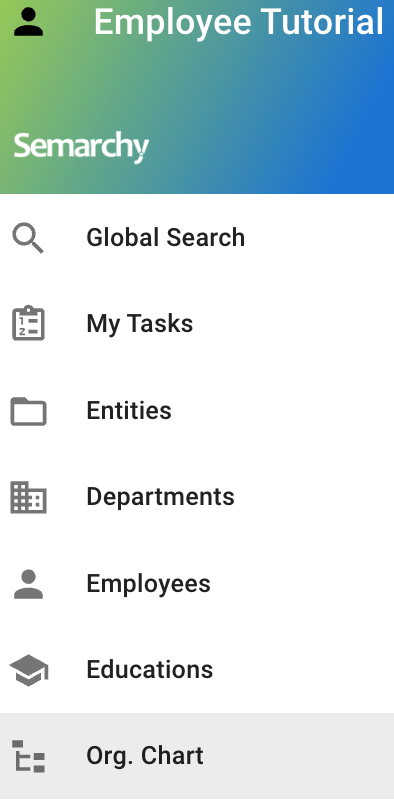
- In the navigation drawer, open the Org. Chart business view.
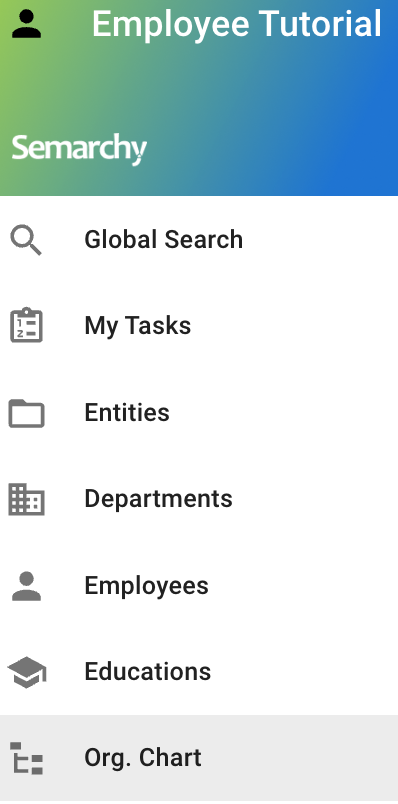
- You can now navigate the organization chart hierarchy, starting from the CEO.
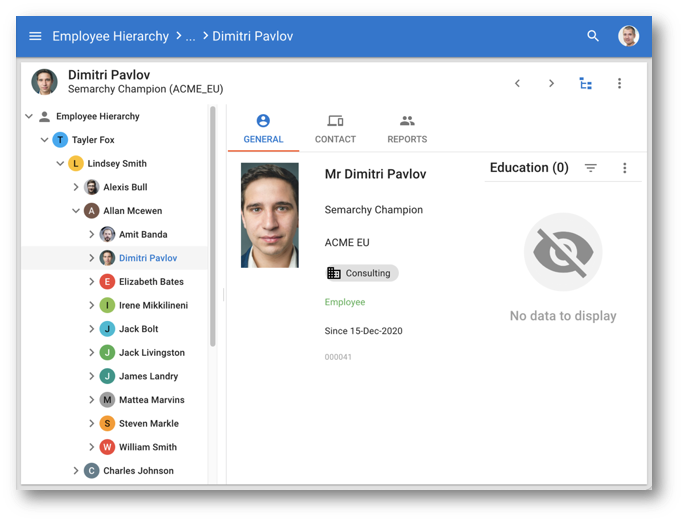
Congratulations!
You changed the model and the data of your application to create a complete employee hierarchy to reflect an organization chart.
In the next section, you will learn about the graph navigation feature and compare it with the hierarchical view.
Semarchy xDM provides a graph visualization feature that allows business users to explore all connections related to a specific record. Graphs can enhance or substitute hierarchies, providing deeper insights into the data.
Use the Graph view
You will now discover how to examine record relationships through the Graph view. A compelling scenario is efficiently locating an employee's manager, their peers, and other people working in their department.
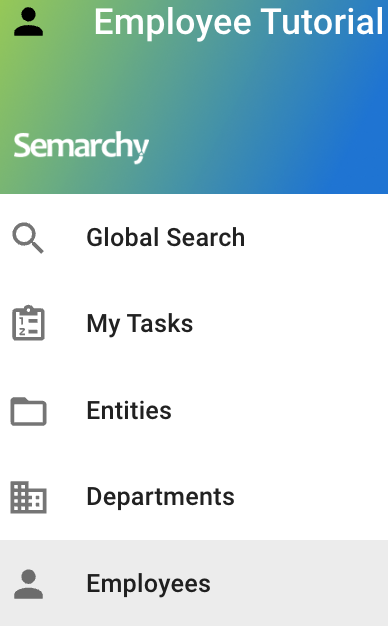
- Go to the Employee Tutorial application and select the Employees business view.
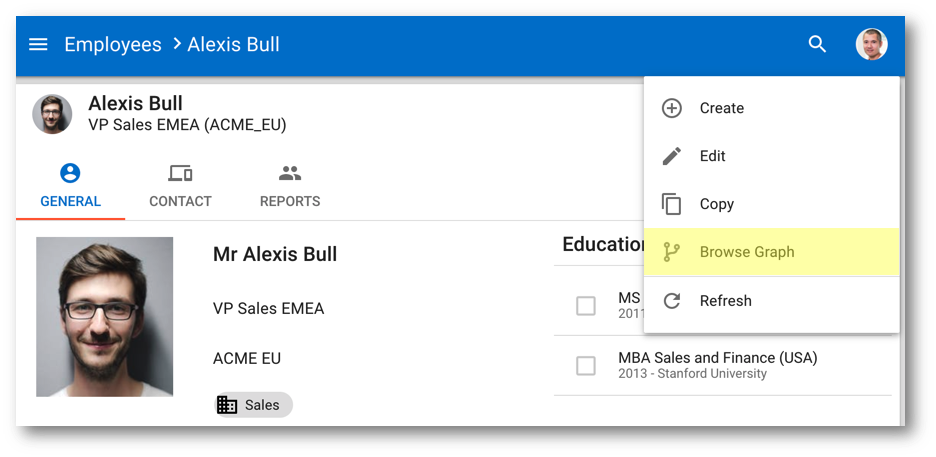
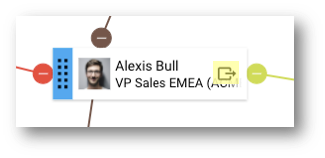
- Select Alexis Bull.
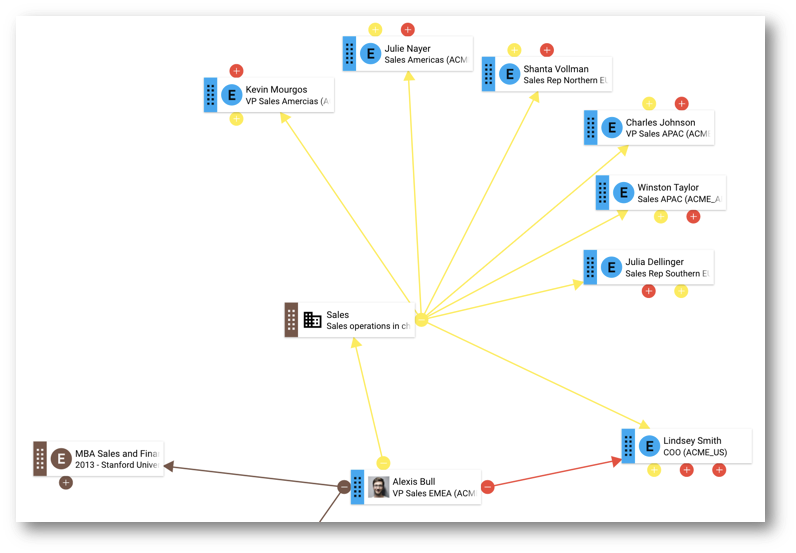
- In the browsing form, open the Options menu and click Browse Graph.
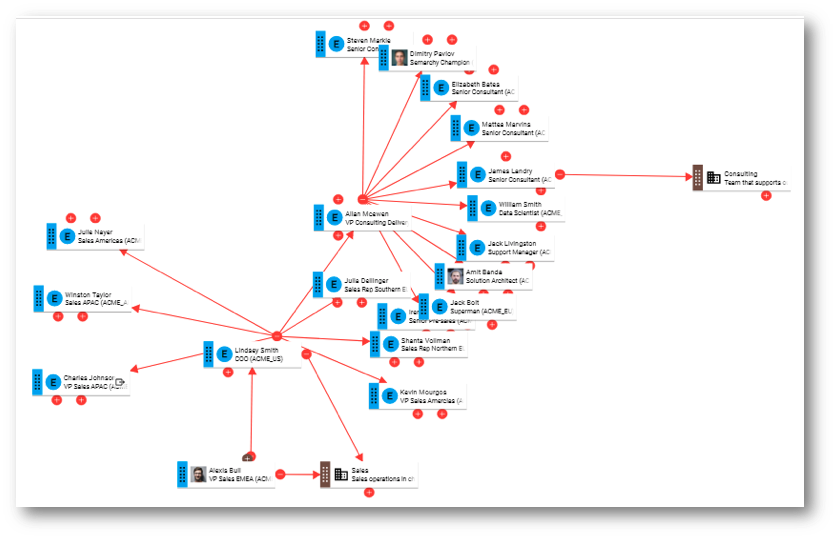
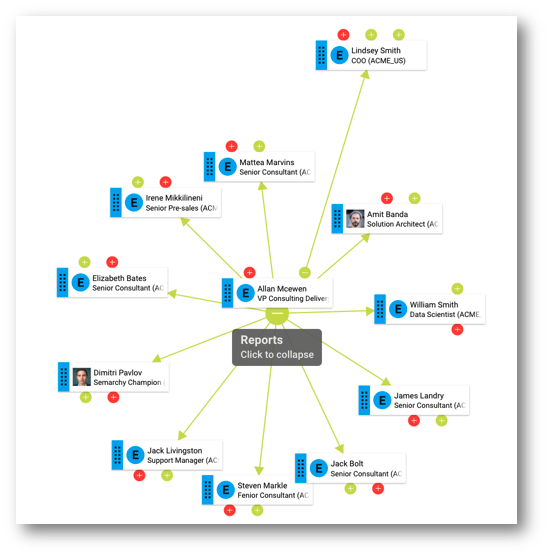
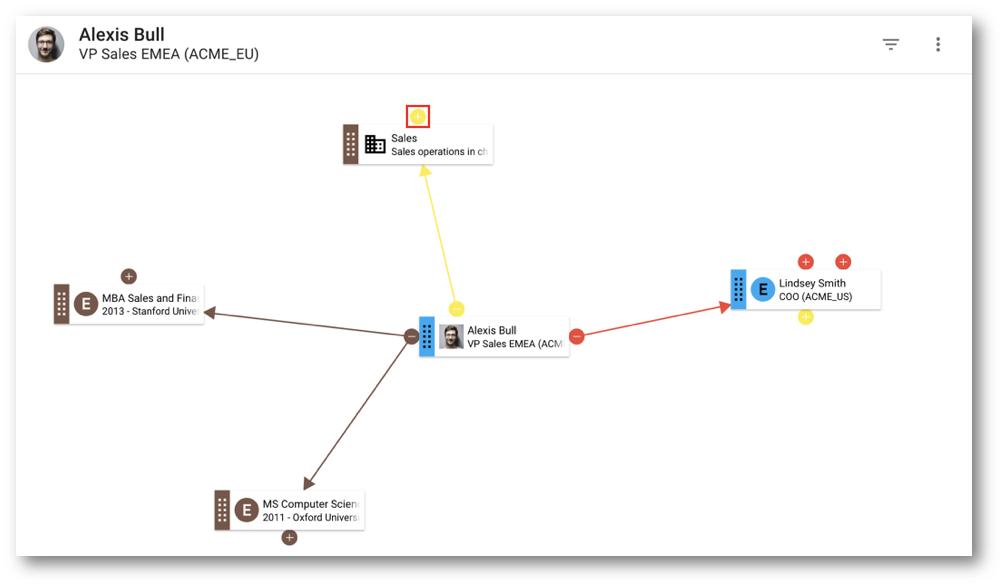
- The graph shows Alexis's manager, his department, and his education records. Click the Expand button on the Sales department card.
- Observe that the graph view allows you to see all employees from the Sales department. You will compare this feature with the hierarchy view in the next section.
- Click the collapse and expand buttons on the different records to browse more related objects.
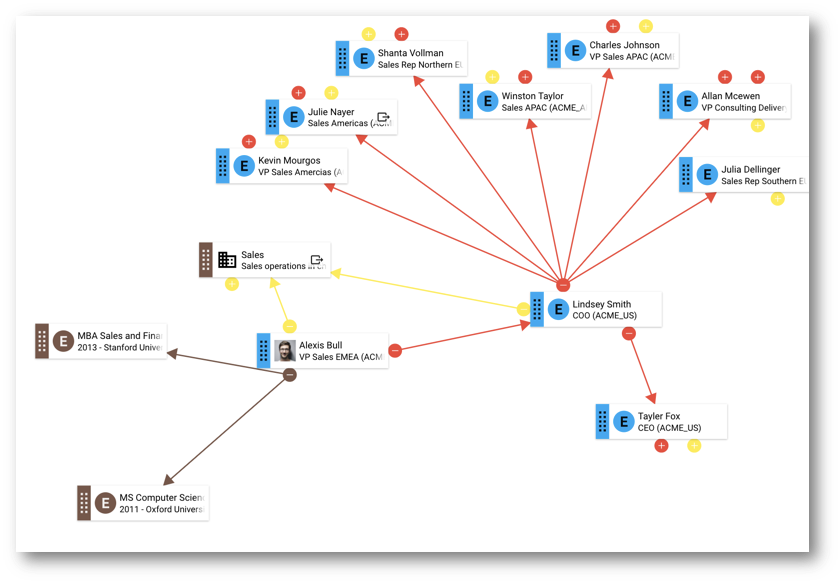
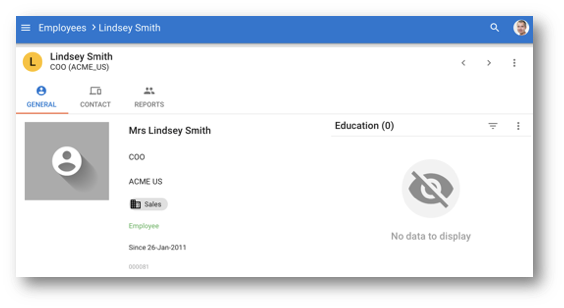
- Move your mouse over the Lindsey Smith display card, and then click the navigate button to see the record's details.
Graph navigation versus hierarchy
You will now assess the distinctions between navigating through graphs and hierarchies.
- In the Employee Tutorial application, select the Org. Chart business view.
- Expand the Taylor Fox > Lindsey Smith node and then select Alexis Bull.
- Observe that the Reports tab allows you to see the direct reports of the employee (if they exist).
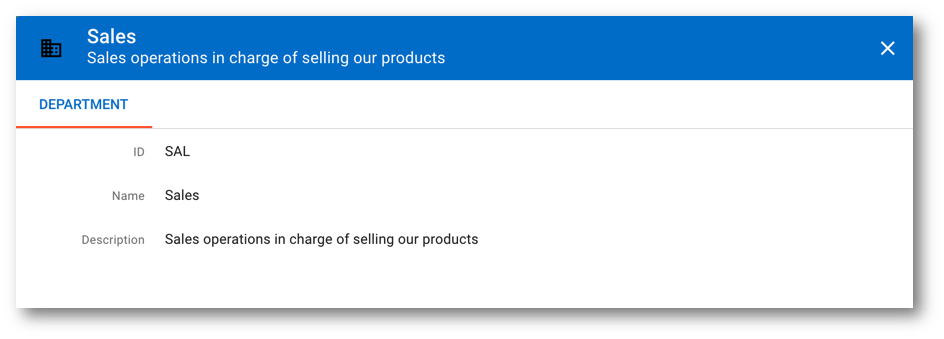
- Click on Sales on the browsing form.
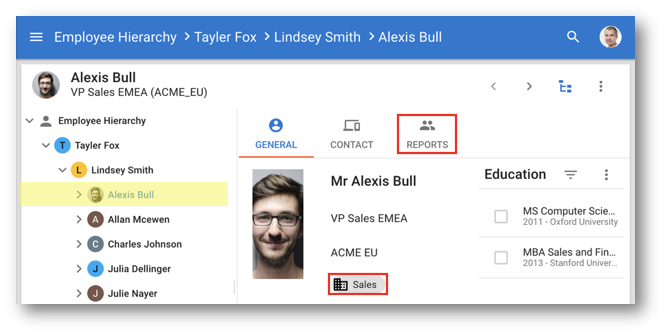
- Observe that the hierarchy view does not allow browsing the employees from the Sales department. This would require customizing the Department browsing form to display employees in a second tab.
Depending on the business requirements, graphs can be more powerful than hierarchies and contribute to a broader user experience.
Congratulations!
You have completed the last section of this tutorial by using the graph view and comparing it with the hierarchy view.
Well done! You have customized business views and built your first hierarchy views with Semarchy xDM.
Learning recap
- You have enhanced the Department and Employee business views.
- You have configured simple and recursive hierarchies.
- You have discovered that graphs can serve as an alternative navigation method compared to hierarchies.
Next steps
The next unit, Guided data authoring, will focus on data authoring use cases to optimize the interactions that business users have with your application when authoring data.
Thank you for completing this tutorial.