This tutorial will concentrate on data authoring scenarios to enhance the interactions between business users and your application.
Learning outcomes
- Configuring steppers with several steps and substeps.
- Configuring action sets to enable or disable data authoring actions based on selected records.
- Using the built-in import and export actions and author data in Excel.
- Configuring delete actions to remove records.
Learning track
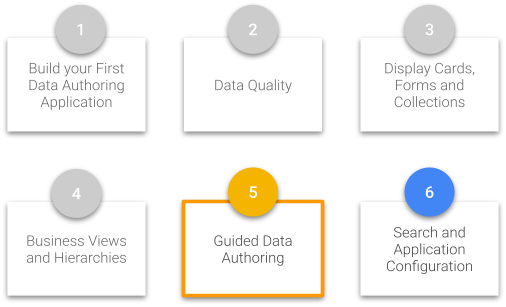
This tutorial is the fifth unit of the Data Authoring track. Make sure to complete the first four units before starting this tutorial:
- Build your first data authoring application
- Data quality
- Display cards, forms, and collections
- Business views and hierarchies
If you have not completed these prerequisites, return to the Tutorials menu.
Also, if you have not already done so, click the button below to download resources such as the images and data sets that will be used within this tutorial.
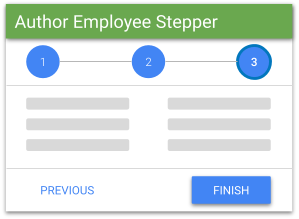
Steppers are started when users perform a Create, Edit, Copy, Import, or Mass-Update action. They define a wizard-like sequence of steps that drive the user through an authoring operation.
Actions are grouped in action sets and appear in a business view's Options menu. They allow a user to perform an action on one or more records.
Actions can be enabled or disabled depending on the selected data.

Next, you will:
- Modify the EmployeeStepper stepper to allow creating and modifying education records as a substep.
- Create a new stepper and its corresponding actions to handle the use case of contract termination.
- Understand how data management actions are organized in action sets and how they are presented in the menu.
We will change the EmployeeForm form and the AuthorEmployee stepper to add support for creating education records in the same activity.
Modify the Employee form
- In the Application Builder, open the HRTutorial model.
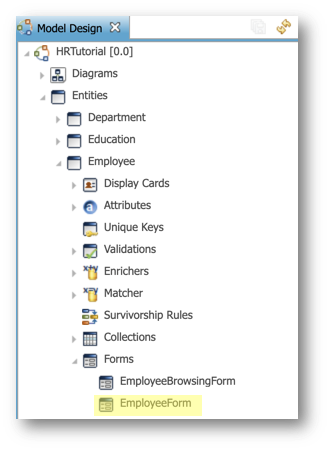
- Navigate to Entities > Employee > Forms in the Model Design view and then double-click EmployeeForm.
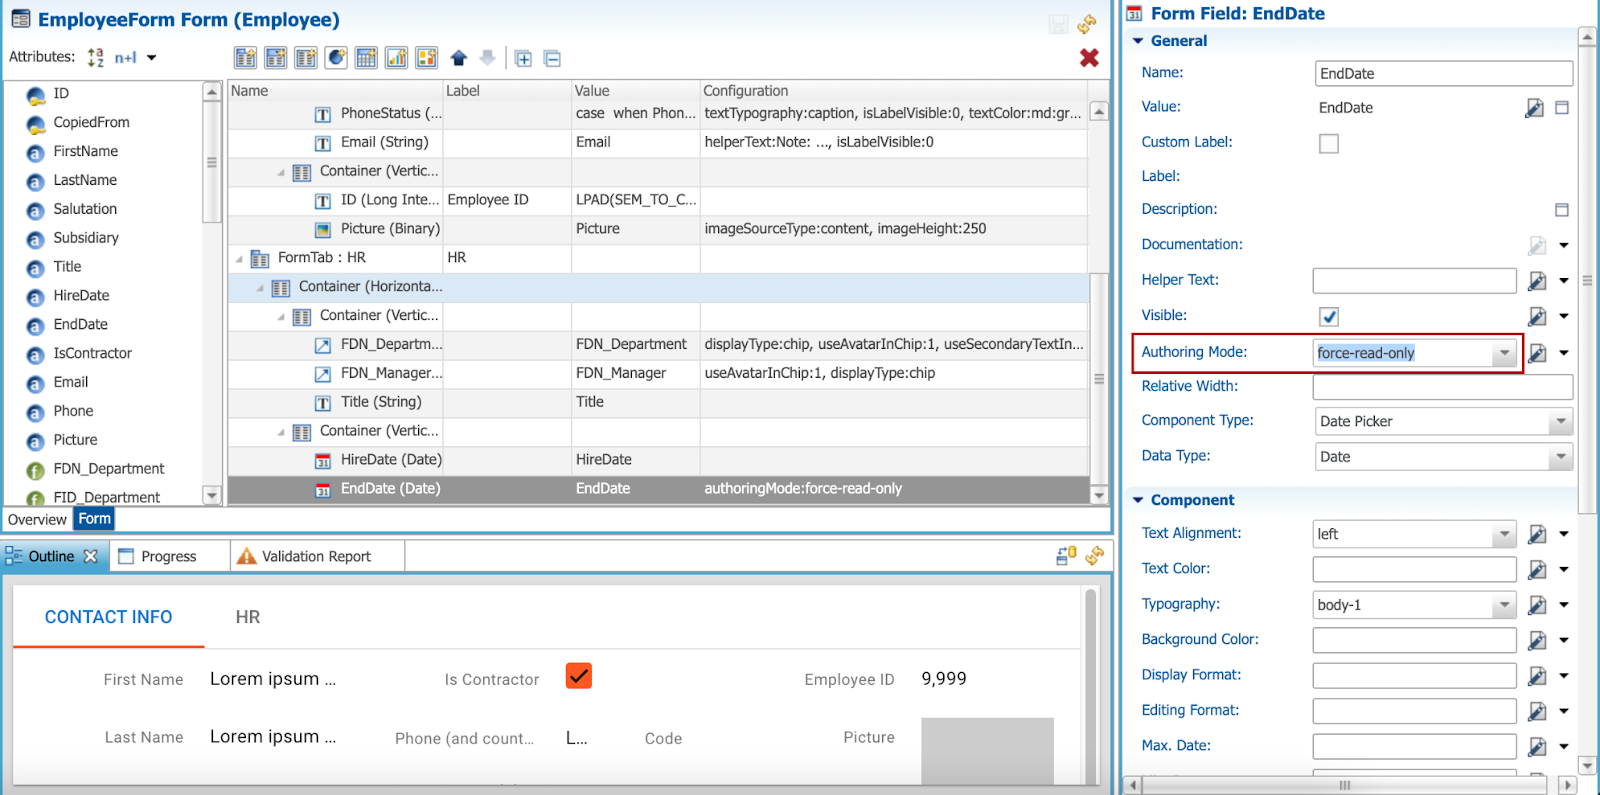
- Select the EndDate form field in the tree view. In the General section of the Properties view, from the Authoring Mode drop-down list select force-read-only.
Modify the Employee stepper
You will now modify the Employee stepper to:
- Disable the possibility to finish the stepper at the Contact step.
- Filter possible managers in the HR step.
- Add the EducationRecords collection step and configure validations for the Education entity.
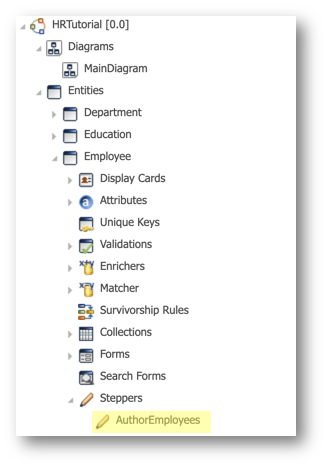
- In the Employee entity, expand the Steppers node and double-click the AuthorEmployees stepper.
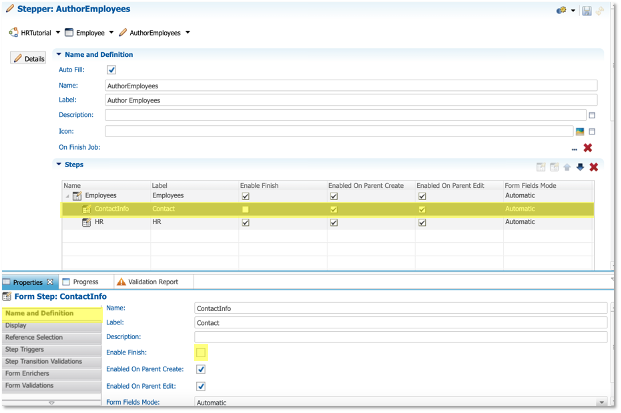
- In the Steps tree table, select the ContactInfo step.
- In the Name and Definition finger tab of the Properties view, deselect the Enable Finish checkbox.
- In the Steps tree table, select the HR step.
- Select the Reference Selection finger tab in the Properties view and click the Refresh References button to make the FDN_Manager reference appear in the table.
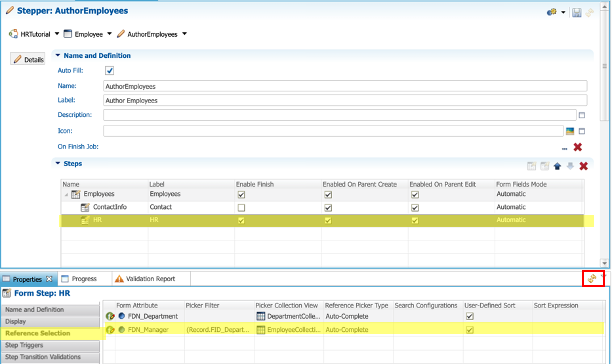
- Select the FDN_Manager reference in the table and then click the Edit Expression button in the Picker Filter column.

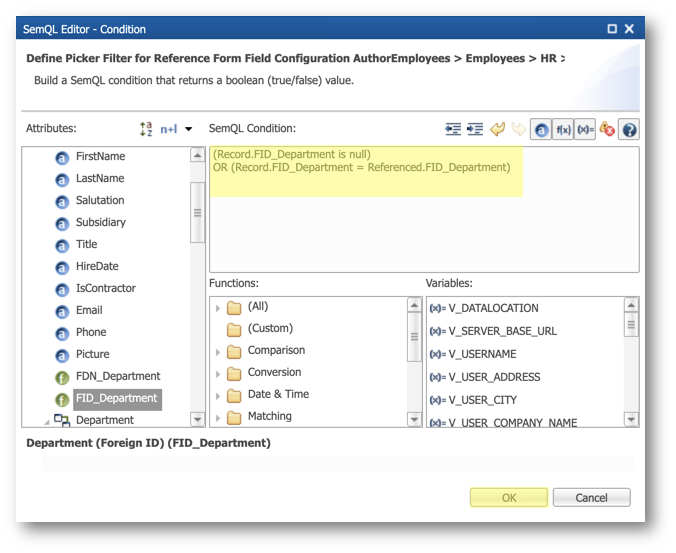
- Enter the following expression in the SemQL Editor and click OK.
(Record.FID_Department is null)
OR (Record.FID_Department = Referenced.FID_Department)
- Select the first row in the Steps tree list and click the Add Collection Step button.

- Enter the following values and click Next:
- Name:
EducationRecords - Label:
Education
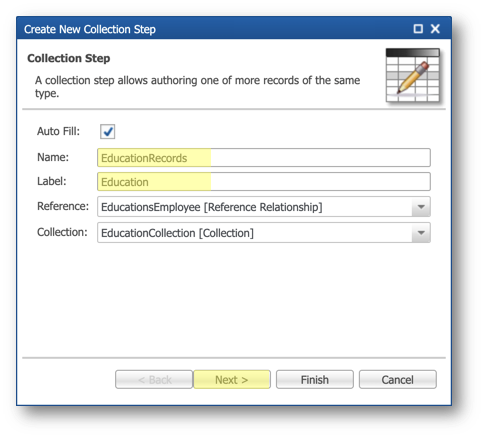
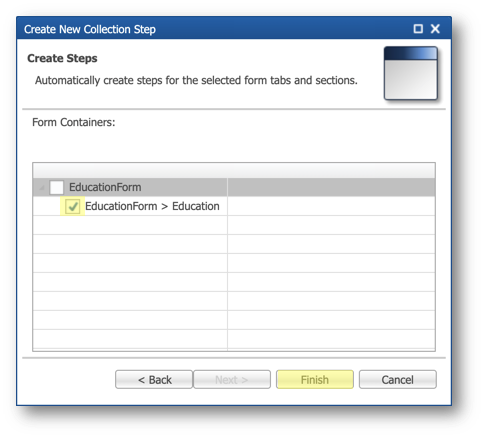
- Select the EducationForm > Education form container, and then click Finish.
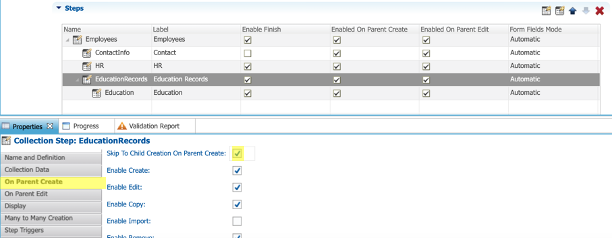
- Select the On Parent Create finger tab in the Properties view.
- Select Skip To Child Creation On Parent Create.
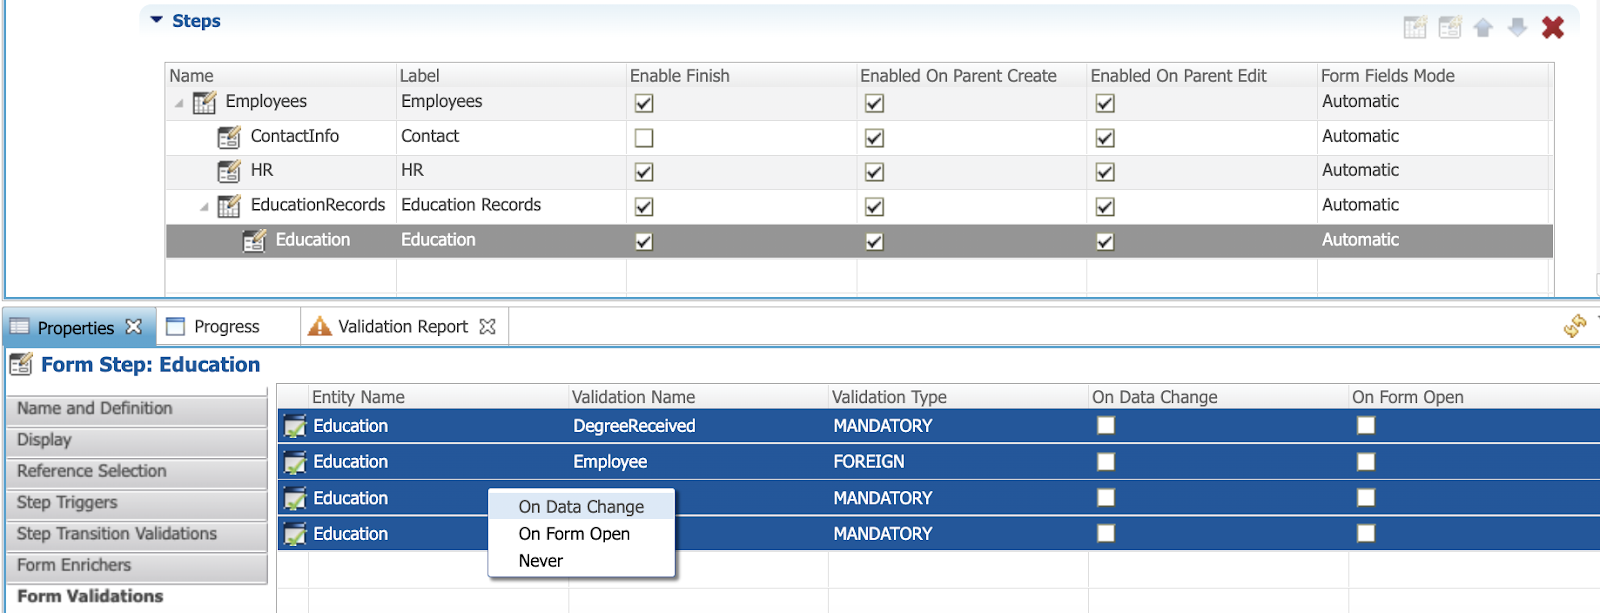
- Apply on data change all the validations defined for the Education entity:
- Select the last step in the Steps tree table.
- Select the Form Validations finger tab in the Properties view
- Select all validations (press and hold
Shift, and select the first and last rows), right-click the selection, and then select On Data Change.
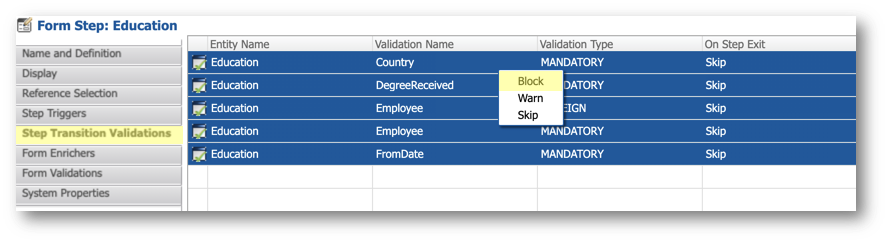
- Make the same validations blocking for this step:
- Select the Step Transition Validations finger tab in the Properties view.
- Select all validations (press and hold
Shift, and select the first and last rows), right-click the selection, and then select Block.
- In the Stepper editor, scroll down to the Validations section.
- Select all validations for the Education entity, right-click the selection, and then select Block.
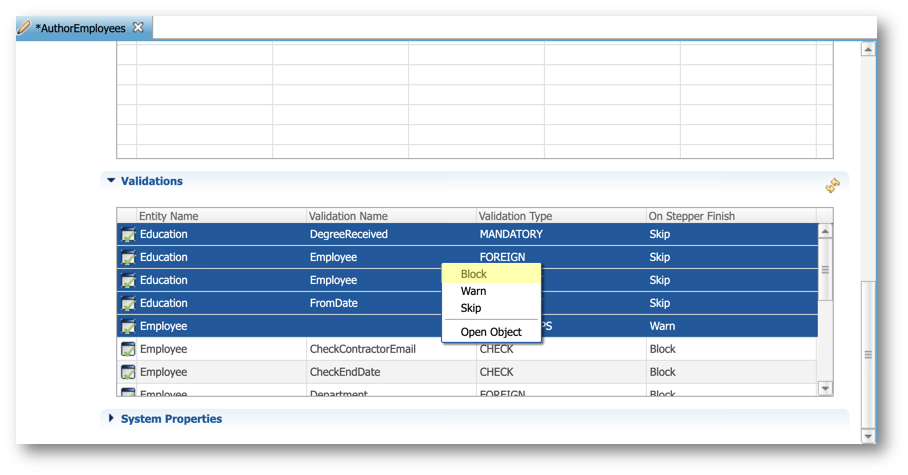
- Save your work.
Deploy the model changes
- In the Application Builder, right-click on the root node in the Model Design view, corresponding to the HRTutorial [0.0] model, and then select Validate.
The validation report should raise no error.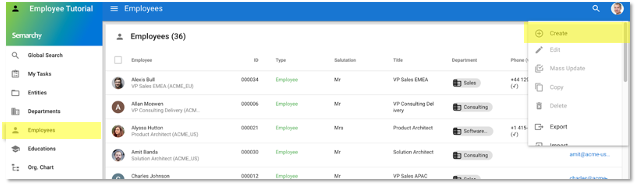

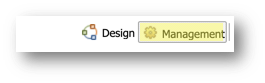
- Go to the Management perspective of the Application Builder.
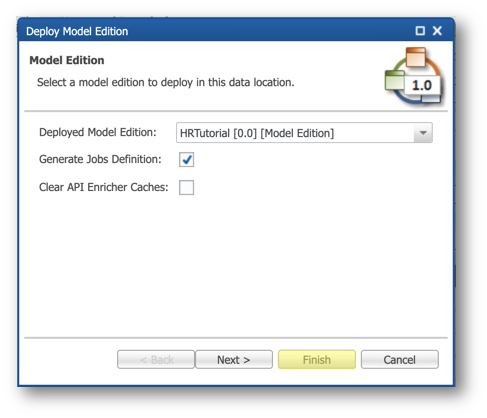
- Right-click the EmployeeTutorial data location and select Deploy Model Edition.
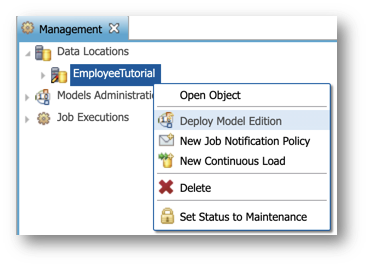
- Click Finish in the wizard to deploy your model changes.
Create an employee with the new stepper
We are going to create a new employee to see the new stepper.
- Open your application from the Welcome page.
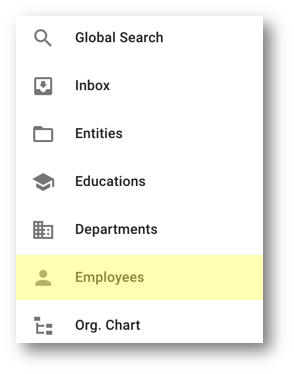
- In the navigation drawer, select Employees.
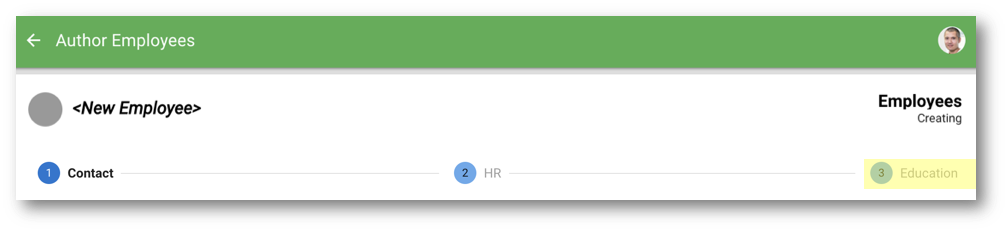
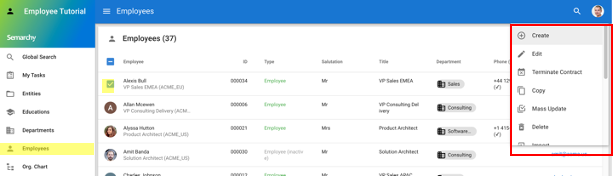
- In the Options menu, click Create.
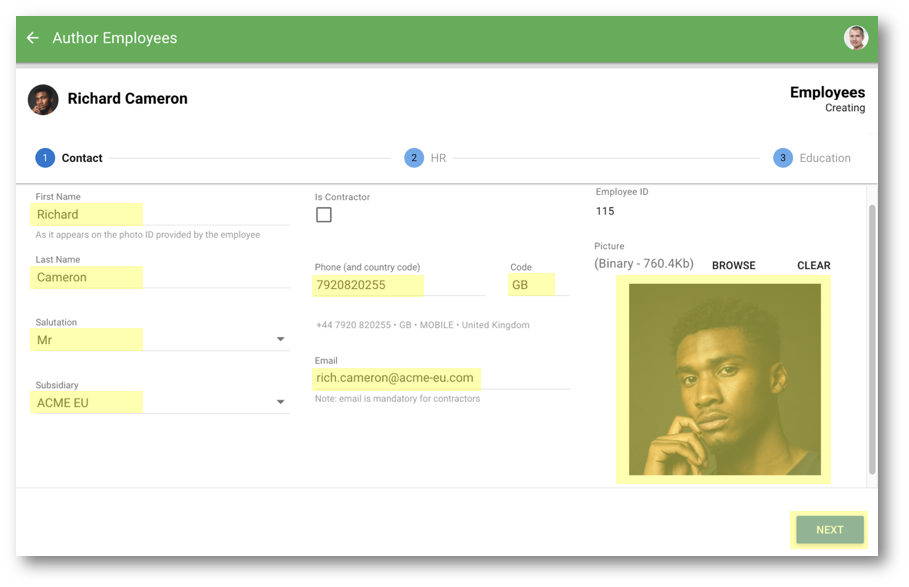
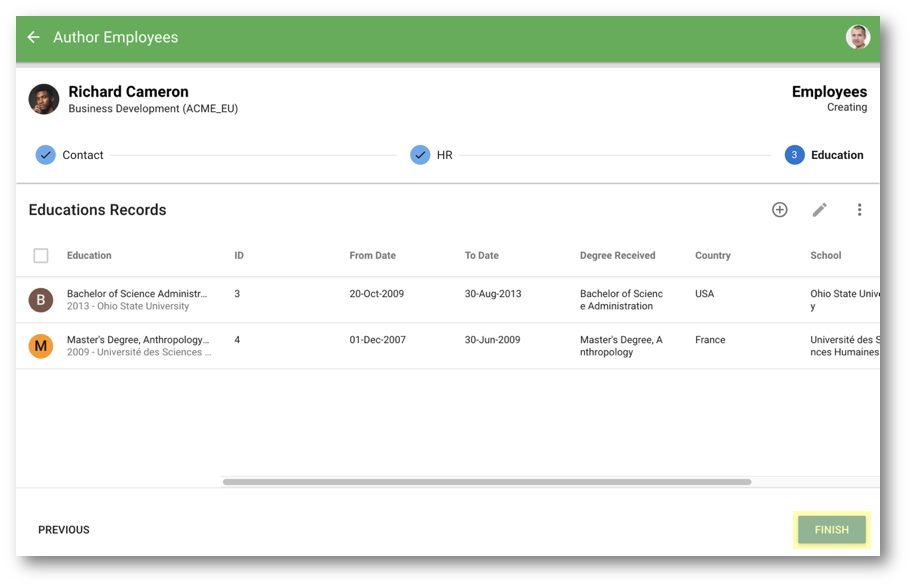
- Observe that the stepper has one additional step to author the Education records.
- Enter the new employee information and click Next:
- First Name:
Richard - Last Name:
Cameron - Salutation:
Mr - Subsidiary:
ACME EU - Phone:
7920820255 - Code:
GB - Email:
rich.cameron@acme-eu.com - Picture: browse and select the file
data-authoring\employees\richard.pngfrom the tutorial resources.
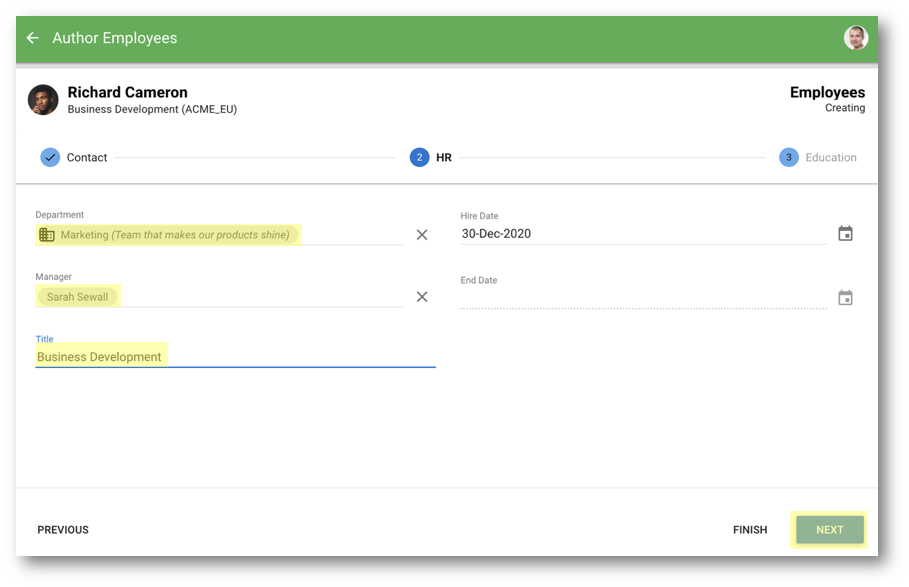
- Enter the following information for the HR step and then click Next:
- Department:
Marketing (Team that makes our products shine) - Manager:
Sarah Sewall(notice that the list now shows only the employees from the Marketing department) - Title:
Business Development
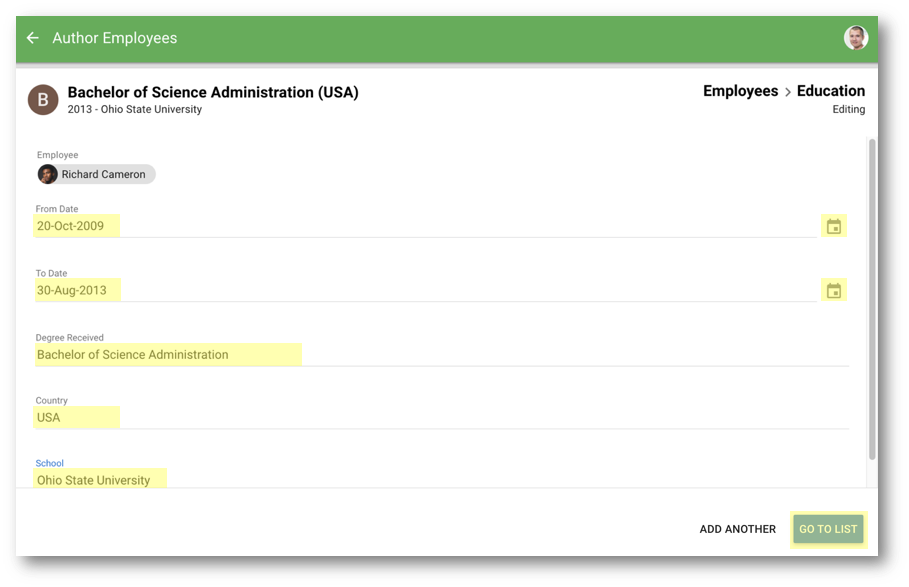
- Create a first Education record and then click Add another:
- From date: 20-Oct-2009
- To date: 30-Aug-2013
- Degree Received:
Bachelor of Science Administration - Country:
USA - School:
Ohio State University
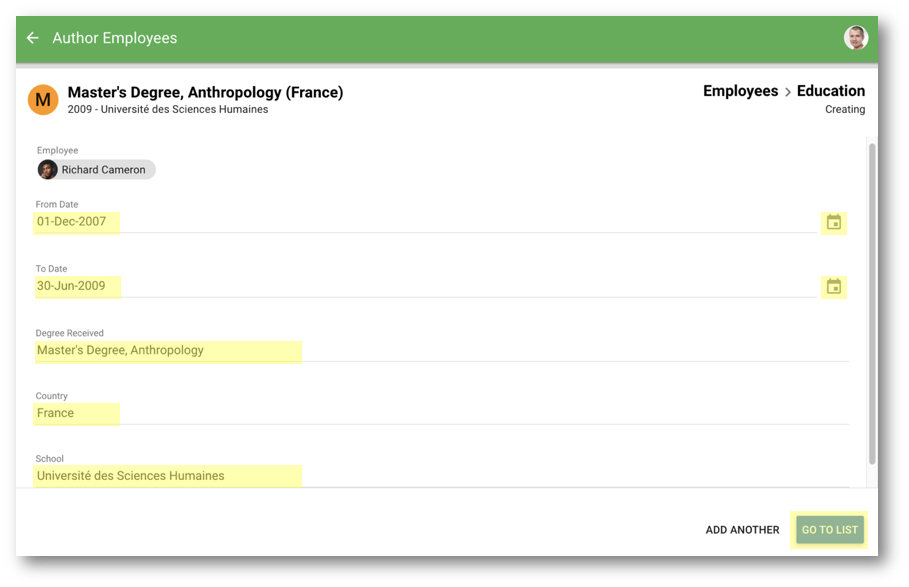
- Enter the following details for the second education record and then click Go to list:
- From date: 01-Dec-2007
- To date: 30-Jun-2009
- Degree Received:
Master's Degree, Anthropology - Country:
France - School:
Université des Sciences Humaines
- The process of authoring a new employee is now finished. Click Finish.
- When the toaster on the bottom left corner of the screen indicates "Changes successfully applied," click Click to refresh.

- Click the Filter button above the Employees collection to open the filter panel.
- Type
cameronin the Search Text field, and then click Apply.
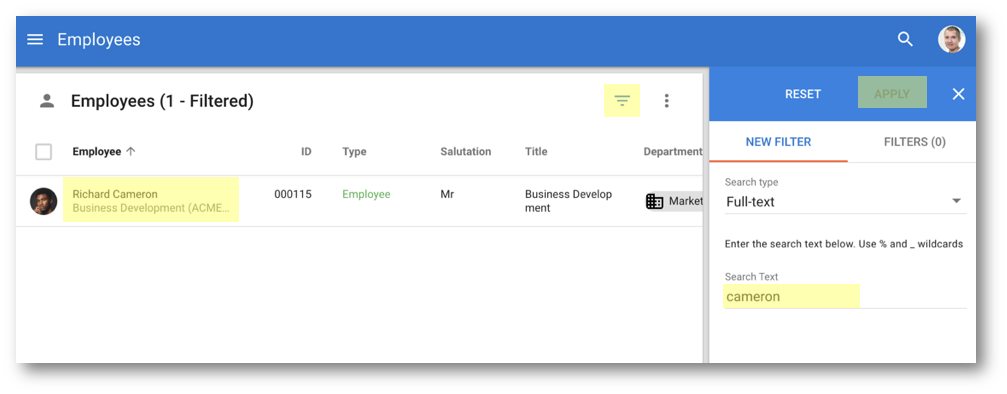
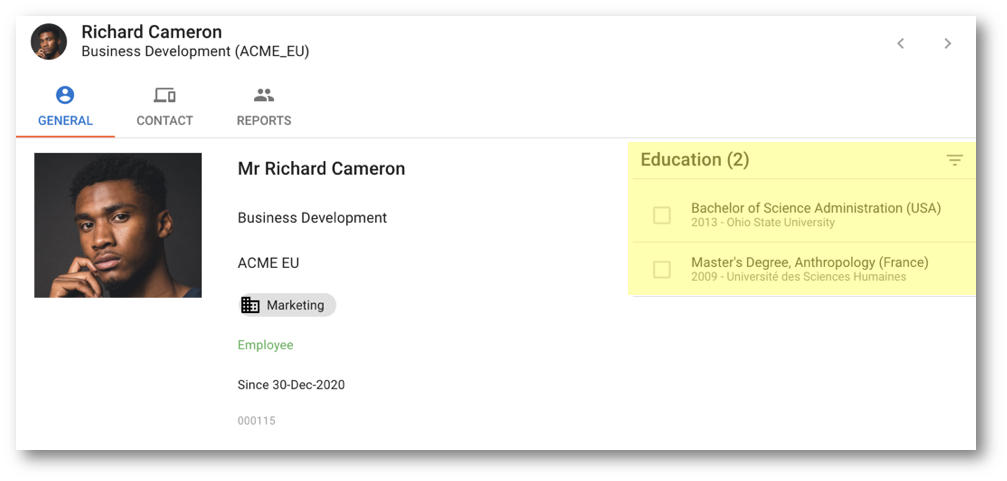
- Select the record and observe the updated browsing form showing the education records.
Congratulations!
You have optimized your data authoring user experience by customizing the Employee form and stepper to support the creation of Education records.
Next, you will create a new form and stepper to cover another use case.
You are now going to design a straightforward use case for contract termination. The goal is to introduce a new action called Terminate Contract when selecting an employee. The action should be disabled when an employee already has an end date.
You will:
- Build a contract termination form where only the end date can be edited.
- Build a new contract termination stepper that will use this form.
- Add the Terminate Contract action and enable it conditionally.
Create the contract termination form
To get started, you need to create the ContractTerminationForm form that focuses primarily on setting an end date for an employee.
- In the Application Builder, expand the Entities > Employee > Forms node.
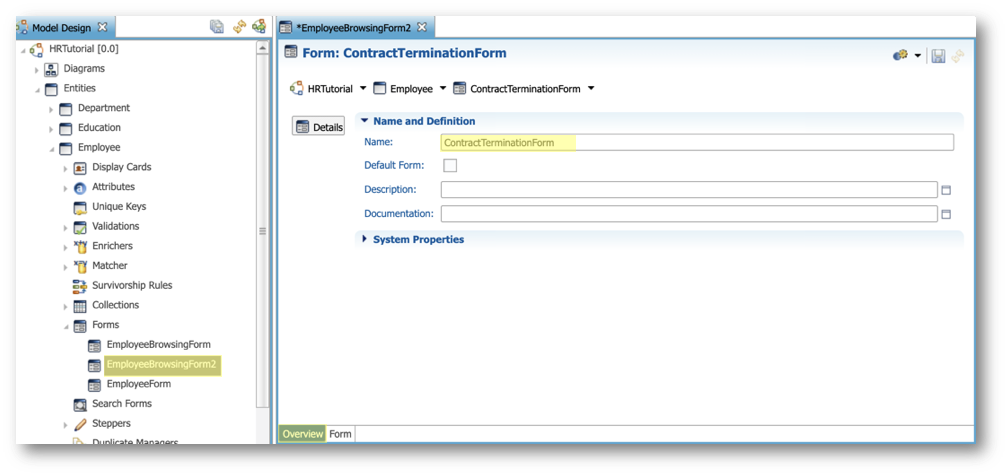
- Right-click the EmployeeBrowsingForm and click Duplicate.
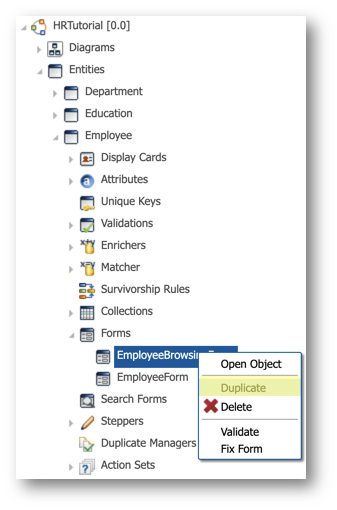
- Double-click EmployeeBrowsingForm2 in the Model Design view. Select the Overview tab of the editor, and set the Name to
ContractTerminationForm.
- Select the form tab of the editor.
- Expand the first form container in the General form tab.
- Select the FormCollection: Education in the tree view and click the Delete selection button.
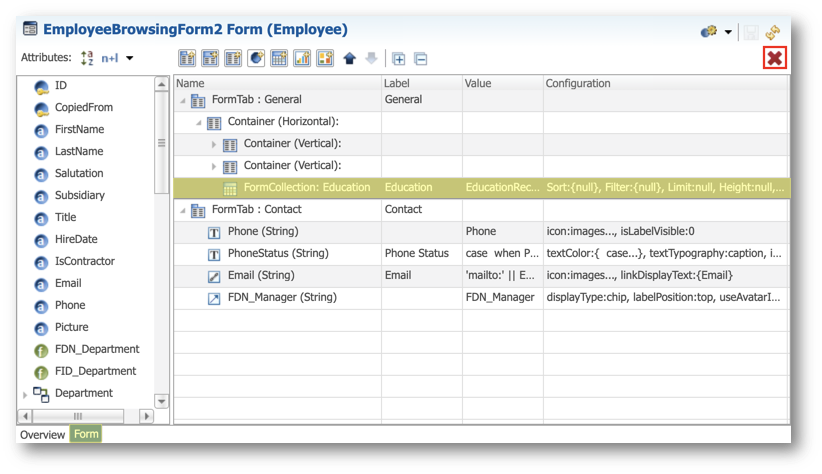
- Confirm the deletion.
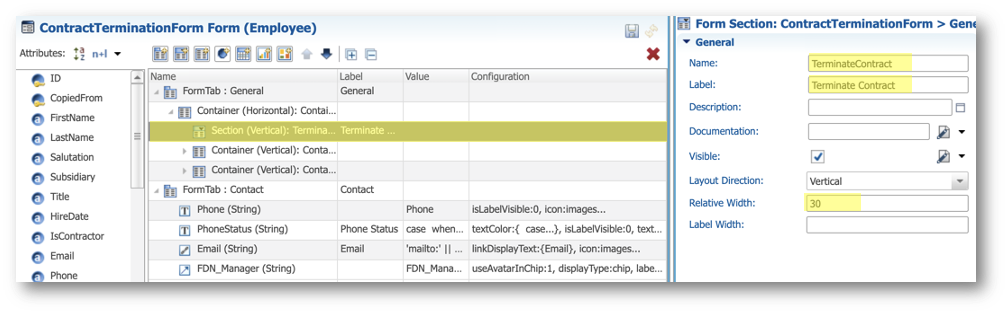
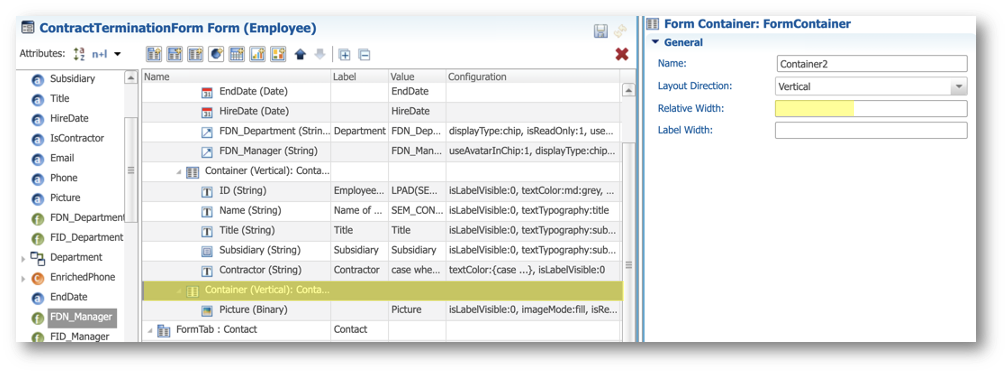
- Drag the Add Form Section button and and drop it into the first container of the General form tab.
- Select the form section you just added.
- In the Properties view, enter the following values:
- Name:
TerminateContract - Label:
Terminate Contract - Relative Width:
30
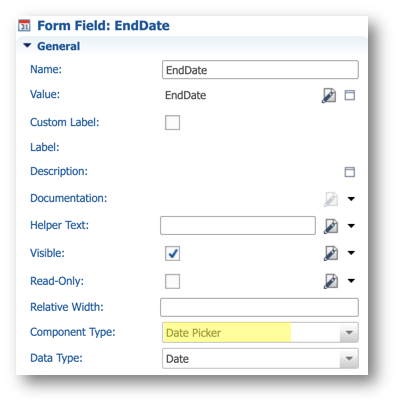
- Drag the EndDate attribute and and drop it from the Attributes list into the TerminateContract form section.
- Select the EndDate field in the tree view and in the General section of the Properties view. Make sure the Component Type is set to Date Picker.
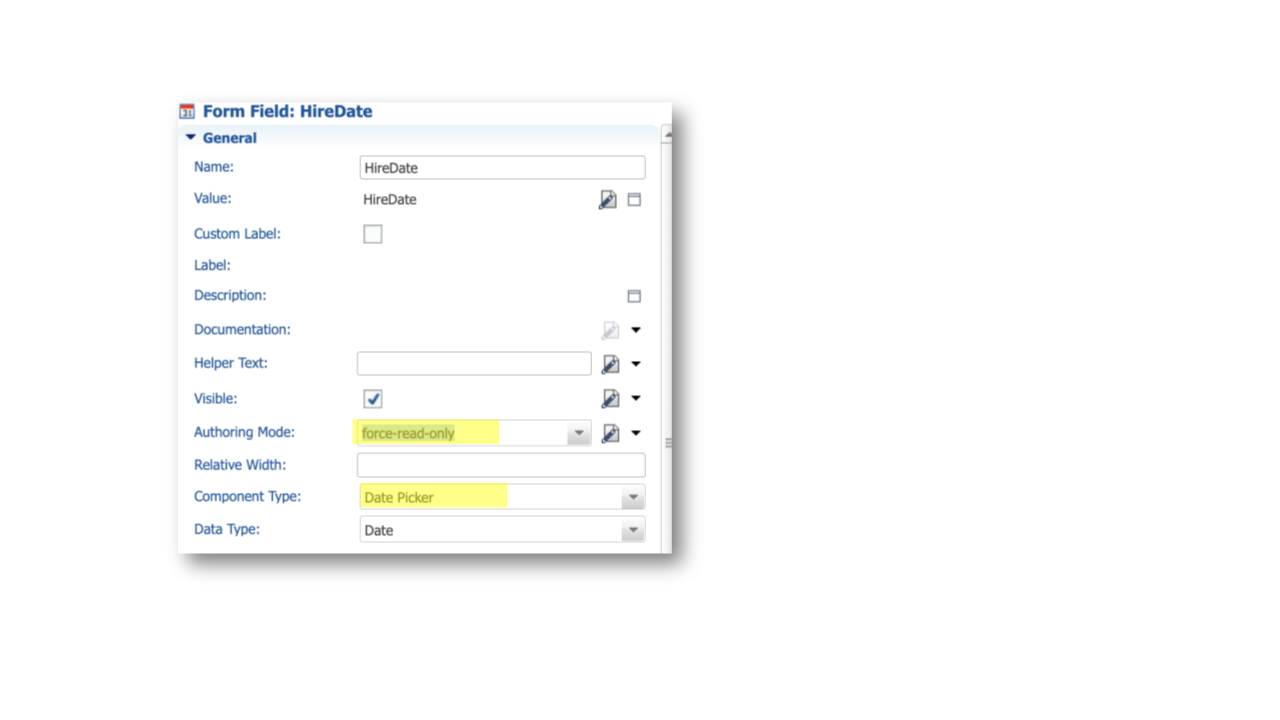
- Drag the HireDate attribute and drop it into the TerminateContract section, below the EndDate field.

- Select the HireDate form field in the tree view and in the General section of the Properties view:
- In the Authoring Mode drop-down list, select force-read-only.
- Make sure the Component Type is set to Date Picker.
- Expand the third container within the General form tab. Drag and drop the FDN_Department field into the TerminateContract section, after the HireDate field.
- Select the FDN_Department form field.
- In the General section of the Properties view, in the Authoring Mode drop-down list, select force-read-only.
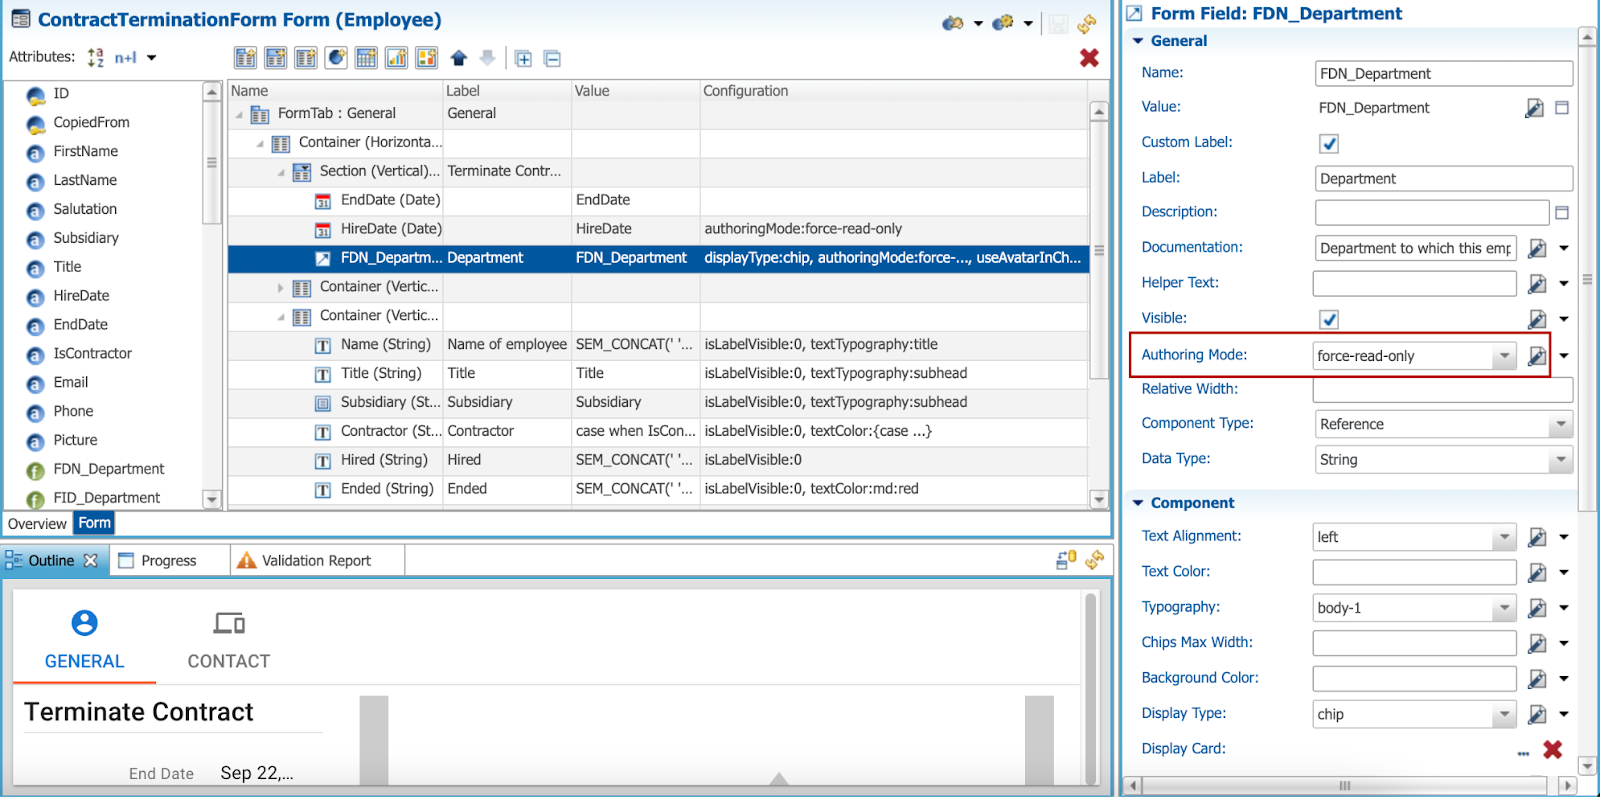
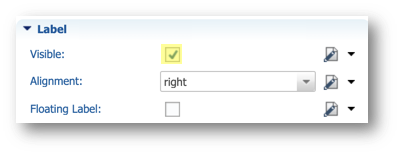
- In the Label section, select Visible.
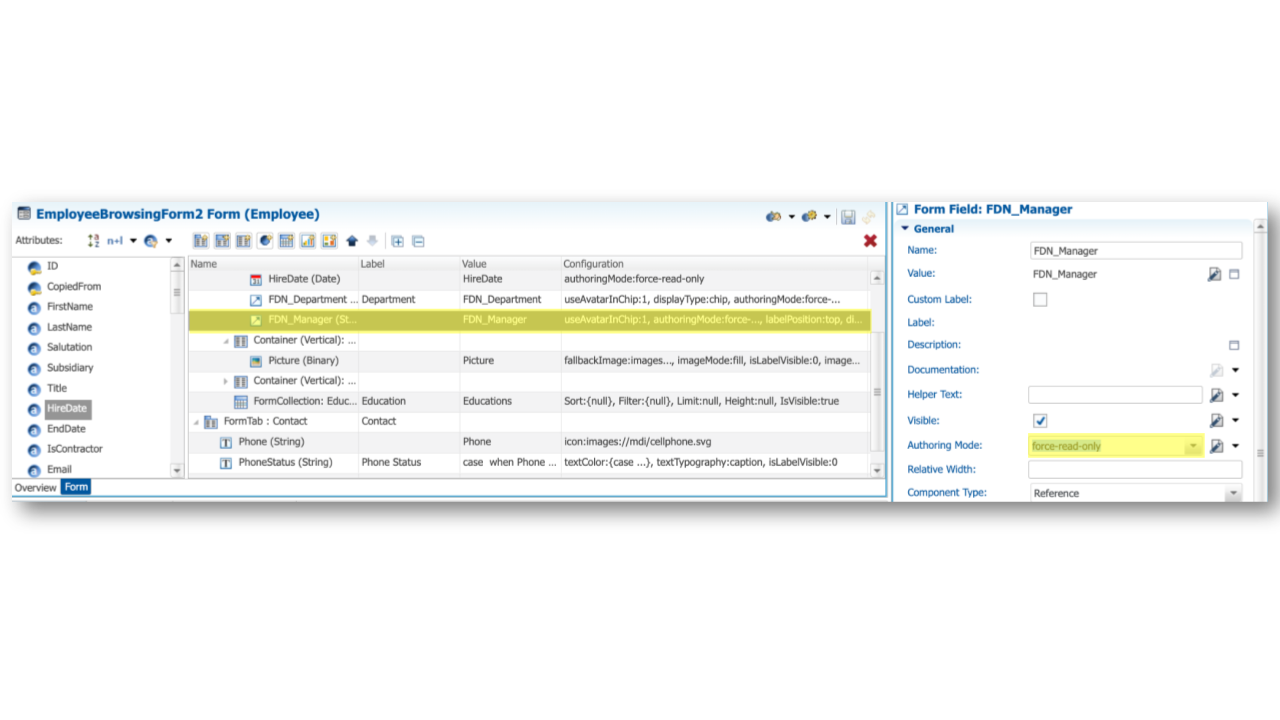
- Drag the FDN_Manager form field from the Contact form tab and drop it into the TerminateContract section, after FDN_Department.
- Select the FDN_Manager form field and in the General section of the Properties view, in the Authoring Mode drop-down list, select force-read-only.
- Drag and drop the second form container after the TerminateContract section.
- Expand the container you just moved.
- Drag the ID form field and drop it above the Name field.
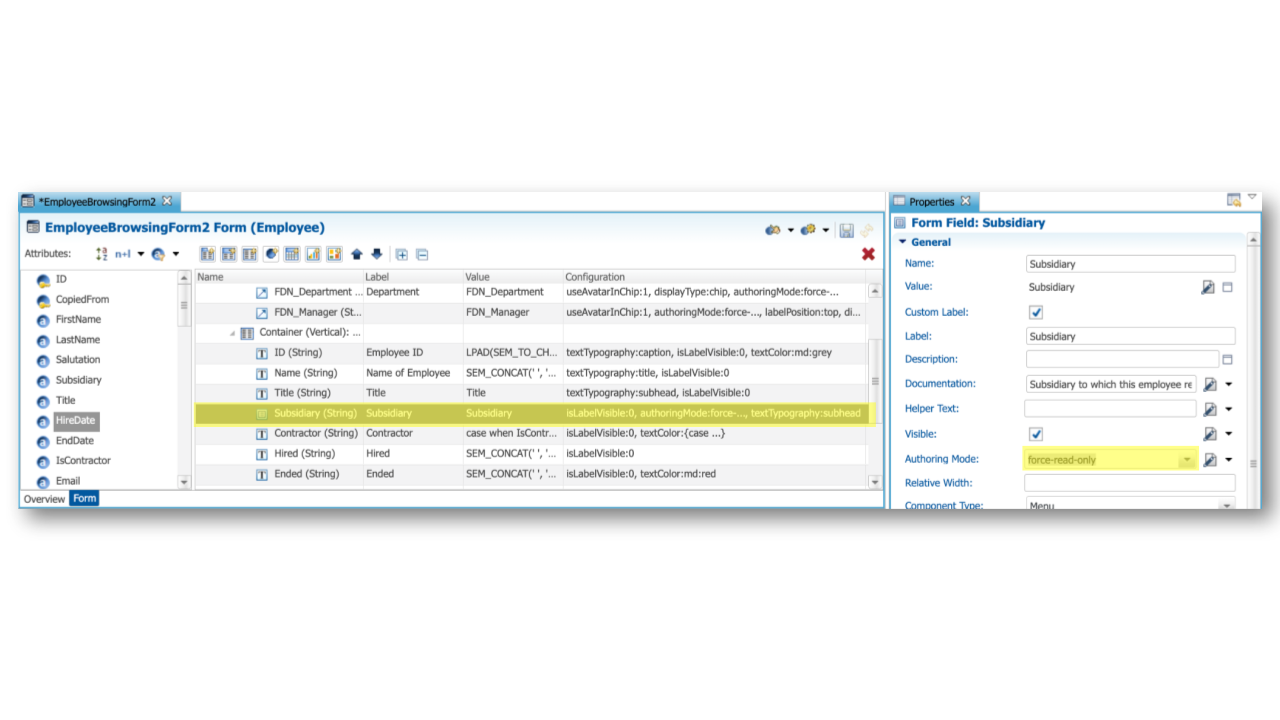
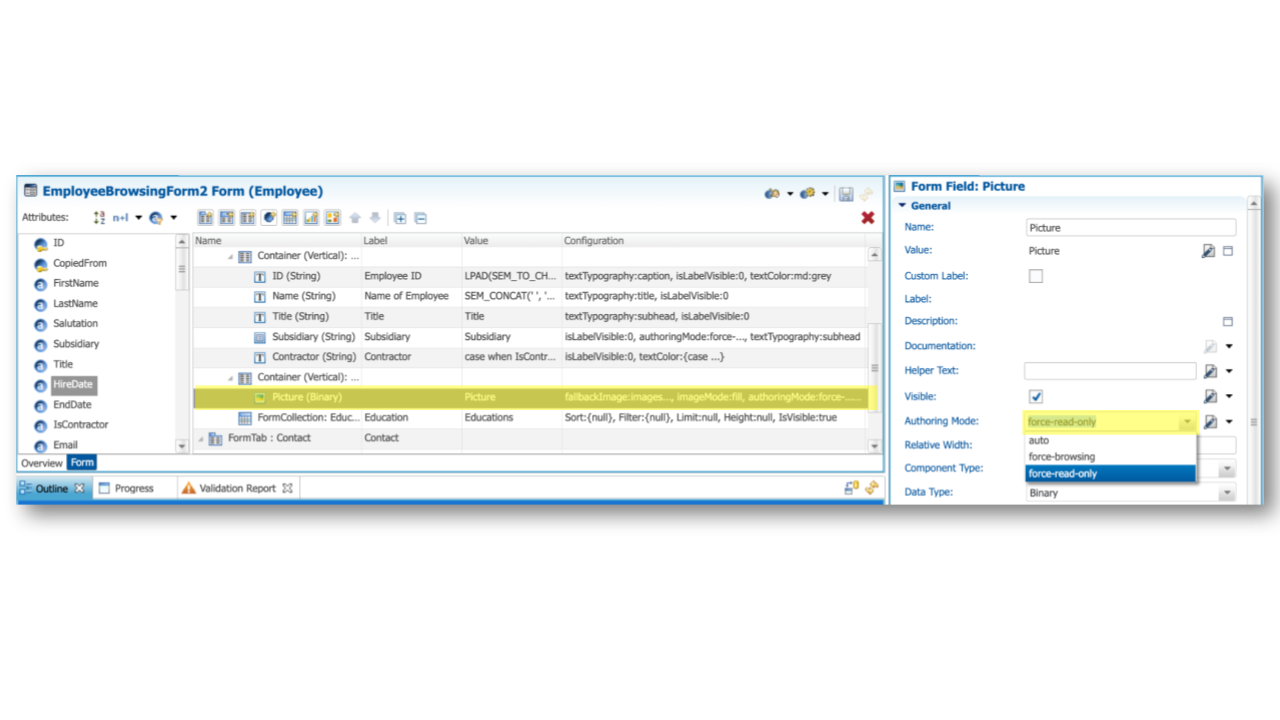
- Select the Subsidiary form field in the tree view and in the General section of the Properties view, in the Authoring Mode drop-down list, select force-read-only.
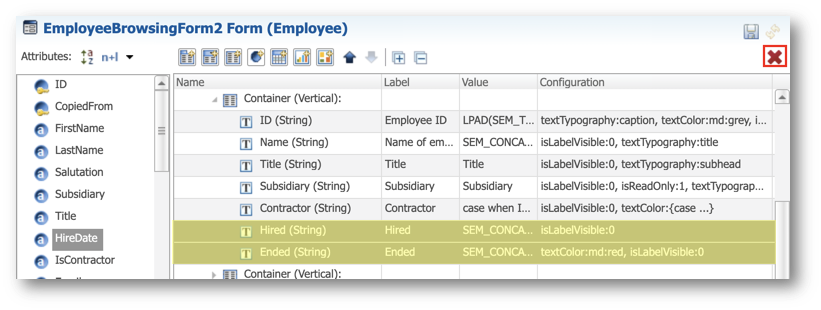
- Delete the Hired and Ended fields.
- Select the second container within the General form tab. Empty the Relative Width property in the Properties view.
- Select the Picture form field. In the General section of the Properties view, in the Authoring Mode drop-down list, select force-read-only.
- Delete the Contact form tab.
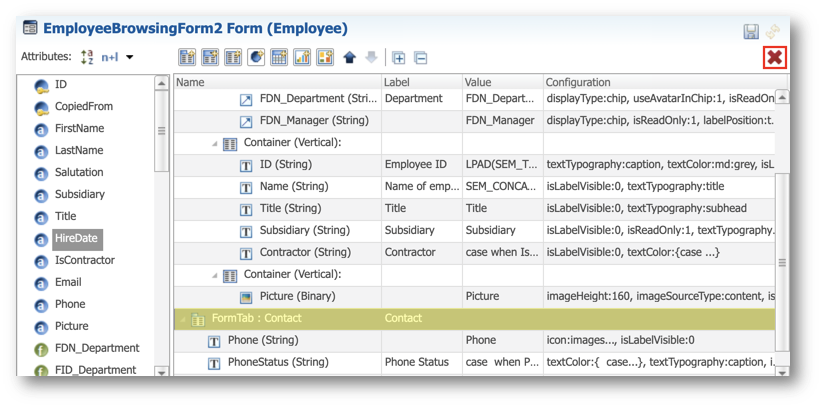
- Save your work.
Your form is complete and ready to be used in a stepper.
Create the contract termination stepper
It is now time to create the TerminateContractStepper stepper that will use the ContractTerminationForm form you have just designed.
The stepper will contain a single step with a minimum set of validations enabled.
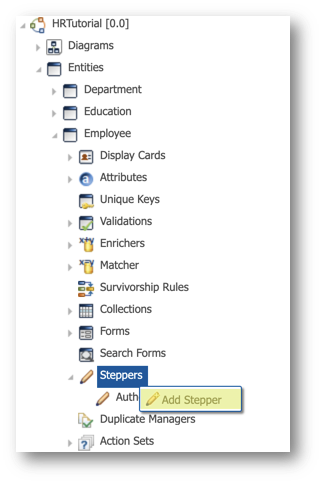
- Expand the Entities > Employee node.
- Right-click the Steppers node and select Add Stepper.
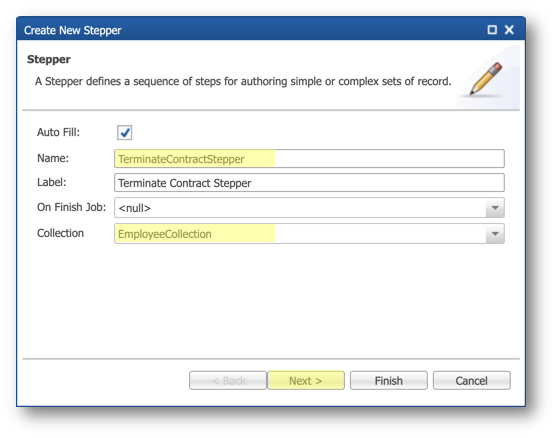
- Enter the following values and click Next:
- Name:
TerminateContractStepper - Collection: EmployeeCollection
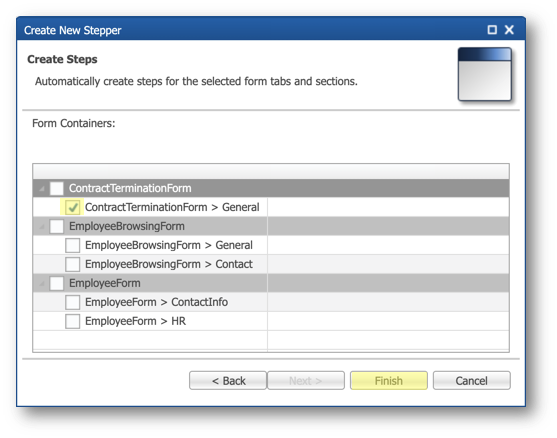
- Select the General tab of the ContractTerminationForm form you created earlier and click Finish.
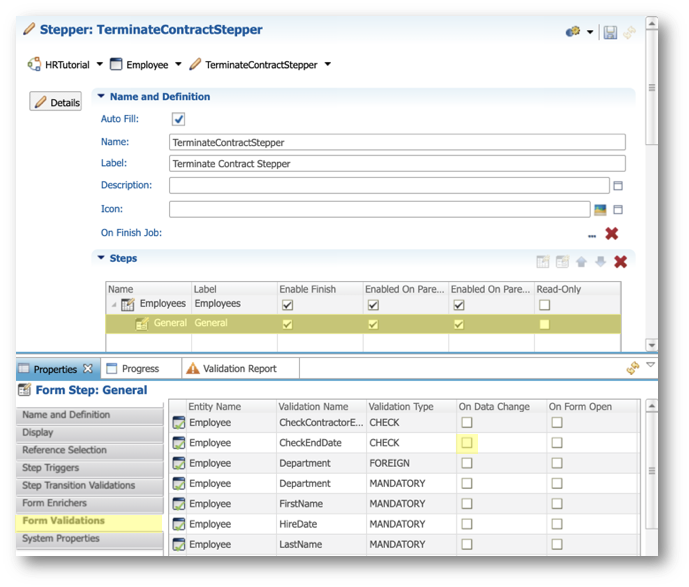
- Select the General step in the Steps tree table.
- In the Properties view, open the Form Validations finger tab, and select On Data Change for the CheckEndDate validation.
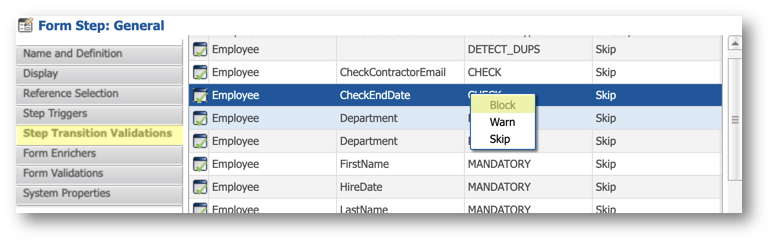
- In the Step Transition Validations finger tab, right-click the CheckEndDate validation, and select Block.
- Save your work.
Your stepper is complete. You can now trigger it with an action.
Create the Terminate Contract conditional action
You will now create the Terminate Contract action in the EmployeeActionSet actions, and link it to the TerminateContractStepper stepper.
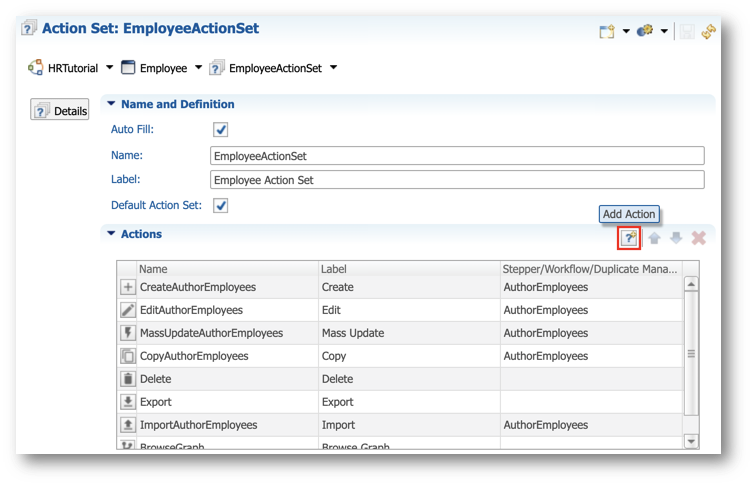
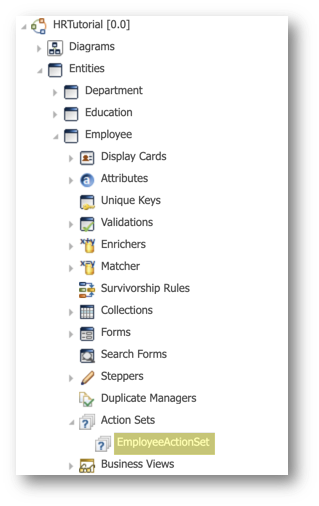
- Expand the Entities > Employee > Action Sets node and double-click the EmployeeActionSet.
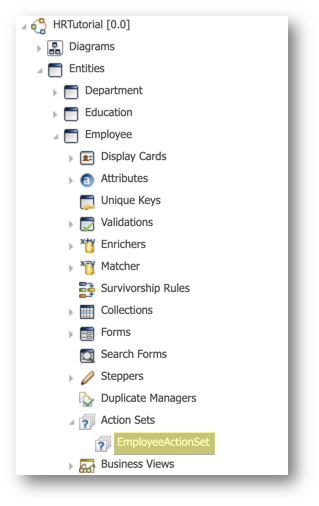
- Click the Add Action button in the editor.
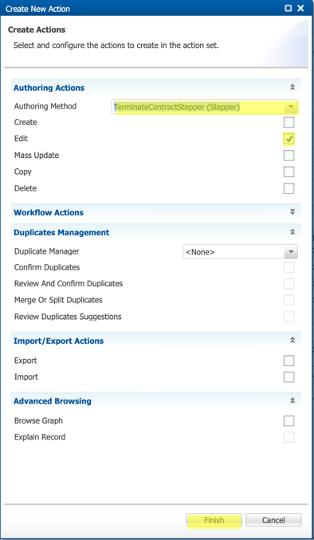
- Enter the following values in the wizard and click Finish:
- Select Stepper: TerminateContractStepper
- Select Edit
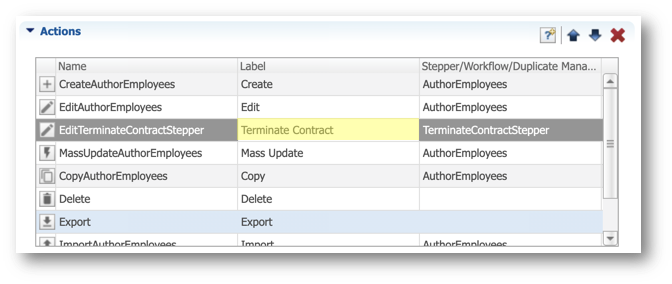
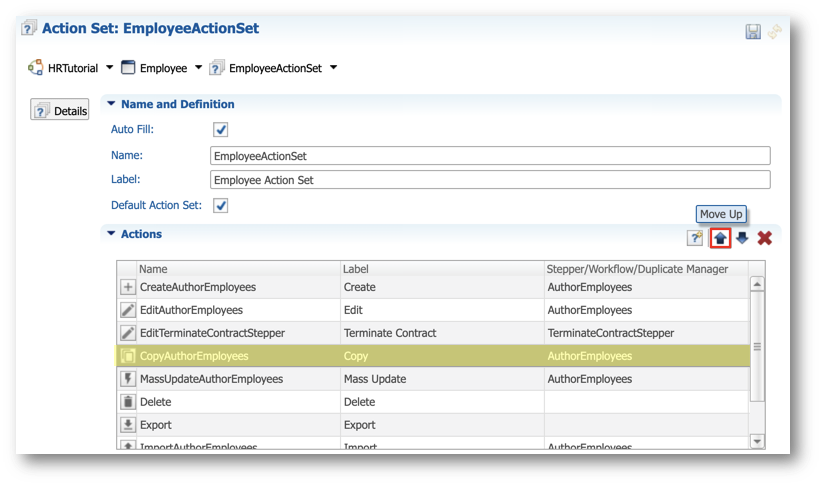
- In the Actions list, select the EditTerminateContractStepper action and use the Move Up button to move it between EditAuthorEmployees and MassUpdateAuthorEmployees.
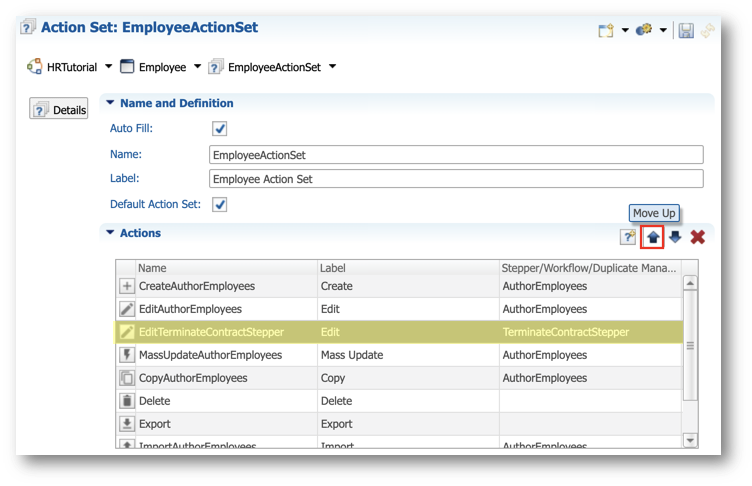
- Set the Label to Terminate Contract.
- In the Name and Definition finger tab of the Properties view, set the Icon property to
images://mdi/calendar-remove.svg. - In the Action Configuration finger tab, click the Edit Expression button next to the Condition property.
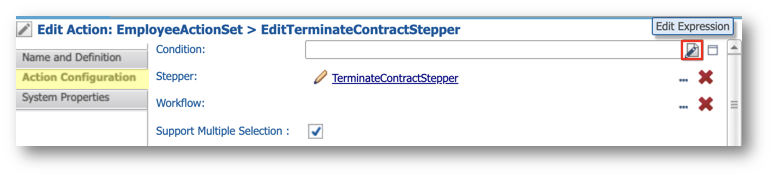
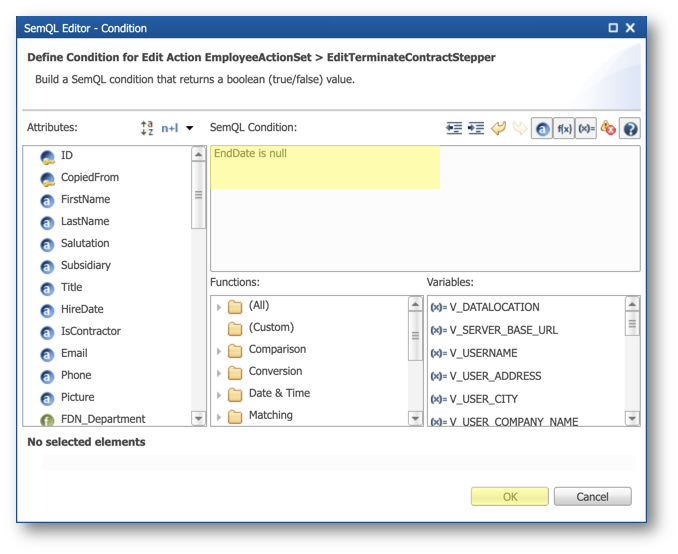
- Add the following SemQL Condition and click OK:
EndDate is null
- Save your work.
Validate and deploy your changes
- In the Application Builder, right-click the root node in the Model Design view, corresponding to the HRTutorial [0.0] model, and then select Validate.
The validation report should raise no error.
- Go to the Management perspective in the Application Builder.
- Right-click on the EmployeeTutorial data location and select Deploy Model Edition.
- Click Finish in the wizard to deploy your model changes.
You are now ready to see your changes.
See your changes in the application
- Open your application from the Welcome page.
- In the navigation drawer, select the Employees business view.
- Search for consultants: click the Filter button, type
consultin the Search Text field, and click Apply.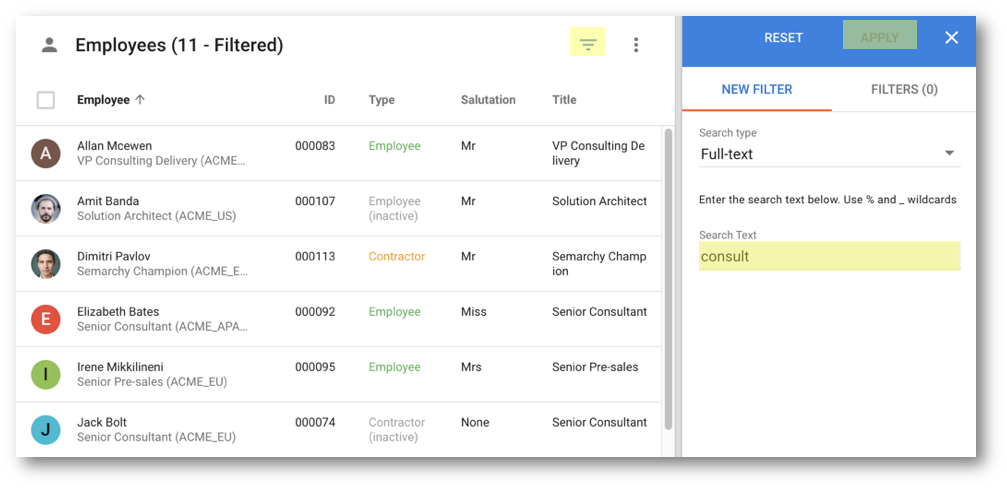
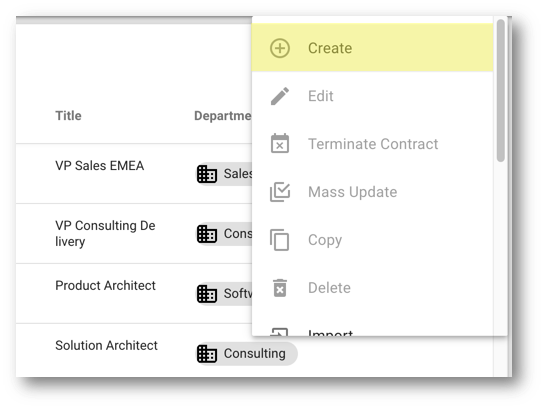
- Select Jack Livingston and open the Options menu.
- Notice that the Terminate Contract action is disabled because this employee is inactive.

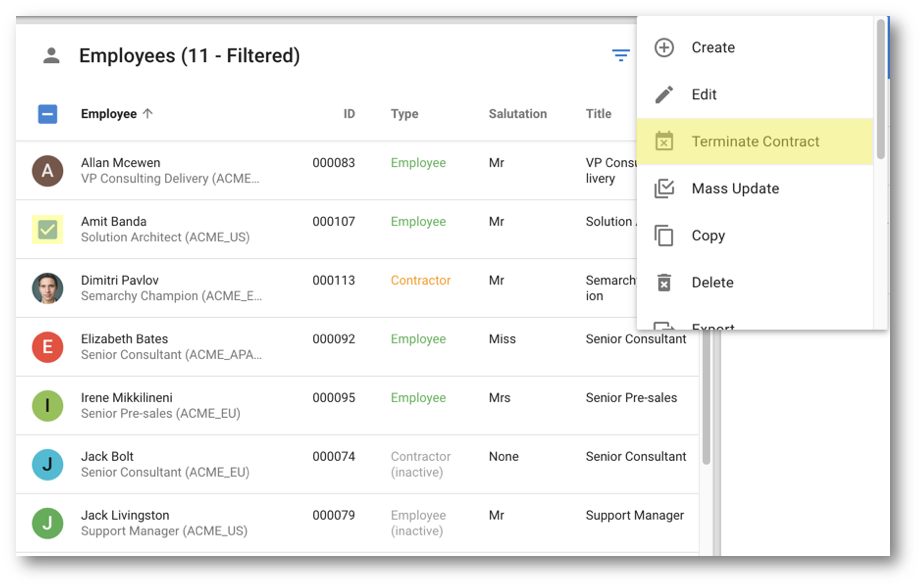
- Select Amit Banda and open the Options menu.
- Notice that the Terminate Contract action is enabled for this active employee.
- Click Terminate Contract.
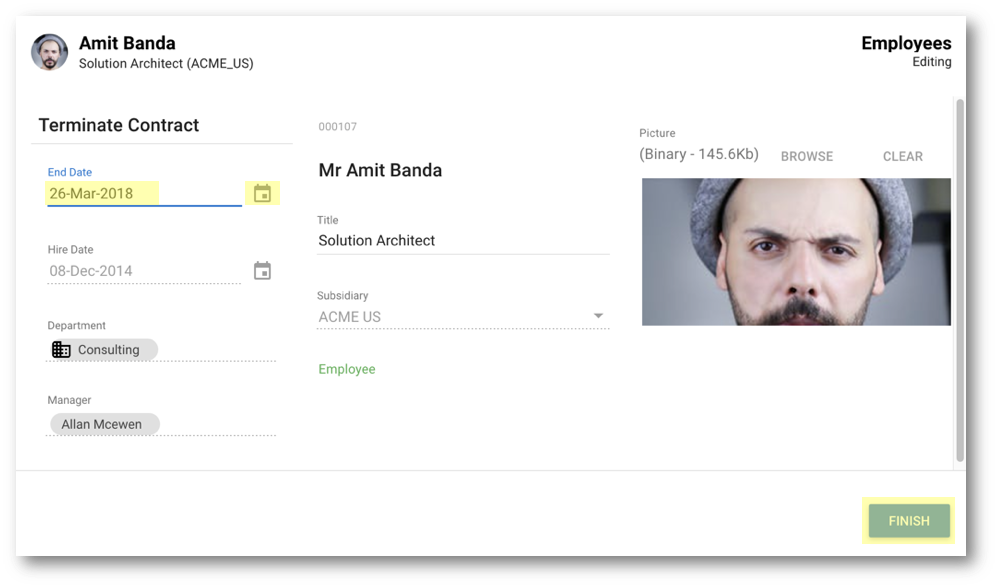
- The action takes you to the newly added ContractTerminationForm form. Set the End Date to any date later than the Hire Date, and click Finish.
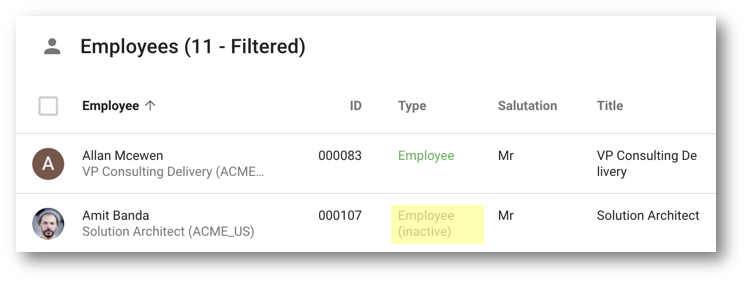
- When the toaster on the bottom left corner of the screen indicates "Changes successfully applied," click Click to refresh.
- Observe that Amit Banda is now marked as inactive.
Congratulations!
You have successfully generated a new stepper and action to manage the contract termination scenario.
Next, you will learn more about actions.
Actions define what business users can do on records. They are organized in action sets, which can be assigned to business views. Additionally, some actions (such as Create or Import) are available as standalone application actions, and can be triggered from the navigation drawer.
Data authoring actions
Depending on the entity type, possible authoring actions include:
- Create: triggers the creation of one or more records.
- Edit: triggers the modification of one or more records.
- Mass-Update: allows for the modification of multiple values in a set of records.
- Copy: duplicates one or more records (ID generation must be set to UUID or Sequence).
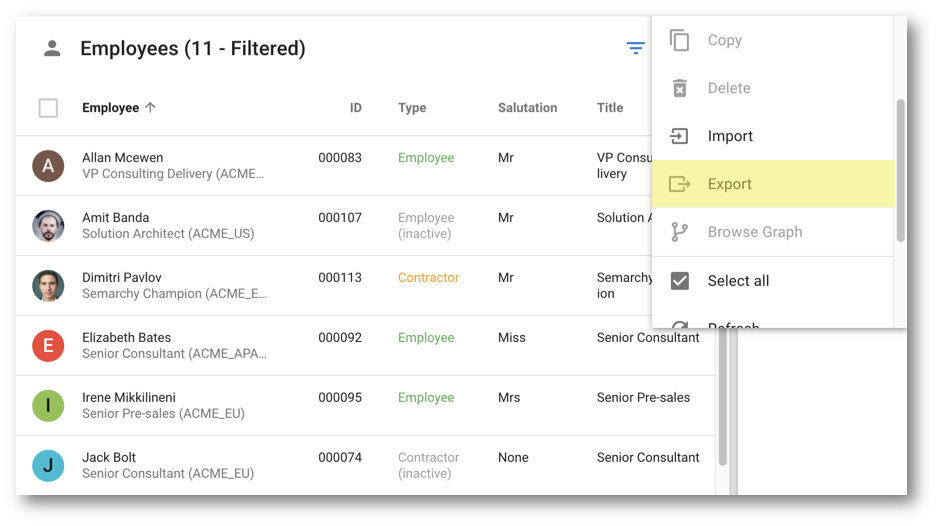
- Delete: removes one or more records (see ⑦ Delete records).
- Import: imports records from Excel or CSV (see ⑥ Import and export data).
- Export: exports records to Excel or CSV (see ⑥ Import and export data).
- Browse Graph: opens the graph navigation view.
Actions that create or modify records (Create, Edit, Mass-Update, Copy, and Import) require a stepper or a workflow to perform the operation.
Actions that change data (Edit, Mass-Update, Copy, and Delete) can be conditionally restricted based on the selected records.
Create, Edit, Copy, and Delete actions can be configured to accept one or multiple records.
Reorganize actions
You are now going to organize the actions in each action set.
- In the Application Builder, expand Entities > Employee > Action Sets node and open EmployeeActionSet.
- Select the CopyAuthorEmployees action in the Actions table and use the Move Up button to move it between EditTerminateContractStepper and MassUpdateAuthorEmployees.
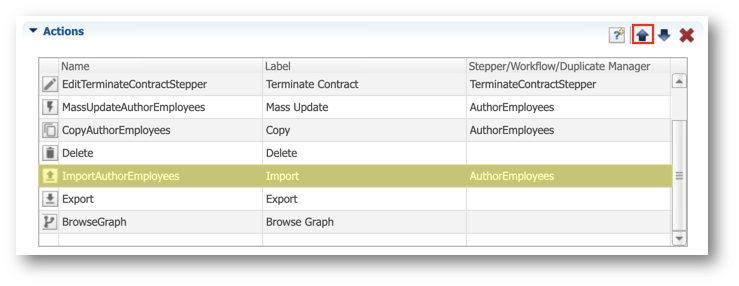
- Move the ImportAuthorEmployees action between Delete and Export.
- Save your work.
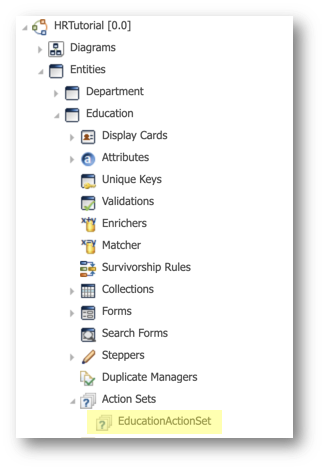
- Expand the Entities > Education > Action Sets and open EducationActionSet.
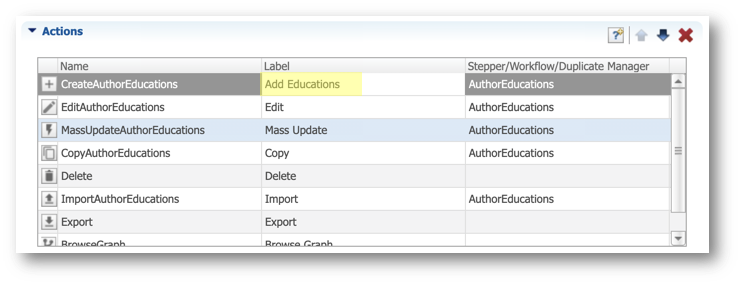
- In the Actions table, move the ImportAuthorEducations between the Delete and Export actions.
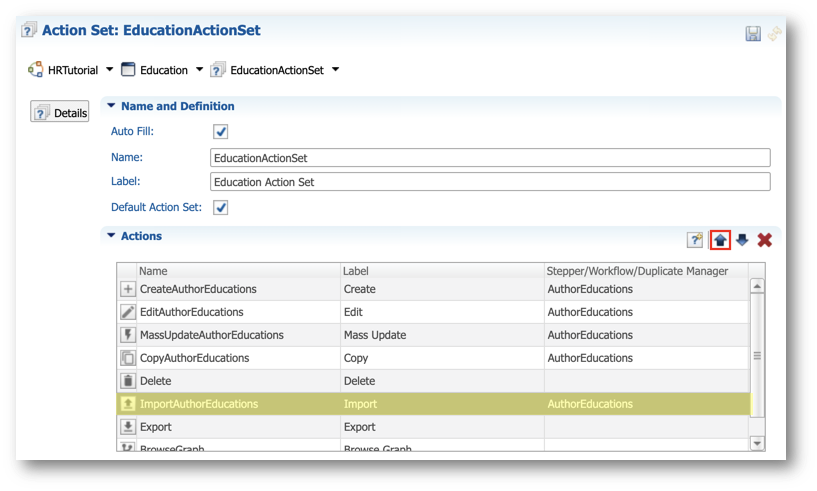
- Click the Label of the CreateAuthorEducations action and set it to Add Educations.
- Save your work.
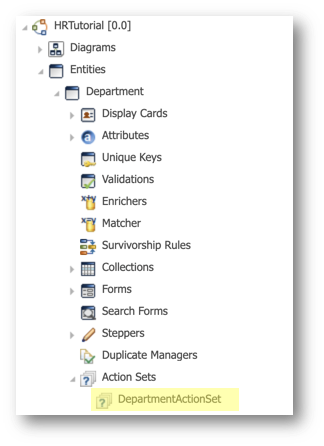
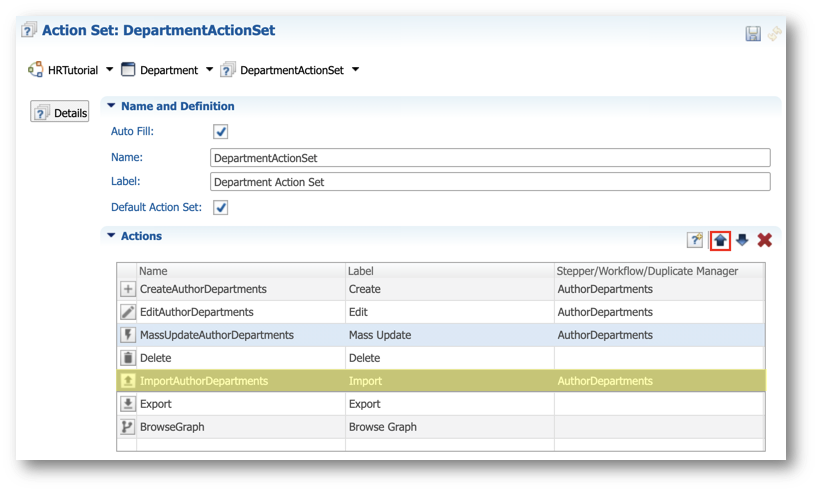
- Expand the Entities > Department > Action Sets node and open the DepartmentActionSet.
- In the Actions list, move the ImportAuthorDepartments between Delete and Export.
- Save your work.
Refresh and observe your changes in the application
Since you have not created or modified any entity or job nor changed any rules, you do not need to re-deploy the model. Simply refresh your application.
- In the Application Builder, right-click on the root node in the Model Design view, corresponding to the HRTutorial [0.0] model, and then select Validate.
The validation report should raise no error.
- Open the Employee Tutorial application from the Welcome page.
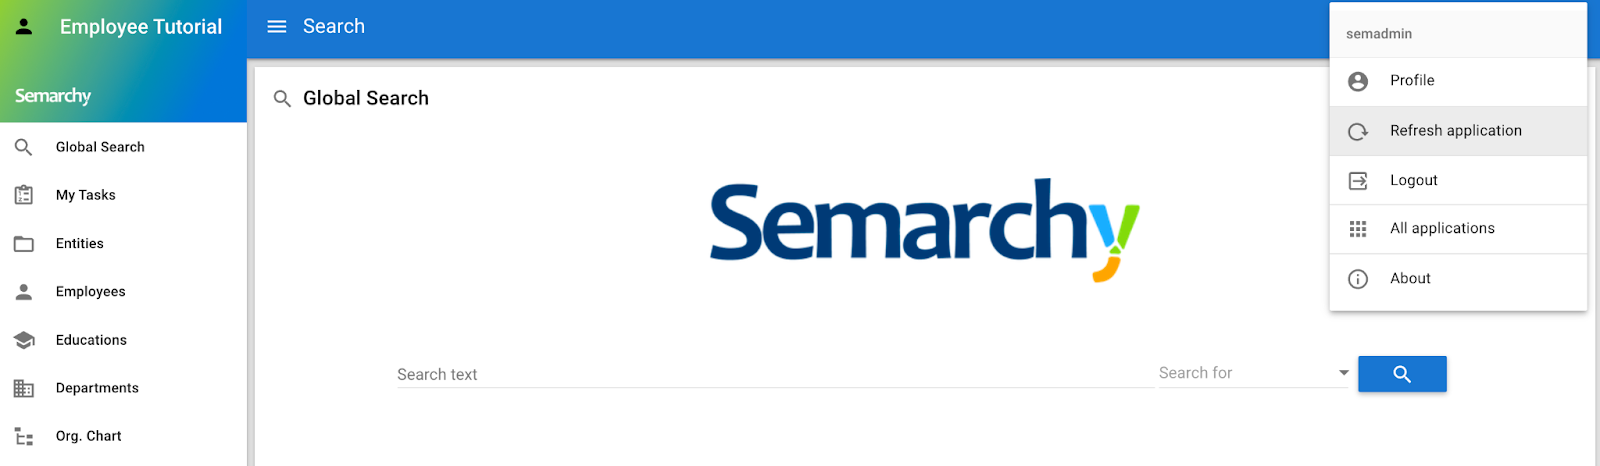
- In the user menu on the top-right corner, click Refresh Application.
- In the navigation drawer, select Employees.
- Select Alexis Bull land open the Options menu.
- Observe that the actions are now displayed in the expected order.
Congratulations!
You have successfully enhanced user experience within your application by customizing action sets.
Next, you will delve into the import and export functionalities.
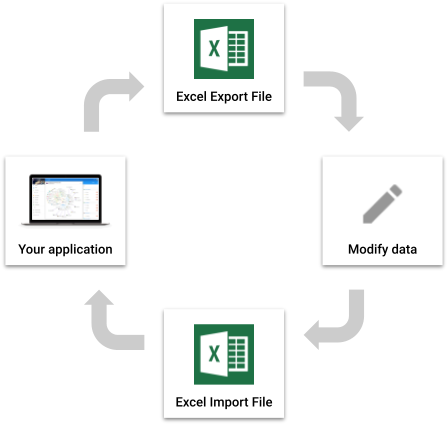
You are now going to use the import and export features.
These actions are very useful for business users. They can load data coming from other sources into xDM, export data from xDM for sharing, or even use Excel as a data authoring tool in conjunction with xDM.
Learning outcomes
- Exporting data from your application to Excel.
- Modifying your data in Excel.
- Importing the modified data back into your application.
Use the import and export features
- Open your application from the Welcome page.
- In the navigation drawer, select Employees.
- Click the Filter button and search for consultants: enter
consultin the Search Text field and click Apply.
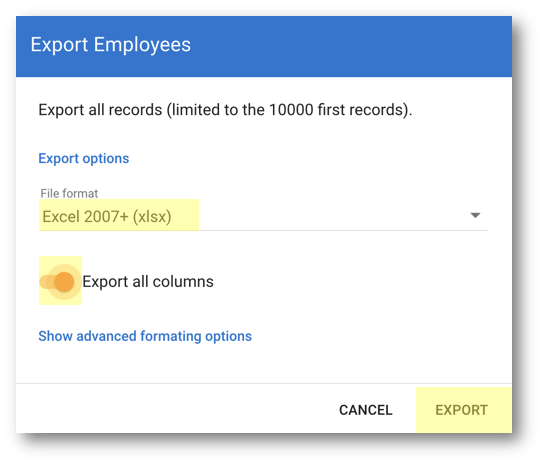
- Open the Options menu and select Export.
- Select the following values and then click Export:
- File format: Excel 2007+ (xlsx)
- Select Export all columns.
- When the download is complete, open the exported Excel file.
- Click the Format as Table button in the Excel toolbar.
- Select a style.
- Make sure the My table has headers option is selected on the Format as Table dialog, and then click OK.
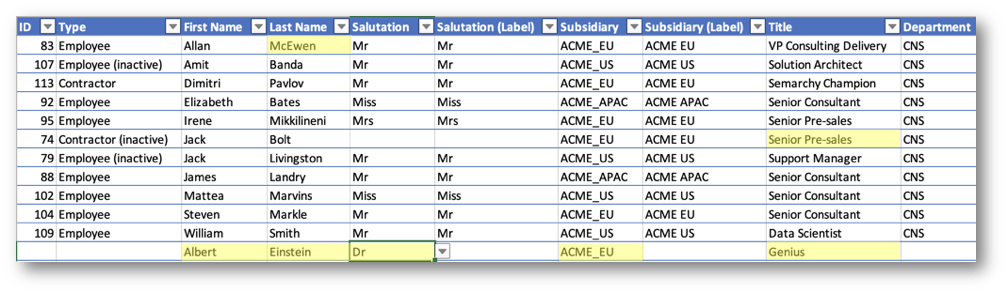
- Edit some records in the Excel file:
- In the Last Name column, change the name Allan Mcewen to
McEwen. - In the Title column, change Jack Bolt's title to
Senior Pre-sales.
- Add a new line to the Excel file with the following values:
- First Name:
Albert - Last Name:
Einstein - Salutation:
Dr(notice that lists of values are available in the Excel spreadsheet) - Subsidiary:
ACME EU - Title:
Genius
- Save the Excel file.
- Return to your application.
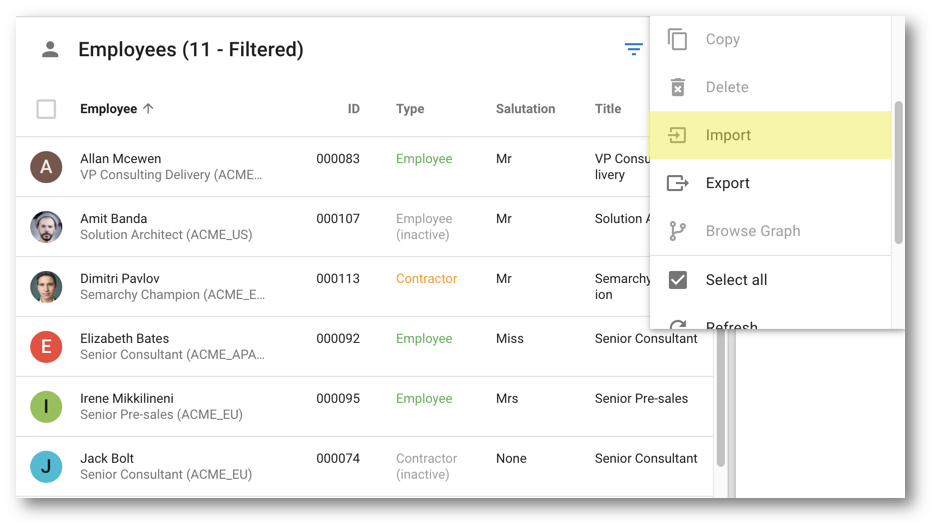
- Open the Options menu of the Employees collection and select Import.
- Select the edited Excel file.
- Click Continue on the first page.
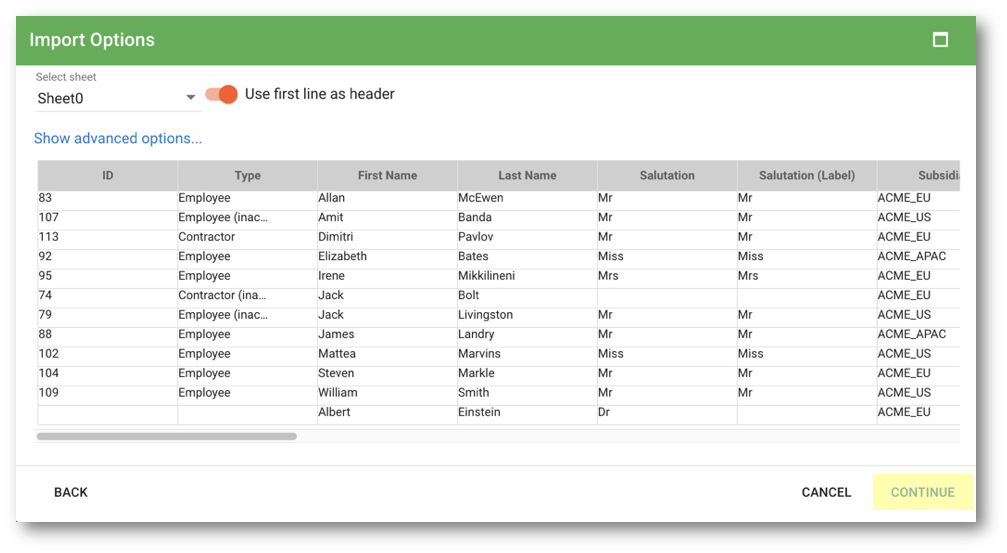
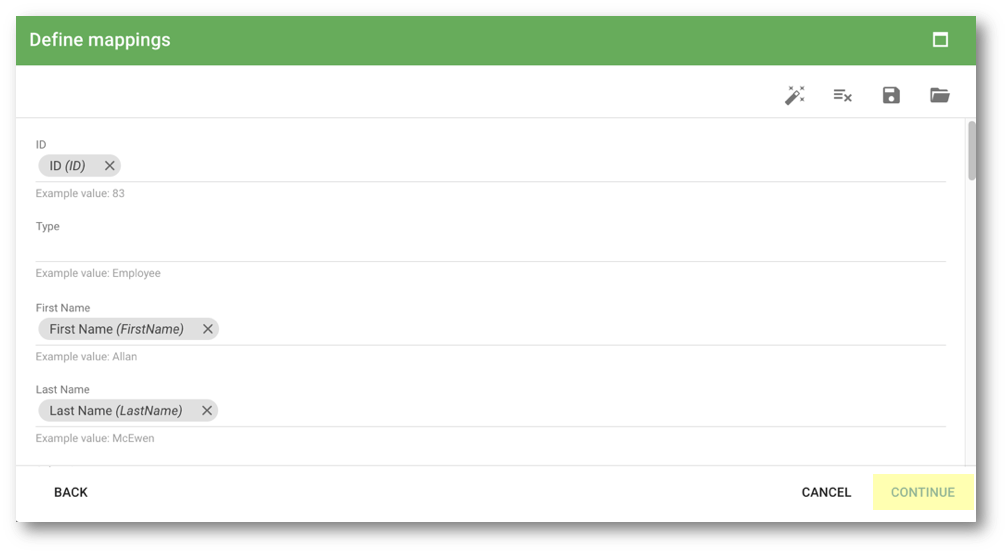
- Click Continue on the "Define Mappings" page.
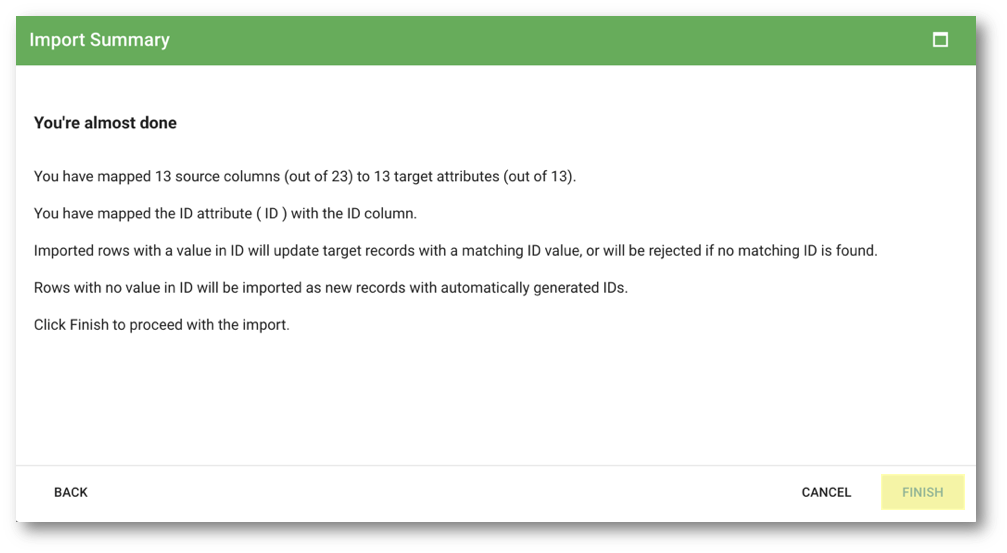
- Click Finish on the "Import Summary" page.
- Review your data changes and scroll down to see Albert Einstein's record.
- Select this record by clicking its display card.
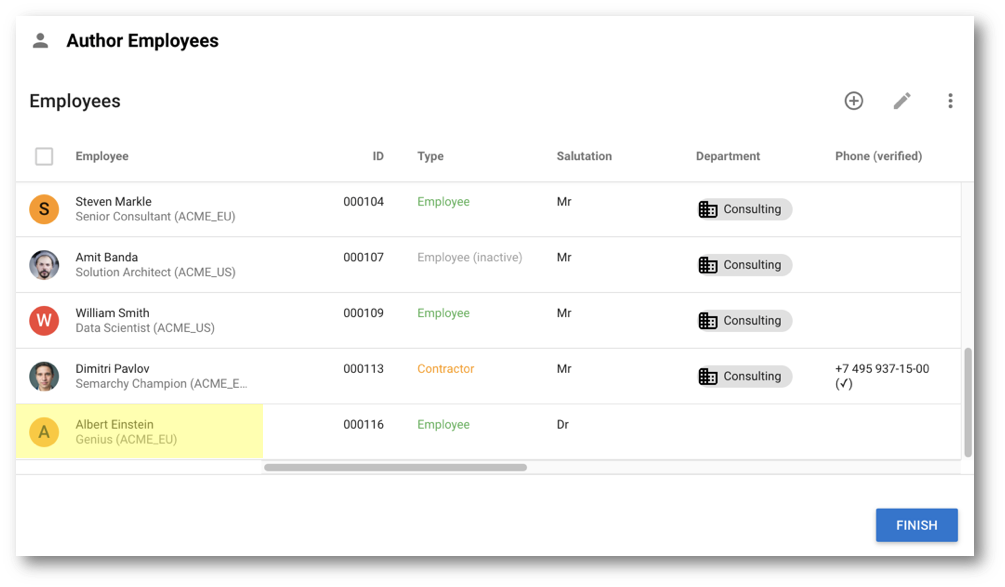
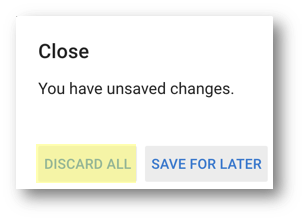
- Review the imported data and finally click the Close button to cancel the import.
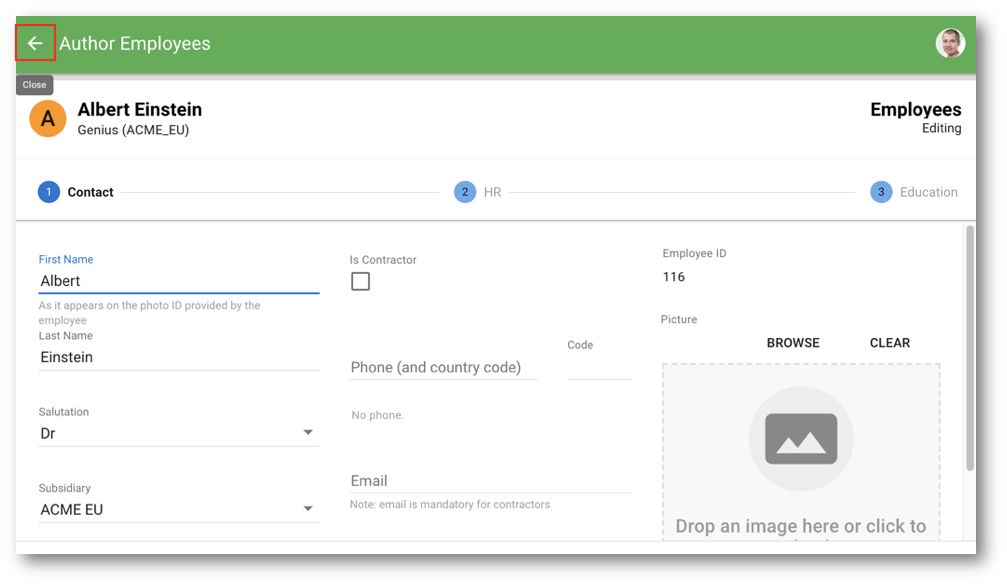
- Click Discard all to discard your changes and keep your tutorial data clean.
Congratulations!
You have learned to export and import data to and from an Excel spreadsheet.
To summarize:
- You have exported data from a collection to an Excel file.
- You have edited data in Excel and imported it back into your application.
Next, you will learn about record deletion.
Deleting data is often a complex task, both on the data governance side and on the technical side.
The following aspects must be considered by designers when it comes to record deletion:
- Conditions: Under what circumstances / privileges is the deletion allowed?
- Retention: Should the data of the deleted record be physically removed, or can it be kept in a separate table?
- Propagation: What should be done with records that reference the deleted record?
- Integration: Is the record used in other systems? Should the deletion event be pushed to those systems?
Semarchy xDM uses a flexible framework that allows you to plan for:
- Enabling or disabling delete actions.
- Propagating deletions to child records.
- Keeping track of deleted record IDs in order to share them with downstream systems.
- Storing deleted data (soft delete).
- Permanently removing data for regulatory compliance (hard delete).
In this section, you will configure and use the deletion feature.
Learning outcomes
- Configuring delete operations.
- Understanding the difference between hard and soft delete operations.
Configuring delete
View the default configuration
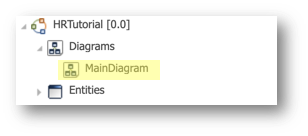
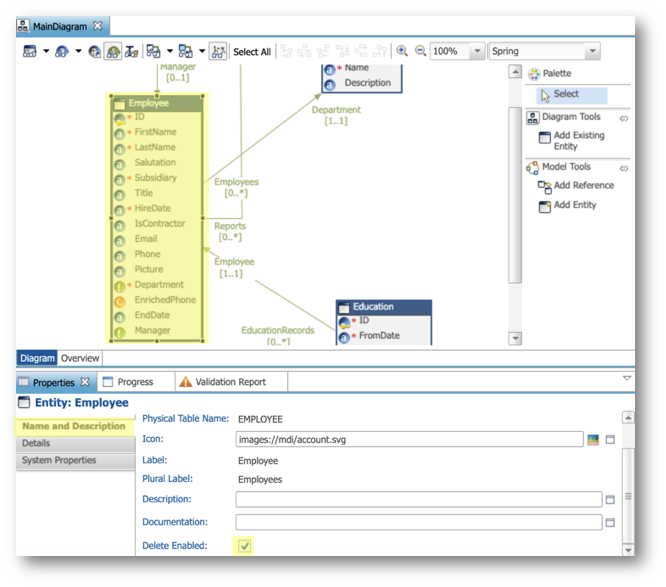
- In the Application Builder, open the main diagram: expand the Diagrams node in the Model Design view and double-click MainDiagram.
- Select the Employee entity on your diagram.
- Observe that the Delete Enabled checkbox is selected in the Name and Description finger tab of the Properties view. This means that the delete action is enabled by default for all new entities.
- Select the self-reference relationship from Employee to Employee.
- In the Name and Description finger tab of the Properties view, open the Delete Propagation drop-down. Here is how deletion propagates through this reference:
- Cascade: deletes children when parent is deleted.
- Nullify: references to parent are set to null.
- Restrict (default): prevents parent from being deleted if child records exist.
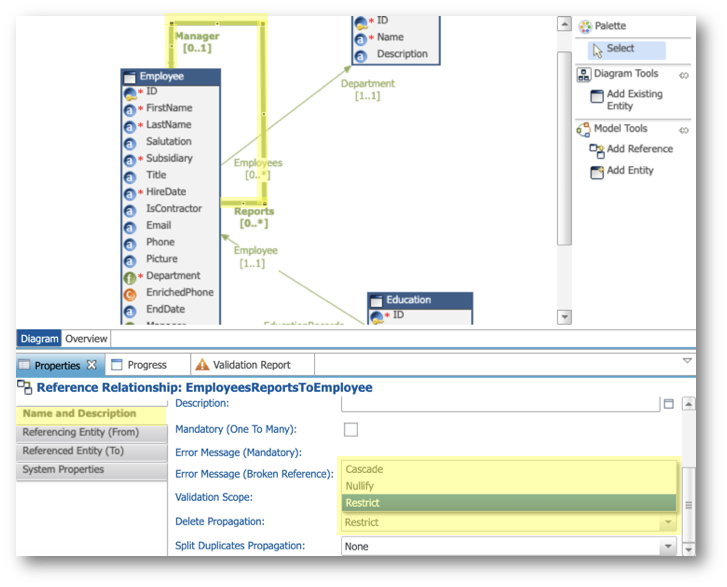
- Keep the default value (i.e., Restrict) for the Delete Propagation property of EmployeesReportsToEmployee.
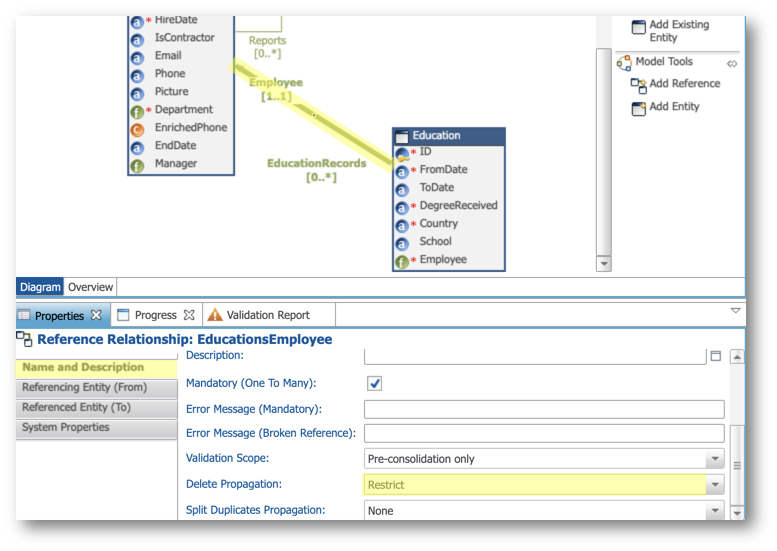
- Select the reference relationship from Education to Employee.
- Observe in the Properties view that the Delete Propagation property is also set to Restrict. This relationship should therefore prevent an employee record from being deleted if education records are found.
Create a delete action and try to delete a record
- Return to the Welcome page and open your application.
- In the navigation drawer, select the Employees business view.
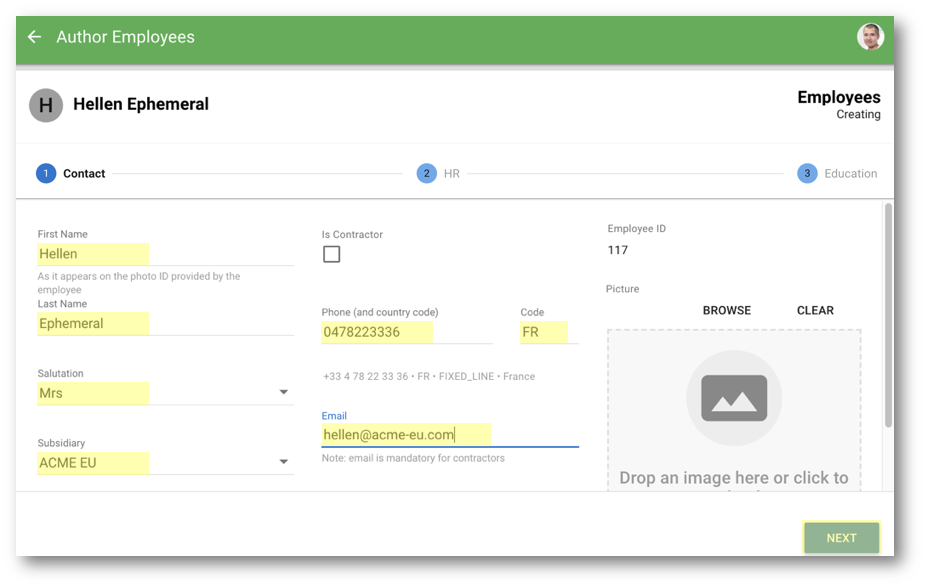
- In the Options menu, click Create.
- Enter the following values and click Next:
- First Name:
Hellen - Last Name:
Ephemeral - Salutation:
Mrs - Subsidiary:
ACME EU - Phone:
0478223336 - Code:
FR - Email:
hellen@acme-eu.com
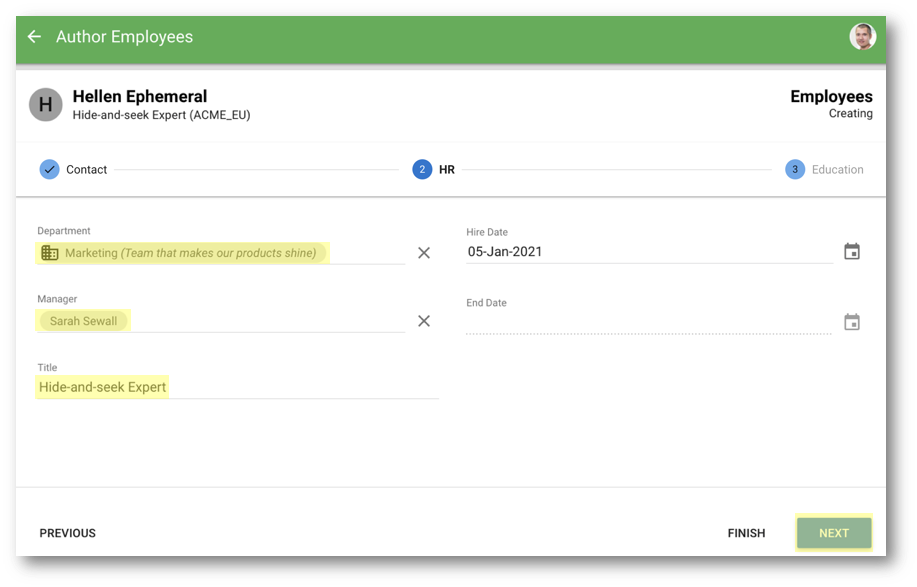
- Enter the following values for the HR step and click Next:
- Department:
Marketing (Team that makes our products shine) - Manager:
Sarah Sewall - Title:
Hide-and-seek Expert
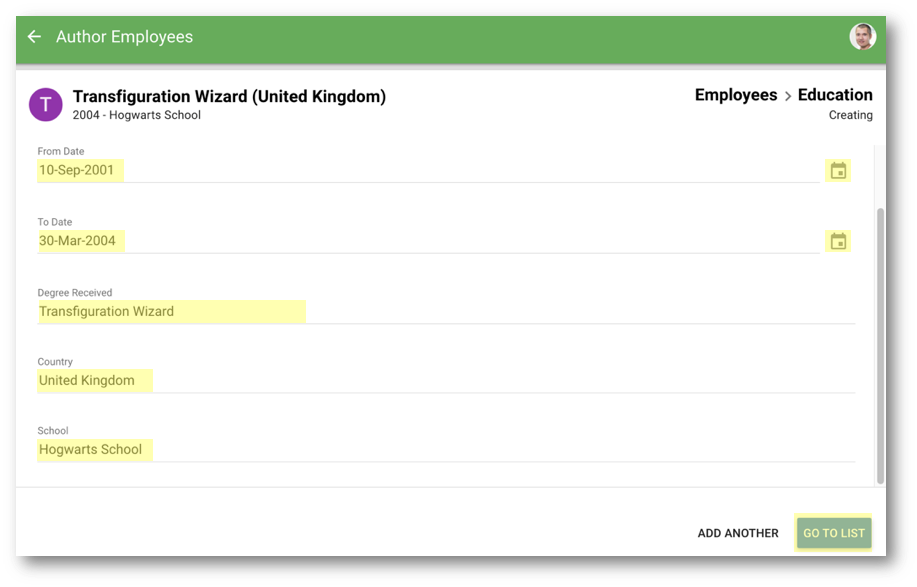
- Enter the following values of a first education record, and click Go to list:
- From Date: using the date picker, select September 10, 2001
- To Date: select March 30, 2004
- Degree Received:
Transfiguration Wizard - Country:
United Kingdom - School:
Hogwarts School
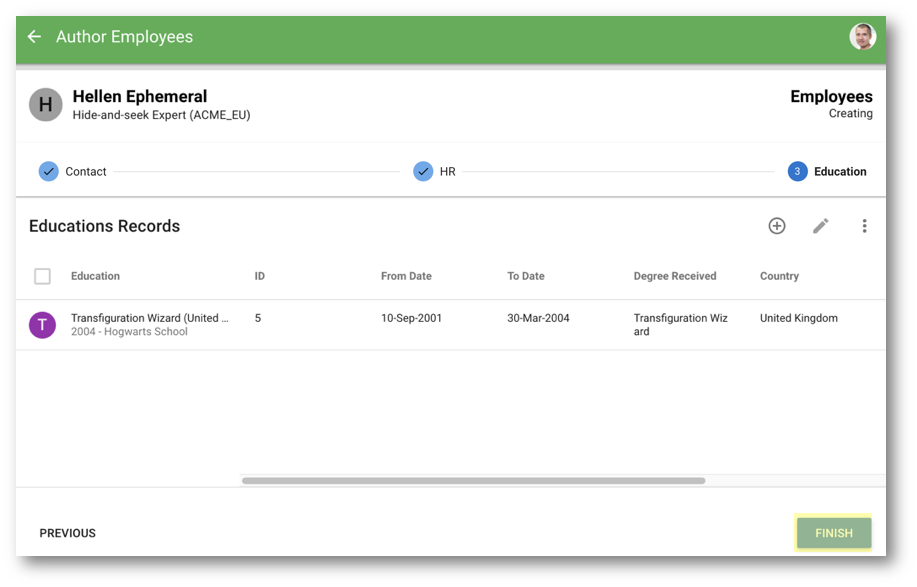
- Click Finish.
- When the toaster on the bottom left corner of the screen indicates "Changes successfully applied," click Click to refresh.
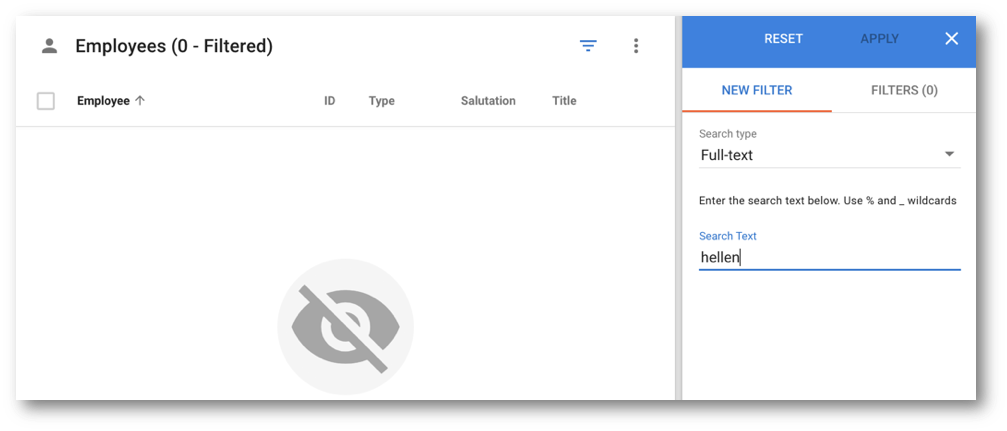
- Click the Filter button above the Employees collection to open the filter panel.
- Type
hellenin the Search Text field and click Apply.
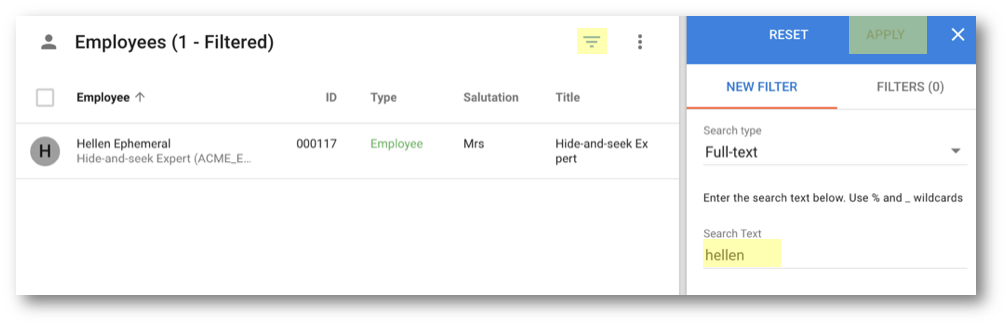
- Select the record found.
- In the Options menu, click Delete.
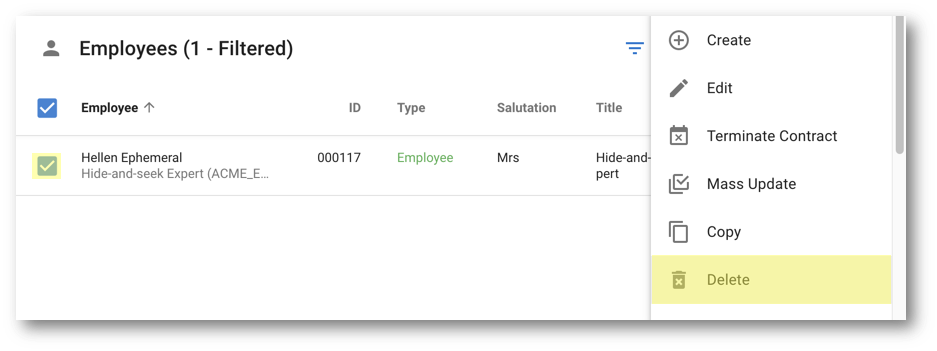
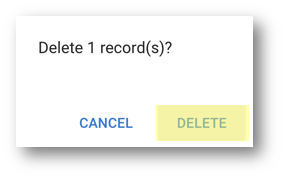
- Click Delete to confirm the deletion.
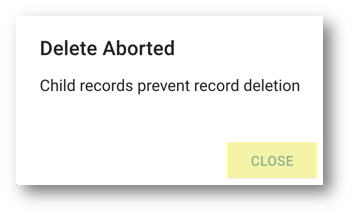
- Observe that the delete fails because this employee has one education record while the reference relationship between Education and Employee is set to Restrict.
- Click Close to return to the collection.
Change the deletion configuration
- Return to the Application Builder and open MainDiagram again.
- Select the reference relationship from Education to Employee.
- Set the Delete Propagation property to Cascade in the Properties view.
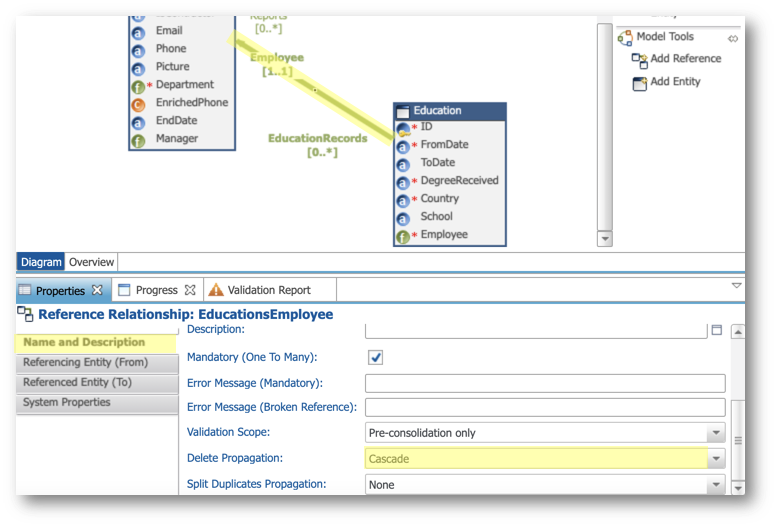
- Save your work.
Validate and deploy your changes
- In the Application Builder, right-click on the root node in the Model Design view, corresponding to the HRTutorial [0.0] model and select Validate.
The validation report should raise no error.
- Open the Management perspective in the Application Builder.
- Right-click the EmployeeTutorial data location and select Deploy Model Edition.
- Click Finish in the wizard to deploy your model changes.
You are now ready to view your changes.
Cascade delete the employee and education records
- Open your application from the Welcome page.
- Select Employees in the navigation drawer.
- Open the filter panel and search again for
hellen. - Select the record by clicking its avatar, and select Delete in the Options menu.
- Click Delete to confirm the deletion.
- Observe that the delete is not rejected anymore.
- When the toaster on the bottom left corner of the screen indicates "Record(s) successfully deleted," click Click to refresh. The search no longer returns the record.

Hard delete and soft delete
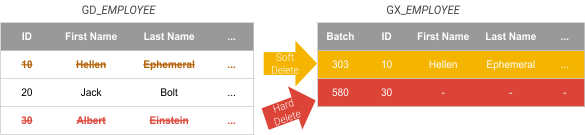
Deleting records of a given entity in xDM involves two database tables:
- GD_<entity_name >: the table that stores the golden records
- GX_<entity_name >: the table that stores the deleted records
Semarchy xDM allows you to perform either hard or soft delete actions on entities.
- Soft delete actions remove records from the GD table and move them with their data to the GX table.
- Hard delete actions remove records from the GD table and only move their ID to the GX table. Data is permanently deleted.
Therefore, xDM allows you to configure the deletion behavior to match your regulatory compliance requirements.
To see how hard and soft delete actions are configured, proceed as follows:
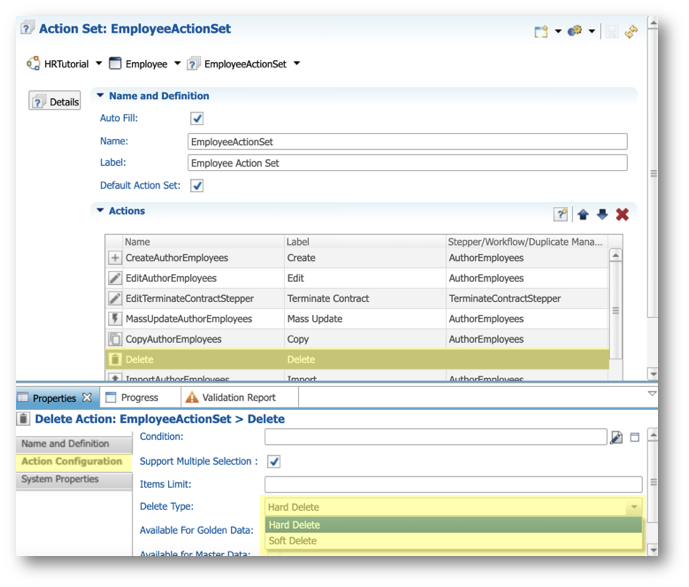
- In the Application Builder, expand the Entities > Employee > Action Sets and open EmployeeActionSet.
- In the Actions table, select the Delete action.
- Select the Action Configuration finger tab in the Properties view.
- Observe that, by default, the Delete Type property is set to Hard Delete. It can be set to Soft Delete.
Congratulations!
You have configured the deletion behavior and learned about hard and soft delete operations.
To summarize:
- You have changed the deletion configuration for reference relationships.
- You have learned the difference between hard and soft delete actions, and discovered how they are configured in action sets.
You have learned how to customize your applications with steppers and action sets. You also learned how to import, export, and delete data in Semarchy xDM.
Learning recap
- You have refined data authoring steppers to enhance user experience.
- You have tailored conditional actions to business-driven scenarios.
- You have used the import and export feature and manipulated data in Excel.
- You have configured the deletion behavior to align with business-specific data removal requirements.
Next steps
The next unit, Search and application configuration, will focus on customizing a better search experience and on building an elegant and productive navigation experience.
Thank you for completing this tutorial.