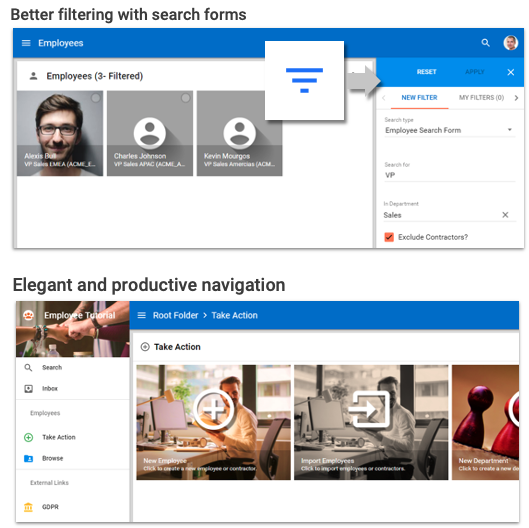
In this tutorial, your focus will be on enhancing the search experience and crafting a refined and efficient navigation system.
Learning outcomes
- Creating your own search forms and customizing the Global Search feature.
- Interacting with the image libraries to load your own set of images.
- Customizing the application branding, folders, actions, and navigation drawer.
- Embedding external links in your application.
Learning track
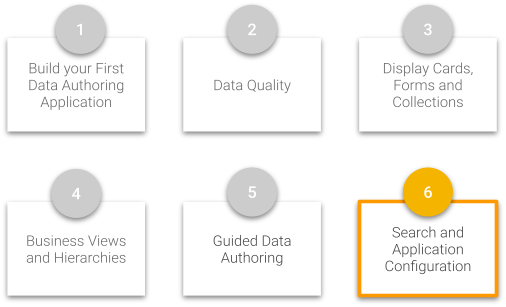
This tutorial is the sixth unit of the Data Authoring track. Make sure to complete the first five units before starting this tutorial:
- Build your first data authoring application
- Data quality
- Display cards, forms, and collections
- Business views and hierarchies
- Guided data authoring
If you have not completed these prerequisites, return to the Tutorials menu.
Also, if you have not already done so, click the button below to download resources such as the images and data sets that will be used within this tutorial.
In this section, you will discover the search capabilities of Semarchy xDM and learn how to create a custom search form for the Employee entity and the Global Search.
Learning outcomes
- Creating a custom search form using parameters and a SemQL condition.
- Testing your search form with various search criteria.
- Saving filters and sharing filters among your team.
- Enhancing the Global Search.
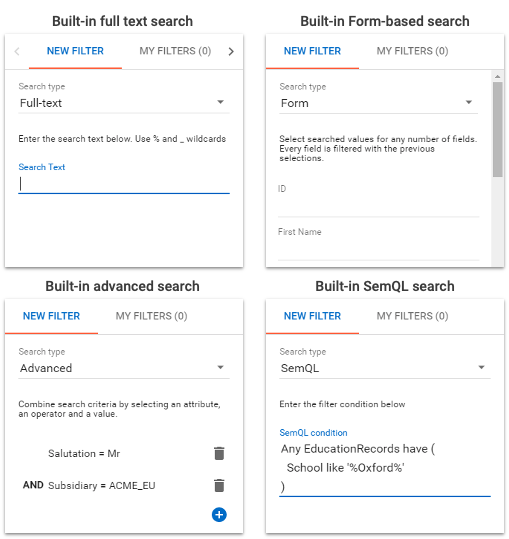
Built-in search types
xDM provides built-in search types that you can customize as accessible search options in your business views.
Built-in search types include:
- Full-text: scans all searchable attributes of an entity.
- Form: displays a default form with all attributes and pickers for value selection.
- Advanced: allows specifying which attributes to search on and the operators to use for comparison.
- SemQL: allows using SemQL queries for searching (for advanced users).
Next, you will create a custom search form.
Offering users a personalized search experience through custom search forms typically proves very effective.
Search forms enable you to define search criteria for users to filter data. They utilize these criteria to build a SemQL condition that applies the desired filter.
Search parameters may manifest as text fields, checkboxes, date pickers, static drop-down lists, or dynamic value pickers.
In the next sections, you will learn how to build your first search form and enhance the Global Search with a second search form.
Create the Employee search form
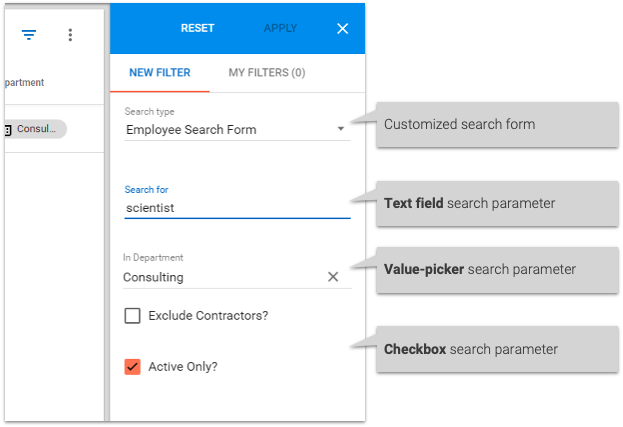
In this section, you will build an employee search form to help your users be more productive when filtering data.
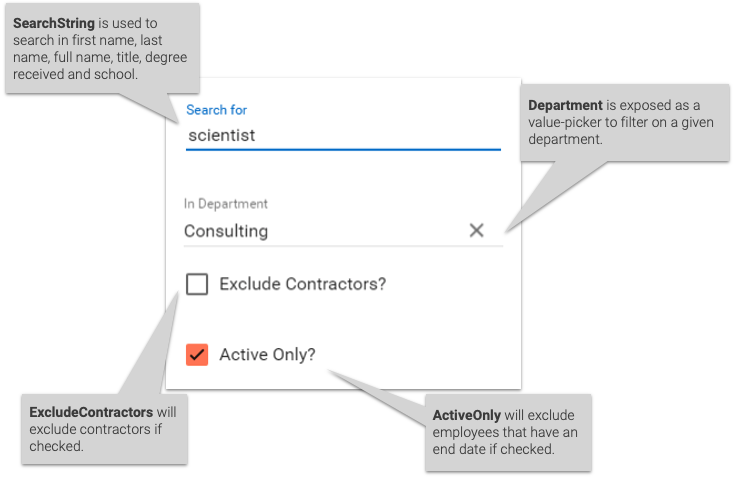
The form will have four parameters:
- Search for (simple text field)
- In Department (value-picker field)
- Exclude Contractors (checkbox)
- Active Only (checkbox)
Building such a search form involves incorporating parameters into the form; creating a SemQL condition utilizing these parameters; and eventually exposing this form within your business view.
Define the SemQL search condition
The filter applied by your form is a SemQL condition that will use each parameter as a bind variable to filter the appropriate records.
This condition will use four parameters:
SEARCH_STRING: used to search within the first name, last name, full name (i.e., a concatenation of the first and last names), title, within any education records' degree received, or school. Notice the use of thelower()function and thelikeoperator.
(/* 1. search in first name, last name, title and education records */
(:SEARCH_STRING is null)
or (lower(FirstName) like '%' || lower(:SEARCH_STRING) || '%')
or (lower(LastName) like '%' || lower(:SEARCH_STRING) || '%')
or (lower(FirstName ||' '|| LastName) like '%' || lower(:SEARCH_STRING) || '%')
or (lower(Title) like '%' || lower(:SEARCH_STRING) || '%')
or (any EducationRecords have (
          (lower(DegreeReceived) like '%' || lower(:SEARCH_STRING) || '%')
       or (lower(School) like '%' || lower(:SEARCH_STRING) || '%')
       )
    )
)
DEPARTMENT: searches for an exact match on Department if provided.
(    /* 2. Filter by department */
       (:DEPARTMENT is null)
    or (FID_Department = :DEPARTMENT)
)
EXCLUDE_CONTRACTORS: filters on non-contractors if Exclude Contractors? is selected on the form.
(    /* 3. Exclude contractors eventually */
    (:EXCLUDE_CONTRACTORS is null)
    or (:EXCLUDE_CONTRACTORS = '0')
    or (:EXCLUDE_CONTRACTORS = '1' and IsContractor = '0')
)
ACTIVE_ONLY: filters on end date null if Active Only? is selected.
(    /* 4. Keep active employees only */
    (:ACTIVE_ONLY is null)
    or (:ACTIVE_ONLY = '0')
    or (:ACTIVE_ONLY = '1' and EndDate is null)
)
You will use this SemQL condition in the next section.
Add the search form
You will now configure a new search form for the Employee entity.
- Open the HRTutorial model in the Application Builder.
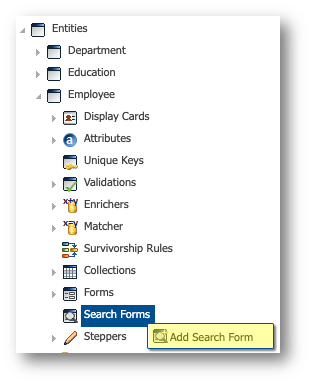
- Navigate to Entities > Employee in the Model Design view. Right-click Search Forms and then select Add Search Form.
- Leave all default properties in the dialog and then click Finish.

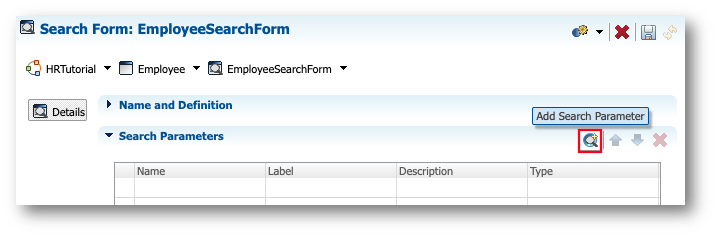
- In the Search Parameters section, click the Add Search Parameter button.
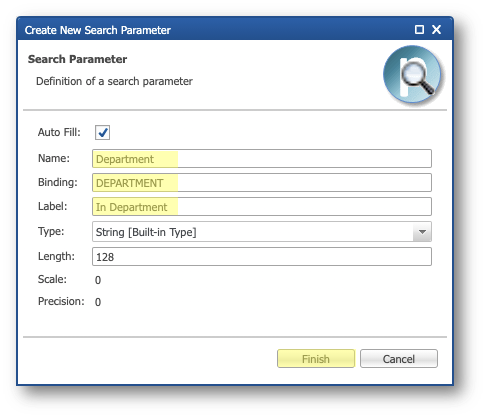
- In the dialog, enter the following values and then click Finish:
- Name:
SearchString - Binding:
SEARCH_STRING - Label:
Search for

- Click again the Add Search Parameter in the editor.
- Enter the following values and then click Finish:
- Name:
Department - Binding:
DEPARTMENT - Label:
In Department
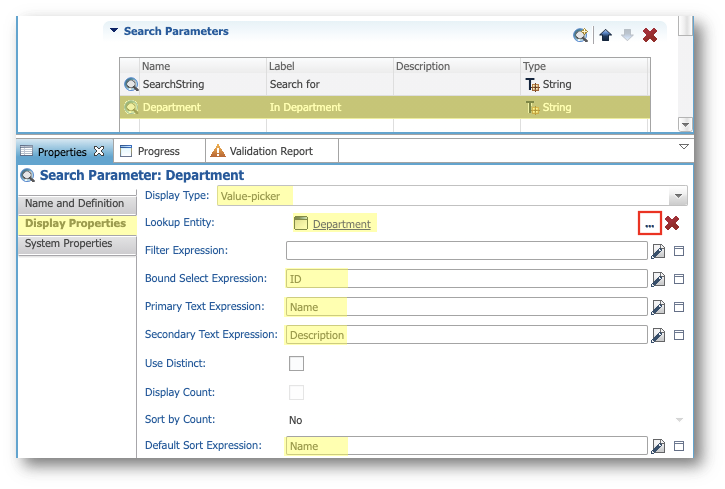
- Select the Department parameter in the Search Parameters table.
- Select the Display Properties finger tab of the Properties view and then enter the following values:
- Display Type: Value Picker
- Lookup Entity: click the Select a value button and then select Department.
- Bound Select Expression:
ID - Primary Text Expression:
Name - Secondary Text Expression:
Description - Default Sort Expression:
Name
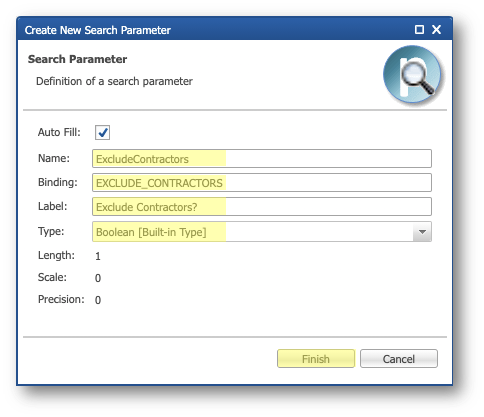
- Click again the Add Search Parameter button in the editor.
- Enter the following values and then click Finish:
- Name:
ExcludeContractors - Binding:
EXCLUDE_CONTRACTORS - Label:
Exclude Contractors? - Type: Boolean [Built-in Type]
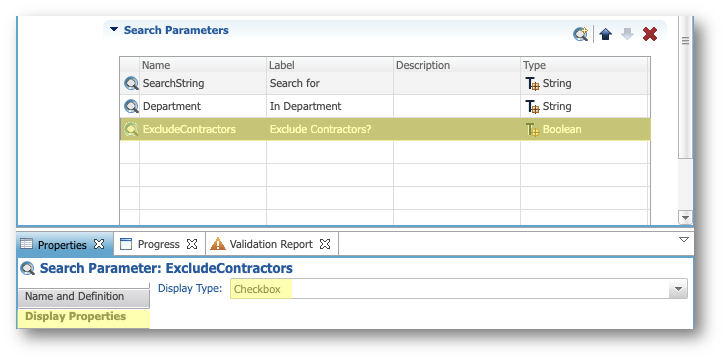
- Select the ExcludeContractors parameter in the Search Parameters table.
- Select the Display Properties finger tab of the Properties view, and set Display Type to Checkbox.
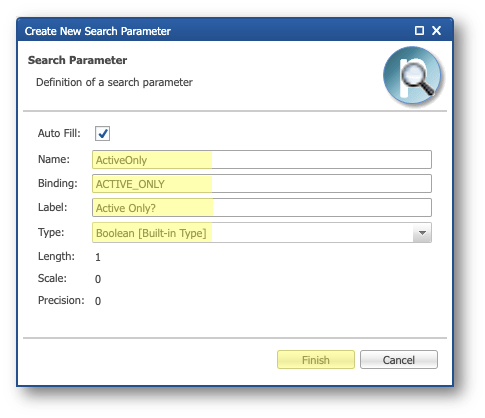
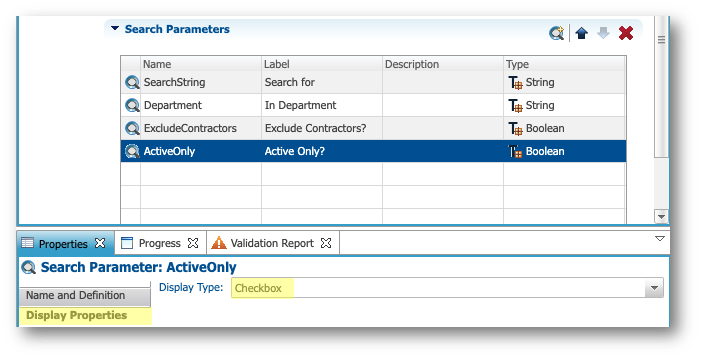
- Click again the Add Search Parameter button in the editor.
- Enter the following values and then click Finish:
- Name:
ActiveOnly - Binding:
ACTIVE_ONLY - Label:
Active Only? - Type: Boolean [Built-in Type]
- Select the ActiveOnly parameter in the Search Parameters table.
- Select the Display Properties finger tab of the Properties view, and then set Display Type to Checkbox.
- In the Name and Definition section of the editor, click the Edit Expression button next to the SemQL Condition property.
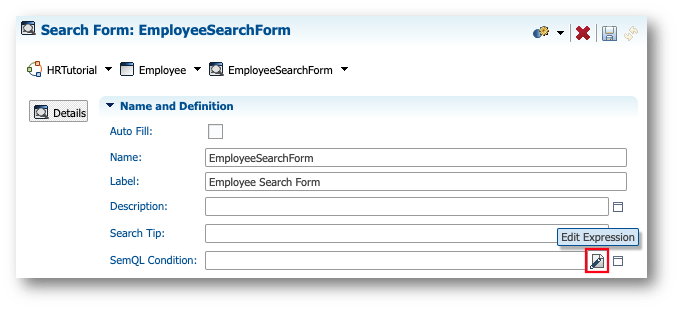
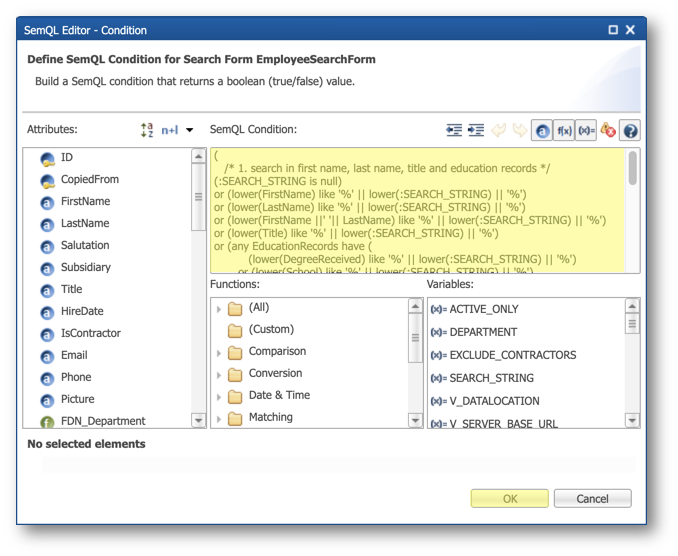
- Paste the following SemQL Condition and then click OK.
(
   /* 1. search in first name, last name, title and education records */
(:SEARCH_STRING is null)
or (lower(FirstName) like '%' || lower(:SEARCH_STRING) || '%')
or (lower(LastName) like '%' || lower(:SEARCH_STRING) || '%')
or (lower(FirstName ||' '|| LastName) like '%' || lower(:SEARCH_STRING) || '%')
or (lower(Title) like '%' || lower(:SEARCH_STRING) || '%')
or (any EducationRecords have (
          (lower(DegreeReceived) like '%' || lower(:SEARCH_STRING) || '%')
       or (lower(School) like '%' || lower(:SEARCH_STRING) || '%')
       )
    )
)
and (
    /* 2. Filter by department */
       (:DEPARTMENT is null)
    or (FID_Department = :DEPARTMENT)
)
and (
    /* 3. Exclude contractors eventually */
    (:EXCLUDE_CONTRACTORS is null)
    or (:EXCLUDE_CONTRACTORS = '0')
    or (:EXCLUDE_CONTRACTORS = '1' and IsContractor = '0')
)
and (
    /* 4. Keep active employees only */
    (:ACTIVE_ONLY is null)
    or (:ACTIVE_ONLY = '0')
    or (:ACTIVE_ONLY = '1' and EndDate is null)
)
- Save your work.
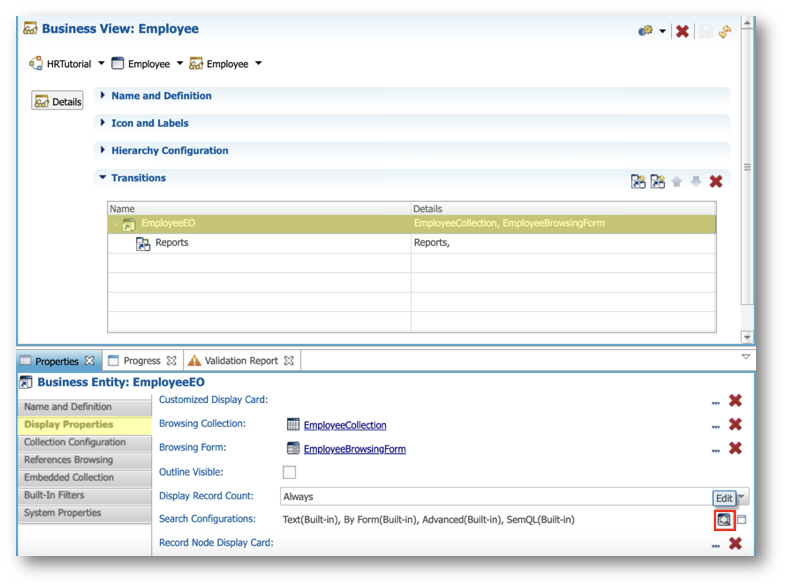
Assign the search form
You will now assign the search form to the Employee business view.
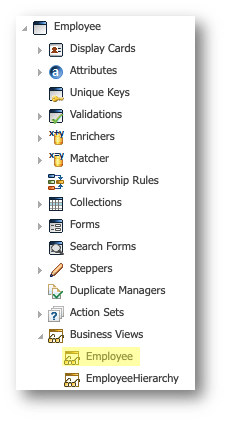
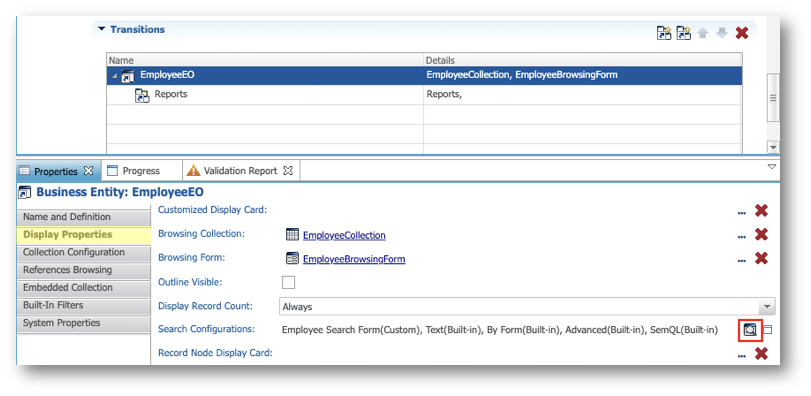
- Navigate to Entities > Employee > Business Views in the Model Design view and then double-click Employee.
- In the Transitions section of the editor, select EmployeeEO in the table view.
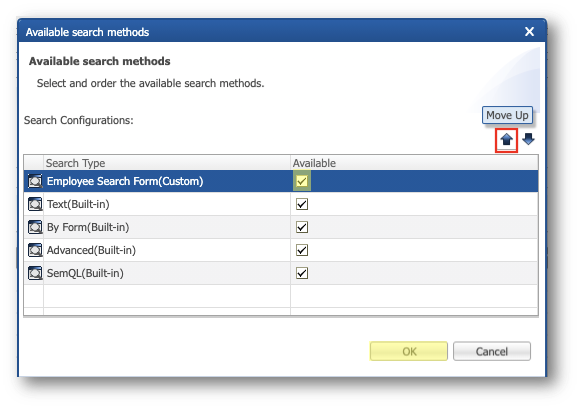
- Select the Display Properties finger tab of the Properties view, and then click the Edit button next to the Search Configurations property.
- Select the Employee Search Form(Custom) in the Available column.
- Move it to the first position using the Move Up button and then click OK.
- Save your work.
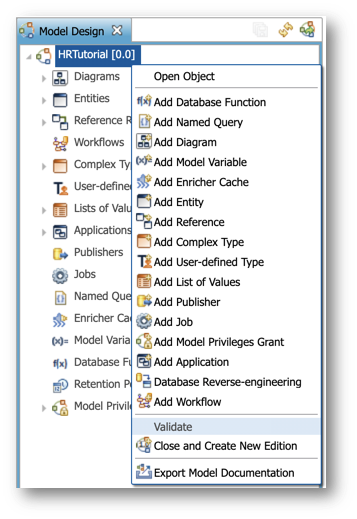
- In the Application Builder, right-click on the root node in the Model Design view, corresponding to the HRTutorial [0.0] model, and then select Validate.
The validation report should raise no error.
You will test your form in the next section.
Use the Employee search form
After designing your search form, you will now refresh your application to see your changes and then test different search combinations.
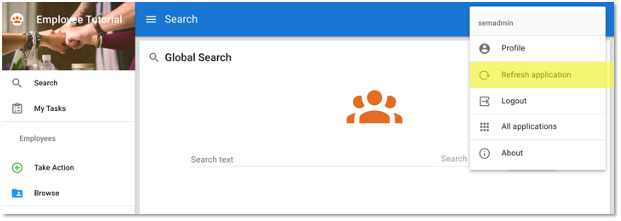
- Open your application from the Welcome page.
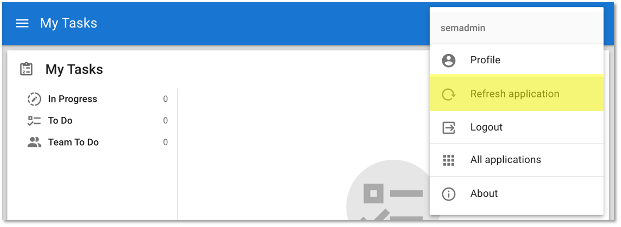
- Open the user menu on the top-right corner, and then select Refresh Application.
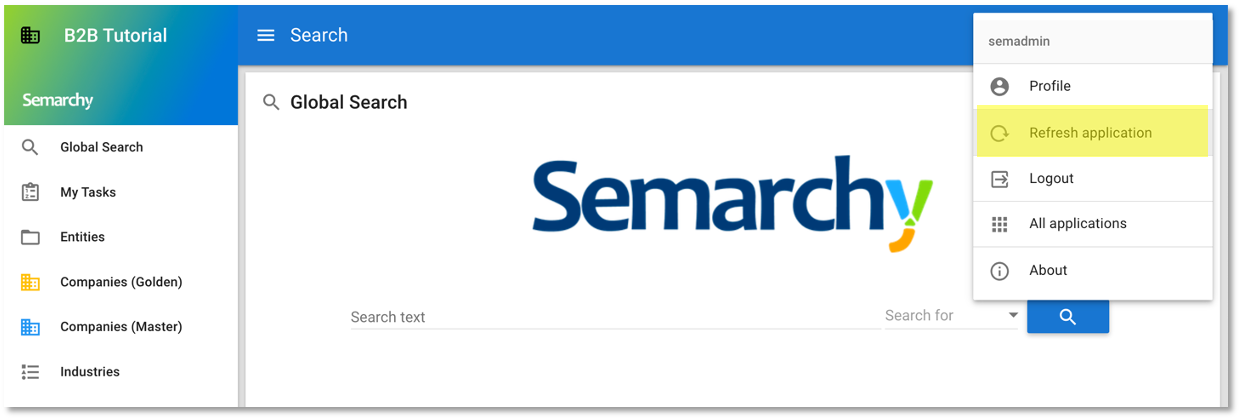
- Select Employees in the navigation drawer.
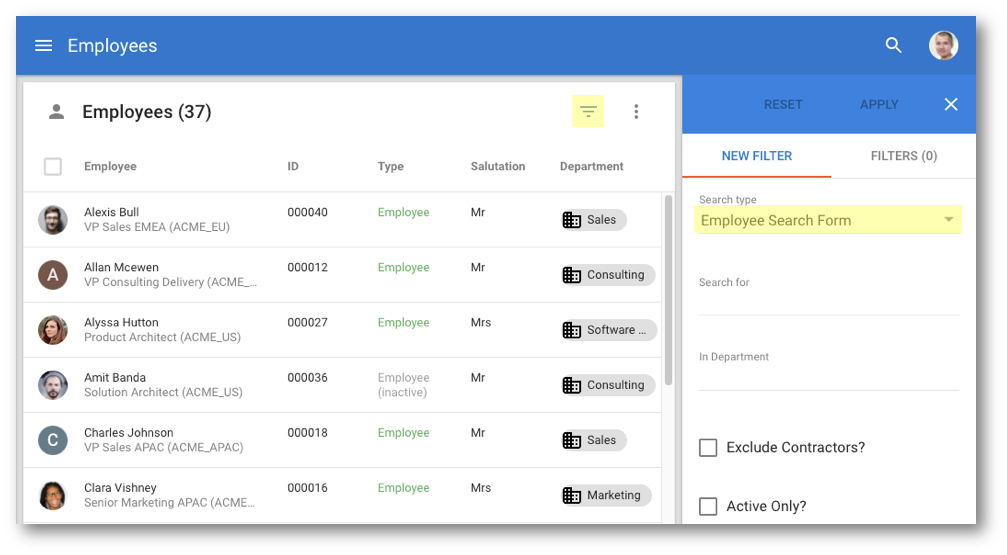
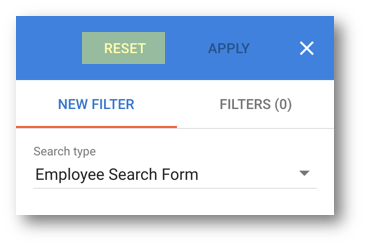
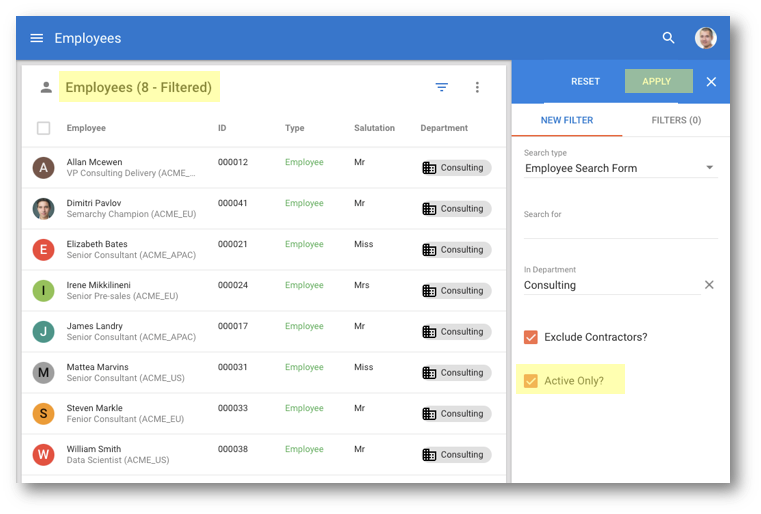
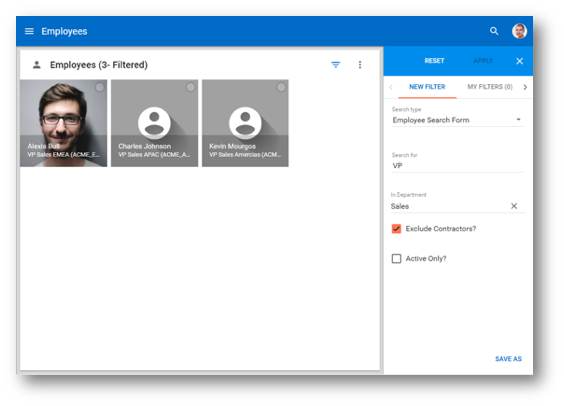
- Click the Filter button above the Employees collection to open the filter panel.
The employee search form you created is selected by default.
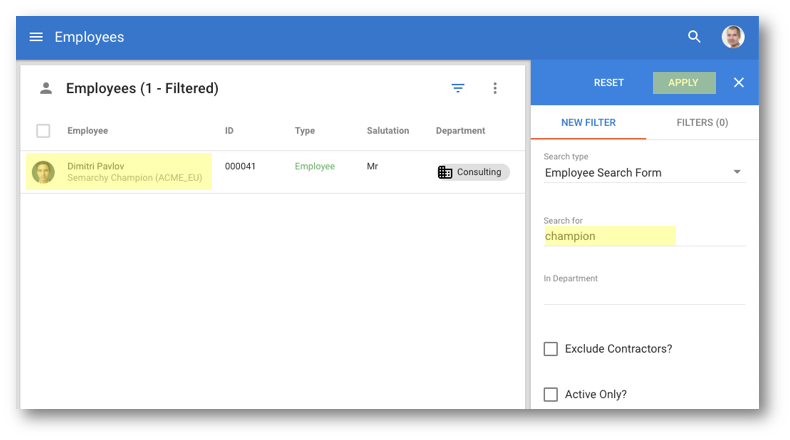
- Type
championin the Search for field and then click Apply.
- Select Reset to clear the search results.
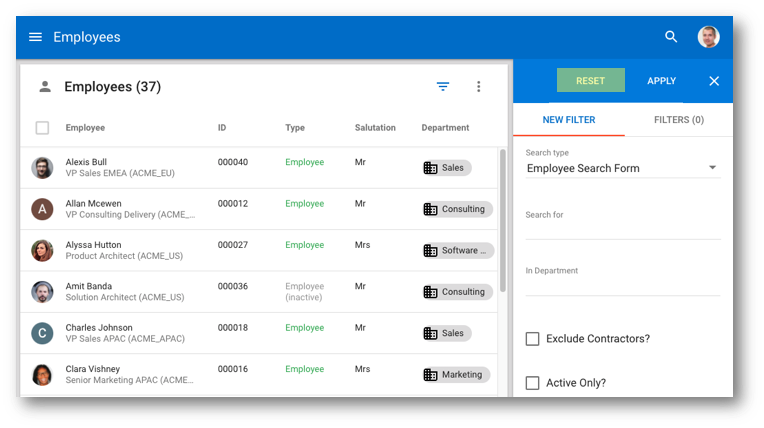
- Type
oxfordin the Search for field and then click Apply.

- Select Reset to clear the search results.
- Type
amit bandain the Search for field and then click Apply.
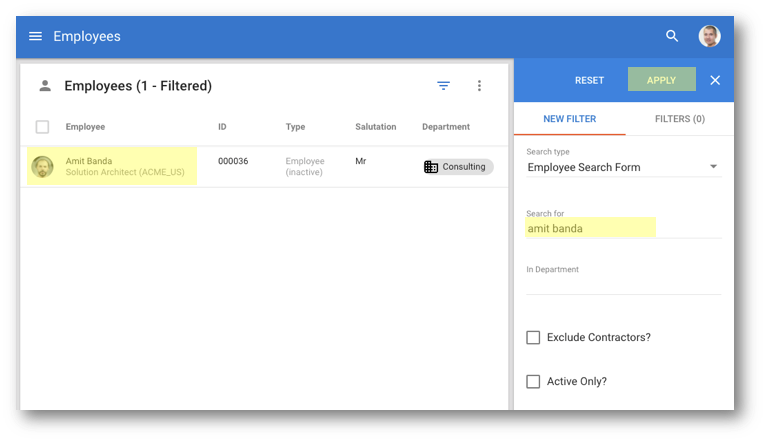
- Select Reset to clear the search criteria and results.
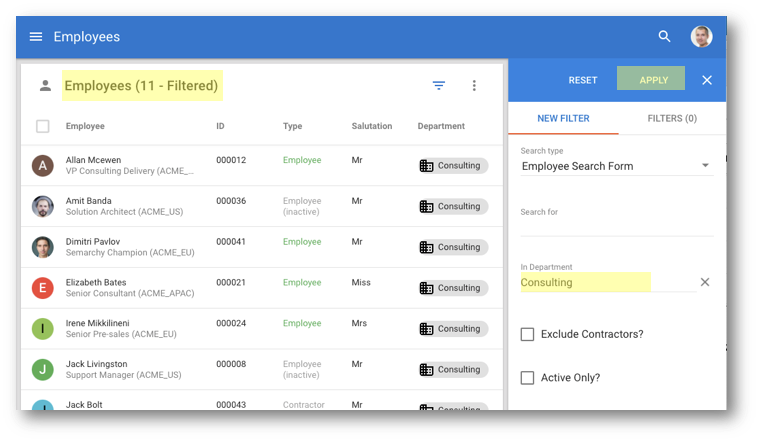
- Type
Consultingin the In Department field and then select Apply.
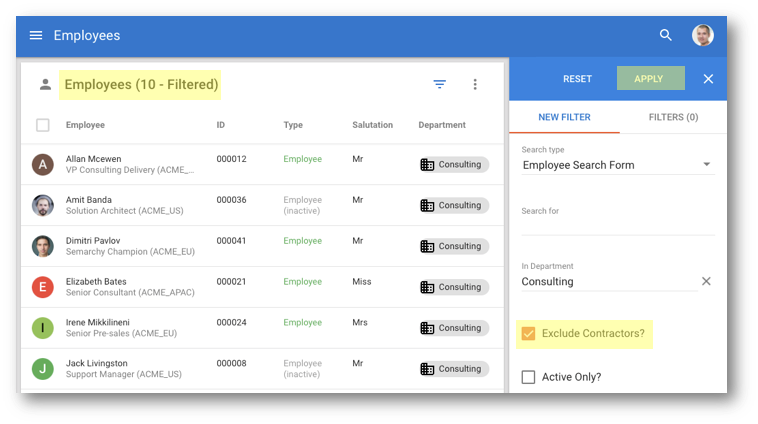
- Select Exclude Contractors? and then click Apply.
- Select Active Only? and then click Apply.
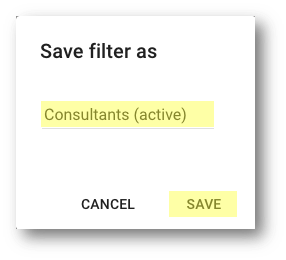
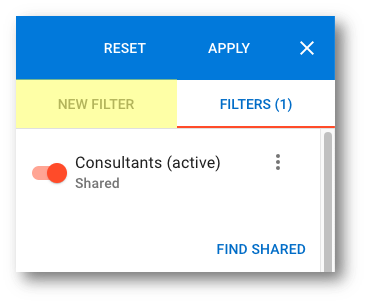
- Save your search criteria by selecting Save as. You will be able to reuse it later.
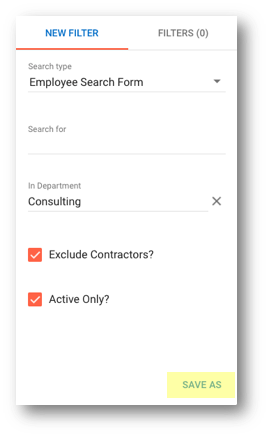
- Name your filter
Consultants (active)and then select Save.
- Share this filter with other users: open the Options menu next to your filter and then click Share.
Combine filters
You will now create another filter to learn how to combine filters.
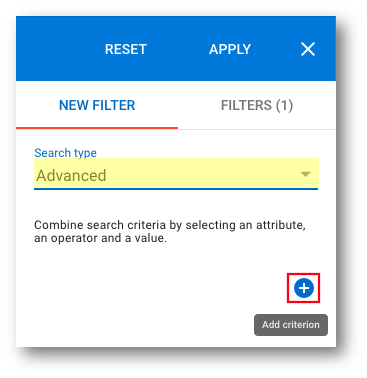
- Select New filter.
- Set the Search type to Advanced and then select Add criterion.
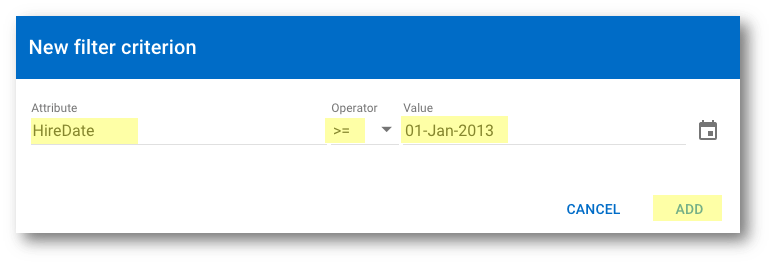
- Enter the following values and then click Add:
- Attribute:
HireDate - Operator:
>= - Value:
01-Jan-2013
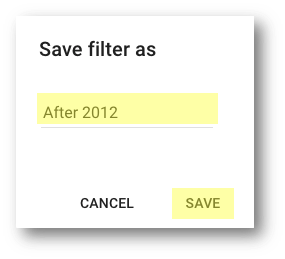
- Select Save as.
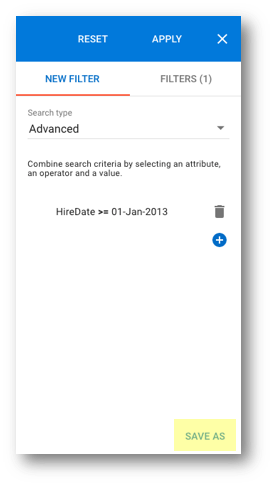
- Set the filter name to
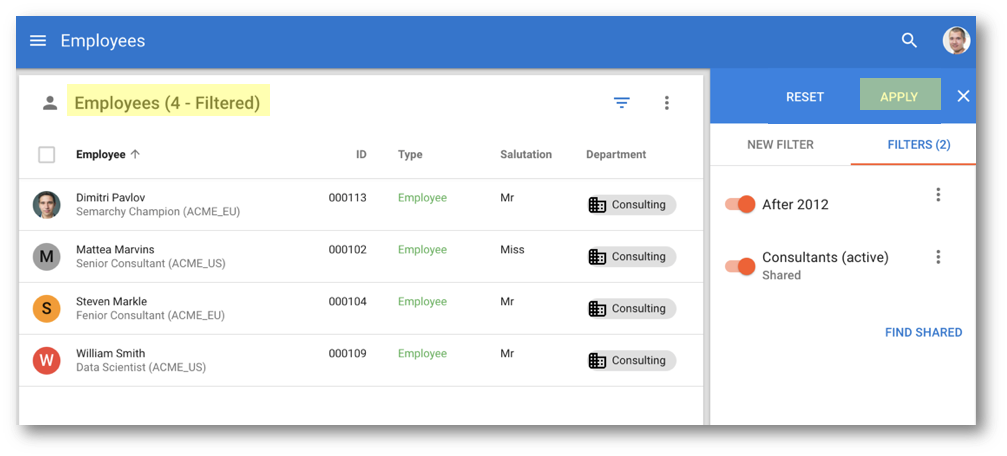
After 2012and then select Save.
- Click Apply and observe that the new filter returns only four records.
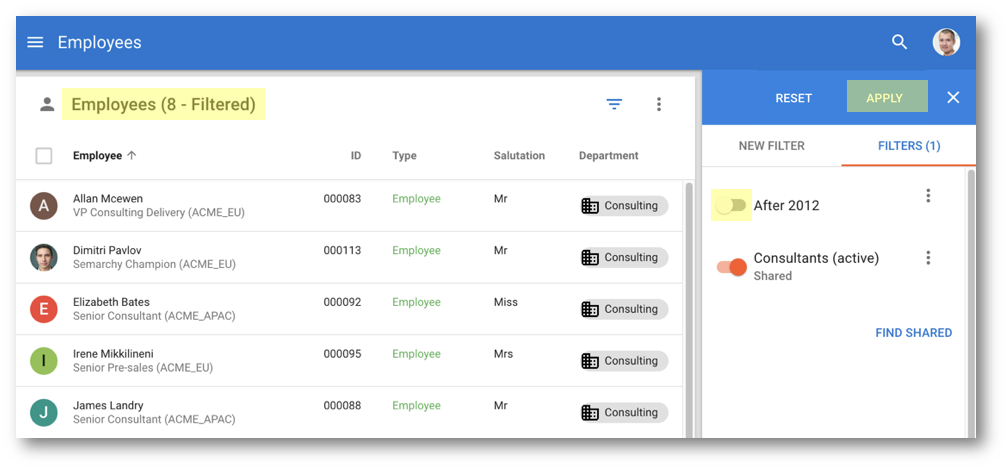
- Click the toggle next to the After 2012 filter to the off position, and click Apply.
- Observe that the search returns eight records now that this filter is disabled.
Congratulations!
You have successfully created and used a custom search form for employees' records. Next, you will learn how to use a search form in the Global Search.
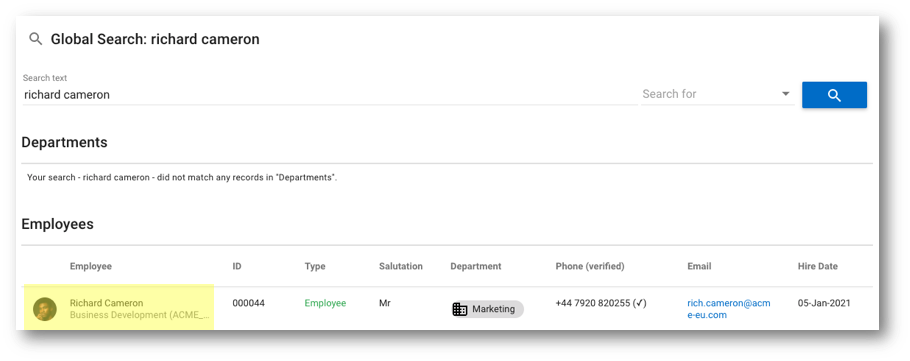
If you use the Global Search feature and try to search for a person's full name, no results will be retrieved. This is because Global Search scans individual attributes like first name or last name, but not their concatenation.
You are now going to examine the Global Search as it was configured initially in the first unit, Build your first data authoring application.
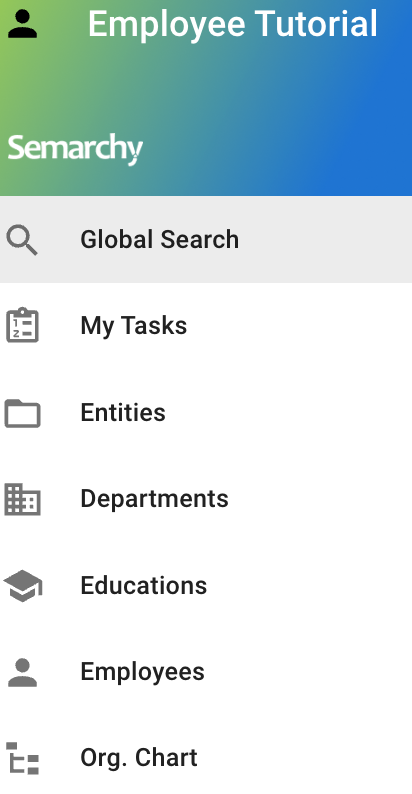
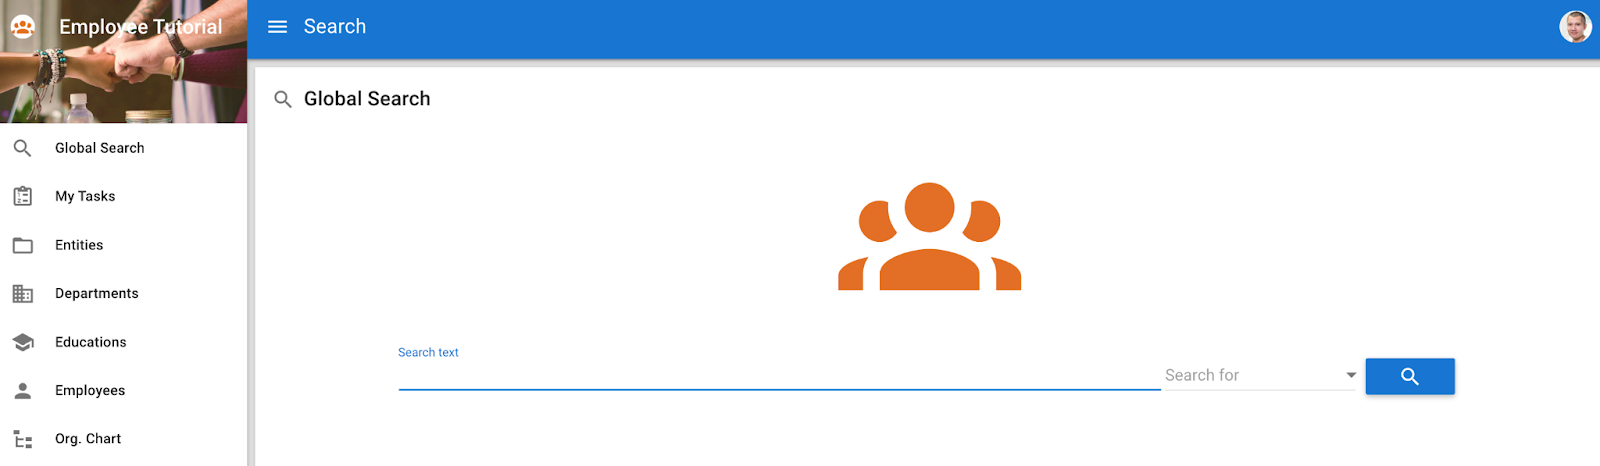
- In the Employee Tutorial application, select Global Search in the navigation drawer.
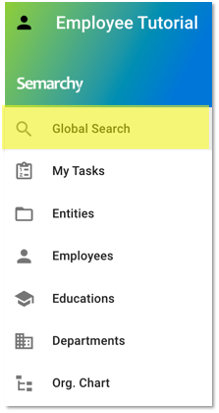
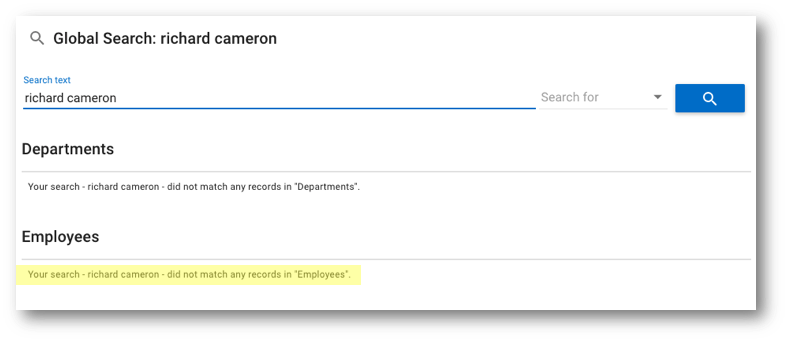
- Search for
richard cameronand click the Search button.
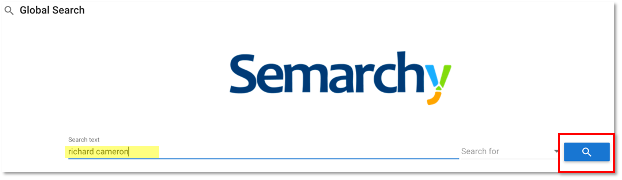
- No results are returned by the search because the Global Search configuration does not include searching on the combination of the first name and last name.
To avoid this issue, you will configure the Global Search to use a similar form and the same condition on full name as the search form you created previously.
Create a new search form
- Open the HRTutorial model in the Application Builder.
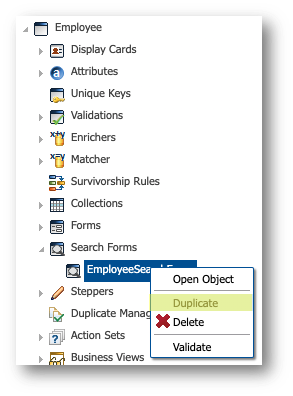
- Navigate to Entities > Employee > Search Forms in the Model Design view.
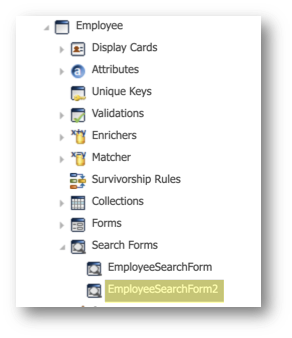
- Right-click EmployeeSearchForm and then select Duplicate.
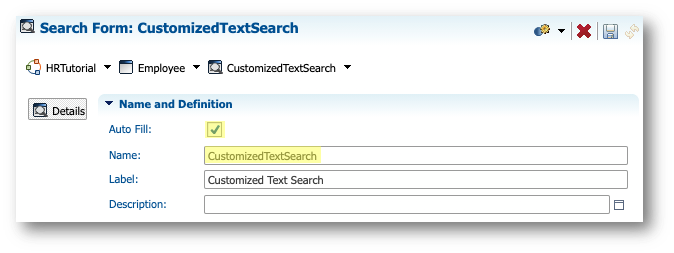
- Double-click on the newly created EmployeeSearchForm2 in the Model Design view.
- In the Name and Definition section of the editor, enter the following values:
- Select Auto-Fill
- Name:
CustomizedTextSearch
- Click the Edit Expression button next to the SemQL Condition property.
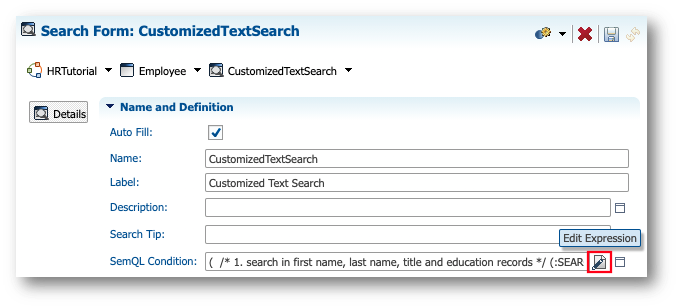
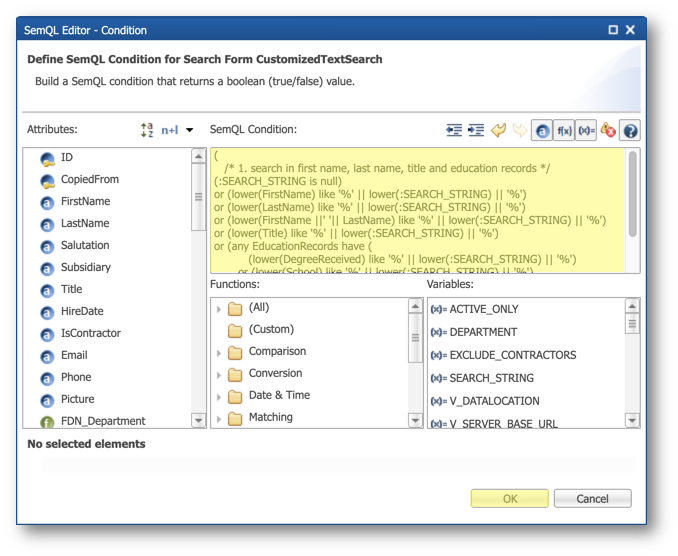
- Replace the existing SemQL Condition with the following one, and then click OK.
(
   /* 1. search in first name, last name, title and education records */
(:SEARCH_STRING is null)
or (lower(FirstName) like '%' || lower(:SEARCH_STRING) || '%')
or (lower(LastName) like '%' || lower(:SEARCH_STRING) || '%')
or (lower(FirstName ||' '|| LastName) like '%' || lower(:SEARCH_STRING) || '%')
or (lower(Title) like '%' || lower(:SEARCH_STRING) || '%')
or (any EducationRecords have (
          (lower(DegreeReceived) like '%' || lower(:SEARCH_STRING) || '%')
       or (lower(School) like '%' || lower(:SEARCH_STRING) || '%')
       )
    )
)
- Select the following Search Parameters in the table view and then click the Delete button:
- Department
- ExcludeContractors
- ActiveOnly
- Save your work.
Modify the Employee business view
You will now edit the Employee business view to add your new search form.
- Navigate to Entities > Employee > Business Views in the Model Design view and double-click Employee.
- In the Transitions section of the editor, select EmployeeEO in the table view.
- Select the Display Properties finger tab of the Properties view, and then click the Edit button next to the Search Configuration property.
- Select the Customized Text Search in the Available column and move it to the second position in the list using the Move Up button.
- Deselect Text(Built-in) and then click OK.
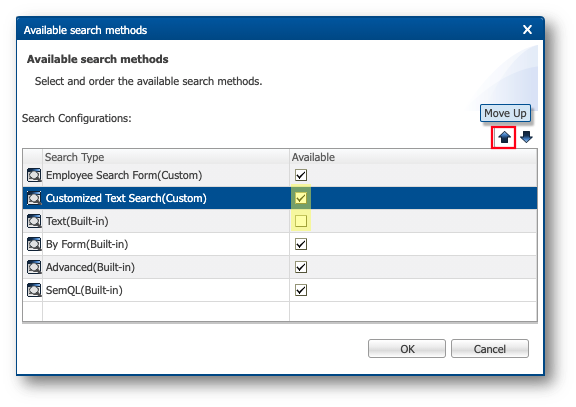
- Save your work.
Modify the Global Search configuration
You will now modify the Global Search configuration to replace the search type used for employees with your new search form.
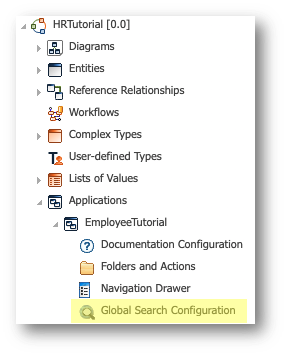
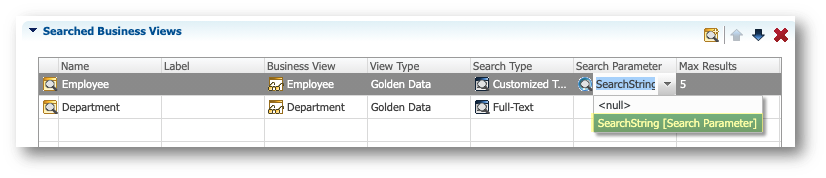
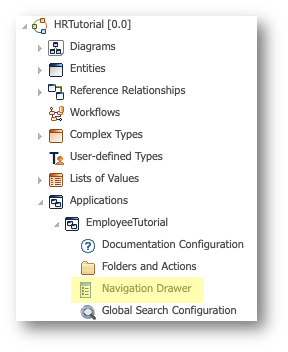
- Navigate to Applications > EmployeeTutorial in the Model Design view and then double-click Global Search Configuration.
- In the Searched Business Views section of the editor, select Employee in the table view, and then set the Search Type to Customized Text Search.
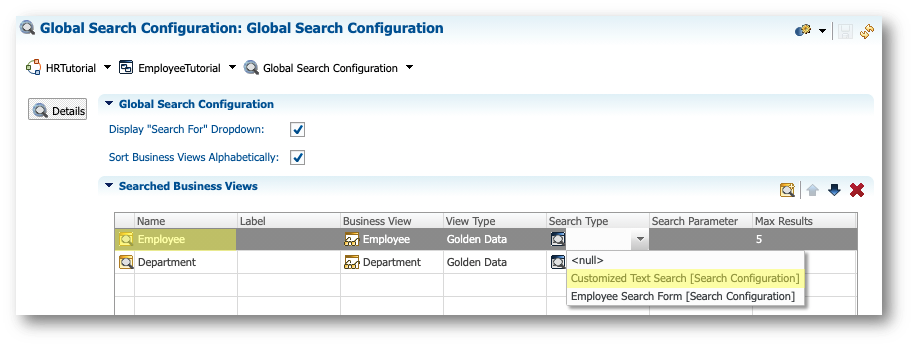
- Set the Search Parameter to
SearchString.
- Save your work.
- In the Application Builder, right-click on the root node in the Model Design view, corresponding to the HRTutorial [0.0] model, and then select Validate.
The validation report should raise no error.
Test the enhanced Global Search
It is now time to test your new search form.
- Open your application from the Welcome page.
- Open the user menu on the top-right corner, and then select Refresh Application.
- Select Global Search in the navigation drawer.
- Search for
richard cameronand click the Search button.
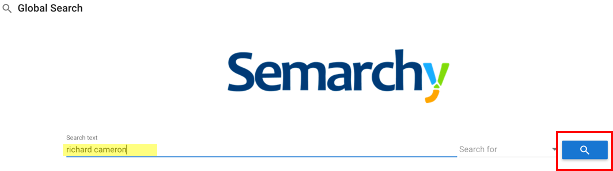
- The Global Search is now able to retrieve an employee when you type in a full name.
- Try other searches:
amit brandaarchitectoxford
Your Global Search is now configured to be more flexible.
Congratulations!
You have successfully enhanced the user experience by adding search forms to your application.
To summarize:
- You have created the EmployeeSearchForm form with its parameters and its SemQL condition.
- You have tested your search form with various search criteria.
- You have learned how to save filters and share filters with other users.
- You have enhanced the Global Search to have it search on employees' full names.
The next section of this tutorial will focus on improving the look and feel of your application.
Now, you will focus on enhancing the user-friendliness of your application.
Your application relies on a folder structure and a navigation drawer located on the left side of the interface. The next sections will guide you through optimizing their content to make your application more user-friendly.
Learning outcomes
- Creating an image library.
- Configuring your application branding.
- Adding the Contractors business view.
- Defining a folder structure with new application actions.
- Defining the navigation drawer (i.e., the main menu) for your application.
- Adding a link to an external resource in your navigation drawer.
Semarchy xDM allows you to load and store images into image libraries and access the images with a URL. The images can then be assigned to folders, actions, cards, etc.
In this section, you will learn how to create a new image library and import some images from the data-authoring\pictures folder of the tutorial resources.
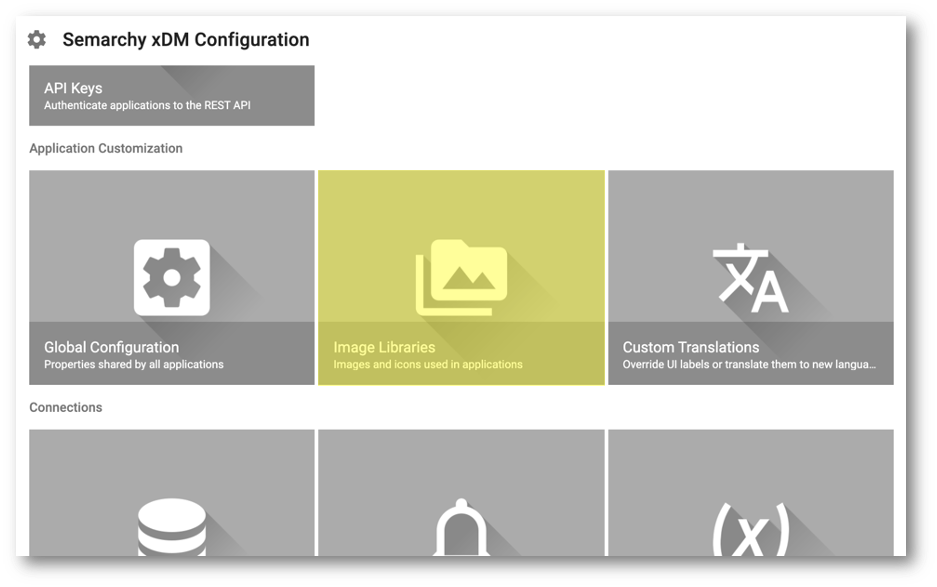
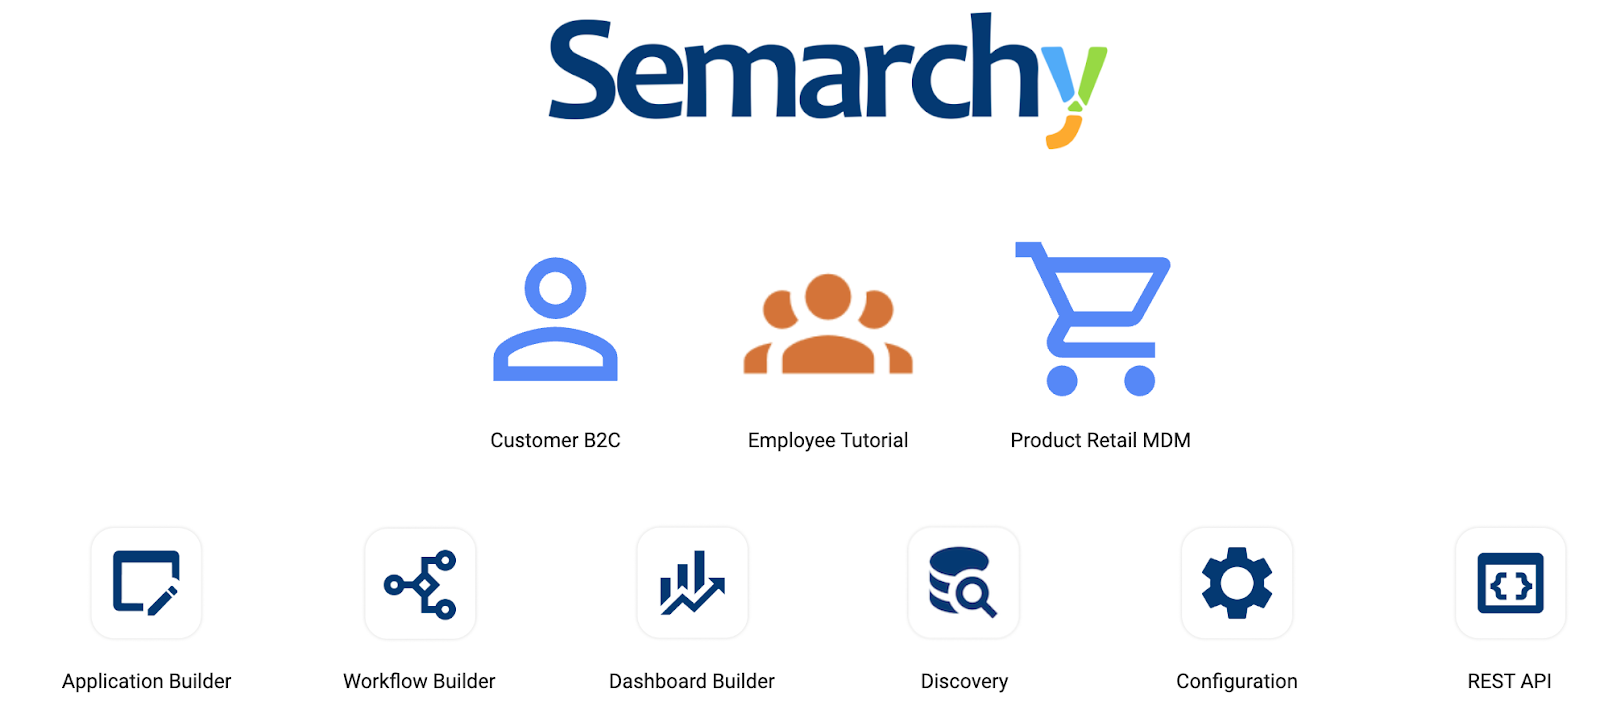
- Select Configuration on the Welcome page.
- Scroll down to Application Customization and click Image Libraries.
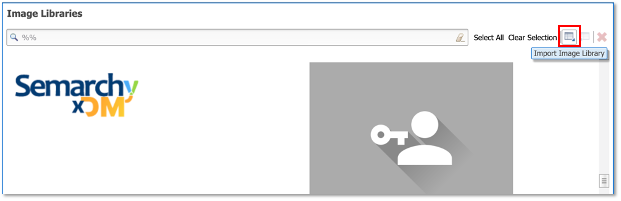
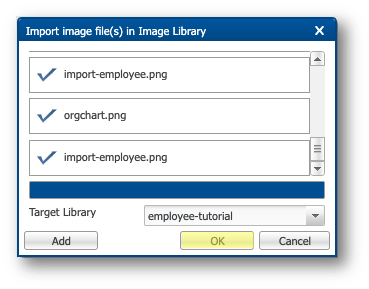
- Click the Import Image Library button to open the import wizard.
- Click Add to load the image files provided in the tutorial resources.
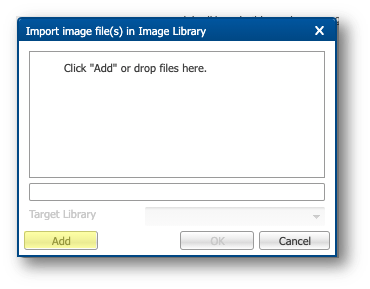
- Select all the files in the
data-authoring\pictures\image-libraryfolder of the tutorial resources, and click Open. - Once the files are loaded, set the Target Library to Create a new library.
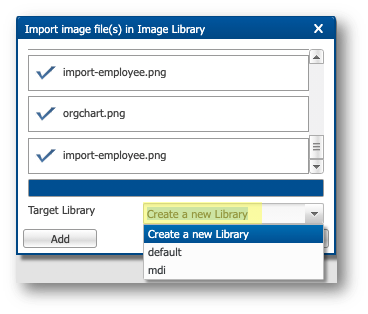
- Set the Name to
employee-tutorialand click OK.
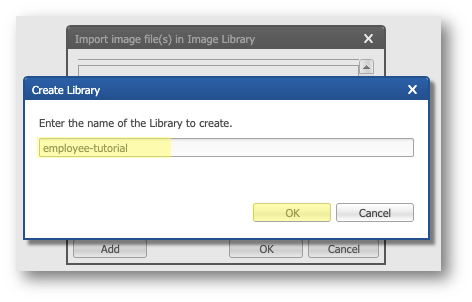
- Click OK to complete the image library creation.
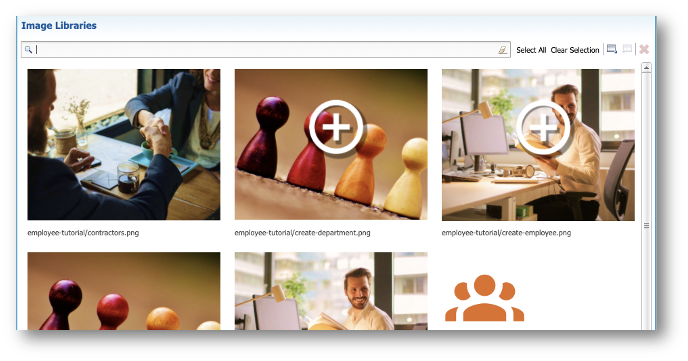
- The images are now available for your application.
Congratulations!
You have successfully created an image library. You will use the images stored within it in the upcoming sections.
Semarchy xDM allows you to adapt the applications to your brand image and guidelines.
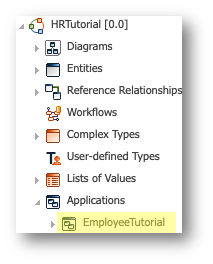
- In the Application Builder, open the HRTutorial model.
- Expand the Applications > EmployeeTutorial node and open EmployeeTutorial.
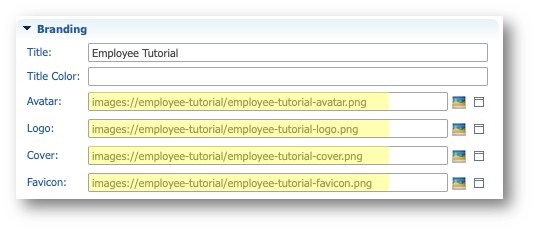
- In the Branding section, set the images in the following fields:
- Avatar:
images://employee-tutorial/employee-tutorial-avatar.png - Logo:
images://employee-tutorial/employee-tutorial-logo.png - Cover:
images://employee-tutorial/employee-tutorial-cover.png - Favicon:
images://employee-tutorial/employee-tutorial-favicon.png
- In the Display Properties section, set the Sort Method to Position.
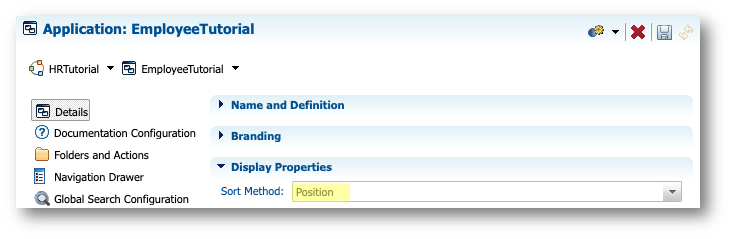
- Save your work.
See your changes in action
- Open the application from the Welcome page.
- In the user menu on the top-right corner, click Refresh Application.
- Notice that the logo of the homepage has been updated with the application logo.
- The navigation drawer has been updated with the application cover.
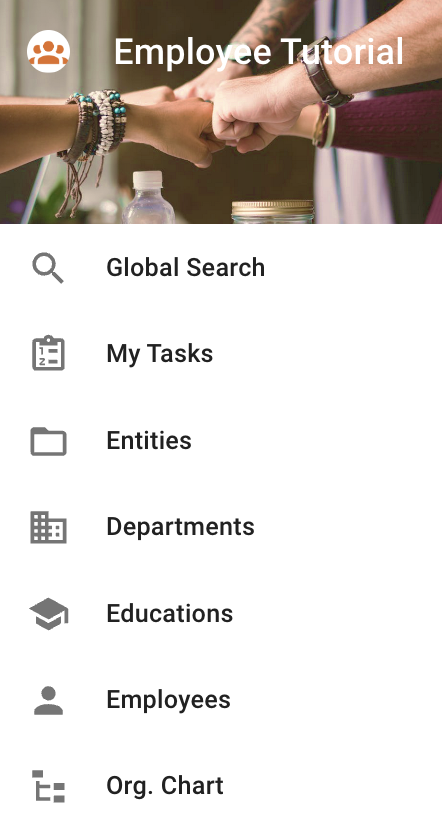
- The avatar has been updated with the application avatar.

- The browser favicon has been updated with the application favicon.
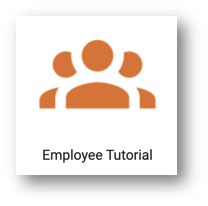
- Go back to the Welcome page to see that the application avatar is also used here.
Congratulations!
You have configured the branding for your application. Next, you will enrich your application with a new business view.
So far, you can browse your employee data through the Employees business view or the Org. Chart business view.
The goal of this section is to have you add the Contractors view with a predefined filter on contractors.
- In the Application Builder, open the HRTutorial model.
- Expand the Entities > Employee > Business Views node, right-click Employee and click Duplicate.
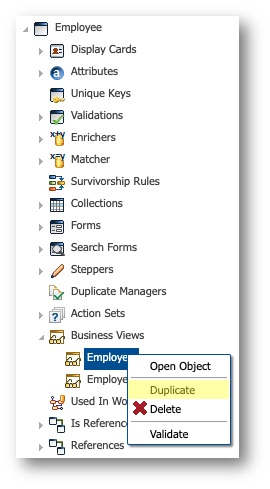
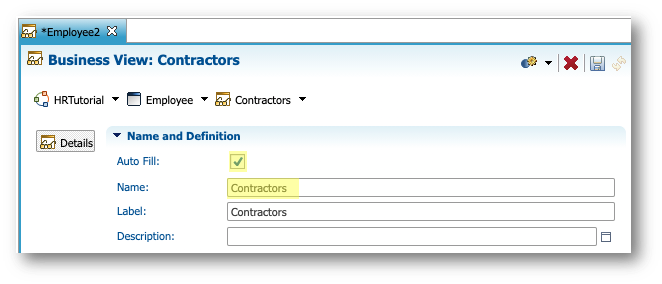
- Open the newly created Employee2 business view.
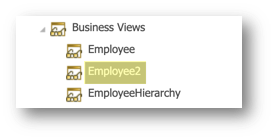
- Select Auto Fill and set the Name to
Contractors.
- Next to the Root Filter property, click the Edit Expression button.
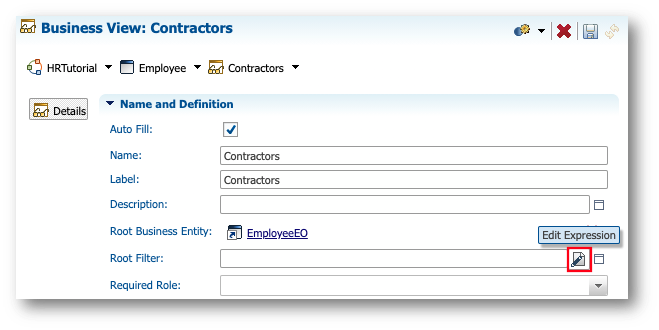
- Enter the following SemQL expression and click OK.
IsContractor = '1'
- Save your work.
- In the Application Builder, right-click the root node in the Model Design view, corresponding to the HRTutorial [0.0] model, and click Validate.
The validation report should raise no error.
Congratulations!
You have successfully added a new business view to your application. Later, you will add this business view as an action from your folders menu.
Next, you will configure folders and actions.
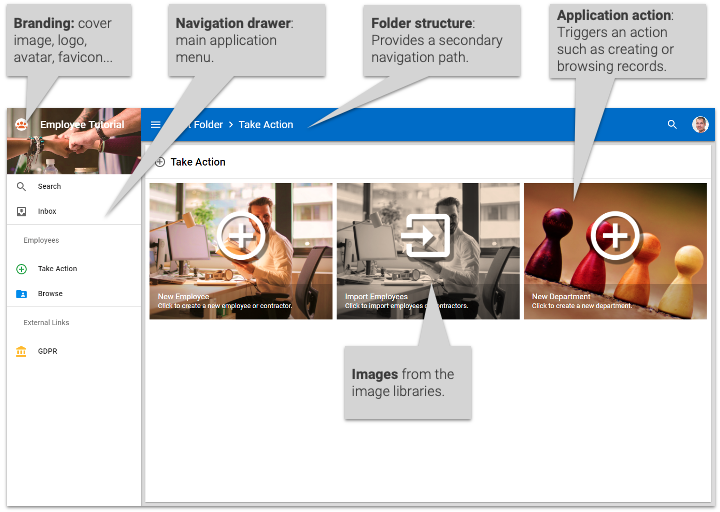
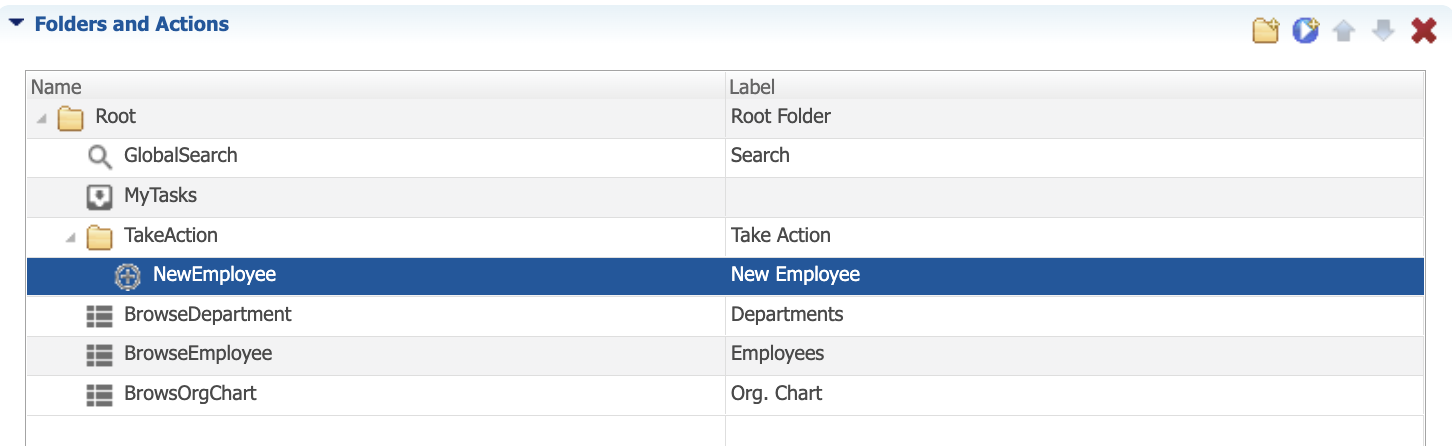
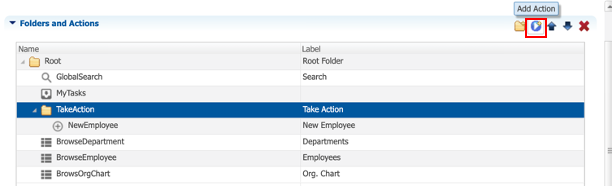
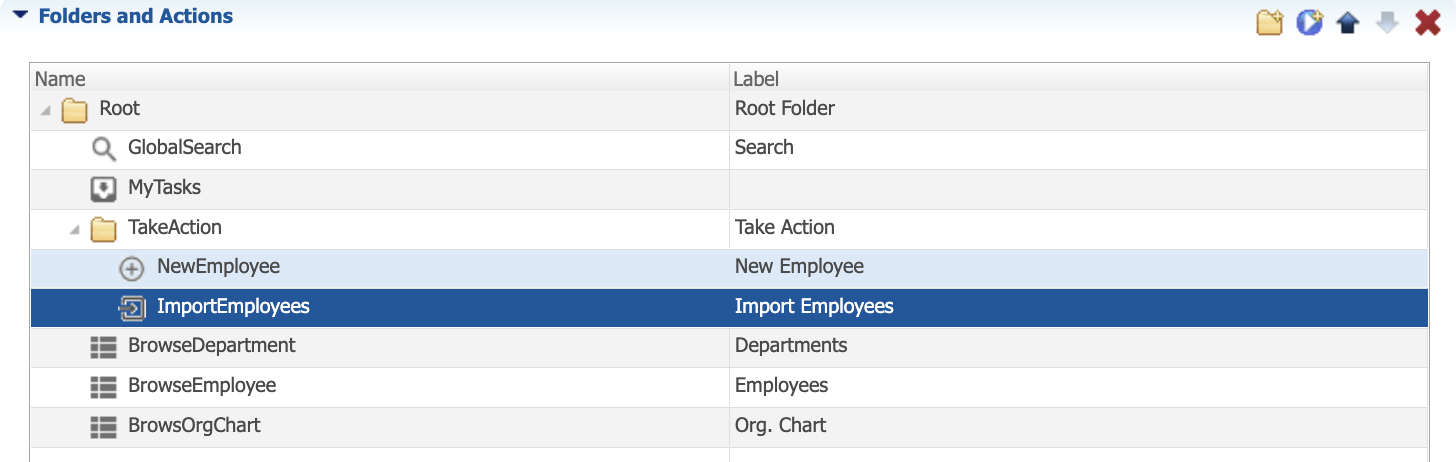
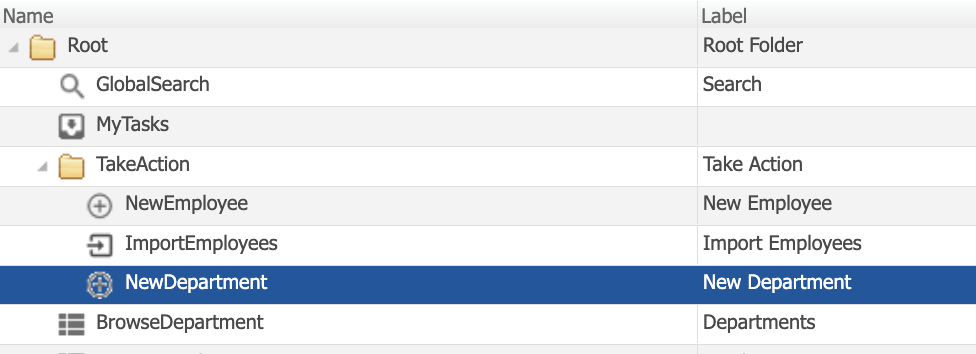
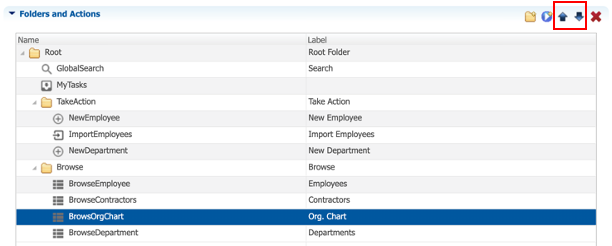
In the next sections, you will be guided to create a folder structure, as shown in the image below.
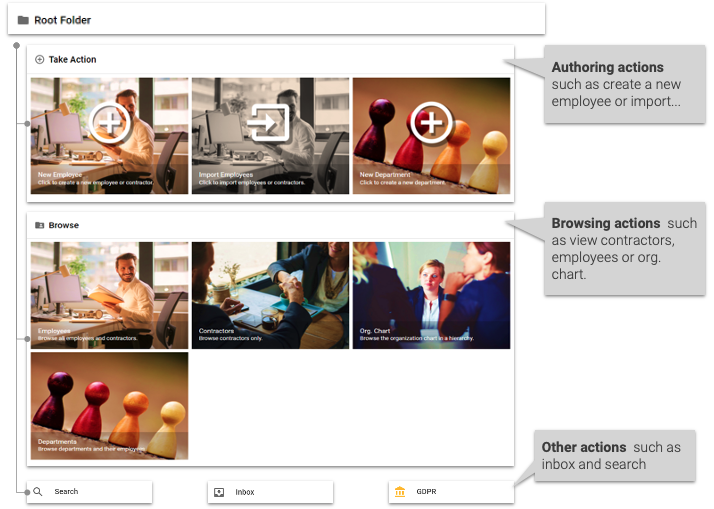
The root folder of your application will contain two folders:
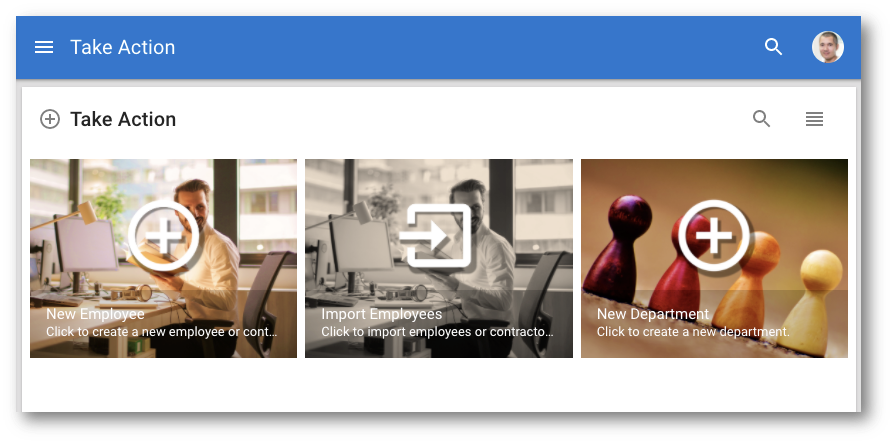
- The Take Action folder, with three actions to create or import employee records and create department records.
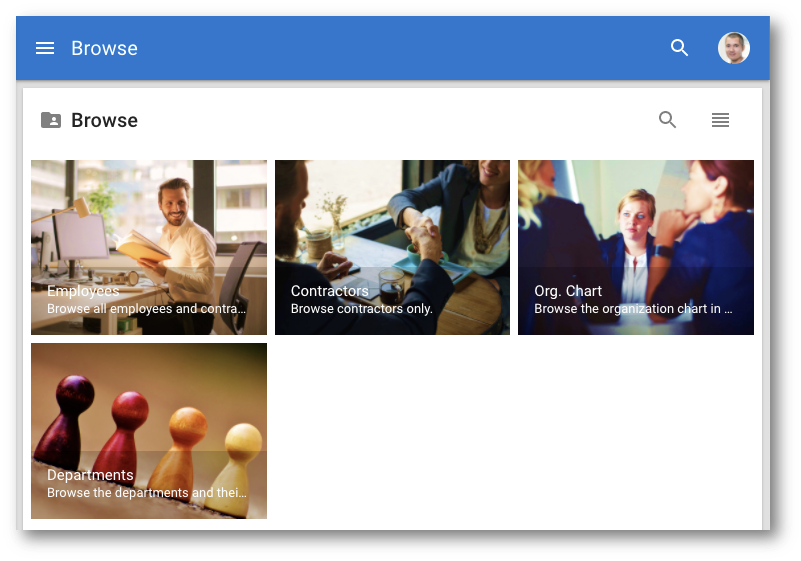
- The Browse folder, with four actions to browse employees, contractors, organization charts, and departments, respectively.
Remove the unused actions
You will start by removing unused actions from the navigation drawer.
- In the Application Builder, open the HRTutorial model.
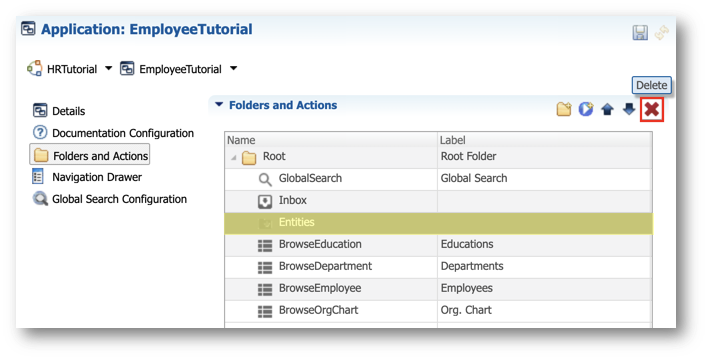
- Expand the Applications > EmployeeTutorial node and open Folders and Actions.
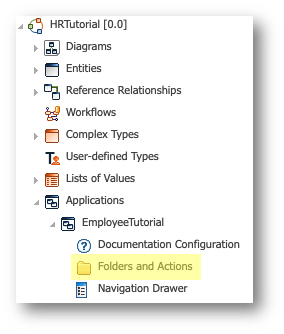
- In the Folders and Actions table, delete:
- Entities
- BrowseEducation

Rename the Global Search feature
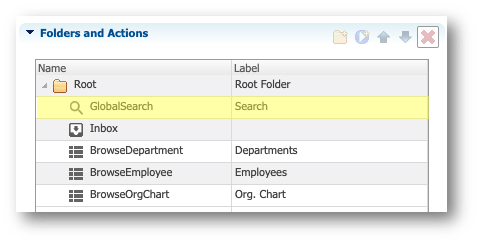
In the Folders and Actions table, select GlobalSearch and set the Label to Search.
Configure new folders and actions
You will now add folders and actions to your application.
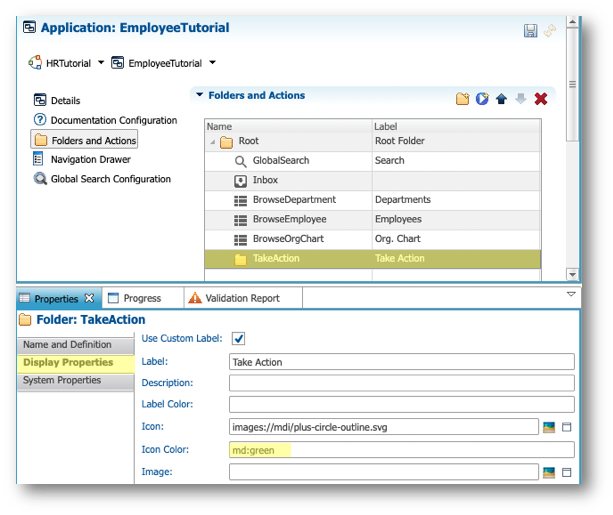
Create the TakeAction folder
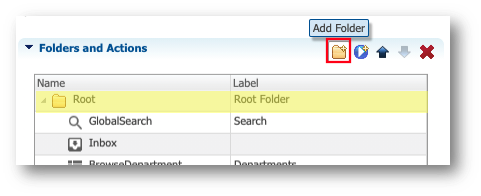
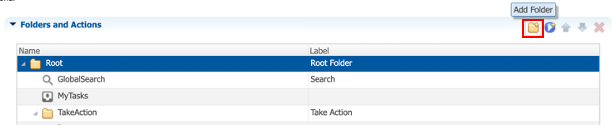
- In the Folders and Actions table, select Root and click Add Folder.
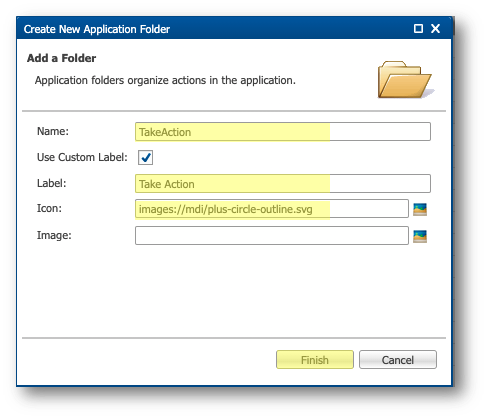
- Enter the following values and click Finish:
- Name:
TakeAction - Label:
Take Action - Icon:
images://mdi/plus-circle-outline.svg
- In the Folders and Actions table, select TakeAction, select the Display Properties finger tab in the Properties view, and set the Icon Color to
md:green.
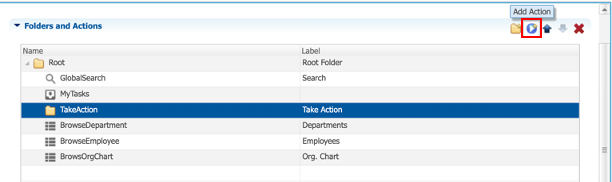
- Drag the TakeAction folder and drop it between MyTasks and BrowseDepartment.
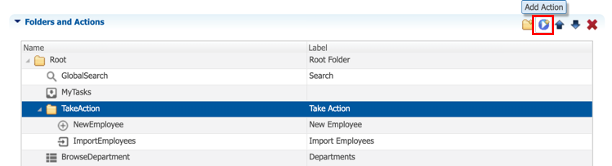
- In the Folders and Actions table, reselect the TakeAction folder, and click Add Action.
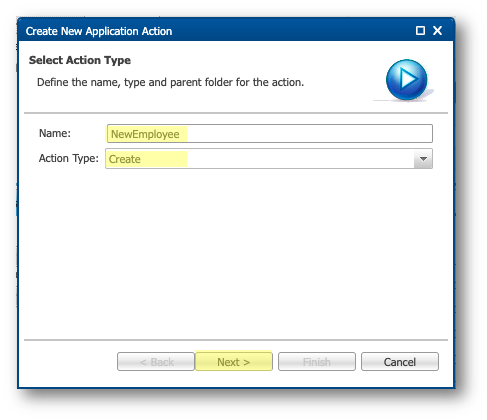
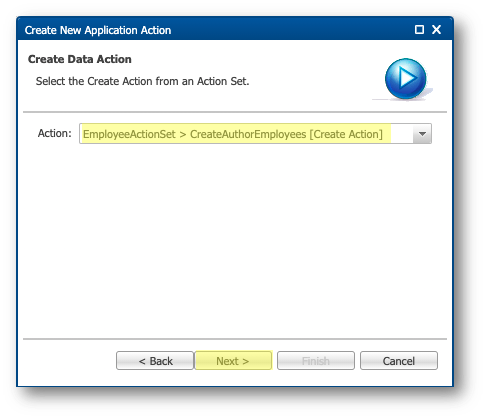
- Enter the following values and click Next:
- Name:
NewEmployee - Action Type: Create
- Set the Action to EmployeeActionSet > CreateAuthorEmployees [Create Action] and click Next.
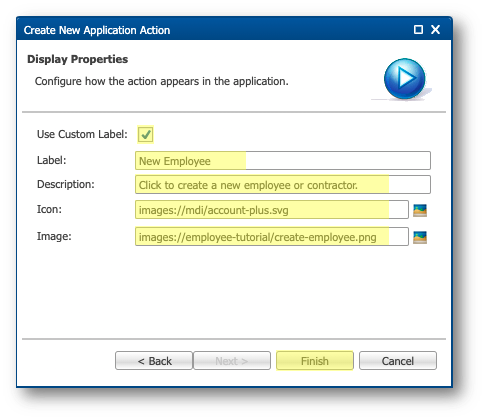
- Enter the following values and click Finish:
- Select Use Custom Label
- Label:
New Employee - Description:
Click to create a new employee or contractor. - Icon:
images://mdi/account-plus.svg - Image:
images://employee-tutorial/create-employee.png
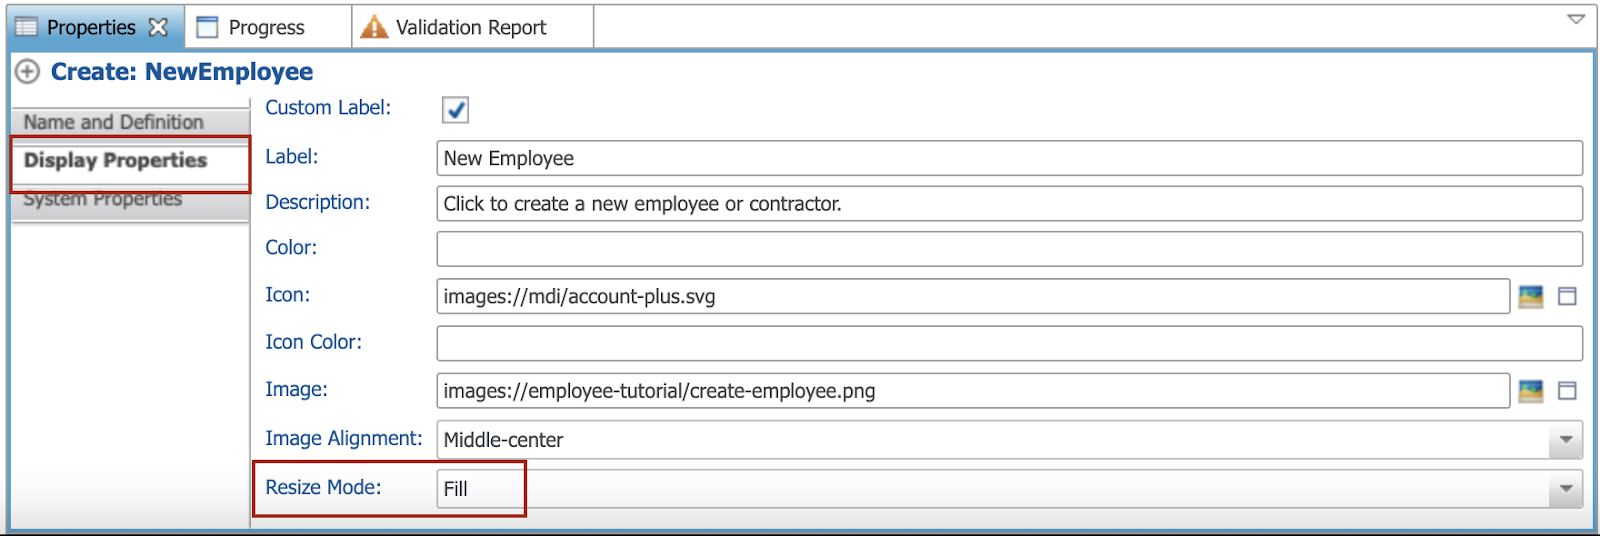
- Expand the TakeAction folder and select NewEmployee.
- Select the Display Properties finger tab in the Properties view, and set the Resize Mode to Fill.
Add the ImportEmployees action
You will now add a new action to import Employee records.
- In the Folders and Actions table, select TakeAction and click Add Action.
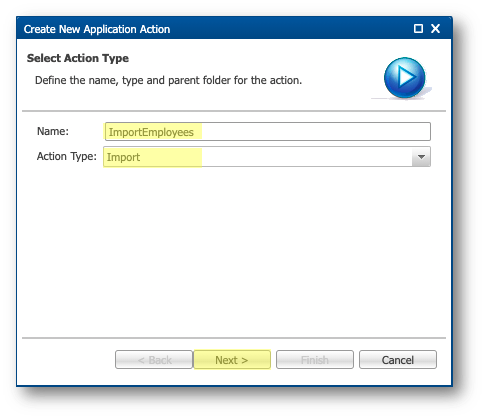
- Enter the following values and then click Next:
- Name:
ImportEmployees - Action Type: Import
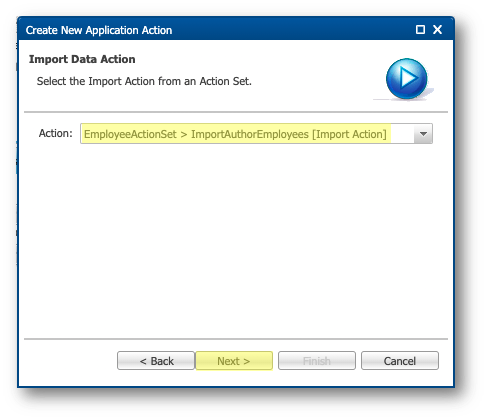
- Set the Action to EmployeeActionSet > ImportAuthorEmployees [Import Action] and click Next.
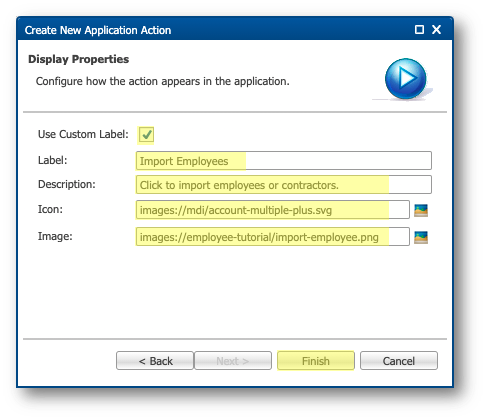
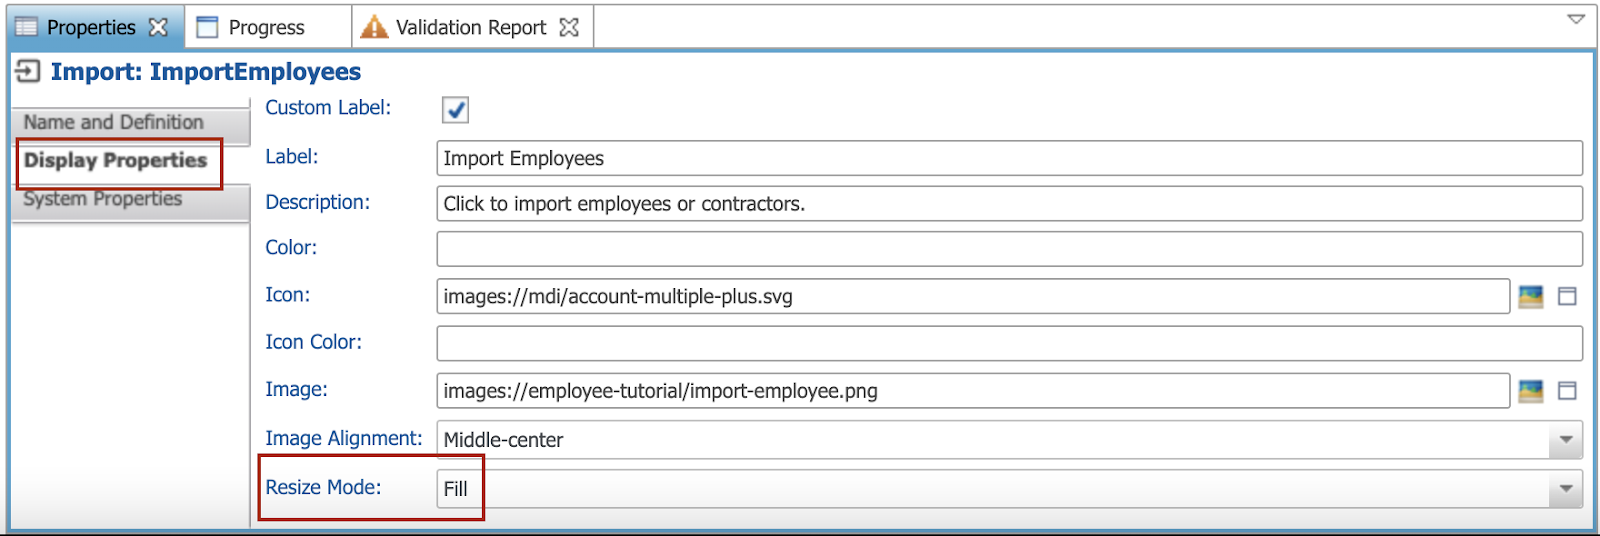
- Enter the following values and click Finish:
- Select Use Custom Label
- Label:
Import Employees - Description:
Click to import employees or contractors. - Icon:
images://mdi/account-multiple-plus.svg - Image:
images://employee-tutorial/import-employee.png
- Select the ImportEmployees action.
- Select the Display Properties finger tab in the Properties view and set the Resize Mode to Fill.
Add the NewDepartment action
Now, you will create a third action to create a Department record.
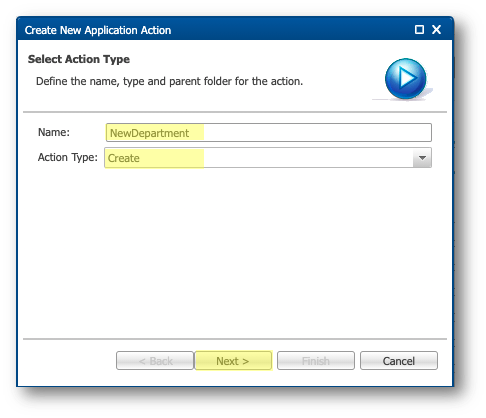
- In the Folders and Actions table, select TakeAction and click Add Action.
- Enter the following values and click Next:
- Name:
NewDepartment - Action Type: Create
- Set the Action to DepartmentActionSet > CreateAuthorDepartments [Create Action] and click Next.
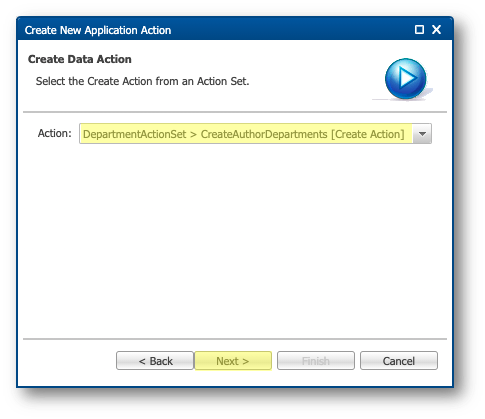
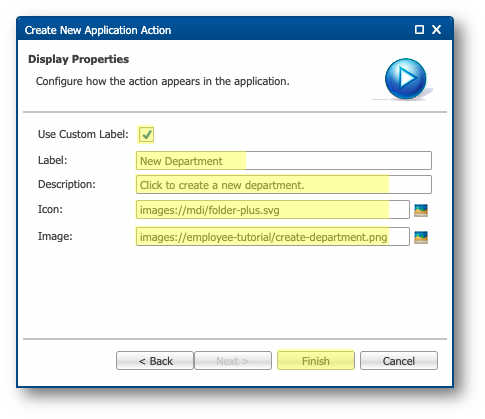
- Enter the following values and then click Finish:
- Select Use Custom Label
- Label:
New Department - Description:
Click to create a new department. - Icon:
images://mdi/folder-plus.svg - Image:
images://employee-tutorial/create-department.png
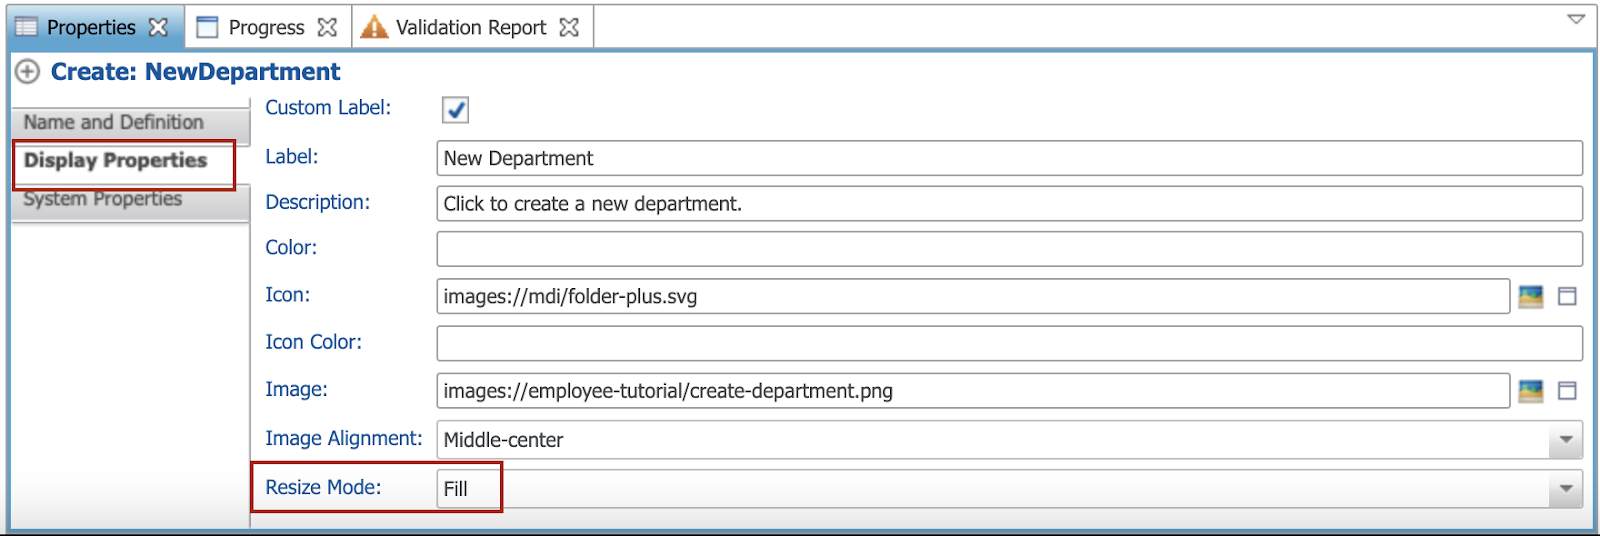
- Select the NewDepartment action.
- Select the Display Properties finger tab in the Properties view, and then set the Resize Mode to Fill.
Add the Browse folder
You will now create the Browse folder.
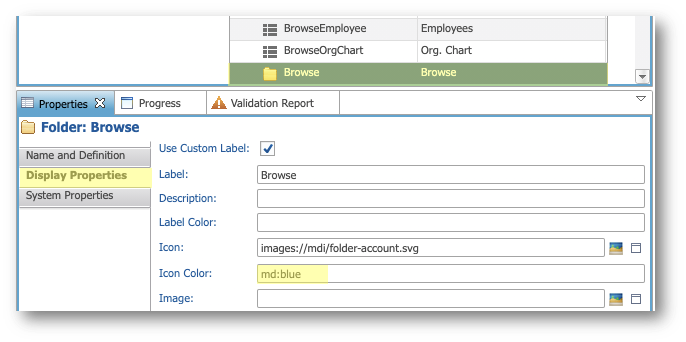
- In the Folders and Actions table, select Root, and click Add Folder.
- Enter the following values and click Finish:
- Name:
Browse - Label:
Browse - Icon:
images://mdi/folder-account.svg

- In the Folders and Actions table, select Browse.
- Select the Display Properties finger tab in the Properties view and set the Icon Color to
md:blue.
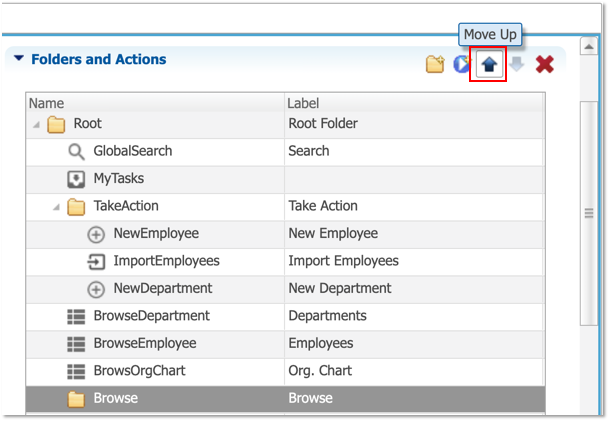
- Move the Browse folder between TakeAction and BrowseDepartment using the Move Up button.
- Select BrowseDepartment, select the Display Properties finger tab in the Properties view and enter the following values:
- Description:
Browse the departments and their employees. - Image:
images://employee-tutorial/departments.png - Resize Mode: Fill
- Select BrowseEmployee, select the Display Properties finger tab and enter the following values:
- Description:
Browse all employees and contractors. - Image:
images://employee-tutorial/employees.png - Resize Mode: Fill
- Select BrowseOrgChart, select the Display Properties finger tab in the Properties view and enter the following values:
- Description:
Browse the organization chart in a hierarchy and their employees. - Image:
images://employee-tutorial/orgchart.png - Resize Mode: Fill
Add the BrowseContractors action
You will now create a new action to browse contractors using the Contractors business view you created earlier.
- In the Folders and Actions table, select Browse and click Add Action.
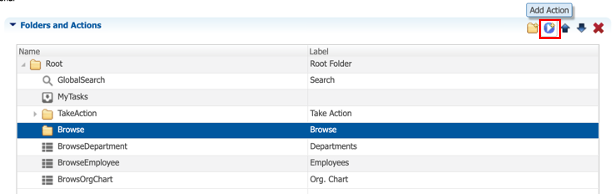
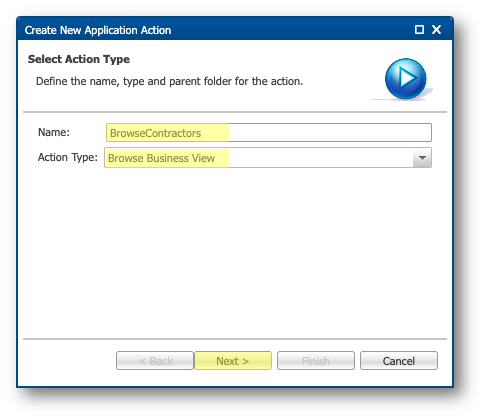
- Enter the following values and click Next:
- Name:
BrowseContractors - Action Type: Browse Business view
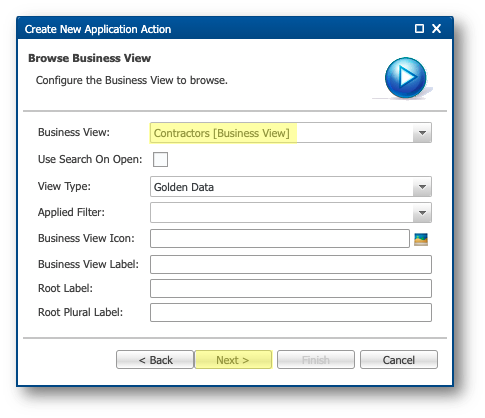
- Set the Business View to Contractors and click Next.
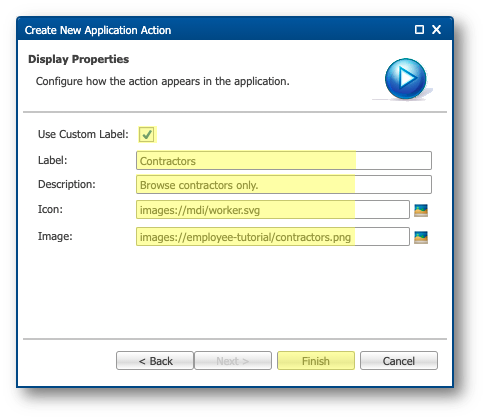
- Enter the following values and click Finish:
- Select Use Custom Label
- Label:
Contractors - Description:
Browse contractors only. - Icon:
images://mdi/worker.svg - Image:
images://employee-tutorial/contractors.png
- Expand the Browse folder.

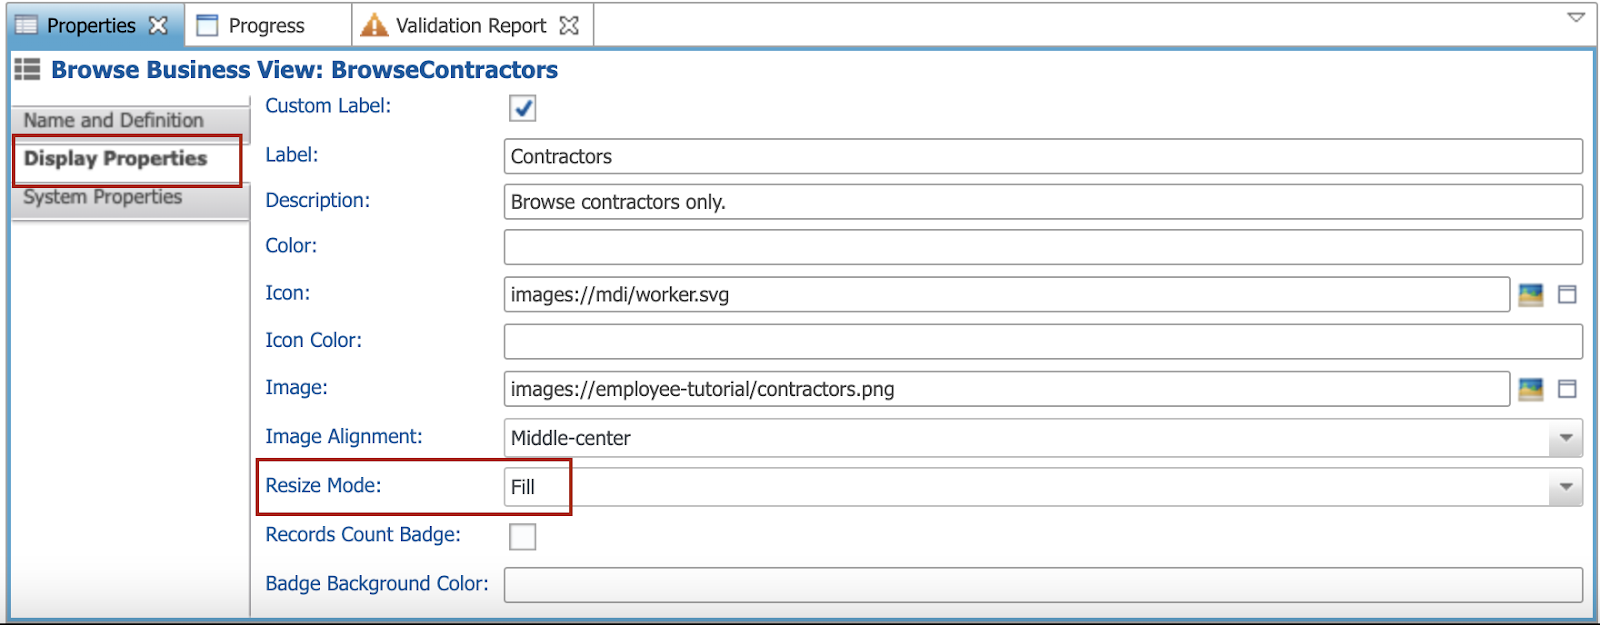
- Select BrowseContractors
- Select the Display Properties finger tab of the Properties view and set the Resize Mode to Fill.
- Drag and drop the following actions into the Browse folder:
- BrowseDepartment
- BrowseEmployee
- BrowseOrgChart
- Order the actions in the Browse folder as below with the Move Up and Move Down buttons:
- BrowseEmployee
- BrowseContractors
- BrowseOrgChart
- BrowseDepartment
- Save your work.
- In the Application Builder, right-click on the root node in the Model Design view, corresponding to the HRTutorial [0.0] model, and click Validate. The validation report should raise no error.
Congratulations!
You have configured the folder structure and application actions.
Next, you will configure the navigation drawer.
The goal of this section is to configure the navigation drawer (i.e., the main menu) of your application.

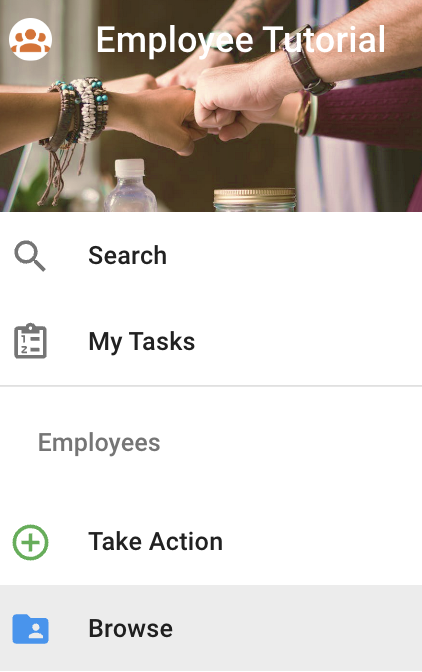
The menu will have four items:
- Search: opens the Global Search.
- Inbox: opens the Inbox (used in workflows).
- Take Action: opens the Take Action folder you created earlier.
- Browse: opens the Browse folder you created earlier.
To build the navigation drawer for your application, follow these steps:
- In the Application Builder, open the HRTutorial model.
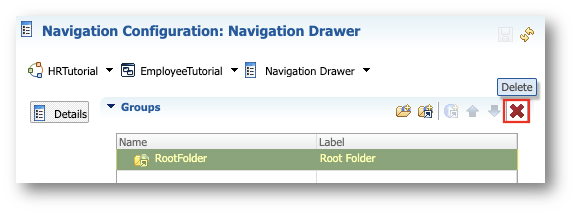
- Expand the Applications > EmployeeTutorial node and open navigation drawer.
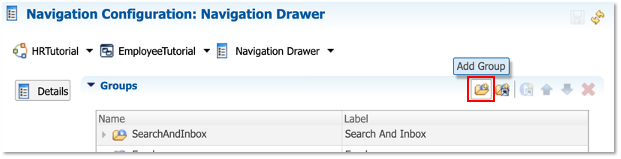
- In the Groups section, delete RootFolder.
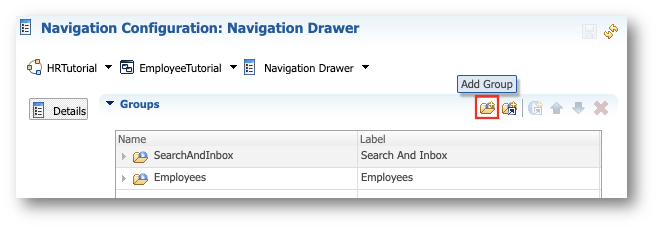
- Click Add Group.
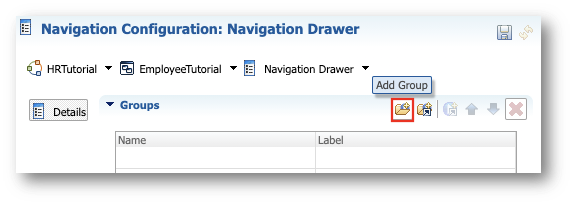
- Enter the following values and click Finish:
- Name:
SearchAndInbox - Deselect Show Label
- Deselect Divider
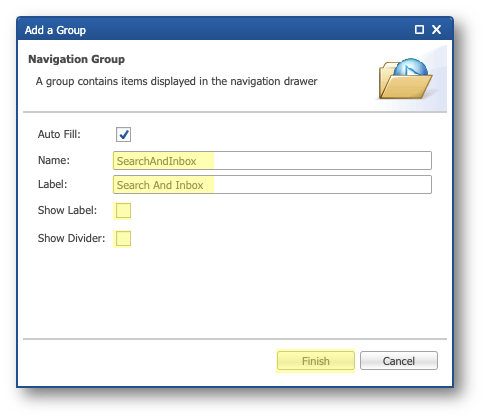
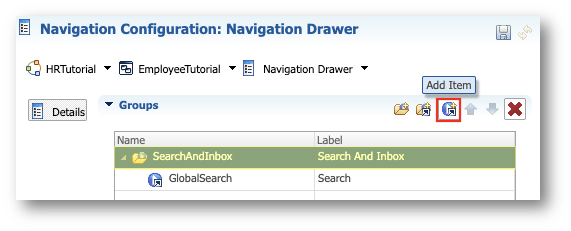
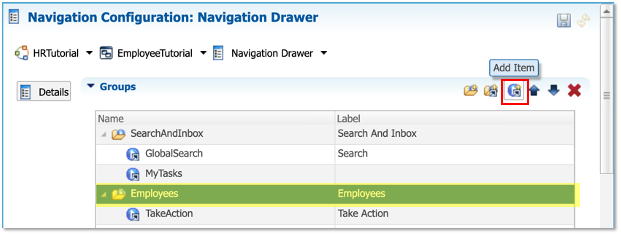
- Select SearchAndInbox, and click the Add Item button.
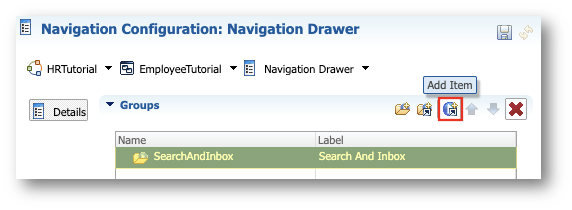
- Set the Action to Search [Global Search] and click Finish.

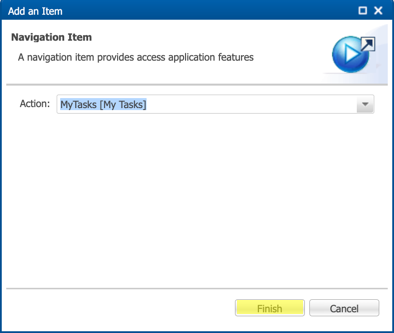
- Expand SearchAndInbox and click Add Item.
- Set the Action to MyTasks [My Tasks] and click Finish.
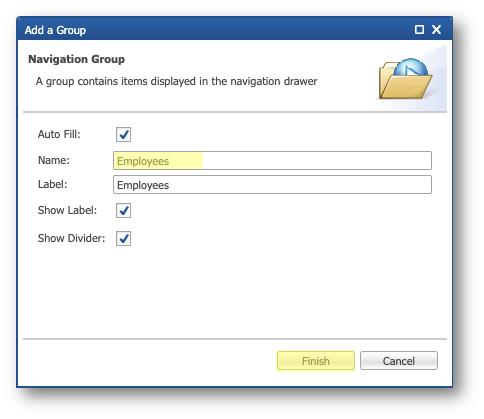
- Select Add Group in the Groups section.
- Set the Name to
Employeesand then click Finish.
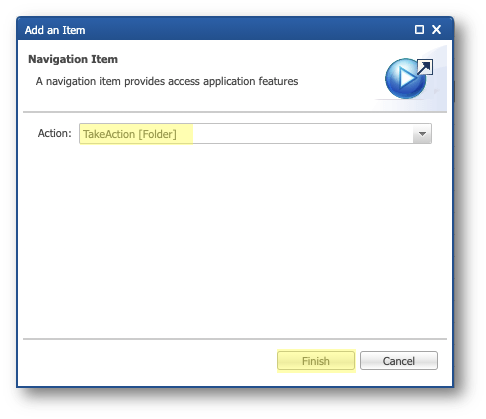
- Select Employees in the Groups table view and then click Add Item.
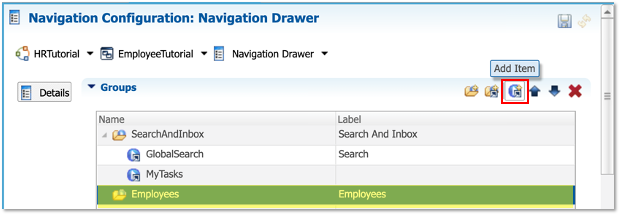
- Set the Action to TakeAction [Folder] and then click Finish.
- Select and expand Employees in the Groups table view, and then click Add Item.
- Set the Action to Browse [Folder] and then click Finish.

- Save your work.
- In the Application Builder, right-click on the root node in the Model Design view, corresponding to the HRTutorial [0.0] model, and then select Validate. The validation report should raise no error.
Congratulations!
You have successfully configured your application's navigation drawer.
It is now time to see your changes reflected in your application.
You can now see the results in the application.
- Open your application from the Welcome page. Notice the updated avatar.
- Open the user menu on the top-right corner, and then select Refresh Application.
- The navigation menu has been updated. Select Take Action.

- The menu offers the following actions:
- New Employee takes you to the AuthorEmployees stepper to create a new employee.
- Import Employees takes you to the AuthorEmployees stepper to import employees.
- New Department takes you to the AuthorDepartments stepper to create a new department.
- Select Browse in the navigation drawer.
- The menu offers the following actions:
- Employees takes you to the employee business view.
- Contractors takes you to the employee business view filter on contractors.
- Org. Chart takes you to the employee hierarchy view by managers.
- Departments takes you to the employee hierarchy view by departments.
Congratulations!
Good job! The application looks much better for your business users.
Next, you will add some external content to your application.
With Semarchy xDM, you can integrate external content via URLs into your application. You have the option to set up actions within your folders that either launch an external link in a separate browser window or tab, or embed it within the application.
Create the GDPR action
Now, you will incorporate a hyperlink to an external resource regarding the GDPR.
- Open the HRTutorial model in the Application Builder.
- Navigate to Applications > EmployeeTutorial in the Model Design view and double-click Folders and Actions.
- Select Root in the Folders and Actions table and then select Add Action.

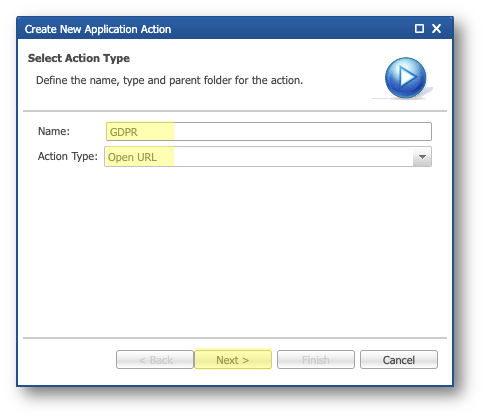
- Enter the following values and then click Next:
- Name:
GDPR - Action: Open URL
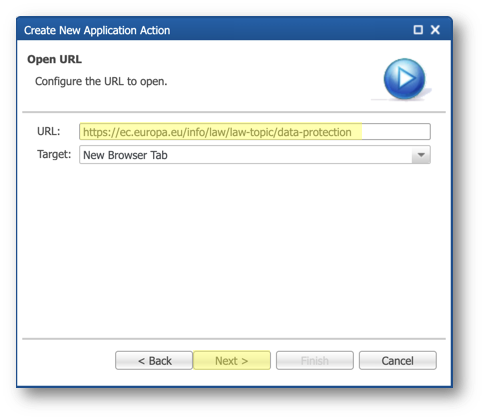
- Enter the following value and then click Next:
- URL:
https://ec.europa.eu/info/law/law-topic/data-protection
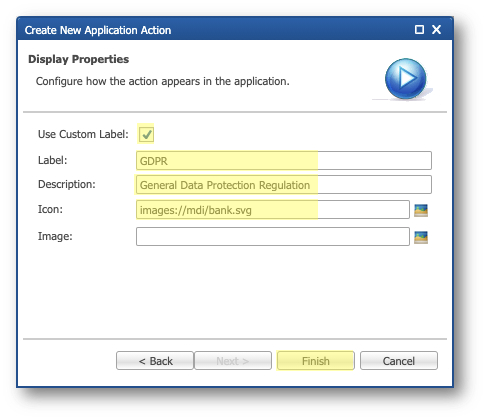
- Finally, enter the following values and then click Finish:
- Select Use Custom Label
- Label:
GDPR - Description:
General Data Protection Regulation - Icon:
images://mdi/bank.svg
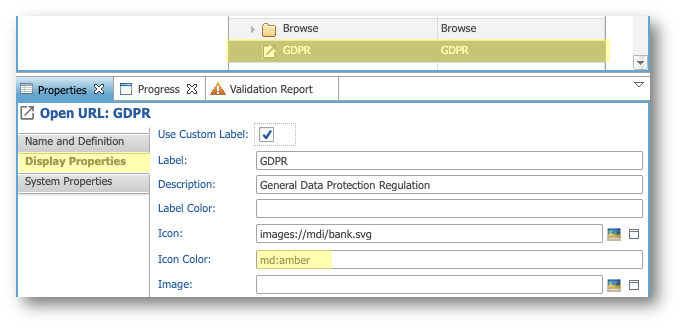
- Select GDPR in the table view of the editor.
- Select the Display Properties finger tab of the Properties view and then set the Icon Color to
md:amber.
- Save your work.
Add the GDPR action to the navigation drawer
You will now add the new action to the navigation drawer.
- Open the HRTutorial model in the Application Builder.
- Navigate to Applications > EmployeeTutorial in the Model Design view and then double-click navigation drawer.
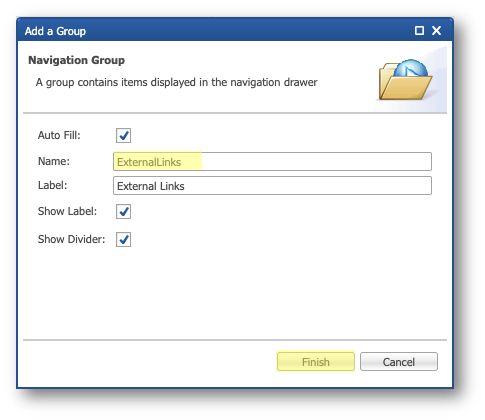
- Select Add Group in the Groups section.
- Set the Name to
ExternalLinksand then click Finish.
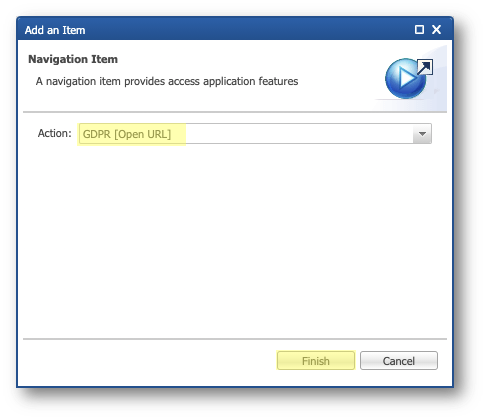
- Select ExternalLinks in the Groups table view and then click Add Item.

- Set the Action to GDPR [Open URL] and then click Finish.
- Save your work.
- In the Application Builder, right-click on the root node in the Model Design view, corresponding to the HRTutorial [0.0] model, and then select Validate.
The validation report should raise no error.
See your changes
You can now see the new external link in your application.
- Open your application from the Welcome page.
- Open the user menu on the top-right corner and then select Refresh Application.
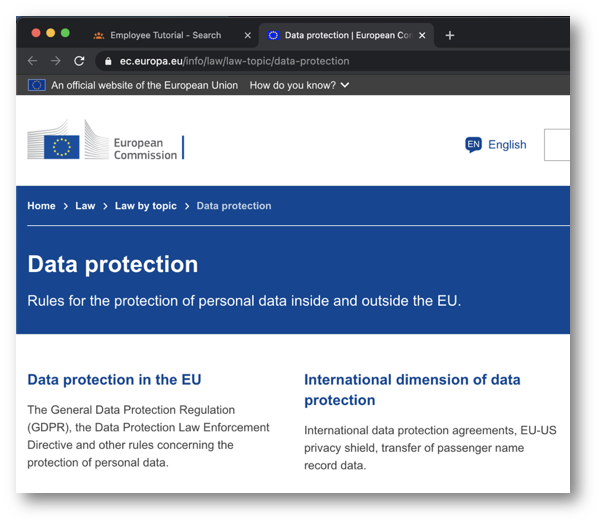
- The navigation menu has been updated. Select GDPR.
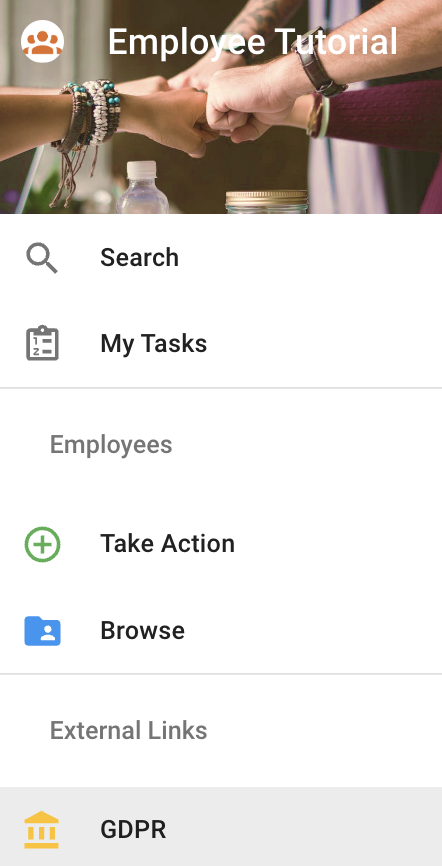
- The GDPR website opens in a new tab.
Congratulations!
You have successfully added an external link to your application.
Excellent job! Throughout this tutorial, you have learned how to customize the search experience, branding, and navigation in your application. You now have a complete and user-friendly application for data authoring.
Learning recap
- You have created your own search forms and customized the Global Search.
- You have added an image library to load your own set of images.
- You have customized the application branding, folders, actions, and navigation drawer.
- You have added a link to an external resource in the navigation drawer.
Next steps
If you have not done so already, you can either follow the Data Consolidation track and create a customer B2B application to consolidate data from various sources, or the Data Publishing & Consumption track to learn how to query and load data via using the SQL and REST APIs.
Thank you for completing this tutorial.