This tutorial will guide you through the process of installing and configuring a REST client in order to call the REST API on Semarchy xDM.
Learning outcomes
- Installing and configuring Postman.
- Running your first REST query.
Learning track
This tutorial is the fourth unit within the Data Publishing & Consumption track, which is composed of SQL-based and REST-based tutorials.
The current unit is a prerequisite for the REST-based units of the Data Publishing & Consumption track:
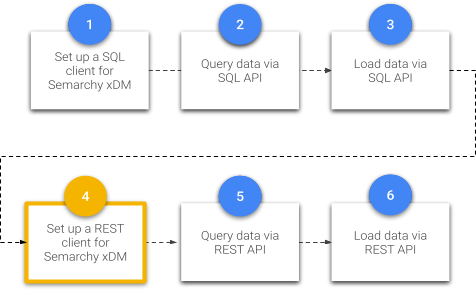
Before following this tutorial, you must have set up Semarchy xDM and completed the Customer B2C demo tutorial.
If you have not yet, complete the Quick Install and Demo Applications tracks.
Otherwise, enjoy this tutorial!
While it is possible to make calls to the REST API via your web browser or using a command line tool like cURL, we recommend using a tool specialized for API development environments. This will be particularly useful for the two tutorial units dedicated to the REST API, namely Query data via the REST API and Load data via the REST API.
Therefore, we recommend Postman, which is available for free and easy to use. If you prefer to use another tool that your organization supports, you are welcome to do so.
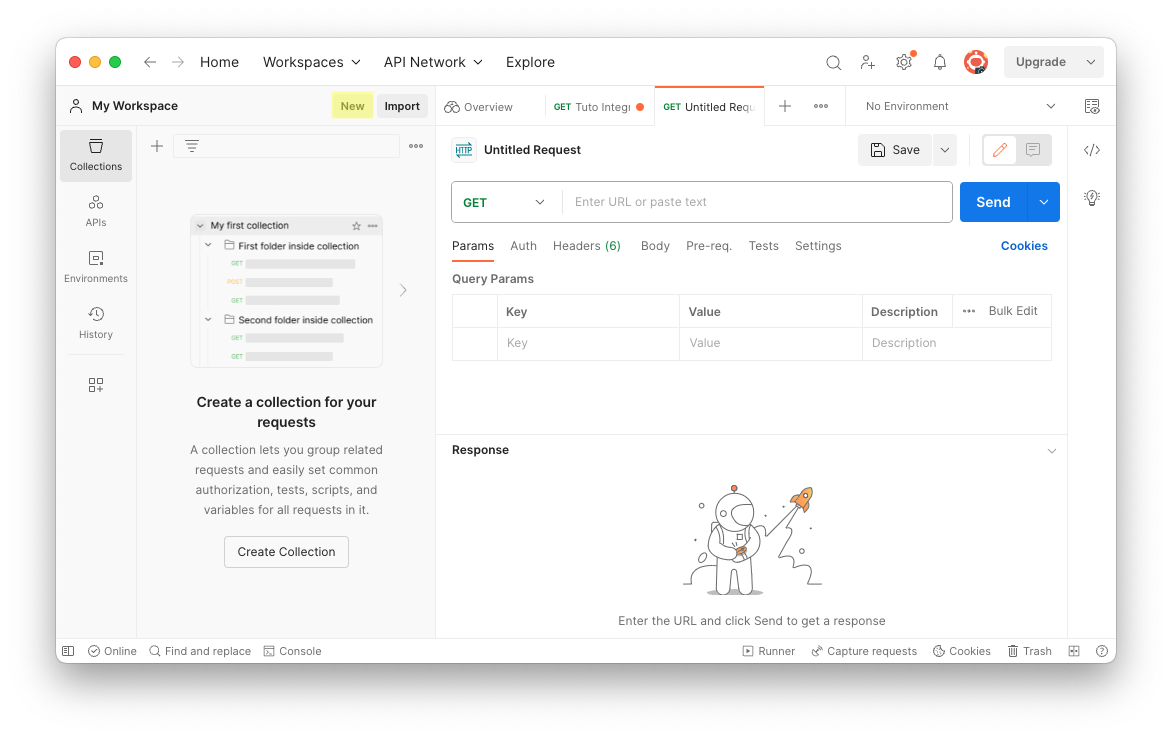
Get the Postman app

- To begin, download the Postman app for your platform from the Postman website.
- Install the application.
Initialize a request
Follow the instructions below to initialize your first request in Postman.
- In the My Workspace side navigation menu, click on the New button.
- Select Collection.
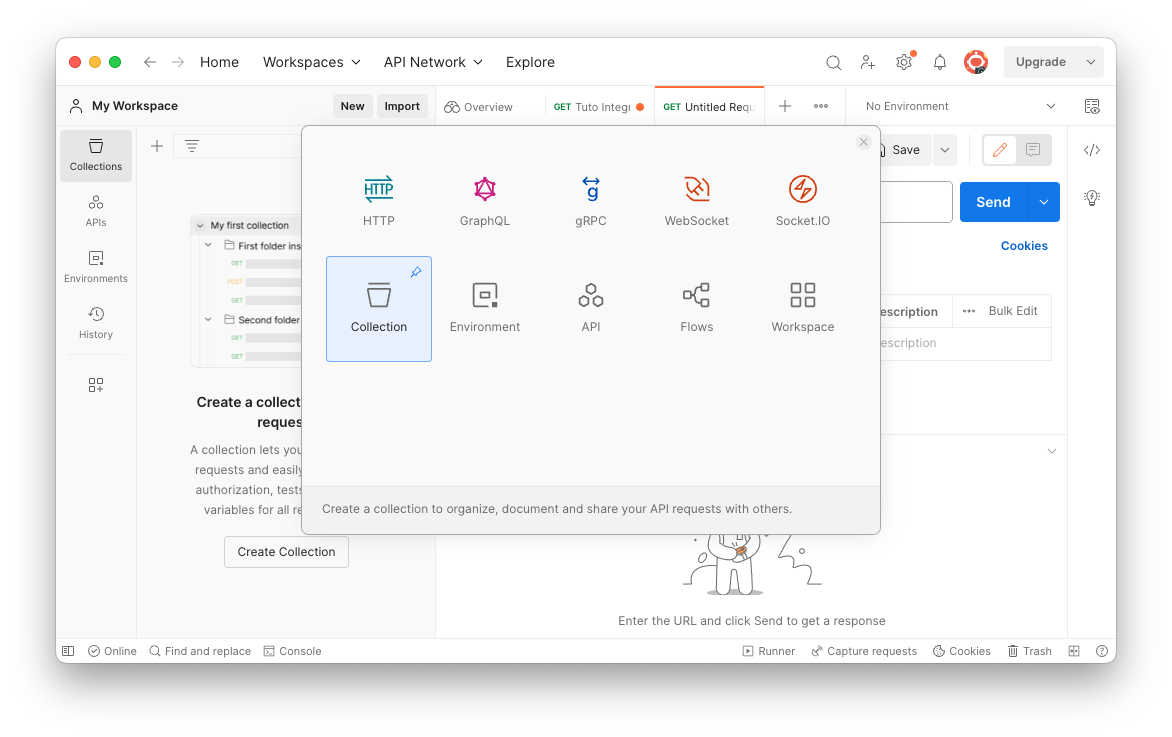
- Enter a name for the collection (i.e., the virtual folder) where you want to store your request.
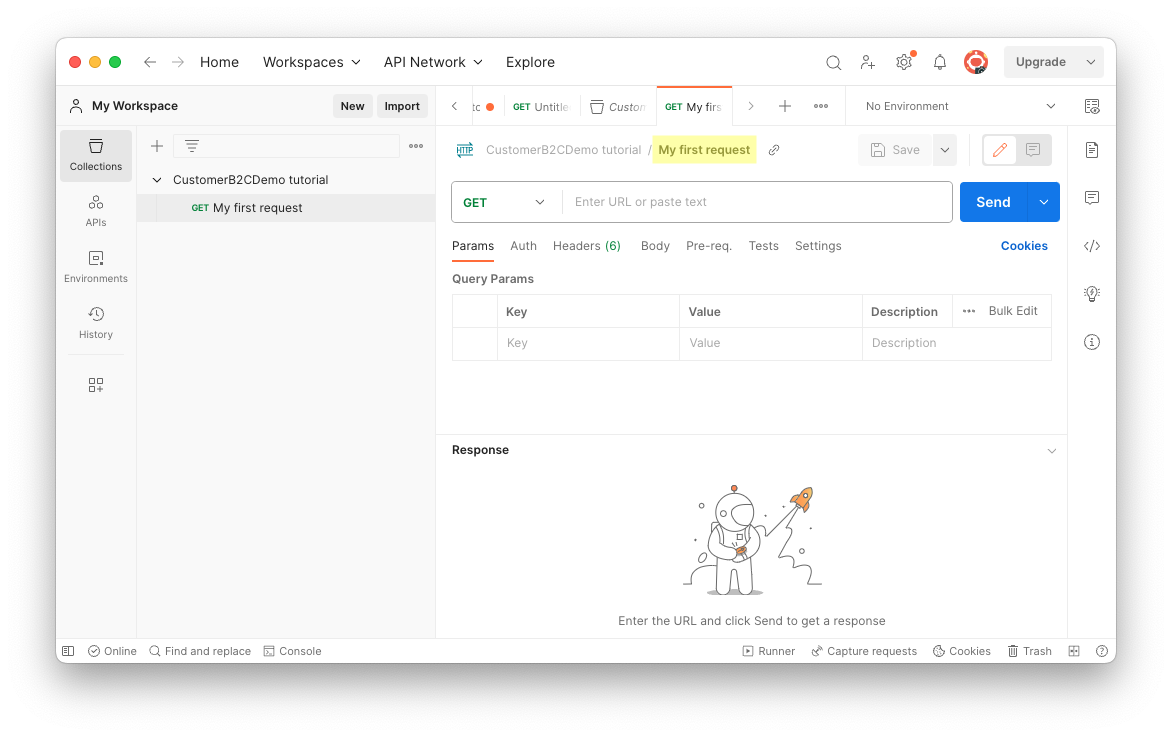
- Your newly created collection appears in the side navigation menu, with a message reading "This collection is empty. Add a request to start working."
Click the "Add a request" link to create a new request in this collection.
- Enter a name for your new request.
Set up authentication
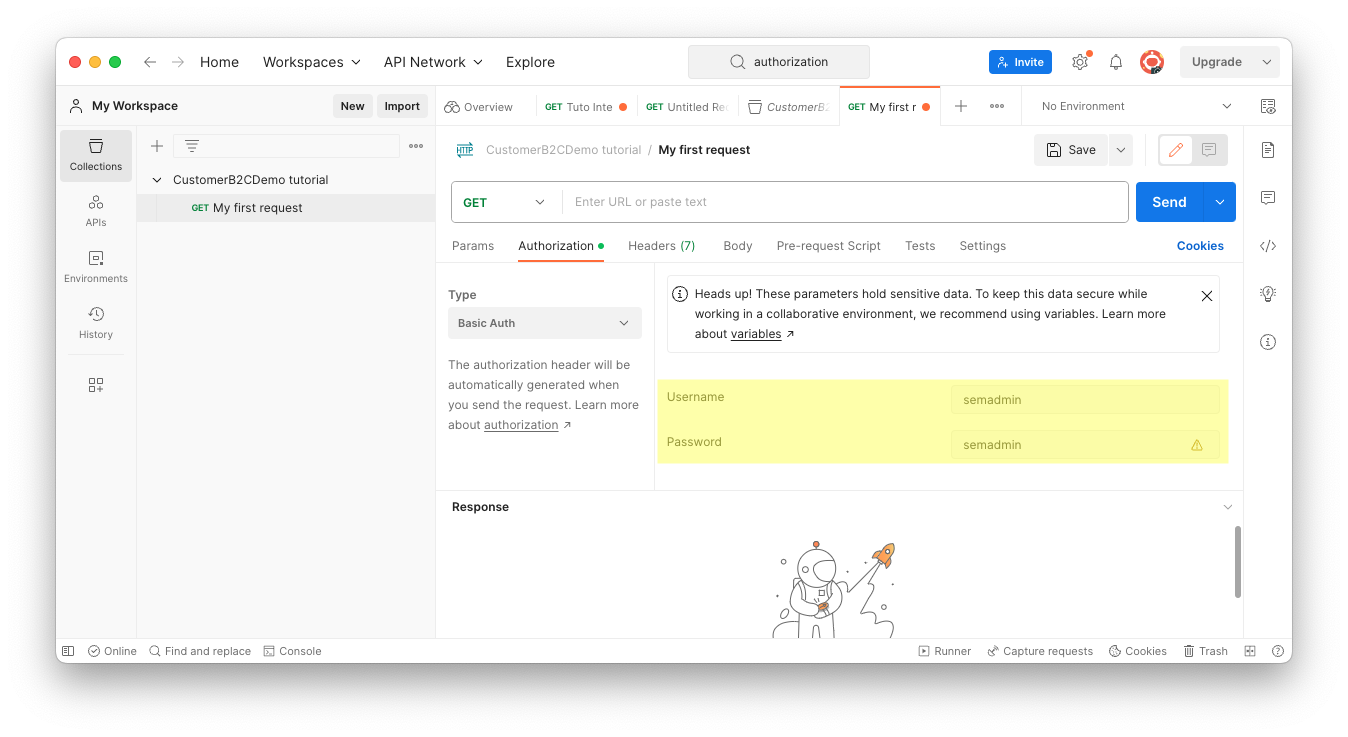
Accessing the REST API is a task normally performed by an integration developer. As a result, we are going to use the semadmin user who has full administrative privileges to do everything in the xDM platform, including using the REST API.
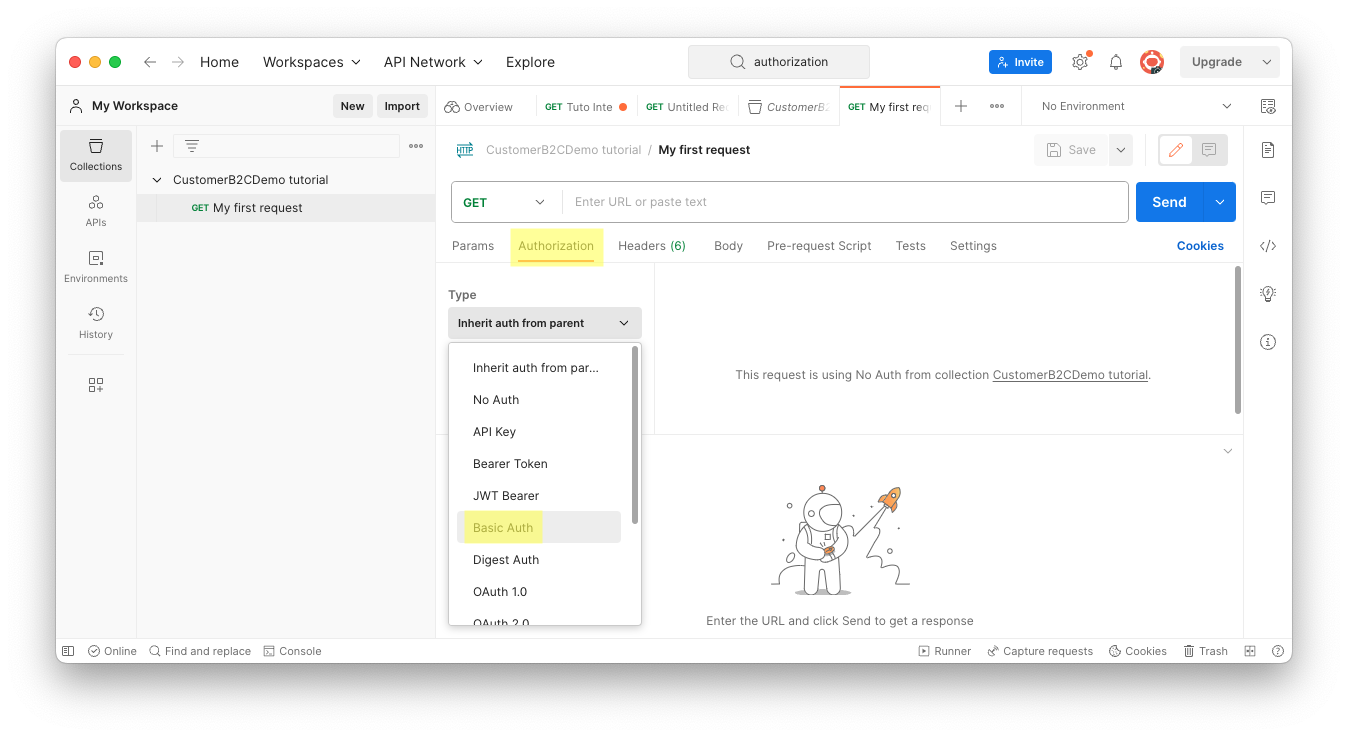
To set up authorization:
- Click on the Authorization tab.
- In the Type section, click the drop-down menu.
- Select Basic Auth.
- Enter the username and password for your Semarchy admin user. Use the same credentials that you use to connect to xDM as the semadmin user:
- If you followed the Install Semarchy xDM on-premises tutorial, then your password is likely semadmin (or whatever you changed the password to when you set up your environment).
- If you installed xDM on AWS, your password is your instance ID. You will find the ID in the AWS EC2 Console.
- If you installed xDM on Azure using the Quick-start VM, your password is the computer name for your virtual machine, which you will find on the Azure portal.
To test your Postman configuration, you will now retrieve all the customer golden records in the Person entity from the CustomerB2CDemo data location. The template request you need is:
http://[host]:[port]/semarchy/api/rest/query/CustomerB2CDemo/Person/GD
- Modify the request to use your host and port:
- If you installed xDM on your local computer following the Install Semarchy xDM on-premises tutorial: use host
localhostand port8088:
http://localhost:8088/semarchy/api/rest/query/CustomerB2CDemo/Person/GD
- If you installed xDM on AWS or Azure, you will need your public DNS or IP address. Since the port is
80, you will not need to include it in your request URL:
http://[public_IP_or_DNS]/semarchy/api/rest/query/CustomerB2CDemo/Person/GD
You can use either the public DNS address or the public IP address. We will proceed with the IP address in future examples in this tutorial.
- Test your credentials:
- Check the request is using the
GETmethod. - Enter the customized request URL (modified for your environment) in the Request field.
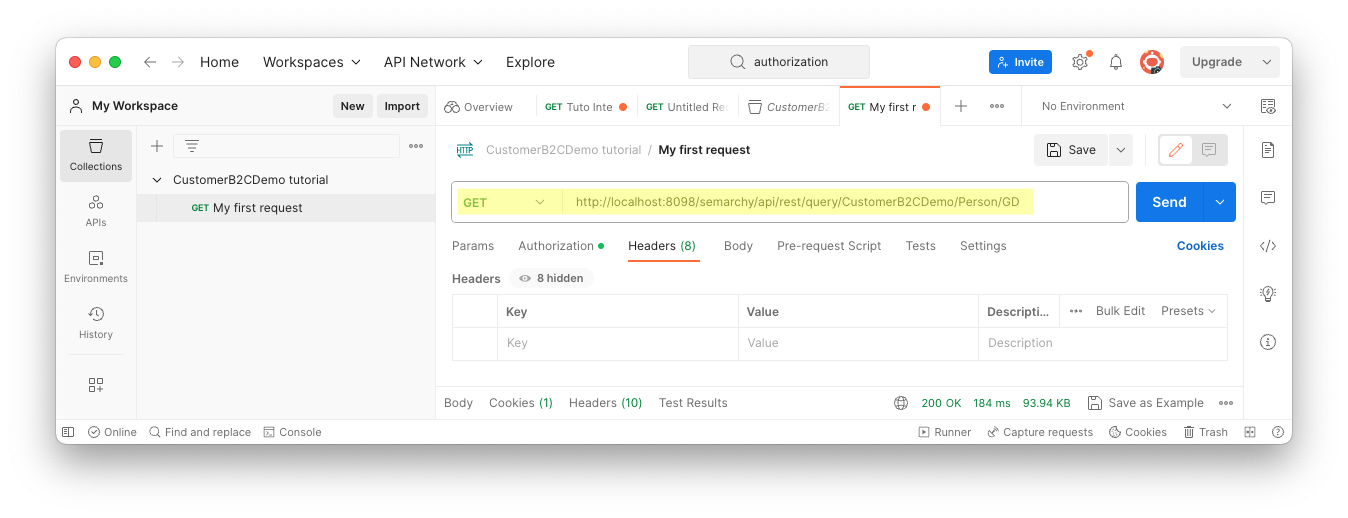
3. Click Send.
4. If you have correctly set up the authorization with your credentials, then you should see results returned. These are all the customer golden records returned in JSON format.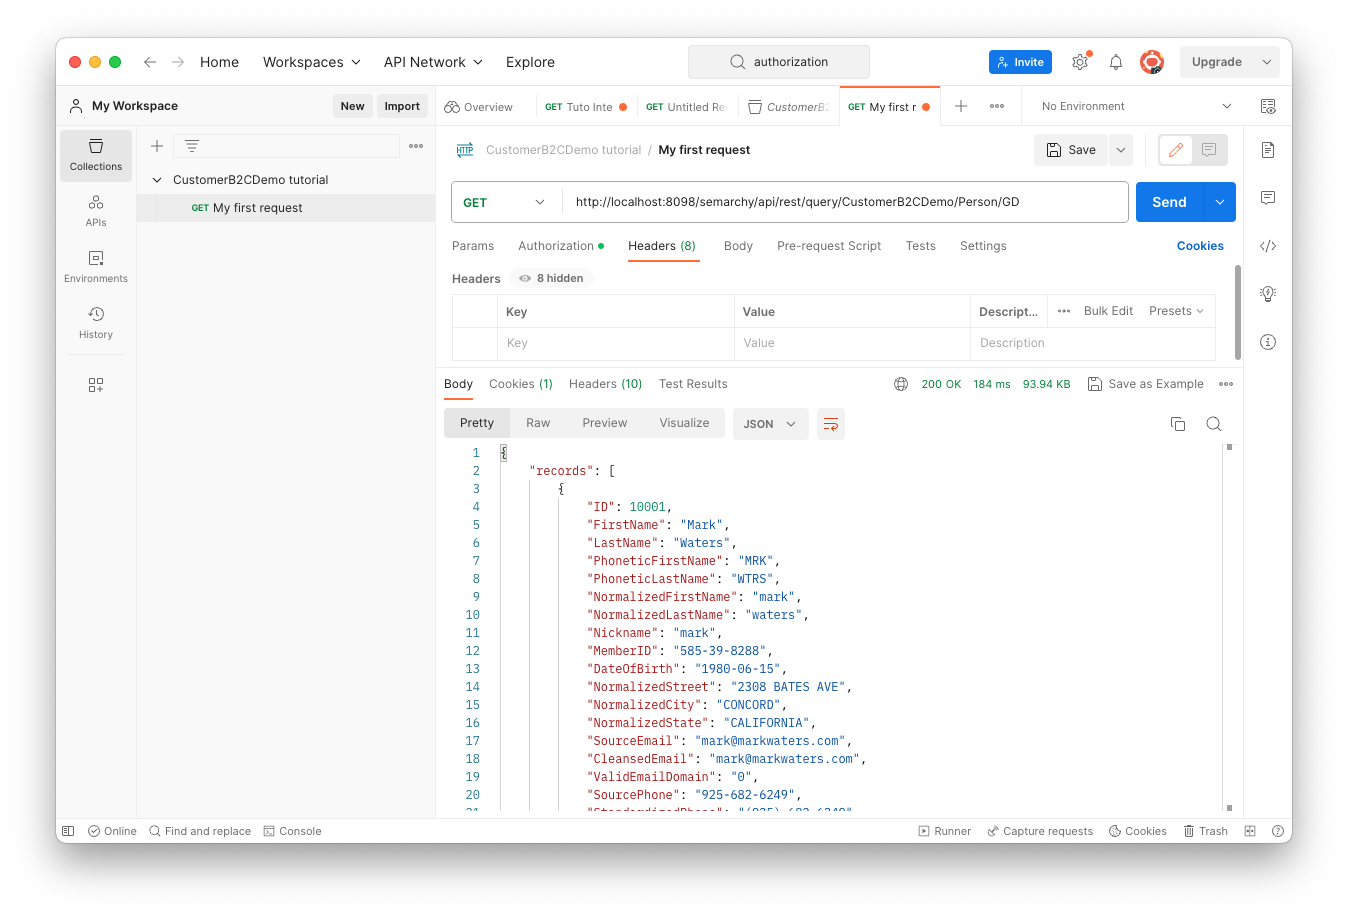
Great job! You successfully configured a REST client and sent your first request via the REST API.
Next steps
In the next unit of the Data Publishing & Consumption track, you will learn how to query data in xDM via the REST API. You will perform basic queries and learn about setting up and using named queries.
To explore other resources, return to the Tutorials menu.
Thank you for completing this tutorial.