This tutorial guides data stewards and business users through xDM to create efficient, collaborative data-driven workflows. You will familiarize yourself with fundamental workflow-related concepts, learn how to design and deploy a workflow, and gain hands-on experience in performing user tasks within an application. |
|

Learning outcomes
- Creating your first workflow.
- Deploying your workflow.
- Initiating and using your workflow within an MDM application.
Background
This tutorial builds off the CustomerB2C demo tutorial by incorporating a workflow into the Customer B2C application to facilitate the creation of new products. Integrating workflows into the data lifecycle enhances collaboration between IT and business users and optimize efficiency for both parties.
By the end of this tutorial, you should have a clear understanding of how to create, deploy, and use data-driven workflows in Semarchy xDM.
Learning track
Before starting this tutorial, you must set up Semarchy xDM and complete the "Customer B2C demo" tutorial. You can find this resource in the Demo Applications track on the Tutorials page.
Since you have completed the "Customer B2C demo" tutorial, your xDM instance should already be up and running with the appropriate data model.
You should also have already created the DataSteward role that you will use in your first workflow.
In this section, you will create a new role and user.
Designing data-driven workflows is typically assigned to an IT team member. For this reason, you will connect as the SemAdmin user, who has full administrative privileges within the xDM platform, including the ability to create and deploy workflows.
Add a role and user
In this section, you will connect to xDM, add the BusinessUser role, and create a user with this role.
- Open your web browser and connect to the URL where xDM is installed.
- Log in using the SemAdmin user credentials.
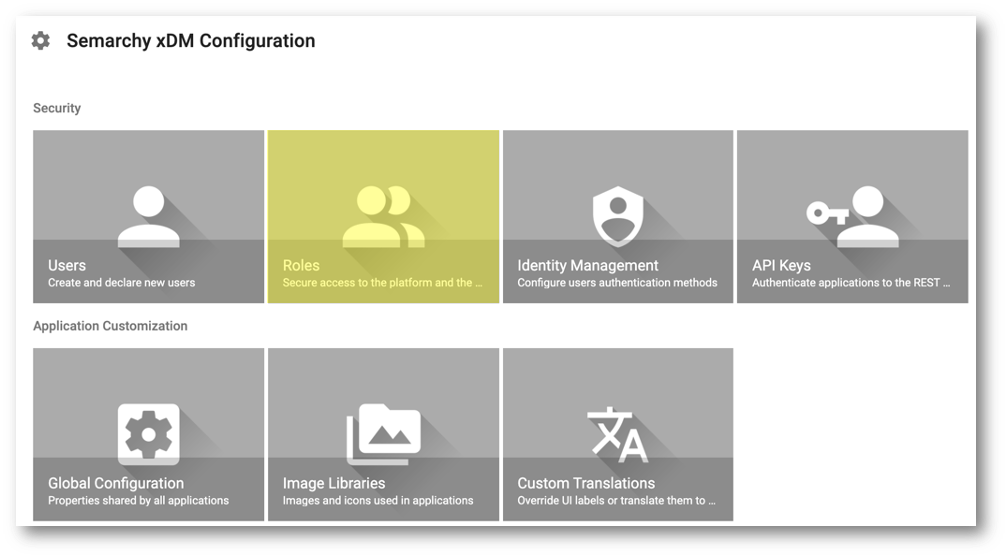
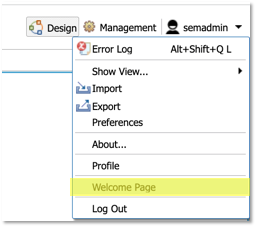
- Open the Configuration application from the Welcome page.
This is where users and roles are configured for Semarchy data applications. You have already created the DataSteward role and Data Steward user as part of the "Customer B2C demo" tutorial. Now, you need to create a BusinessUser role and the corresponding user to complete this tutorial.

- Click Roles.
- Click Add Role in the bottom-right corner to create a new role.
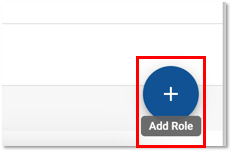
- In the Name field, enter
BusinessUser. - Leave all other fields unmodified, and then click Create.
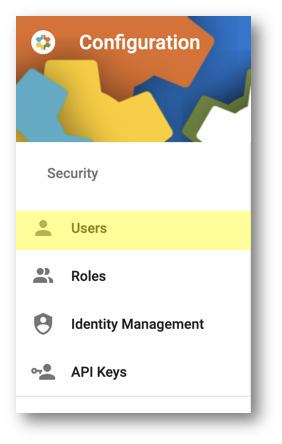
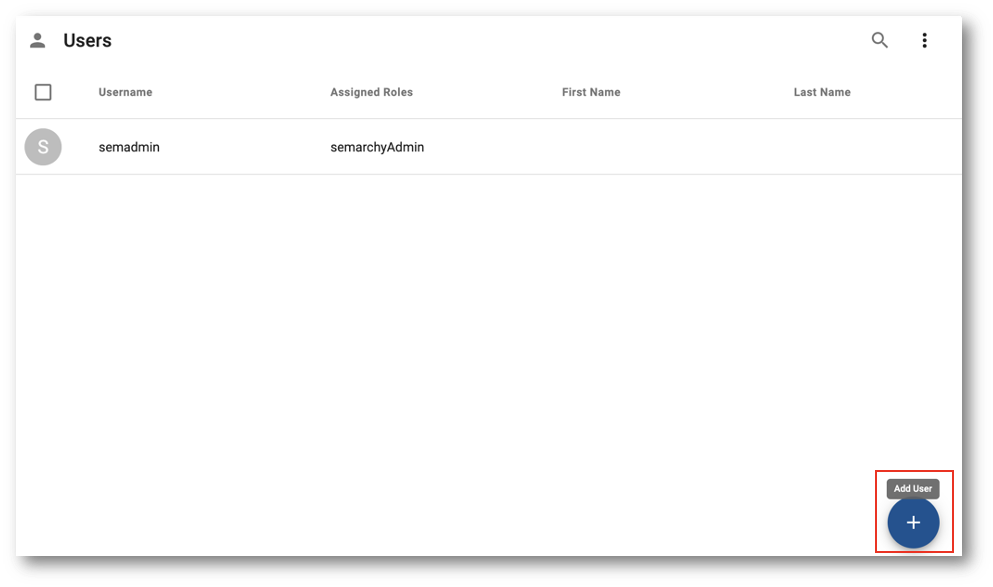
- To create the user for the BusinessUser role you have just created, select Users in the navigation drawer of the Configuration module.
- Click the Add User button.
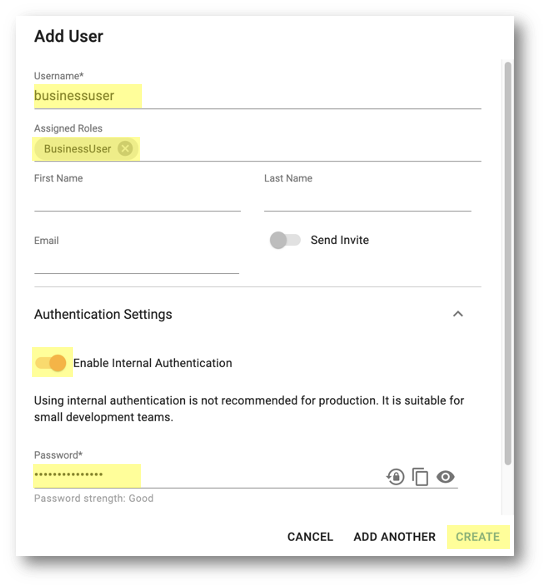
- Enter the following values and then click Create:
- Username:
businessuser - Assigned Roles:
BusinessUser - Select Enable Internal Authentication
- Password:
businessuser123or any password of your choice
Import an image library
You are now going to import images to enhance the user experience.
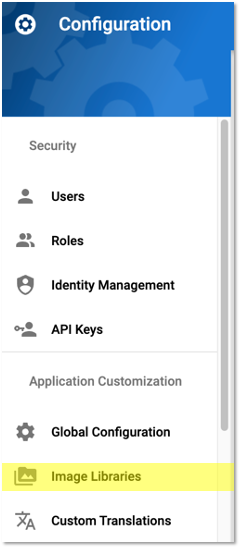
- Select Image Libraries in the navigation drawer of the Configuration module.
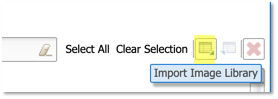
- In the upper-right corner, select Import Image Library.
- Click Add and select the file
assets.zipthat comes in the folderworkflows/image-libraryfrom the tutorial resource that you downloaded previously. Alternatively, you can drag and drop the file directly into the Import box. - Click OK.
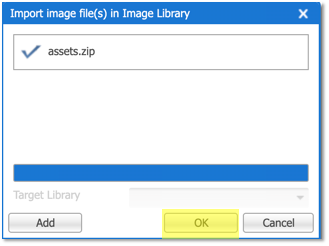
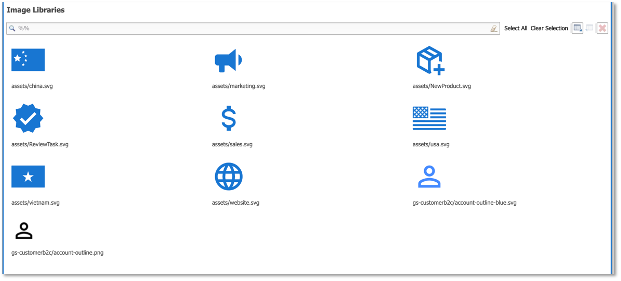
- Observe that the images are now available in xDM.
Congratulations!
You have successfully created all the necessary roles and users for this tutorial, and imported images to enhance the user experience.
Next, you will explore the layout and functionality of the Workflow Builder.
Now that you have created the necessary roles and users, you can begin exploring the Workflow Builder, through which designers can create efficient, collaborative data-driven workflows.
Navigate to the Workflow Builder
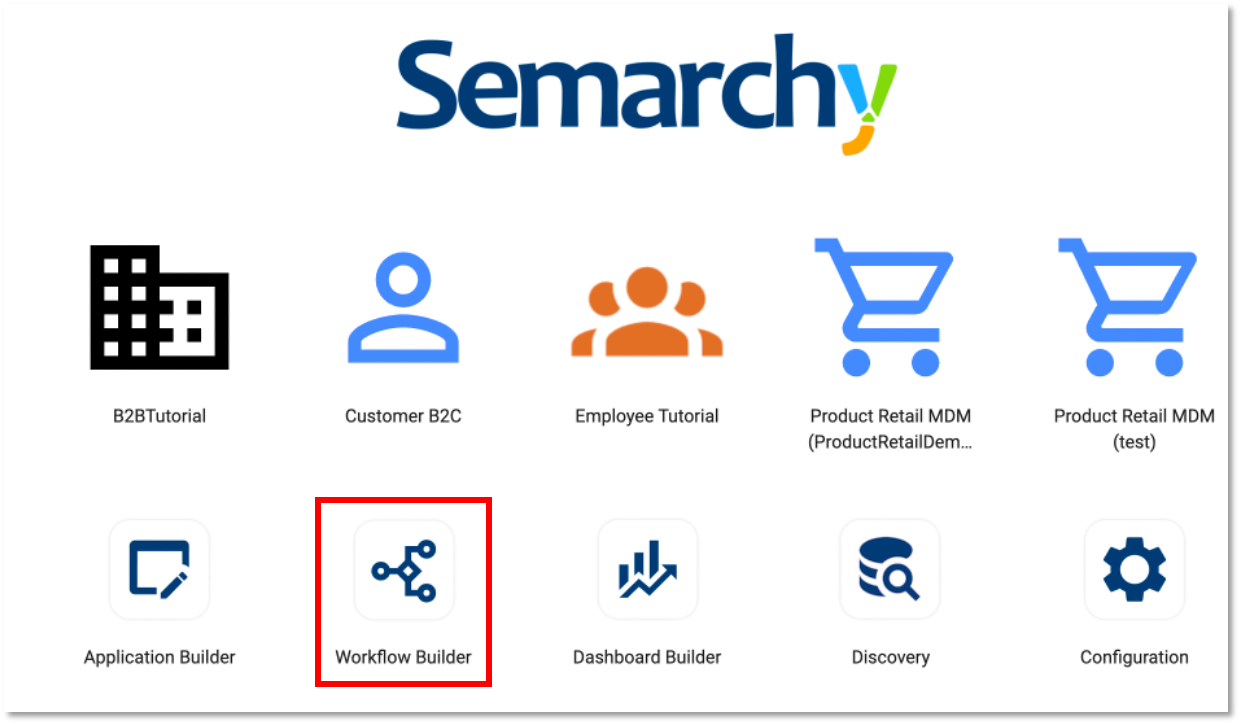
The Workflow Builder module is accessible from the Welcome page.
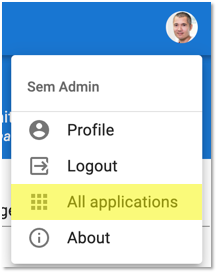
- In the user menu, select All applications.
- Click on the Workflow Builder application
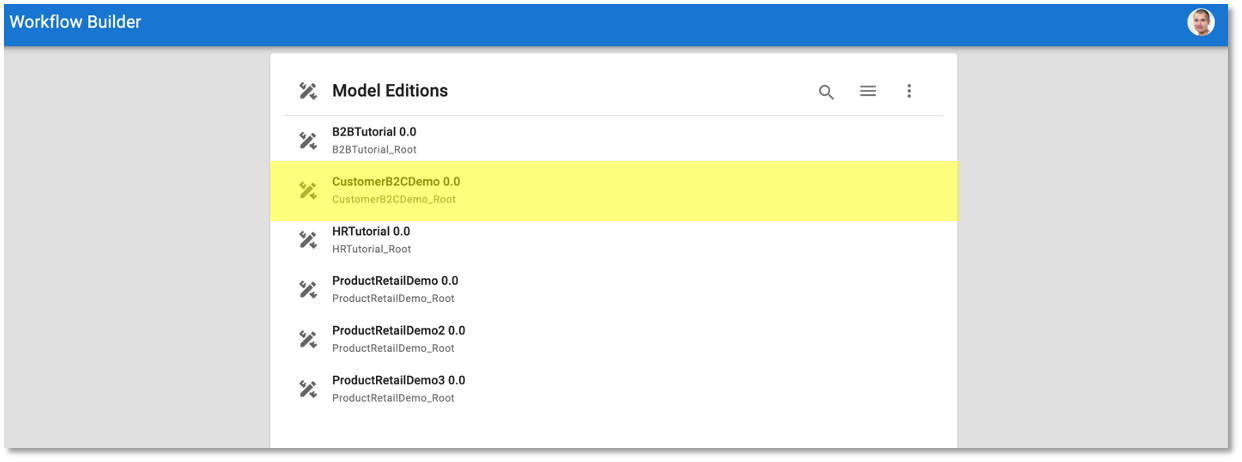
- The Workflow Builder shows the existing model editions.
- Select the CustomerB2CDemo 0.0 model to continue.
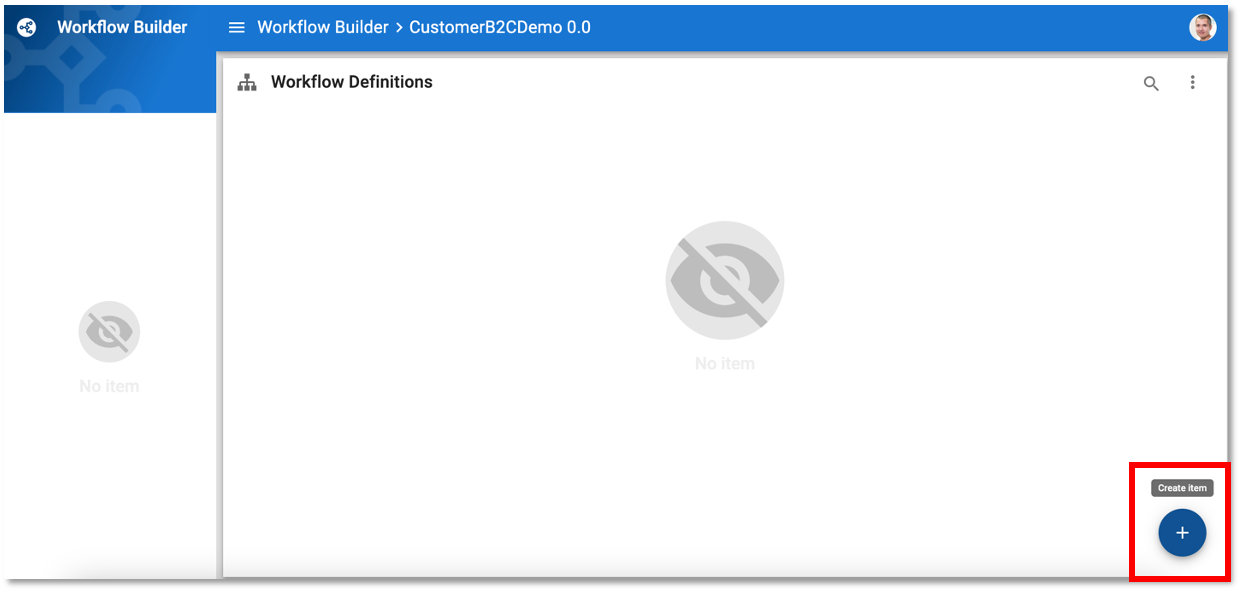
Create a workflow definition
- Create a new workflow by clicking on the Create Item button in the bottom-right corner of the visual editor.
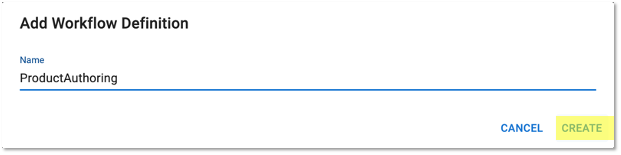
- Name the workflow definition
ProductAuthoringand click Create.
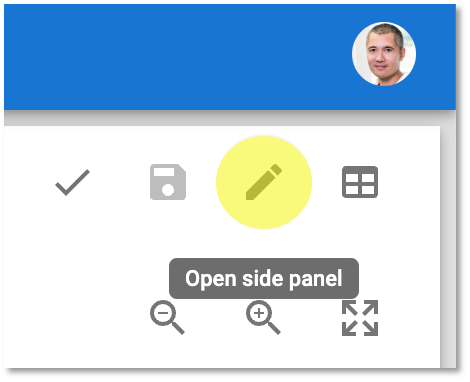
- The upper-right corner of the panel contains controls related to the appearance and display of the workflow visual editor user interface. Click on the Open Side Panel button.
This will open the side panel, where details regarding the workflow and steps being manipulated will appear.
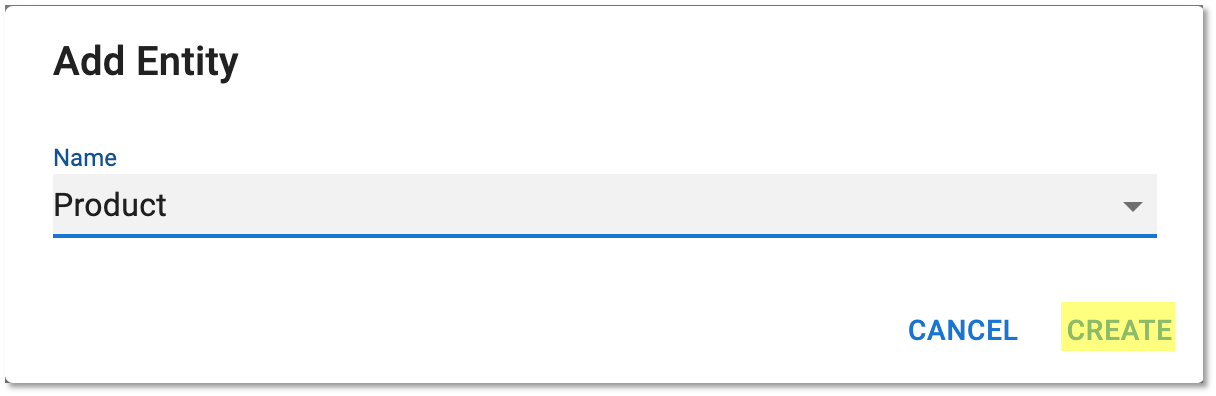
- Next to the Entities category of the side panel, click the Create button.
The Add Entity dialog appears.
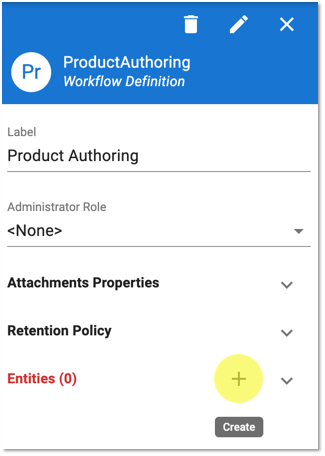
- From the Name drop-down menu, select Product, and then click Create.
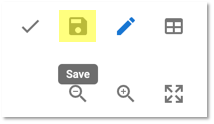
- Save your work by clicking on the Save button.
Congratulations!
You have successfully created a new workflow definition.
Next, you will proceed to incorporate the individual steps that comprise the workflow.
The building blocks for workflows are steps, linked by transitions to move the workflow from one step to the next. Workflows are initiated through a start event, which defines the overall parameters and metadata of the workflow. Workflows also support automations, such as Submit Data to publish record data into the hub.
Add start and end events
Now, you are going to add a start event and an end event.
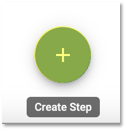
- Click on the Create Step button.
The Add Step dialog appears.
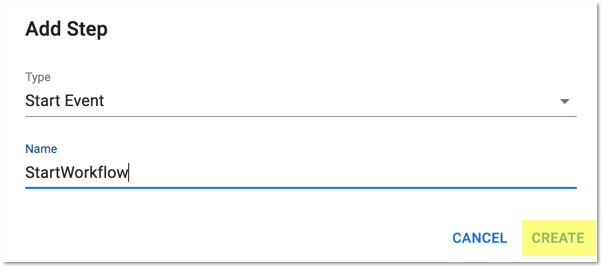
- Select Start Event from the Type drop-down menu.
- In the Name field, enter
StartWorkflow. - Click Create.
- Notice a start event item appears in the workflow visual editor and in the side panel.
You can click and drag this element around the visual editor. - Place the start event item on the left-hand side of the visual editor.
- Click on the Create Step button again to open the Add Step dialog.
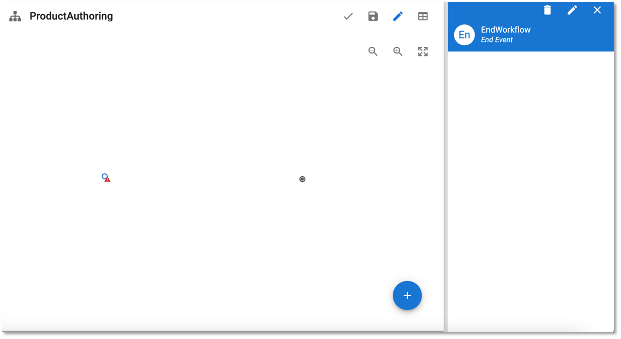
- In the Type drop-down menu, select the End Event.
- In the Name field, enter
EndWorkflow. - Click Create.
The start event and end event are now placed on your workflow diagram.
- Click Save to save your work.
Add a first user task
Now that you have begun building your workflow, you need to add the tasks that users will carry out. The first task that you will incorporate will allow business users to create new products.
- Click on Create Step
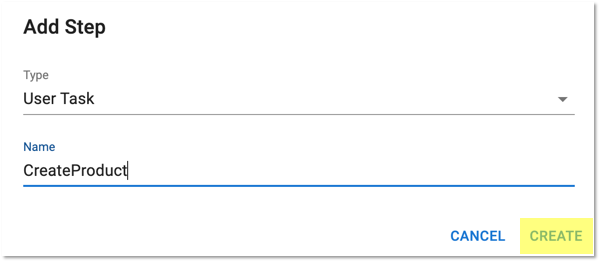
The Add Step dialog appears. - From the Type drop-down menu, select User Task.
- In the Name field, enter
CreateProduct. - Click Create.
- Notice the Create Product item appears in the workflow visual editor.
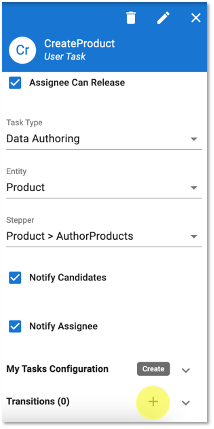
- Click on the step and examine its parameters appear in the side panel.
- Click on the Select an Image button near the Icon parameter.
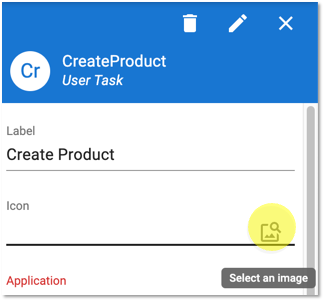
- Type
NewProductin the search field. - Click the the
NewProduct.svgicon to select this image, then click Select.
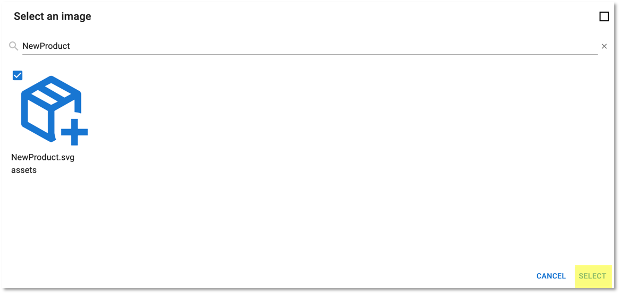
The icon in the Create Product step item will be updated to this icon.
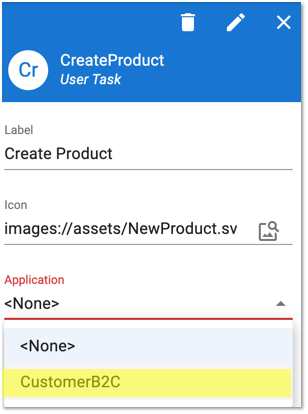
- Return to the side panel for the Create Product item.
- From the Application drop-down menu, select CustomerB2C.
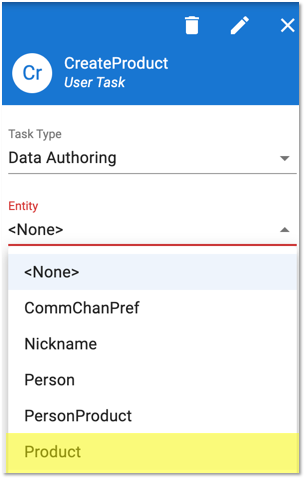
- Scroll down to the Entity property.
- From the Entity drop-down menu, select Product.
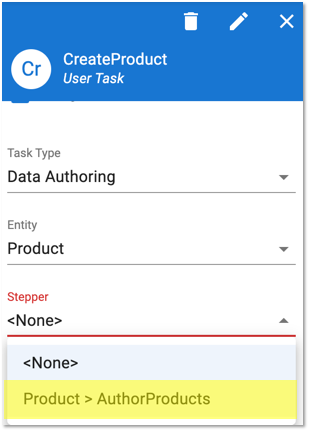
- From the Stepper drop-down menu, select Product > AuthorProducts.
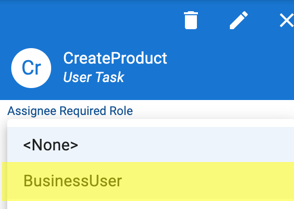
- Scroll back up along the side panel. From the Assignee Required Role drop-down menu, select BusinessUser.
Add a second user task
You are now going to add a second user task to the workflow, where the Data Steward user will be able to validate or reject the creation of the new product by the Business User.
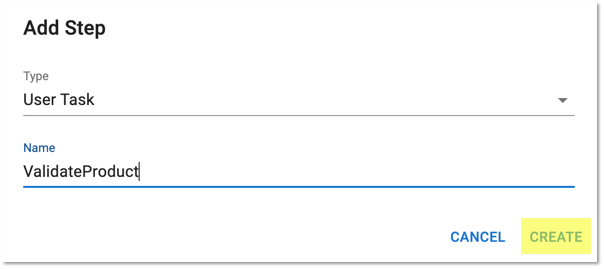
- Click on the Create Step button in the workflow visual editor.
The Add Step dialog appears. - From the Type drop-down menu, select User Task.
- In the Name field, enter
ValidateProduct. - Click Create.
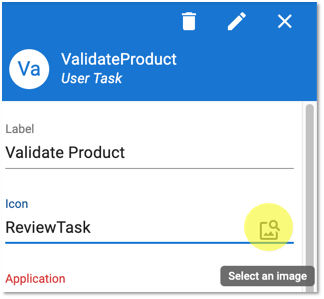
- Type
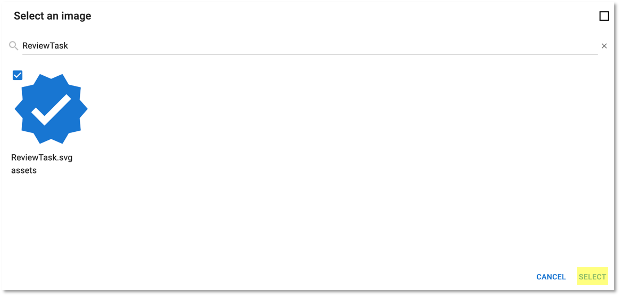
ReviewTaskin the Icon parameter, then click Select an image.
TheReviewTask.svgicon is automatically searched in the image library.
- Click on the image icon to select it, then click Select.
- In the side panel, select the following values:
- From Application drop-down menu, select CustomerB2C
- From the Assignee Required Role drop-down menu, select DataSteward
- From the Entity drop-down menu, select Product
- From the Stepper drop-down menu, select Product > AuthorProducts
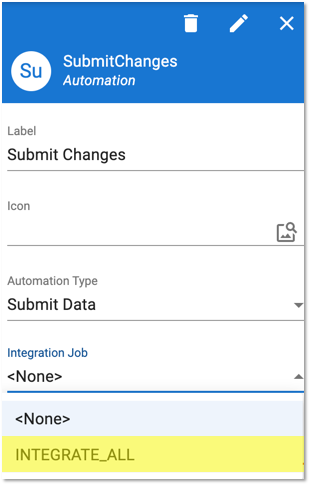
Add a Submit Data automation
In order for any records that are created or changed to become golden records, they need to go through the certification process. This is achieved in workflows by integrating a Submit Data automation.
- Click on the Create Step button in the workflow visual editor.
The Add Step dialog appears. - From the Type drop-down menu, select Automation.
- In the Name field, enter
SubmitChanges. - Click Create.

- On the diagram, select the Submit Changes item to modify its properties in the side panel.
- From the Integration Job drop-down menu, select INTEGRATE_ALL.
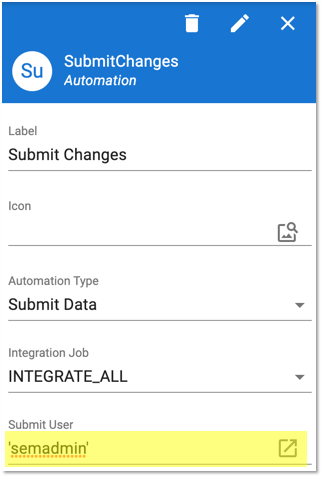
- In the Submit User field, type
ꞌsemadminꞌ.
Make sure to include the single quotes.
This simple SemQL expression sets the user that will be logged in the metadata associated with this record.
Congratulations!
You have successfully incorporated various types of steps into your workflow, including a start and end event, user tasks, and an automation step.
Next, you will create transitions to connect these steps within the workflow.
Transitions define how records move from one step to another in data-driven workflows. Here, you will learn how to create simple transitions from one step to another.
Transition from start event to first user task
Now that all the steps to carry out our workflow are in place, you need to set the transitions between them.
Transitions from start events can only be 1:1, which means that a single start event can only go to a single step.
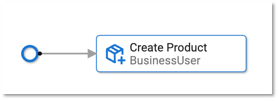
- Select the Start Workflow item on the diagram.
The StartWorklfow side panel appears. - In the Transition parameter, select CreateProduct.
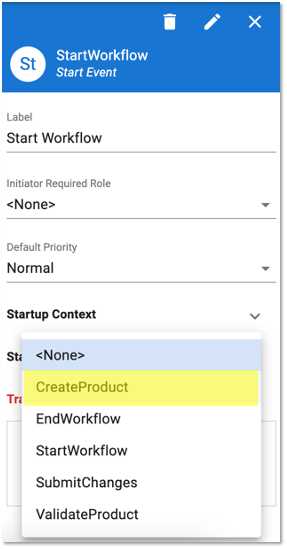
- Notice that an arrow appears between the Start Workflow and Create Product items in the workflow visual editor.
Transition between the user tasks
Transitions from user tasks are more flexible. You are now going to add a first transition from the CreateProduct user task to the ValidateProduct user task.
- Select the Create Product item on the visual editor.
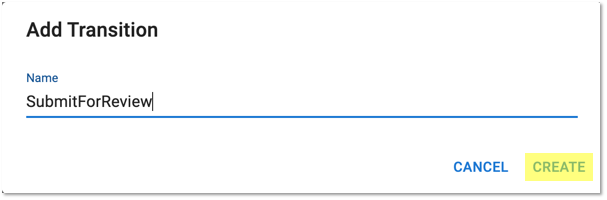
- Next to the Transitions category of the CreateProduct side panel, click on the Create button (i.e., the plus sign icon).
The Add Transition dialog appears.
- In the Name field, enter
SubmitForReview. - Click Create.
- Notice that the transition appears in the side panel for the CreateProduct user task, where you can further configure it.
- Expand the Transitions and SubmitForReview parameters in the CreateProduct side panel.
- From the Target Step drop-down menu, select ValidateProduct.

- Notice that an arrow labeled Submit For Review appears between the Create Product and Validate Product items.

Create transitions to return or submit the record
You will now create a transition from the ValidateProduct user task to return the record to the Business User for any modifications.
- Click on the Validate Product item to open its side panel.
- Next to the Transitions category, click the Create button (i.e., the plus sign icon).
The Add Transition dialog appears. - In the Name field, enter
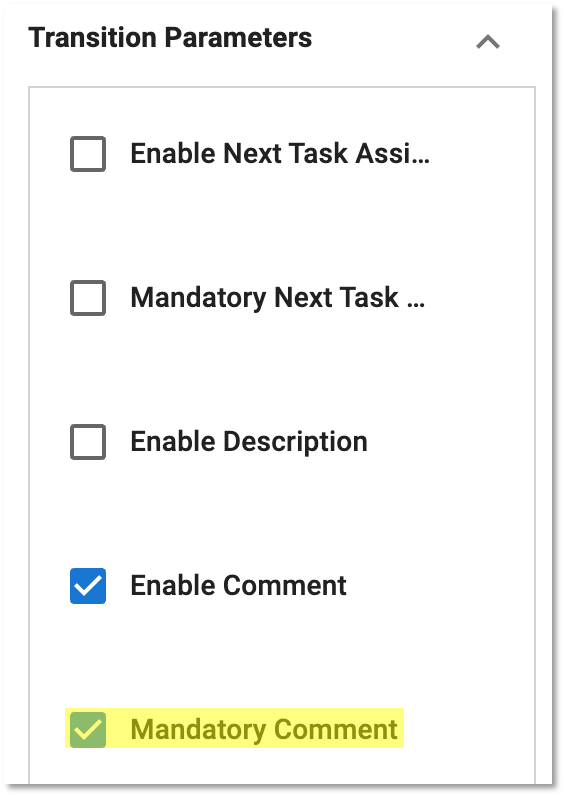
Return. - Expand the Return transition to view its parameters.
- Scroll down and expand the Transition Parameters.
- Select the Mandatory Comment checkbox.
This makes a comment mandatory when the product is returned to the Business User for modifications.
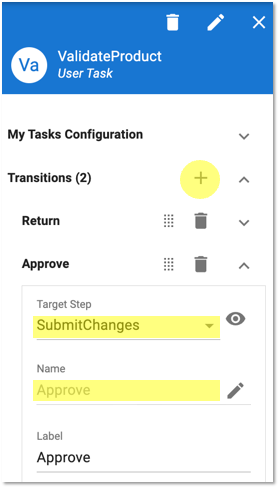
You are now going to create the second transition from the ValidateProduct user task to approve the changes made in the record.
- Click the Validate Product item on the visual editor.
The ValidateProduct side panel appears. - Next to the Transitions category, click on the Create button (i.e., the plus sign icon).
The Add Transition dialog appears. - In the Target Step drop-down menu, select SubmitChanges.
- In the Name field, enter
Approve.
Create the transition to the end event
You can now add the transition from the SubmitChanges automation to the end event.
- Click on the Submit Changes item to open its side panel.
- Expand the Transition category to view its properties.
- From the Target Step drop-down menu, select EndWorkflow.
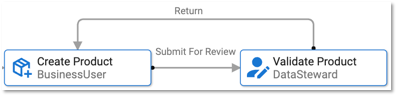
Your workflow should look like this:

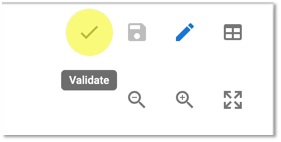
- Click on the Validate button to ensure that there are no issues with your workflow. Validation checks for any errors in SemQL expressions, or any problems with the parameters in your workflow.
- Save your work.
Congratulations!
You have now created your first data-driven workflow definition.
Next, you will add a trigger to initiate your workflow from the MDM application interface.
In order for users to access workflows, triggers need to be incorporated into the applications in which the workflow resides. In this section, you will add an action to launch your workflow from the application's navigation drawer. This is done through the Application Builder.
- In the user menu, click on All applications.
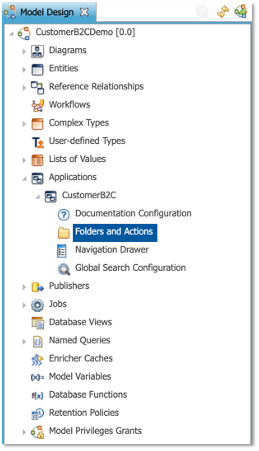
- Select the Application Builder and open the CustomerB2CDemo model.
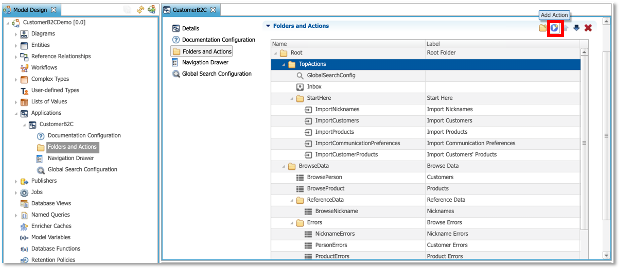
- Navigate to Applications > CustomerB2C > Folders and Actions.
- In the Folders and Actions table, select the TopActions folder.
- Click Add Action.
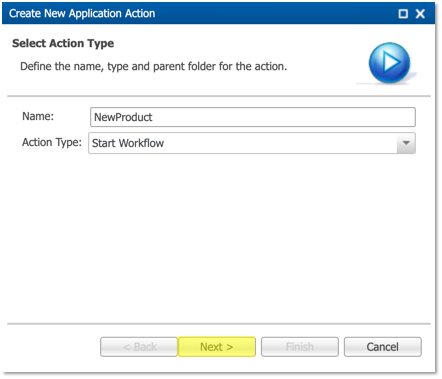
The Create New Application Action dialog appears.
- In the Name field, enter
NewProduct. - From the Action Type drop-down menu, select Start Workflow.
- Click Next.
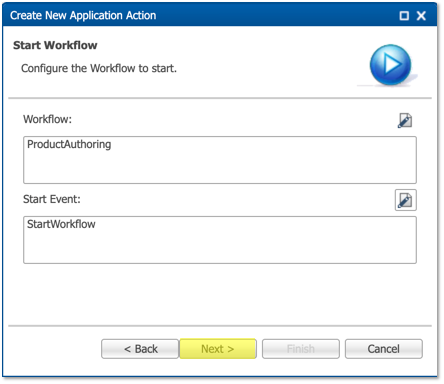
- In the Workflow field, click on the Edit button and select FirstWorkflow.
- Likewise, in the Start Event field, click the Edit button, and select StartWorkflow.
- Click Next.
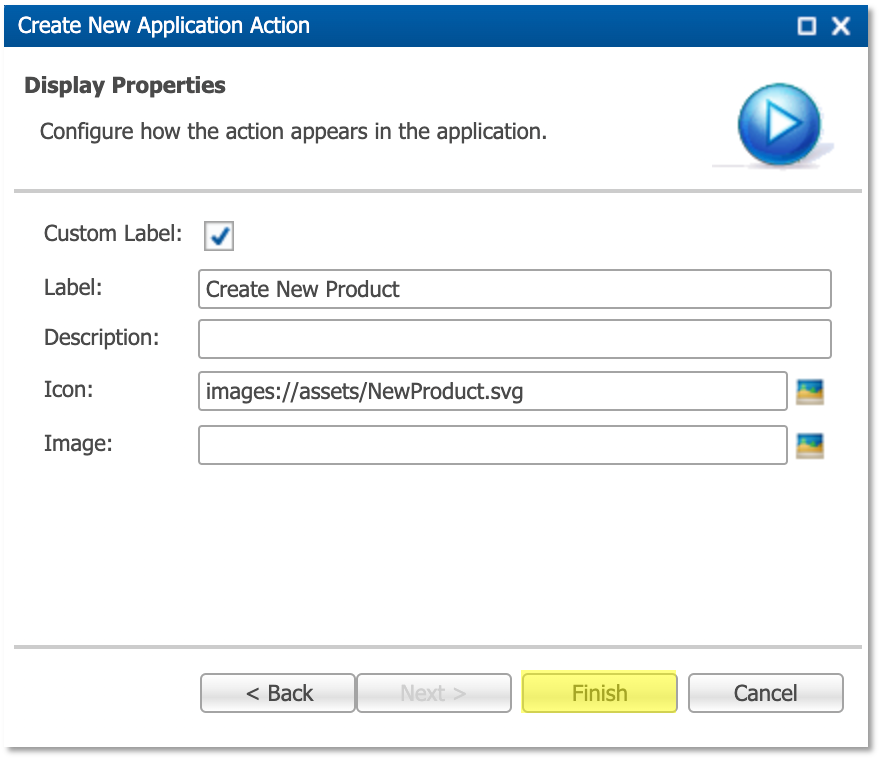
- Select the Custom Label checkbox
- In the label field, enter
Create New Product. - Set the Icon to
images://assets/NewProduct.svg. - Click Finish.
- Save your work.
- Return to the Welcome page.
- Open the Customer B2C application.

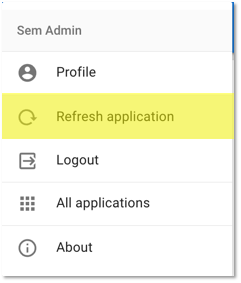
- Open the user menu in the top-right corner of the screen and select Refresh to refresh the application.
Congratulations!
The NewProduct workflow has now been added to the application, and will be available for business users to initiate the creation of a new product record.
Next, you will learn how to start this workflow and create a new product record.
As a reminder, workflows help business users create a new record. When the record is created, a data steward can either approve the product and submit it to the data hub, or send it back to the business user for correction.
- Log out the SemAdmin account, and log back in as Business User.
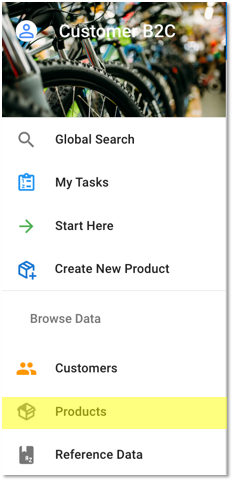
- Open the Customer B2C application.
- The Create New Product workflow appears in the navigation drawer.
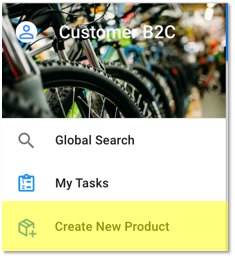
- Click on Create New Product.
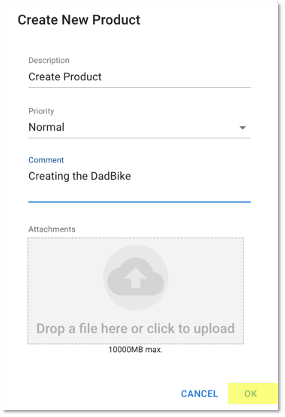
A pop-up appears to enter information about the workflow you are launching. You can change the description, set a priority, or even add an Attachment to the workflow. For the purpose of this tutorial, we will leave the default values here. - Type
Creating the DadBikein the Comment box. - Click OK to continue.
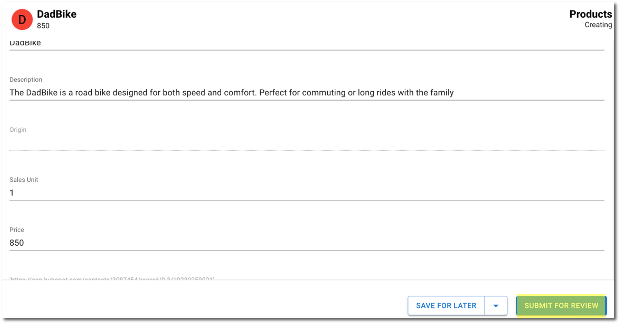
- The stepper for creating a new product opens. Enter the following values:
- ID:
DB6077WD - Product Name:
DadBike - Description:
The DadBike is a road bike designed for both speed and comfort. Perfect for commuting or long rides with the family. - Leave the Origin field blank.
- Sales Unit:
1 - Price:
850
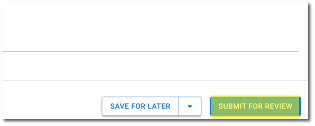
- Click Submit for review.
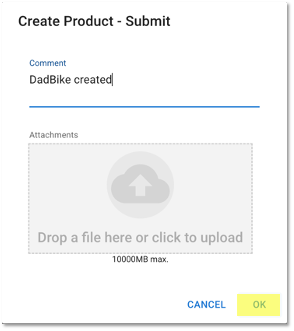
- Enter
DadBike createdin the Comment field of the submit pop-up and click OK.
Congratulations!
You have successfully initiated a workflow and created a new product record.
Next, you will act as a data steward to proceed with the next step of the workflow and review the newly created data.
- Log out of the Business User account and log back in as Data Steward.
- Re-open the Customer B2C application
- In the navigation drawer, notice the notification bubble on the My Tasks icon.
This signals to the Data Steward that they have a task to address.
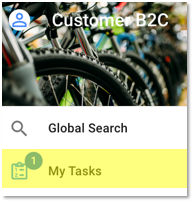
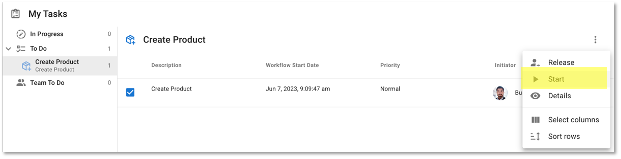
- Click on My Tasks.
The task is listed under the To Do category. - Select the Create Product task.
- Open the Options menu and select the Start option.
The Create Product Stepper appears.

- As a Data Steward, review the information entered by the Business User.
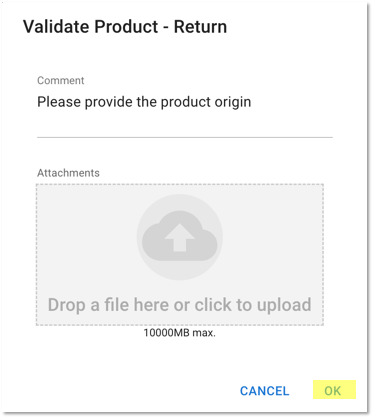
- Click Return to send the record back to the Business User for further information.
The Return step dialog appears.
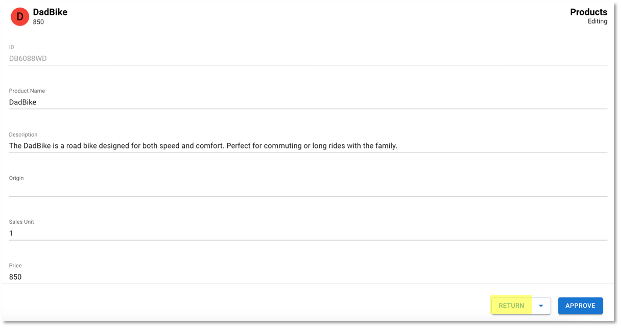
- In the Comment field, enter
Please provide the product origin, and then click OK.
Congratulations!
You have successfully reviewed a newly created record and sent it back to the Business User for additional information.
Next, you will edit the record before submitting it to the data hub.
- Log out of the Data Steward user account, and log in again as Business User.
- Re-open the Customer B2C application.
- Notice the task has reappeared in My Tasks.
- Select the Create Product task.
- Open the Options menu, and select the Start option.
- In the record form, add
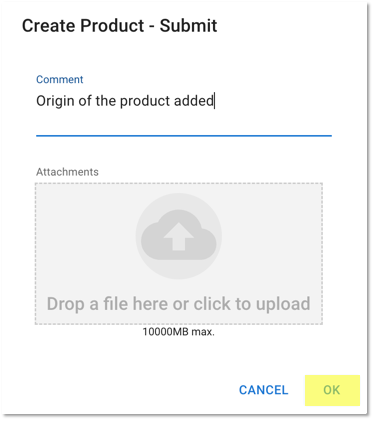
Hollandto the Origin field, and click Submit for review.
The Submit step dialog appears.
- In the Comment field, type
Origin of the product added,and click OK.
- Log out again, and log back in as Data Steward.
- Open the Customer B2C application
- Notice that the task has reappeared in My Tasks.
- Select the Create Product task.
- Open the Options menu, and select the Start option.
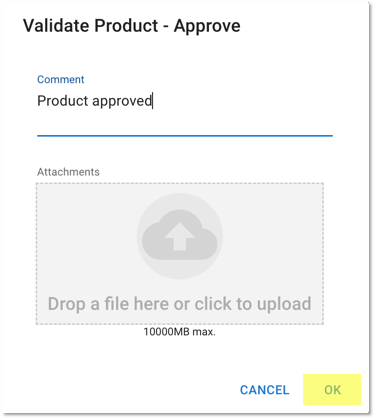
- Review the information to be sure it is accurate, and click Approve.
The Approve step dialog appears.
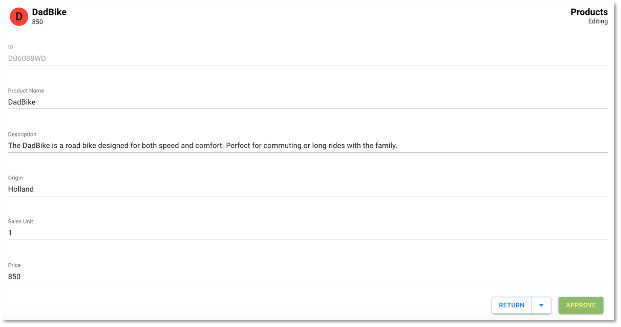
- In the Comment field, type
Product approved, and click OK.
- In the navigation drawer, click on Products.
- The DadBike record now appears in the product list.

Congratulations!
As a business user, you have successful edited a record and submitted it for review within a workflow.
As a data steward, you have successfully requested further information to be included in a record and completed a workflow by publishing the record to the data hub.
You have successfully completed this tutorial. In this unit, you were introduced to the Workflow Builder, and learned how to create a simple data-driven workflow.
Learning recap
- You have learned to build your first workflow definition within the Workflow Builder.
- You have added various steps to your workflow.
- You have established transitions to link the steps within the workflow.
- You have integrated triggers into the application to initiate the workflow from the user interface.
- You have witnessed the workflow in action as users interacted with it to create, review, and approve product records.
Next steps
You can explore additional tutorial resources on the Tutorials page of the Semarchy website.
Thank you for completing this tutorial.