| This is documentation for Semarchy xDM 2023.3, which is no longer supported. For more information, see our Global Support and Maintenance Policy. |
Automations
Automation steps perform automated actions in workflows.
|
Data-driven workflows, available in Semarchy xDM 2023.1 and later, are subject to specific licensing requirements; please confirm your eligibility to use such new functionality by consulting your license agreement or by contacting your Semarchy account representative prior to use. All customers can still use the workflow feature available in previous versions (now known as legacy workflows). For more information, see Workflows (legacy). |
The operations performed by an automation depend on its type. Two automation types are available in Semarchy xDM:
-
Send Email: sends customizable emails to one or multiple recipients. The emails' subject, body, and recipients are data-driven.
-
Submit Data: publishes data to the hub by running the certification process.
Add an automation step
To add an automation step:
-
Click
 Create Step.
The Add a Step dialog appears. -
From the Type drop-down list, select Automation.
-
In the Name field, enter a name for this automation step.
-
Click Create.
A new step icon appears on the workspace:
-
Double-click the step you just added.
A side panel sweeps in. -
Set the general properties:
Automation step general properties Property Required Description Label
Required
Label displayed for the automation step.
Icon
Optional
Image displayed on the automation step in the workflow diagram. The
 Select an image button allows browsing and selecting an image from the image library.
Automation Type
Required
Type of automation. Available options are:
-
Send Email: sends a configurable email to a list of recipients. Emails are sent using the first default SMTP notification server.
-
Submit Data: runs the current dataset through the certification process.
-
-
Set the specific properties depending on the selected automation type. See Configure a Send Email automation or Configure a Submit Data automation.
-
Set the Transition properties:
Automation step transition properties Property Required Description To Step
Required
Step that should follow the current automation step.
Label
Optional
Label displayed for the transition of the automation step. This label appears in the workflow diagram.
Configure a Send Email automation
The following properties are available to configure a Send Email automation:
| Property | Required | Description |
|---|---|---|
Application |
Required |
Application that sends this email. The application branding is used in the layout of emails using the HTML - Preformatted content type. |
Reply-To |
Optional |
Sender’s email address. If this property is not set, the From User property of the default SMTP notification server is used. |
Sender Name |
Optional |
Sender’s display name. |
Recipients |
Required |
List of email recipients. At least one recipient must be configured. See Email recipients. |
Recipients Max Count |
Required |
Maximum number of recipients for an email (defaults to 1,000). If Fail On Error is selected and this maximum number is reached while building the list of recipients, the step fails and no email is sent. Fail On Error is not selected, emails are only sent to the first |
Custom Parameters |
Optional |
Allows defining parameters you can use in the email body. See Email parameters. |
Subject |
Required |
Email subject line. It can use built-in and custom parameters. Click |
Content Type |
Required |
Defines the email body content type:
|
Body |
Required |
Email body. The body can contain built-in and custom parameters. Click |
Fail On Error |
Required |
Defines whether the step must fail if an error occurs while building the list of recipients or sending emails. |
Email recipients
You can define one or multiple recipient configurations for a Send Email automation. Each recipient configuration adds to the email one or multiple recipients.
To add a recipient configuration:
-
Click the
 Create button next to Recipients.
 -
Enter a Name for this recipient configuration and then click Create.
-
Select a Type and then set the type-specific properties:
-
The SemQL - Emails type sends emails to a list of email addresses. This comma-separated list of email addresses is defined in the SemQL Expression property:
Example. Add a list of emails (SemQL literal) to the recipients'adele.mackson@company.com,john.edelman@company.com' -
The SemQL - Usernames type sends emails to a set of platform users identified by their usernames. This comma-separated list of usernames is defined in the SemQL Expression property:
Example. Add a list of named users—plus the initiator—to the recipients'amackson,jedelman,' || WorkflowInstance.InitiatorName -
The Users from Role type sends emails to all the users having a specific role. This role is defined using the Role property.
-
The Workflow Administrators type sends emails to all the workflow administrators. This includes:
-
Users having one role with Grant full access to the model selected in the model privileges.
-
Users having the role defined as the Workflow Administrator Role in the workflow definition.
-
-
Email parameters
You can use email parameters in a Send Email automation step to insert dynamic content in the email subject and body.
Two types of parameters are available:
-
Built-in parameters are available by default and can be used without any configuration.
-
Custom parameters allow designers to insert specific content into emails, such as record chips or values calculated with SemQL.
You can select both types of parameters in the Email editor when composing the email subject and the body.
Built-in parameters
The following table lists the built-in parameters.
| Name | Description |
|---|---|
|
Current recipient’s first name. This parameter returns a value only if the recipient is an xDM user; it returns an empty value if the recipient is added using a SemQL Emails recipient configuration. |
|
Current recipient’s last name. This parameter returns a value only if the recipient is an xDM user; it returns an empty value if the recipient is added using a SemQL Emails recipient configuration. |
|
Current recipient’s username. This parameter returns a value only if the recipient is an xDM user; it returns an empty value if the recipient is added using a SemQL Emails recipient configuration. |
|
Base URL of the xDM instance. |
Custom parameters
Custom parameters are configurable parameters that designers can use to define data-driven content to insert in emails.
To add a custom parameter:
-
Click the
Create button next to Custom Parameters. -
Enter a Name for the parameter and then click Create.
-
Select a Type and enter the related parameters
-
The SemQL type executes a SemQL expression and uses its value. If this type is selected, open the
 SemQL editor to define the expression.Example. SemQL custom parameter using the workflow initiator name.
'Initiated by ' || WorkflowInstance.InitiatorName -
The Records (Chips) type shows records from the current dataset as chips. If this type is selected, set the following properties:
-
Entity: entity from which the record chips must be generated.
-
Max Record Count: maximum number of records to show. Defaults to 1 if the cardinality of the selected entity is Single Record in this workflow definition and to 10 if the cardinality is Multi Record.
-
Max Records Per Row: maximum number of chips per row in the generated email.
-
-
Email editor
The Email editor allows editing the subject and body of emails.
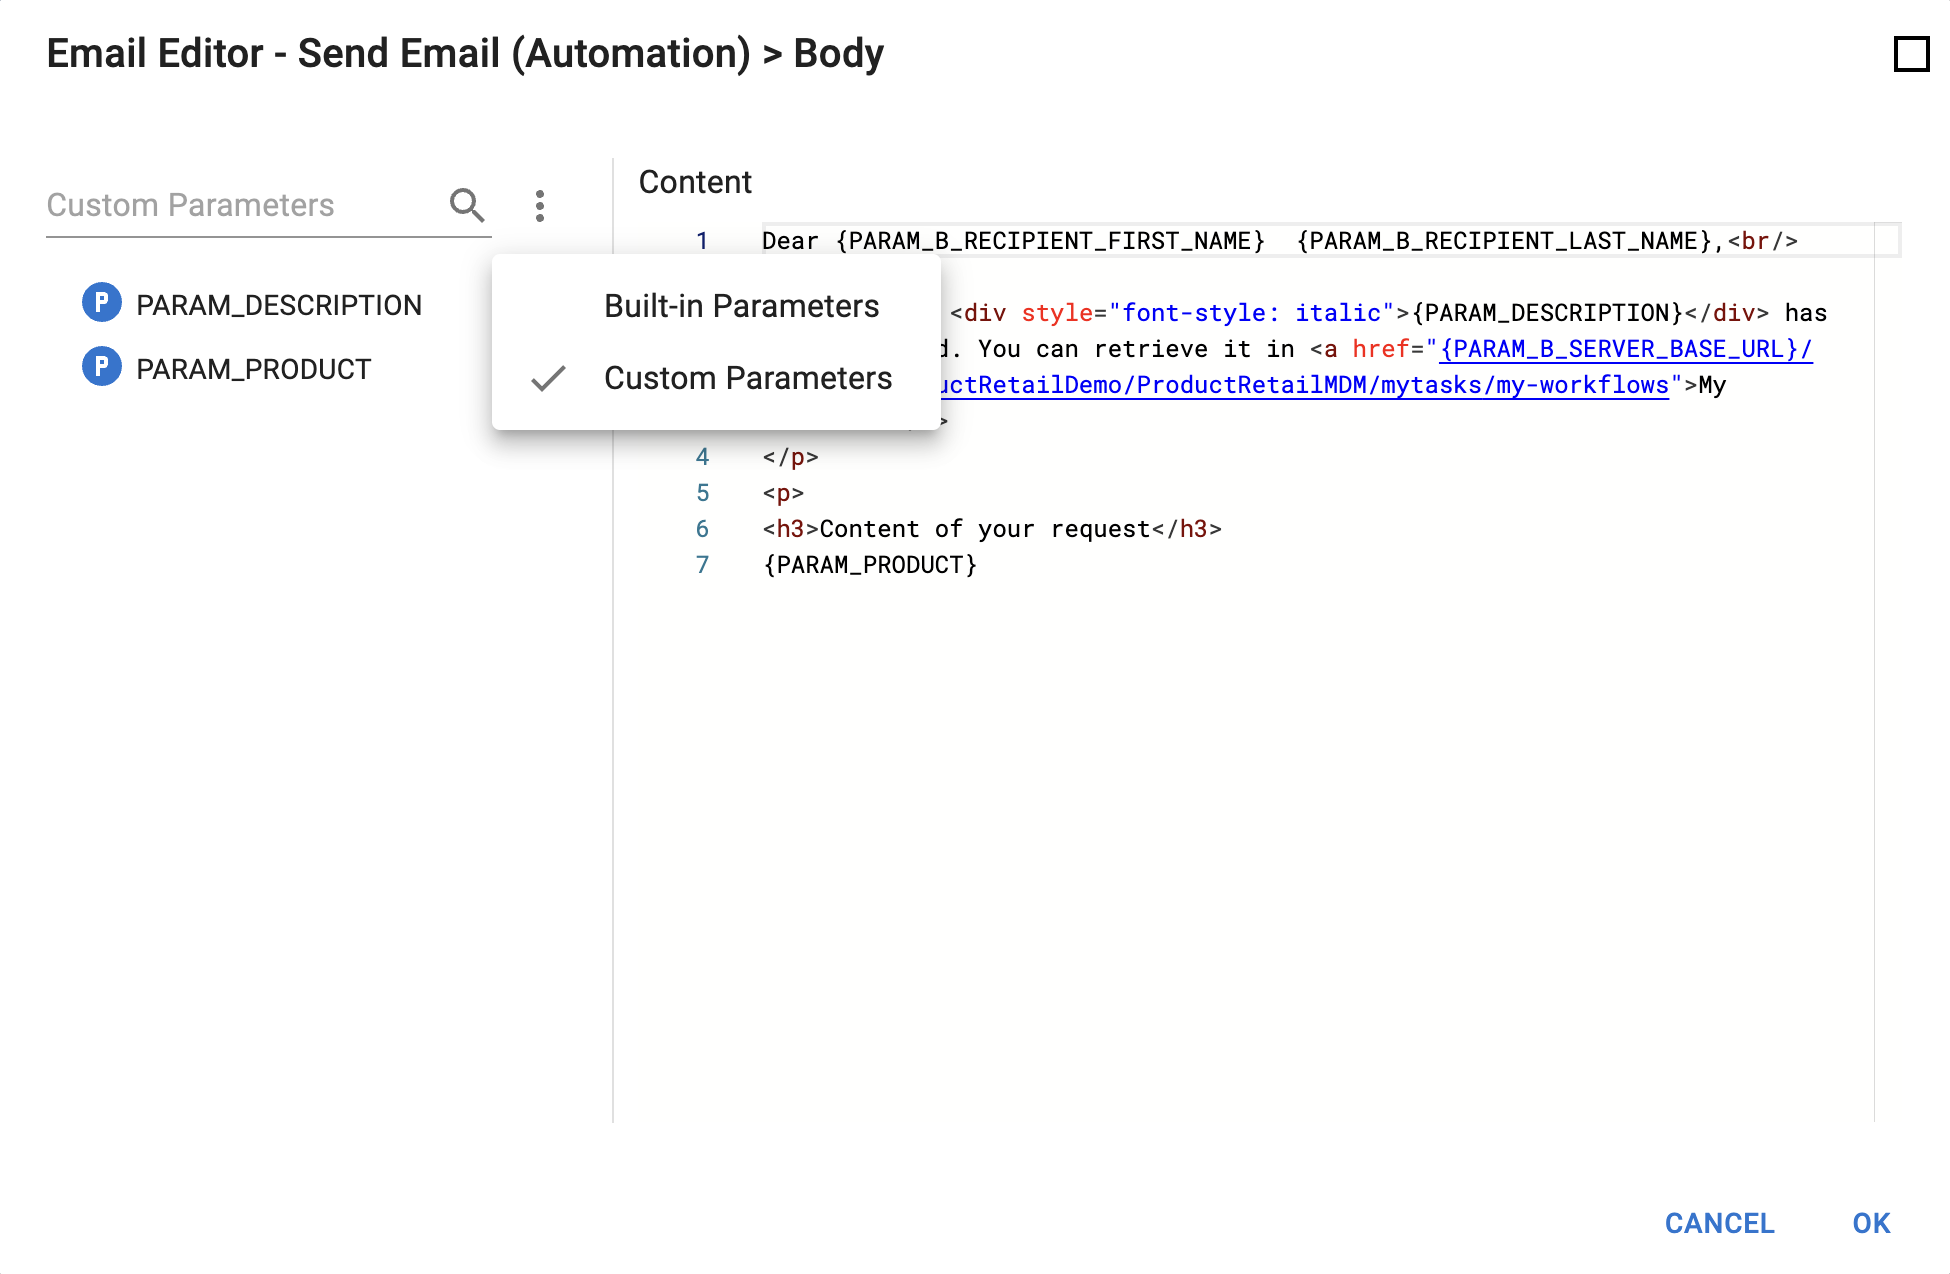
The editor is organized as follows:
-
The left panel displays the Custom Parameters or Built-in Parameters. Double-click a parameter to add it to the condition or the expression.
To switch between custom and built-in parameters, select the corresponding element in the action menu above the tree view. You can enter text in the input field to search among elements of the selected type. -
Problems appear in the right bottom panel, showing parsing errors such as unknown parameters.
Configure a Submit Data automation
The following properties are available to configure a Submit Data automation:
| Property | Required | Description | ||
|---|---|---|---|---|
Integration Job |
Optional |
Job used to process the data submitted by the step. If no job is selected, then a job is generated depending on the root entity of the workflow.
|
||
Submit User |
Required |
Name of the user that submits the data to xDM. This username can be used to log in to xDM. Open the For more information about all the attributes, see Workflow attributes. Example. Submit with the name of user 'semadmin'
Example. Submit with the workflow initiator’s name
|