Configure the authentication in Azure
This document explains how to configure the authentication for a Semarchy xDM instance deployed on Azure, including authentication to Azure Active Directory.
Default authentication configuration
Semarchy xDM is configured by default to use the built-in authentication. A first administrator user is created with the Admin account and Password that you have configured during the deployment.
Connect with this user to create new users, configure identity management, or to configure Azure AD authentication as explained below.
Configure Azure Active Directory
Register the application in AAD
-
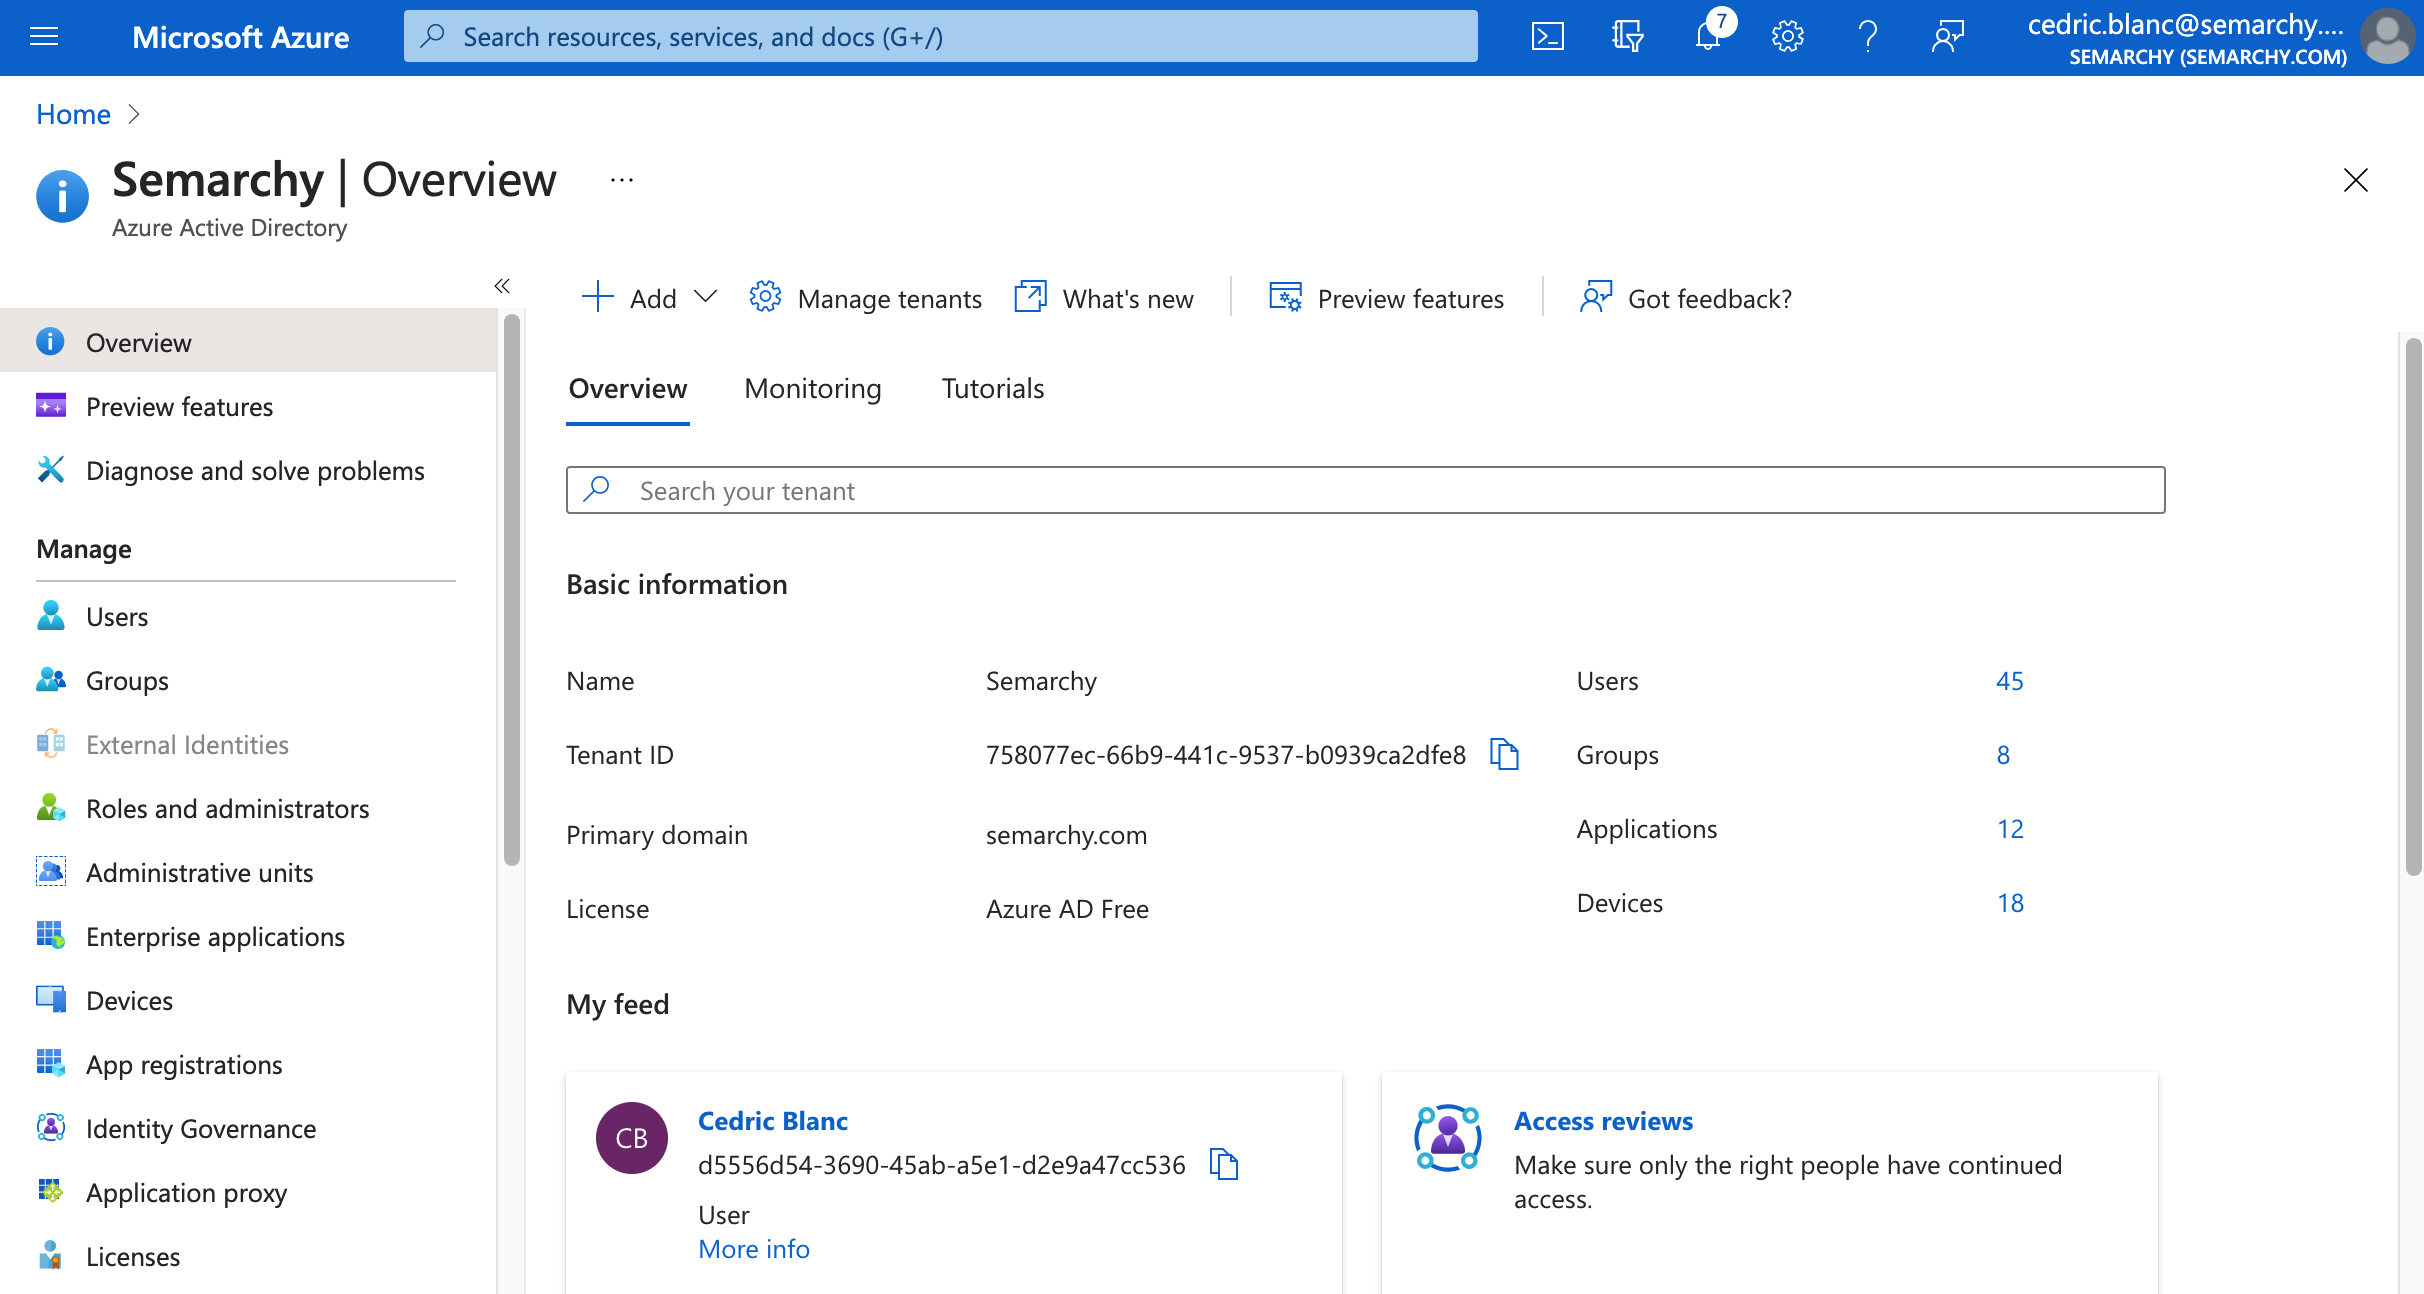
In the Azure Portal, select your Azure Active Directory
-
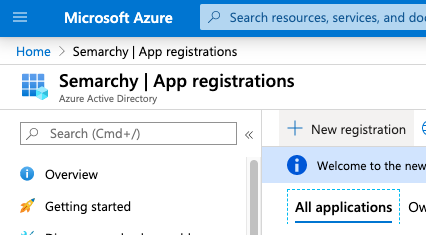
Select App Registration, and then click New Registration
-
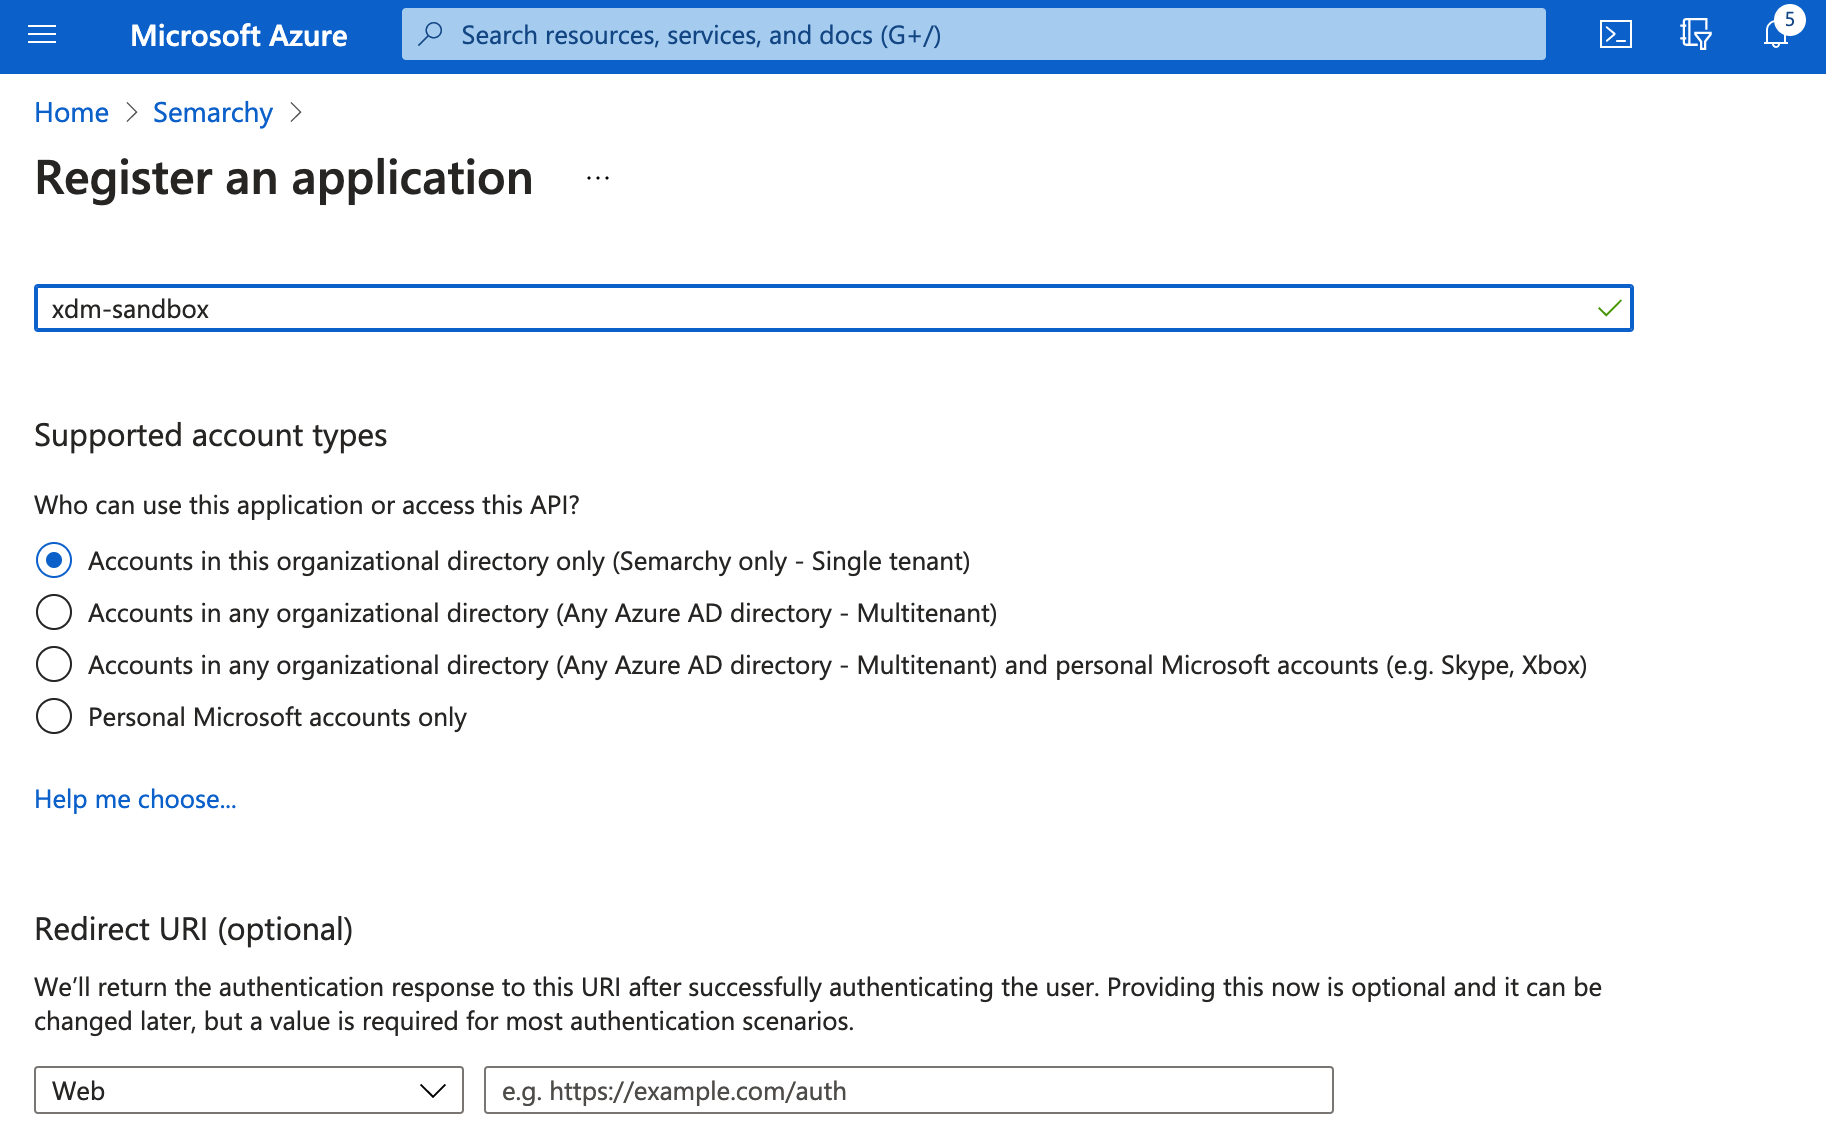
In the Register an Application page enter the following information:
-
Name: Name of the registered application. For example, the name of your instance.
-
Supported accounts type: Select who can use this application.
-
Leave the Redirect URI empty.
You will set the Redirect URI once you have configured the identity provider in Semarchy.
-
-
Click Register. The application registration is created and opens.
-
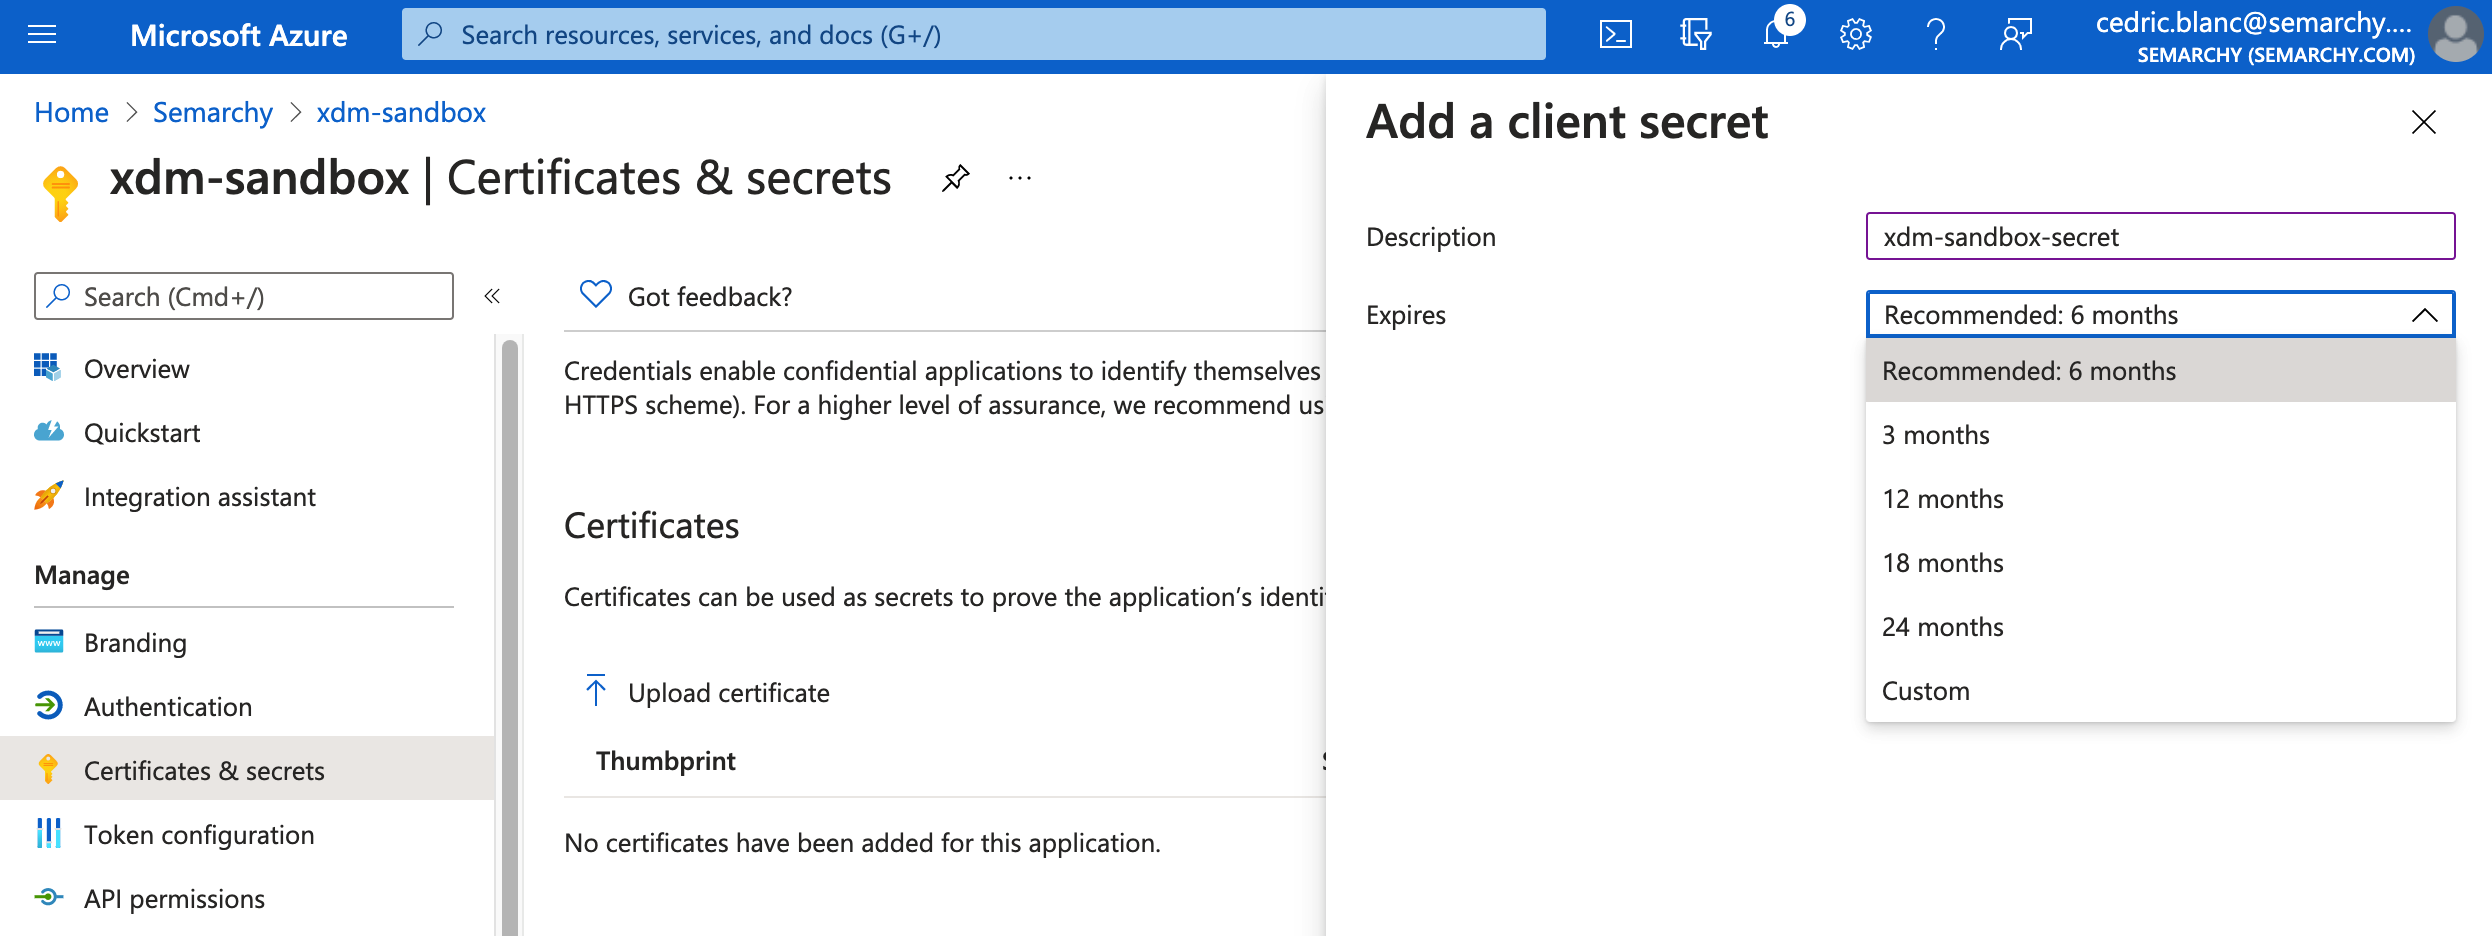
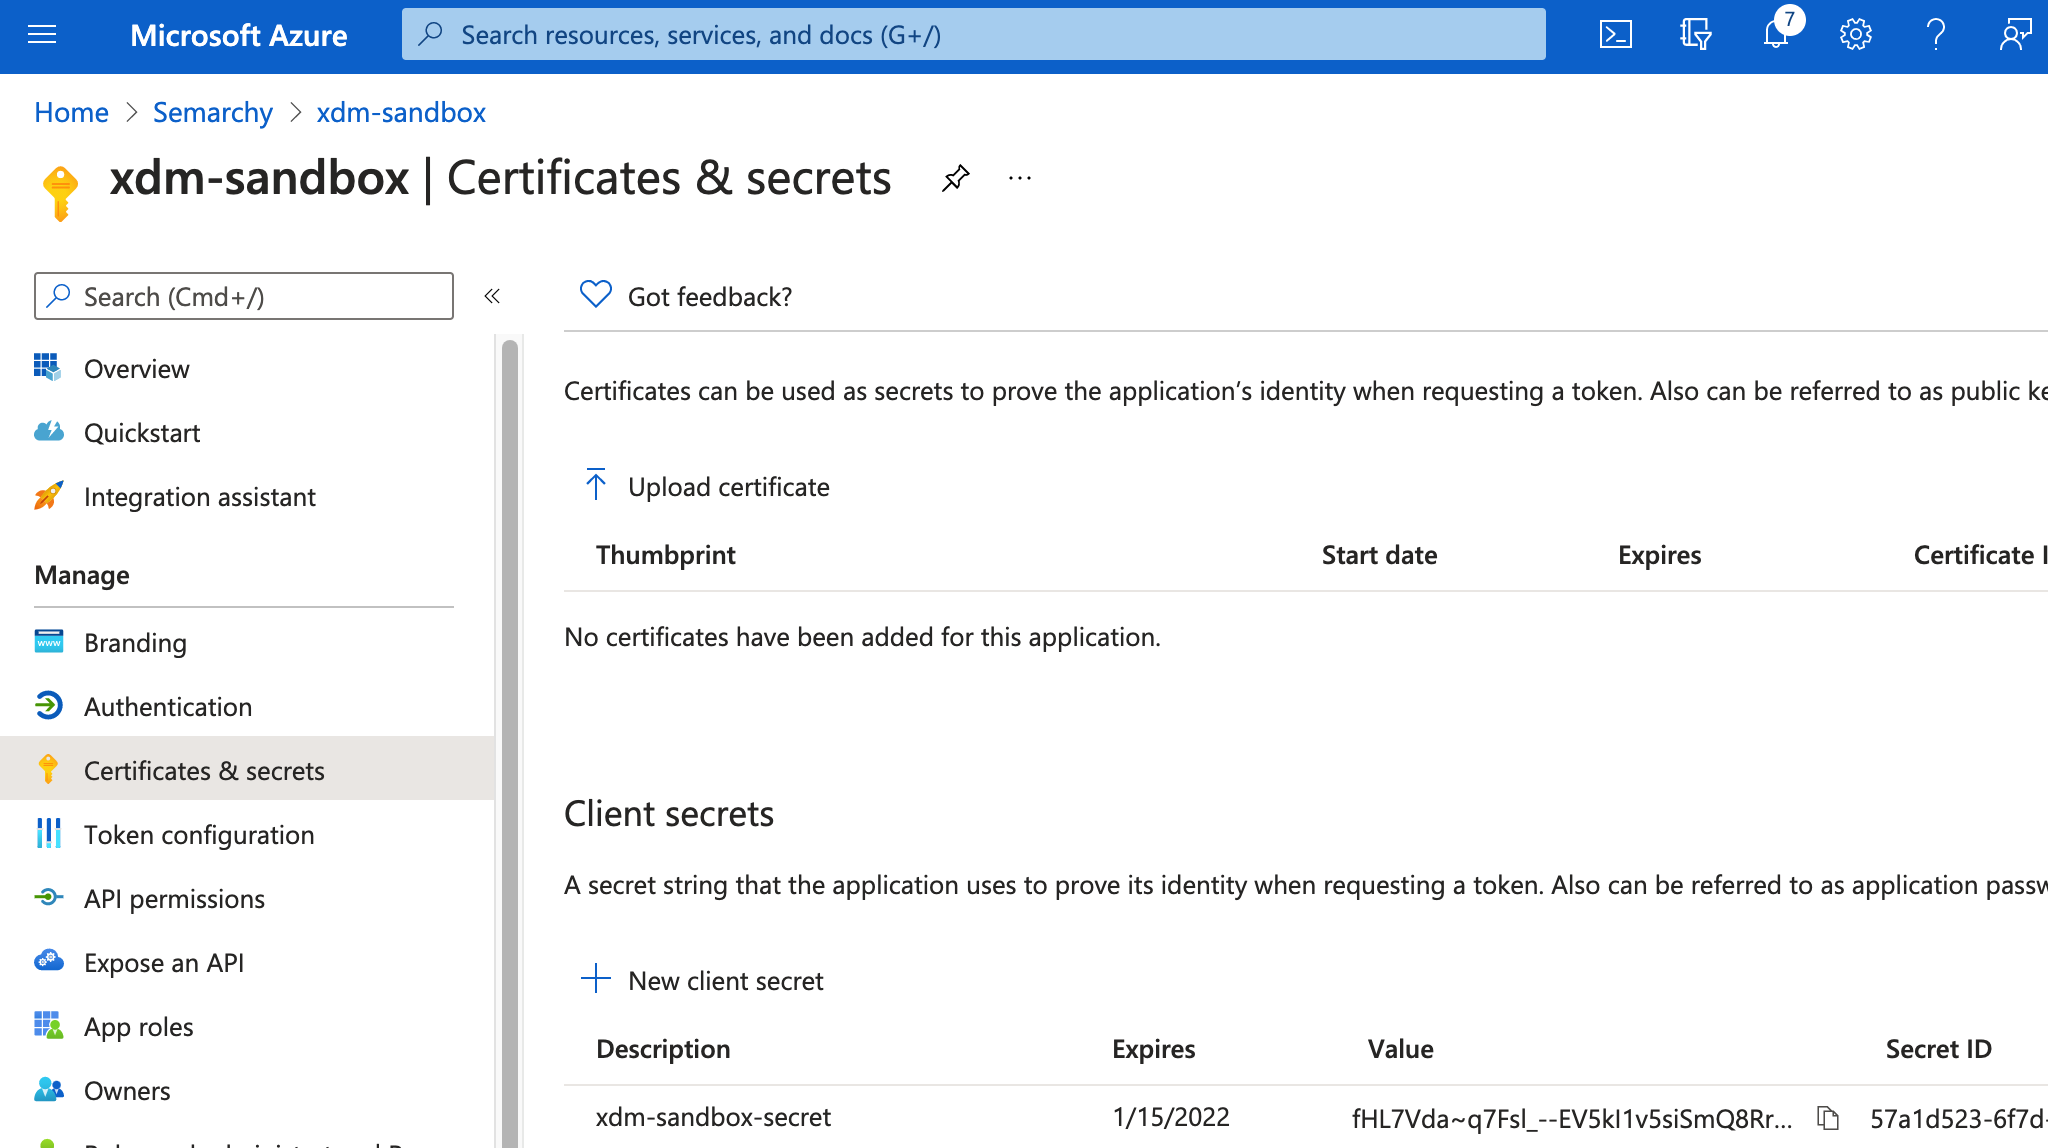
In the App Registration, select Certificates and Secrets, and then click New client Secret.
-
Enter a Description for the client secret, and then click Add.
-
The secret is created. Note the Value of the Client Secret. This value will be used as Client Secret later in the configuration.
-
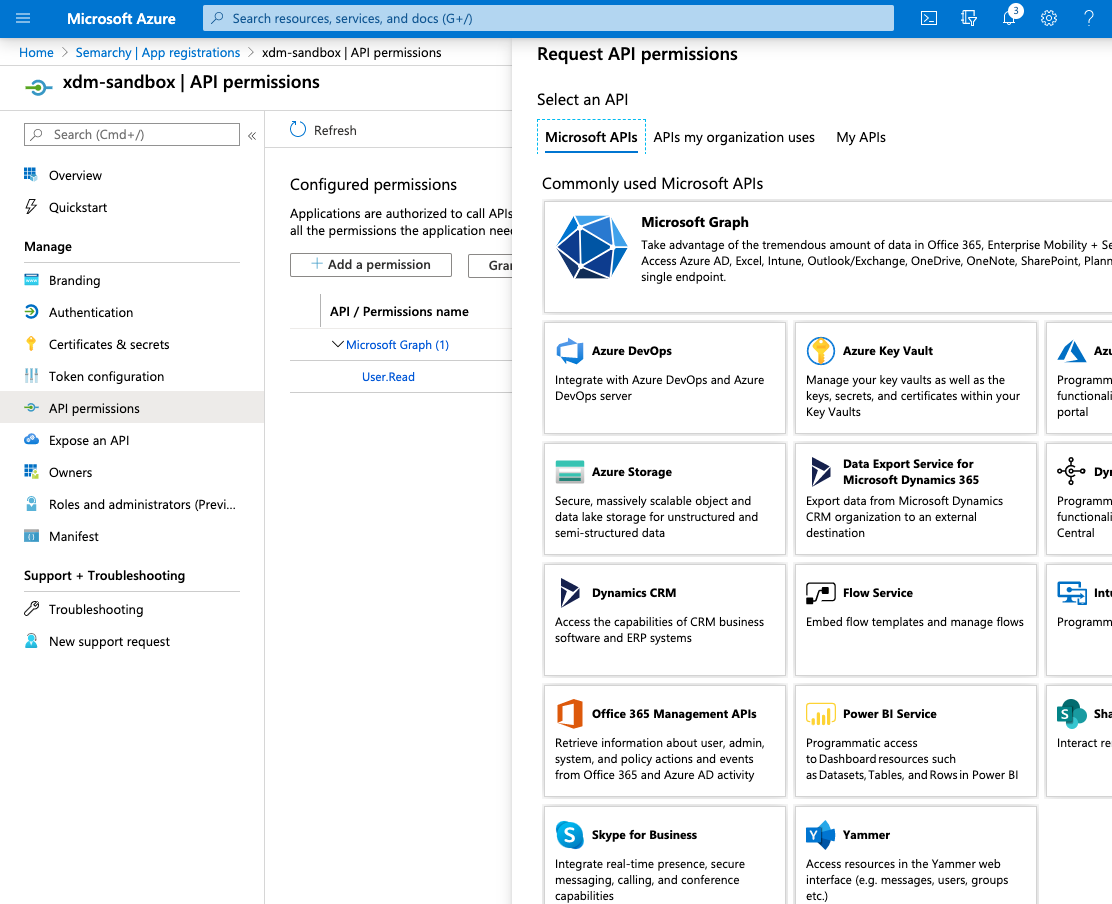
Select API Permissions, and then click Add a permission.
-
Select Microsoft Graph
-
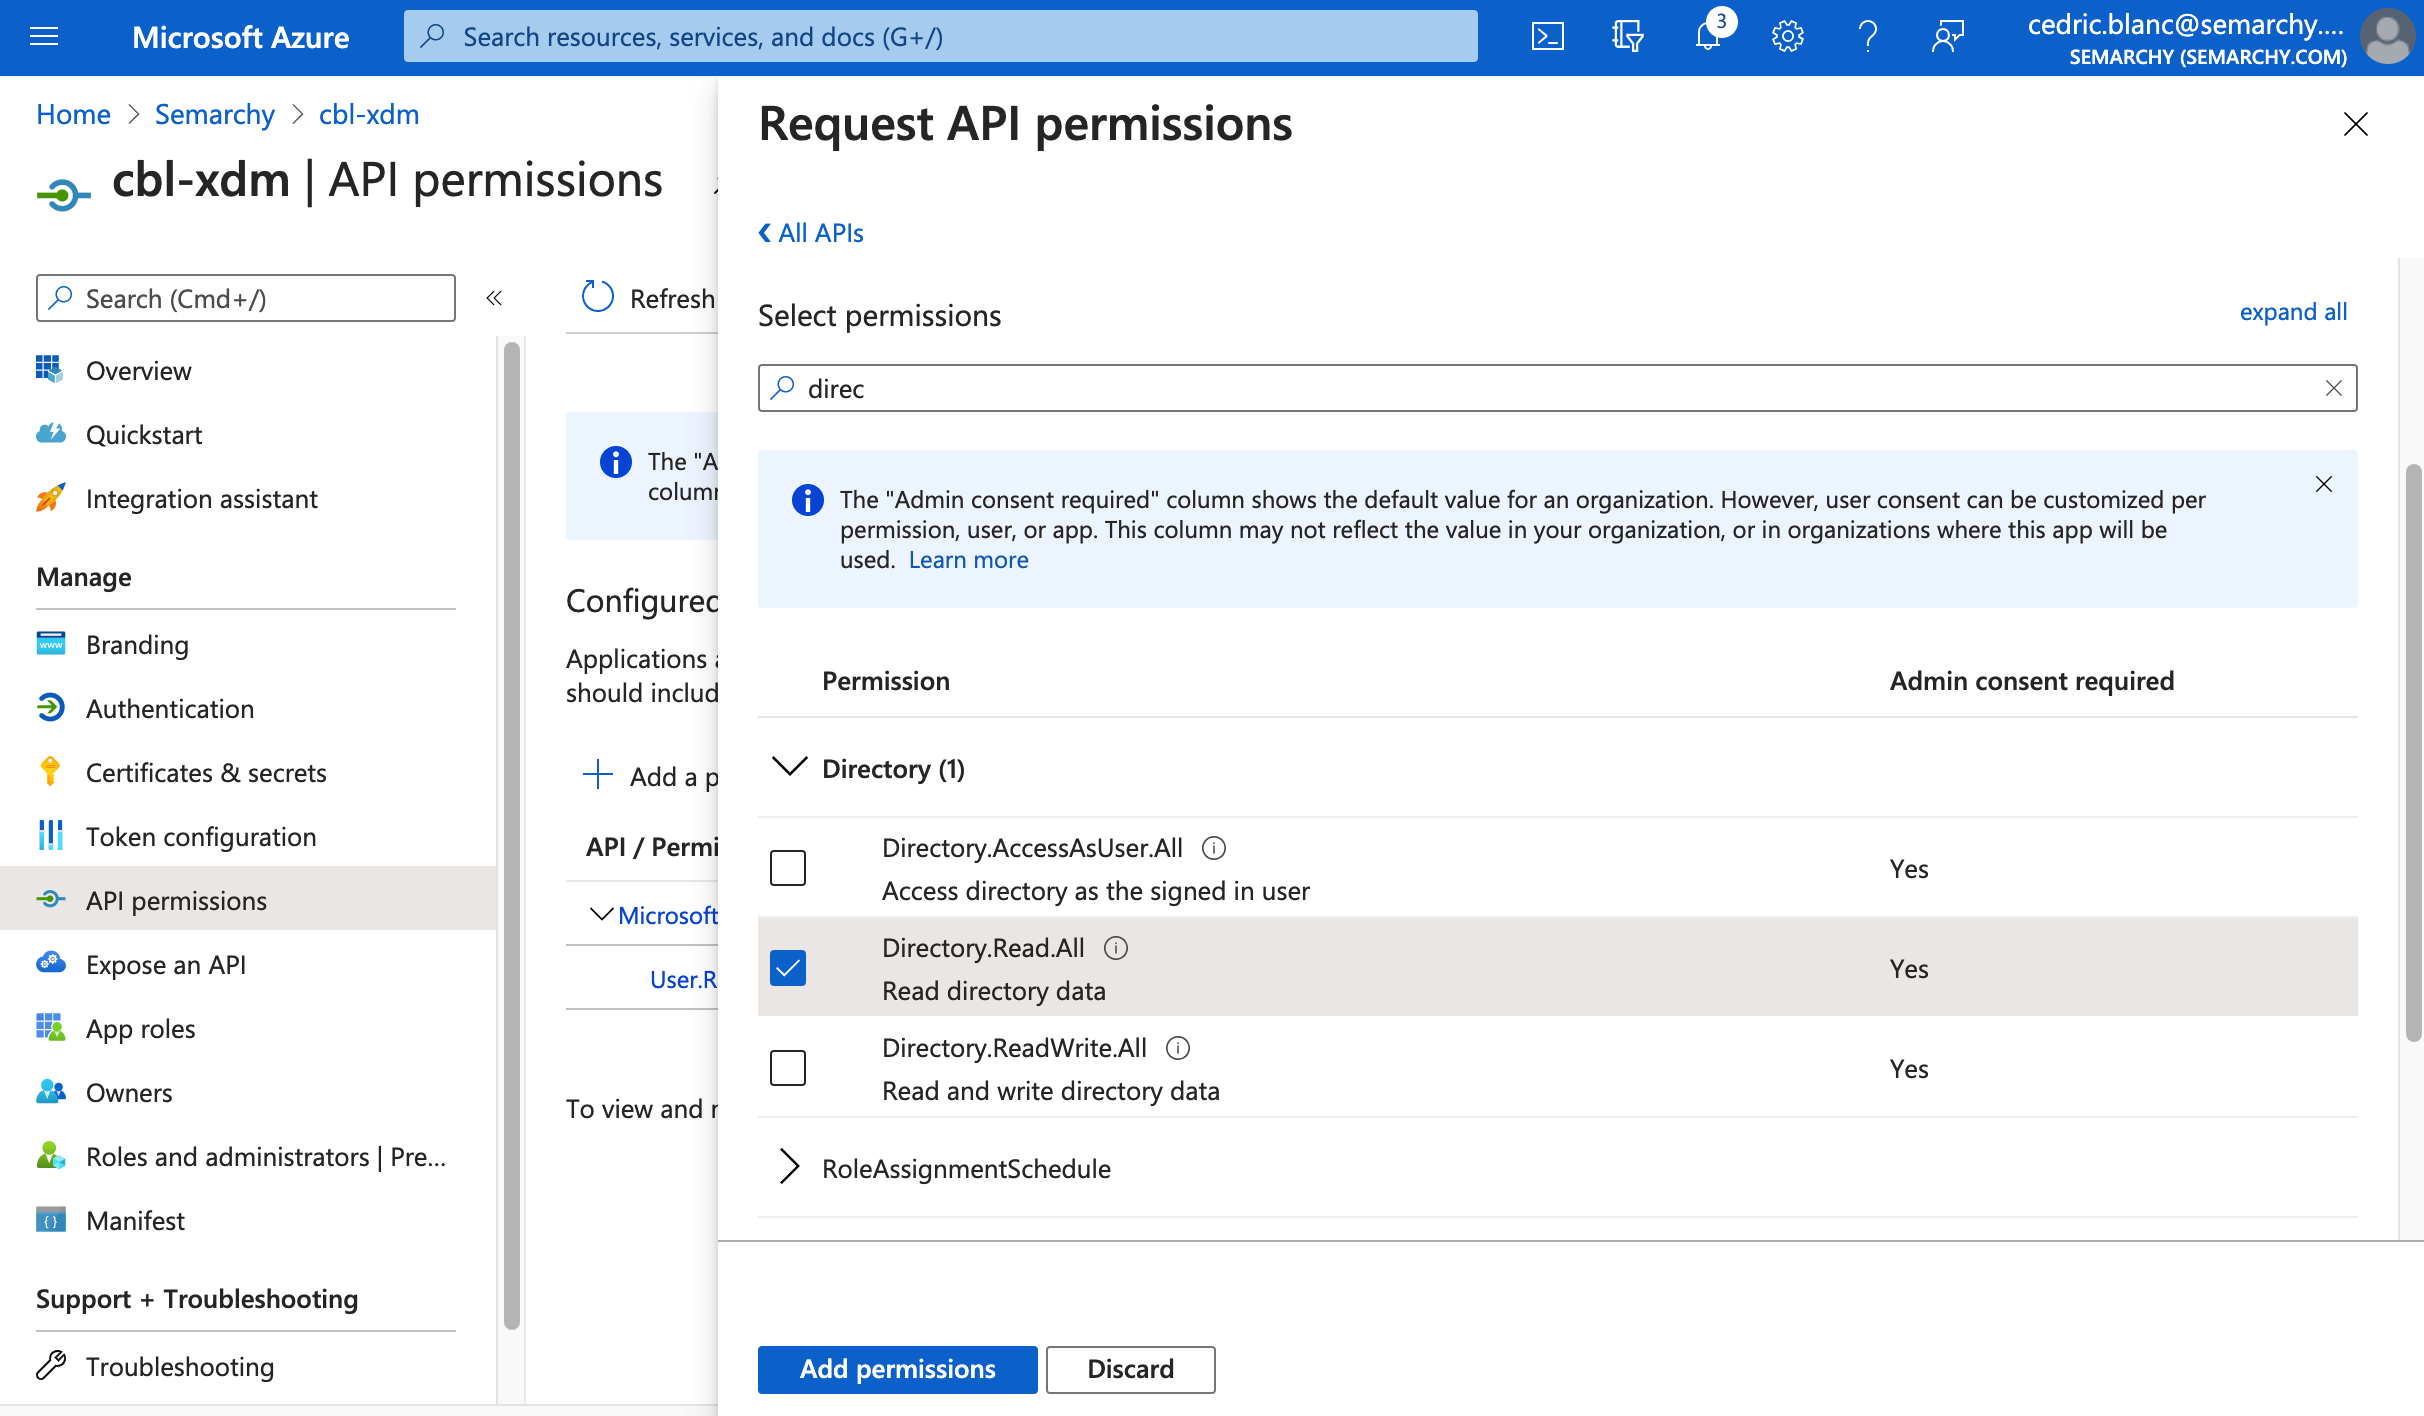
Select Delegated Permissions and then enter directory to filter the permissions.
-
Select the Directory.Read.All permission, and then click the Add permissions button.
-
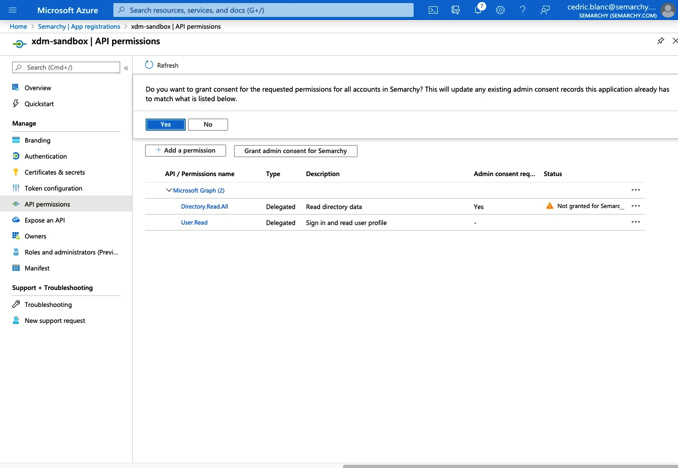
Click the Grant admin consent for … button and then click OK to confirm.
-
Select Manifest.
-
In the editor, search for the
groupMembershipClaimsproperty, currently set to null. Change its value toSecurityGroup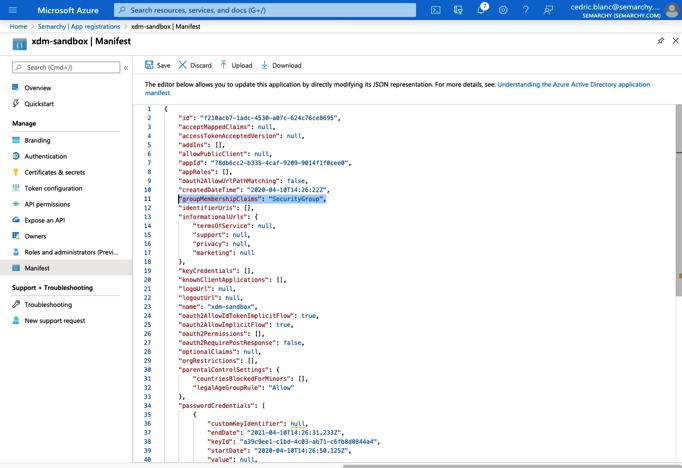
-
Click Save.
-
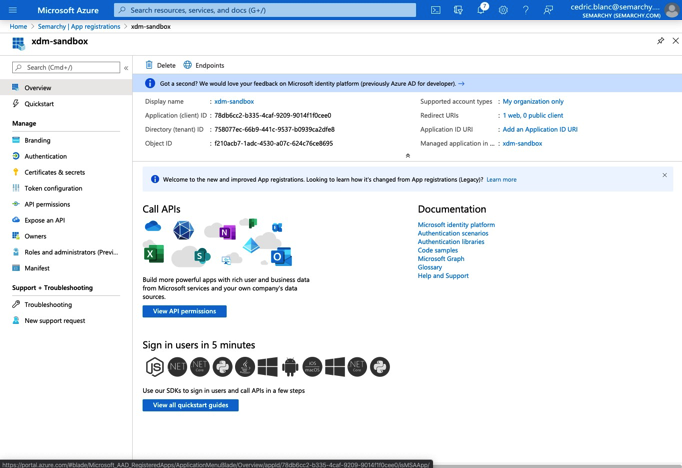
Select Overview. Note the Application (Client ID) value. This value will be used as the Client ID later in the configuration.
-
Click Endpoints. Copy the URL of the OpenID Connect metadata document. This value will be used as the Issuer URL later in the configuration.
You should only copy the part of the URL until 2.0, as shown below.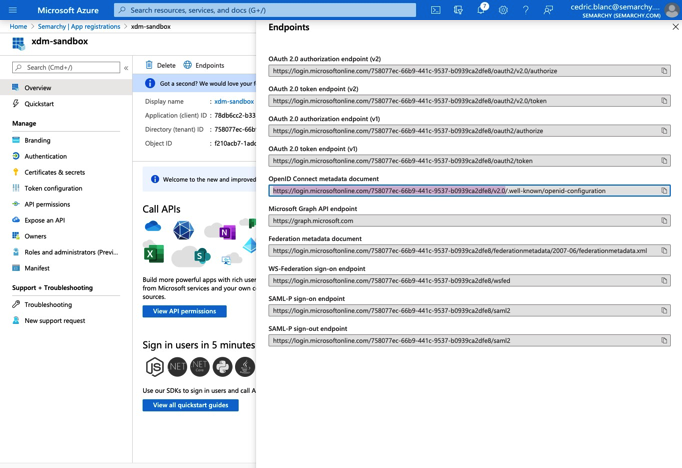
At that stage, you should have the three following values:
-
Client ID: The Application (Client ID) in the App Registration Overview.
-
Client Secret: The value of the secret created in the App Registration Certificate and secrets.
-
Issuer URL: The OpenID Connect metadata document in the App Registration Overview > Endpoints.
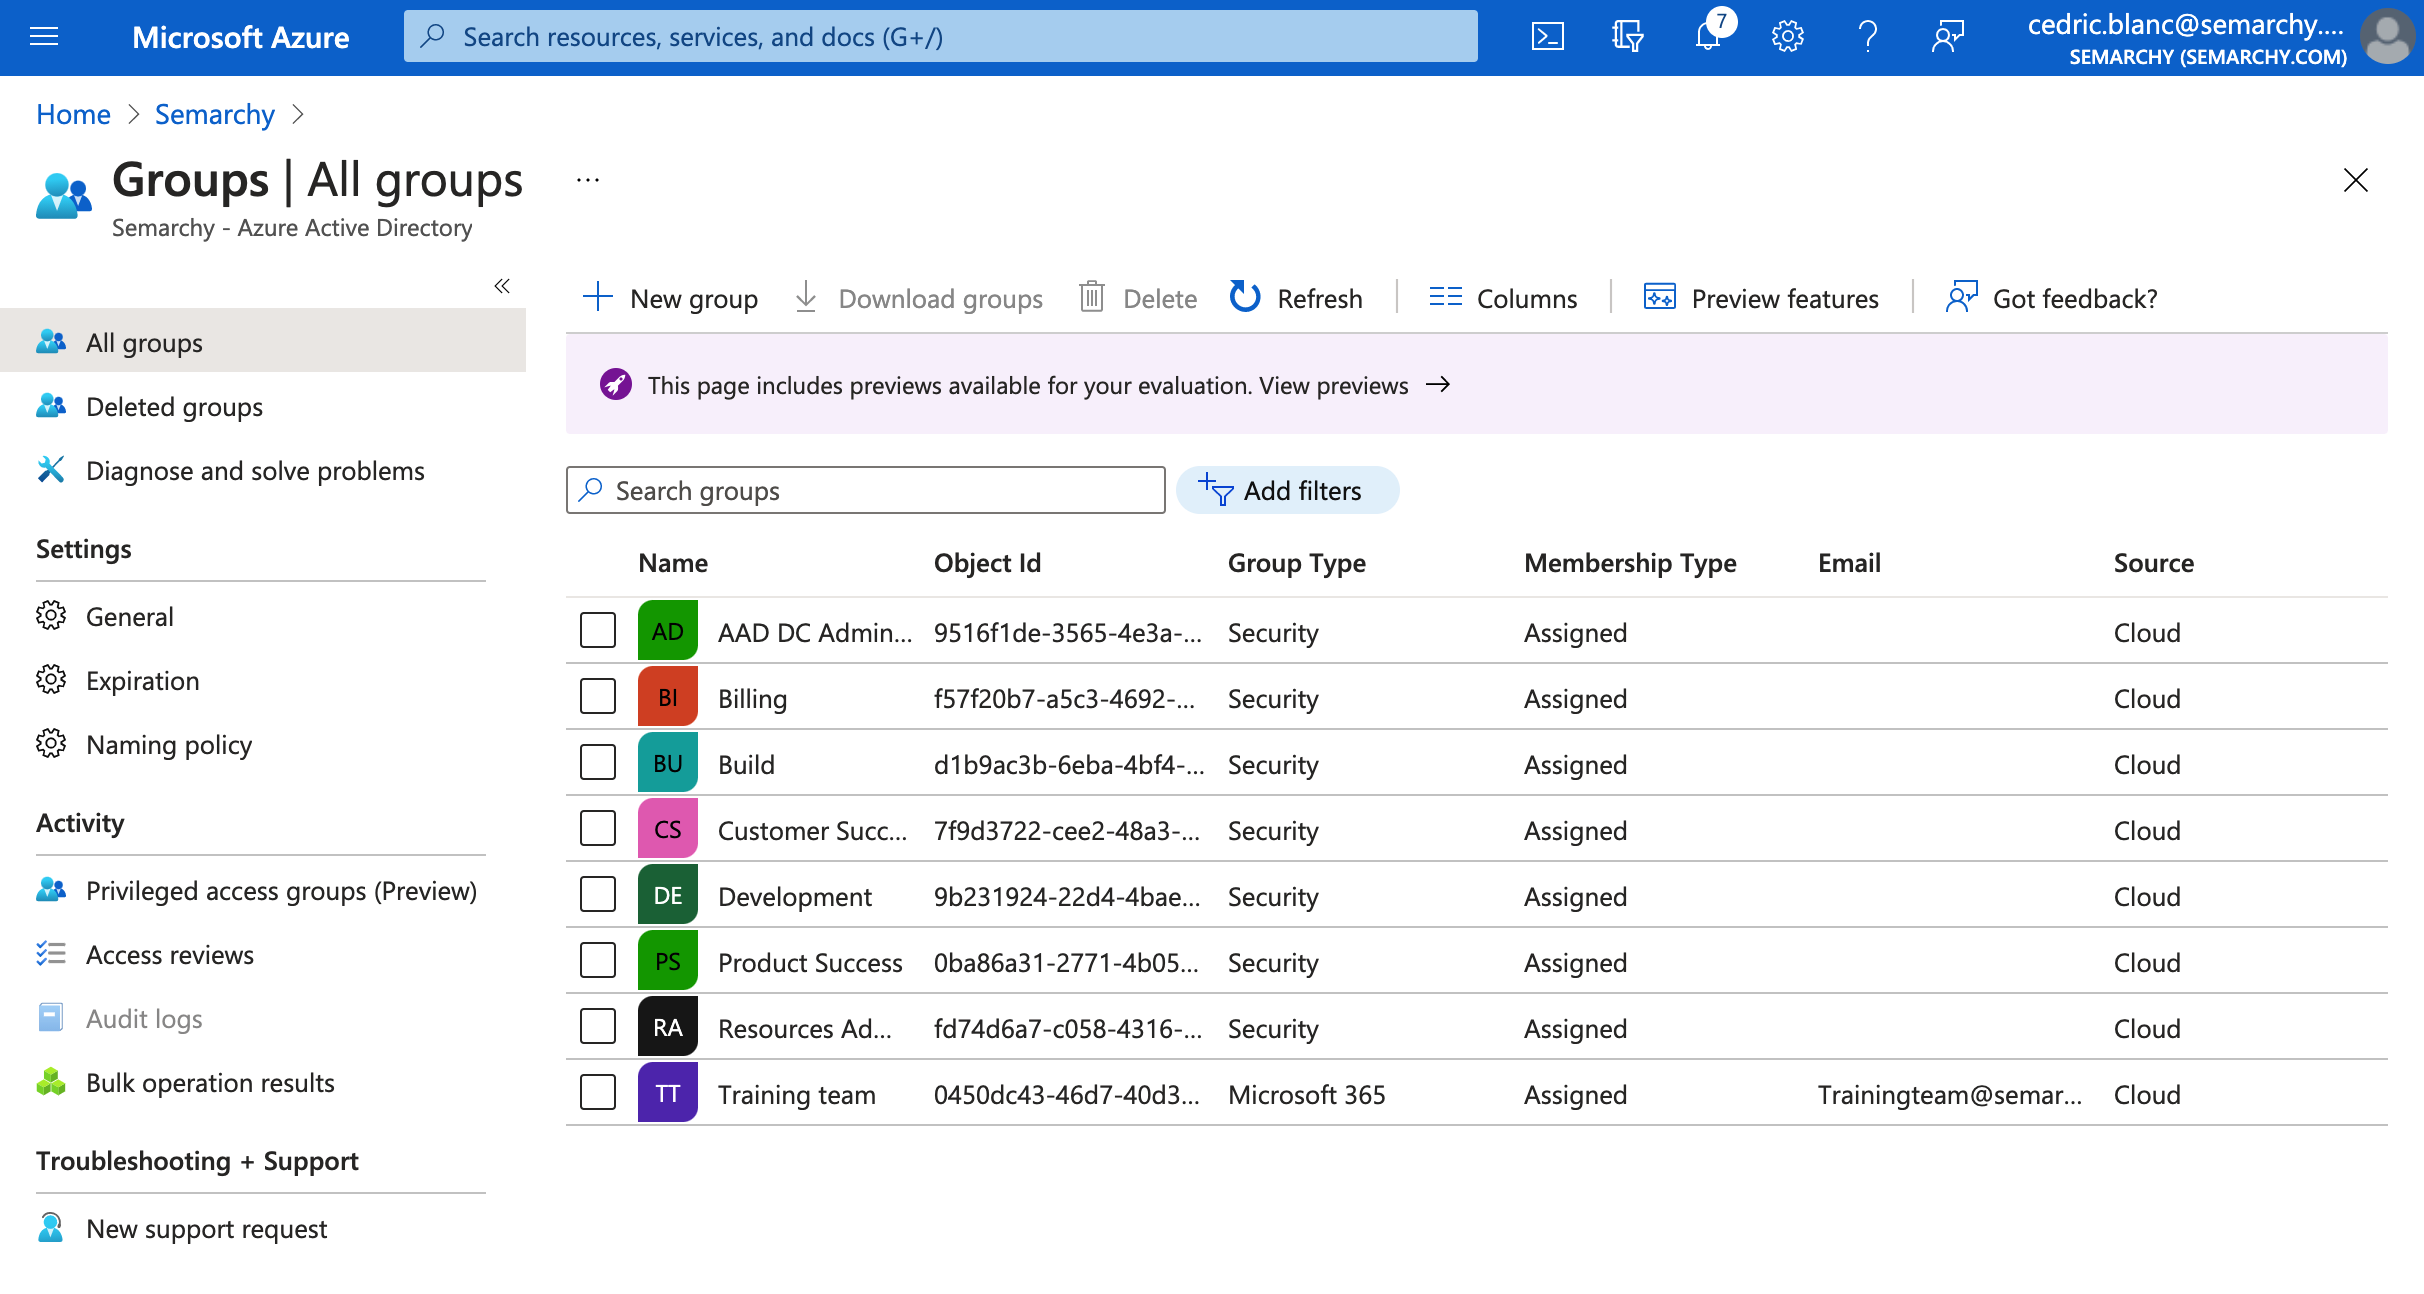
Identify AAD groups to use in Semarchy
Semarchy xDM uses roles that need to be mapped on groups in the Azure Active Directory. You must identify the user groups and their corresponding roles in Semarchy.
-
In the Azure Portal, select your Azure Active Directory
-
Select Groups. Identify those of the groups that you want to map on specific roles and note their Object Id value.
Configure Semarchy xDM to use AAD
-
Access the Semarchy xDM Welcome page, open Configuration, and then select Identity Management.
-
Click the Add provider button.
-
Select the OpenID Connect Provider type.
-
Enter the following values in the Identity Provider editor:
-
Issuer Identifier: The value of Issuer URL in Azure (see Register the application in AAD)
-
ClientID: The value of Client ID for the application in Azure (see Register the application in AAD)
-
Client Secret: The value of Client Secret created in Azure (see Register the application in AAD)
-
Logout URL: https://login.microsoftonline.com/common/oauth2/logout
-
Additional Scopes: email,profile
-
Username Claim: preferred_username
-
-
Note the value of the Redirect URL property, which you will declare in Azure. This value will be designated later in this document as Redirect URL.
-
Click the Save button.
-
Select the Roles Mapping tab.
-
For each group that you identified in AAD, click the Add Role Mapping button and enter the following details for the mapping:
-
Provider role: name of the role in AAD.
-
Mapped role: corresponding role(s) in your Semarchy instance.
Table 1. Examples of a role mapping Provider role Mapped roles 0450dc43-46d7-40d3-95d4-779a723f347a
semarchyConnect,semarchyAdmin
9b231924-22d4-4bae-8a1c-1860c5e1d387
semarchyConnect,dataSteward
7f9d3722-cee2-48a3-95e2-c6be68ab3113
semarchyConnect,businessUser
-
-
Save the identity provider.
Declare a platform for Semarchy xDM in AAD
You must now enter in Azure Active Directory the redirect URI of the identity provider you have defined in Semarchy.
-
In the Azure Portal, select your Azure Active Directory
-
Select App Registration, and then select the application you previously registered.
-
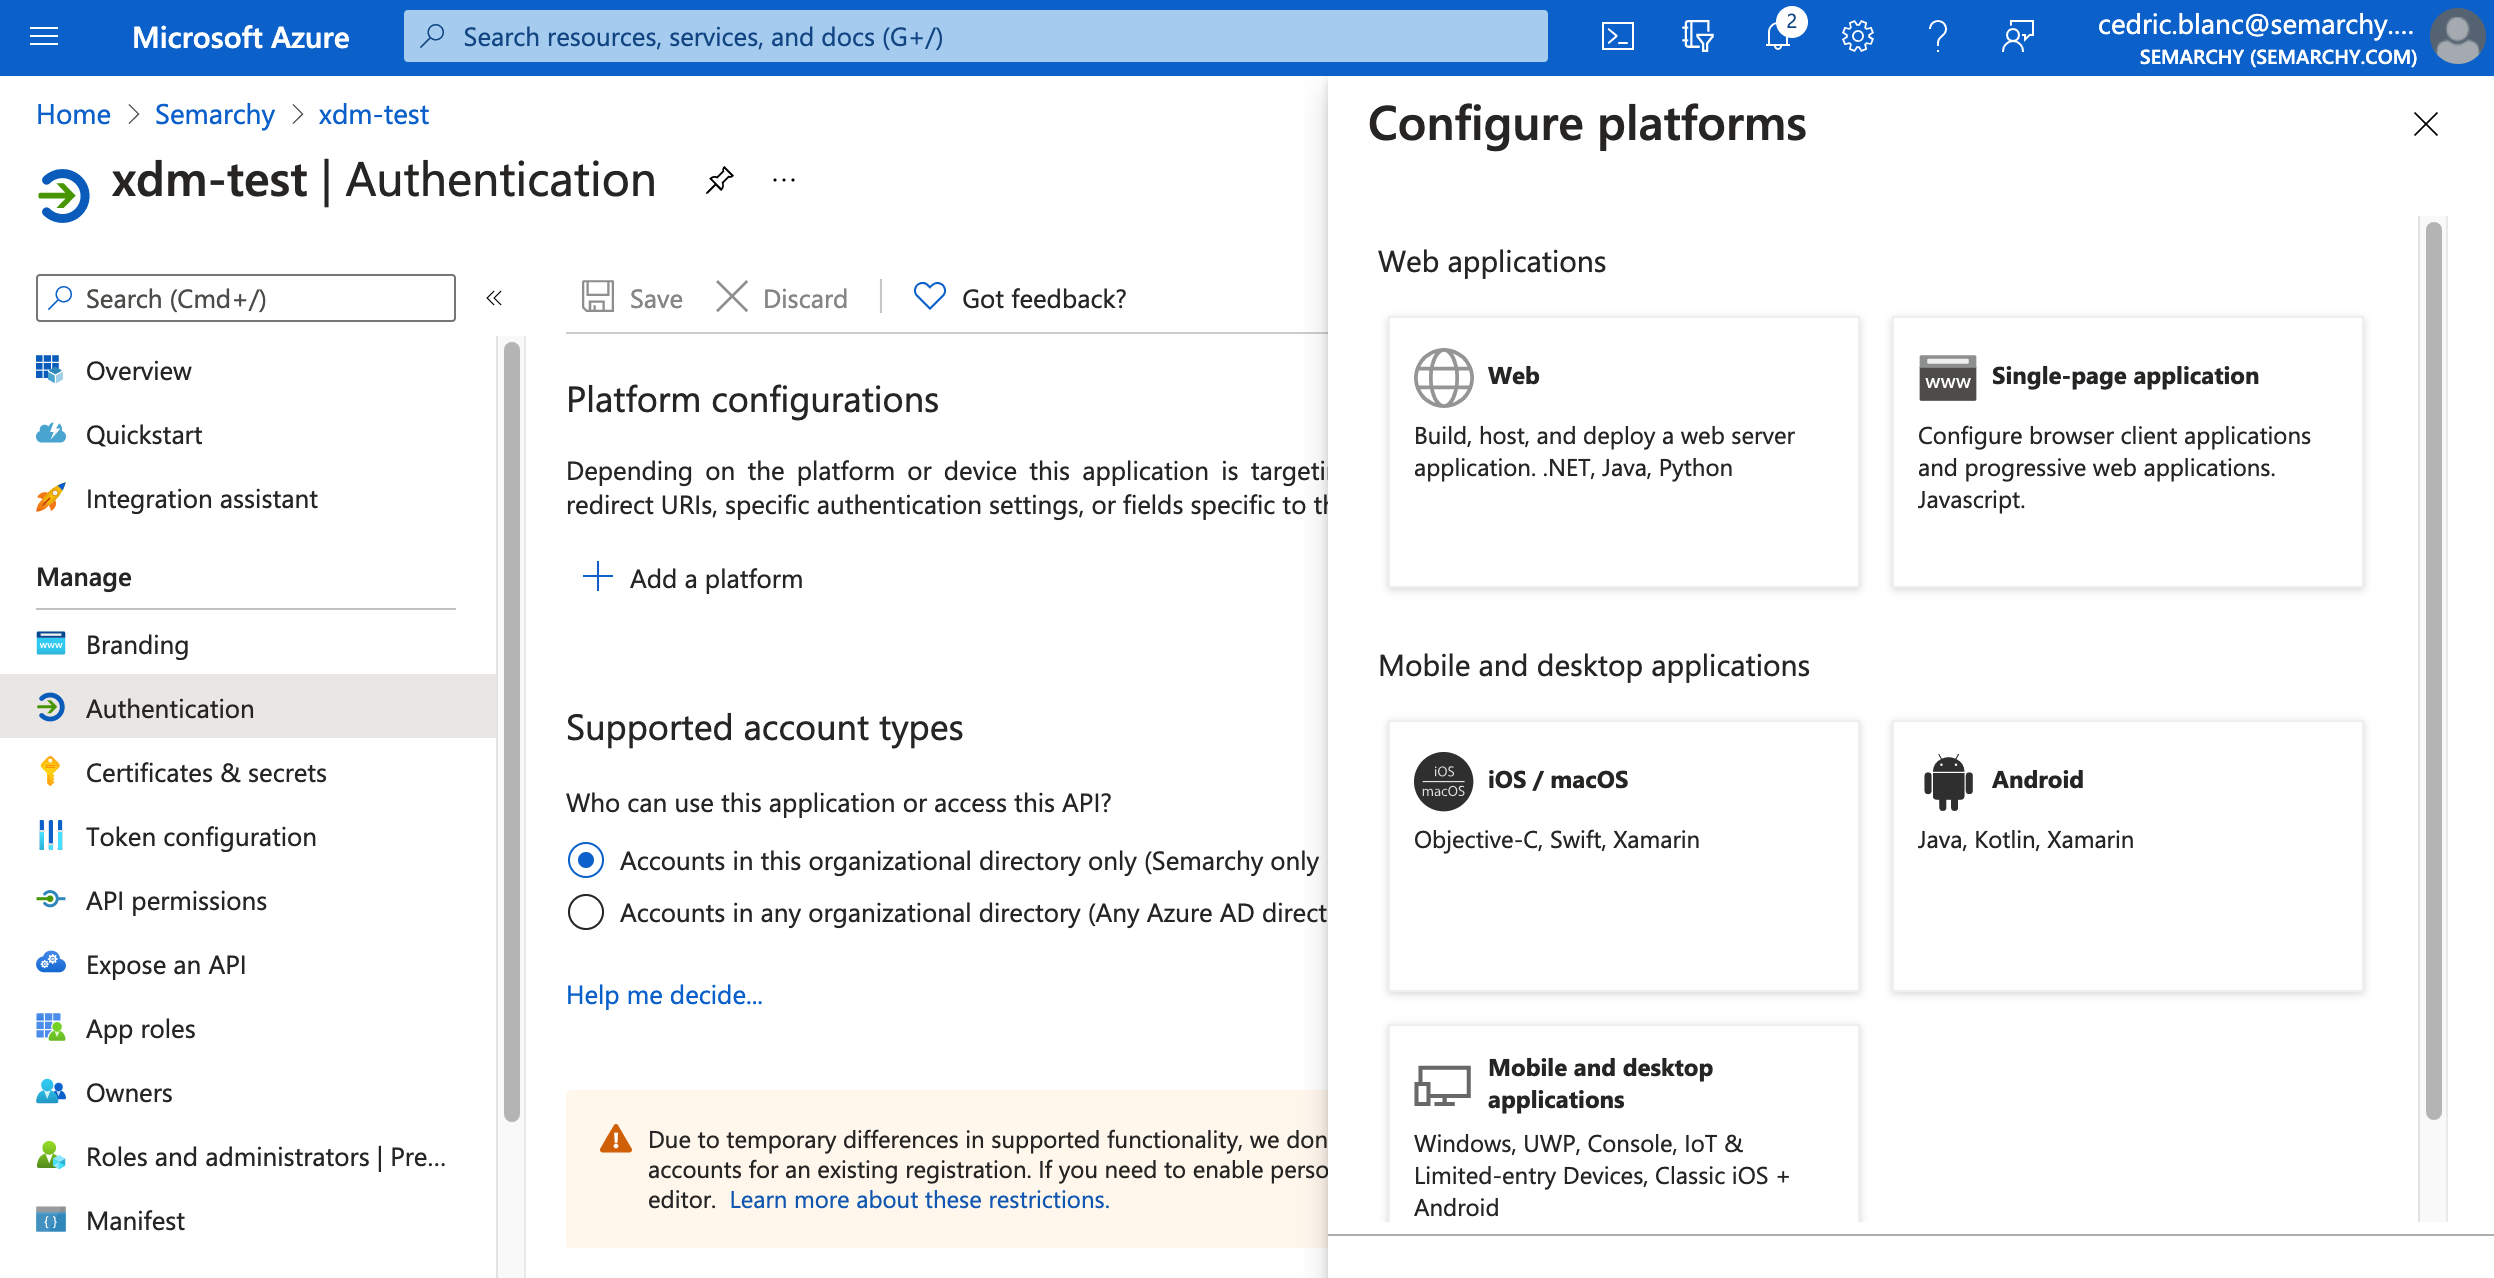
Select Authentication in the navigation menu.
-
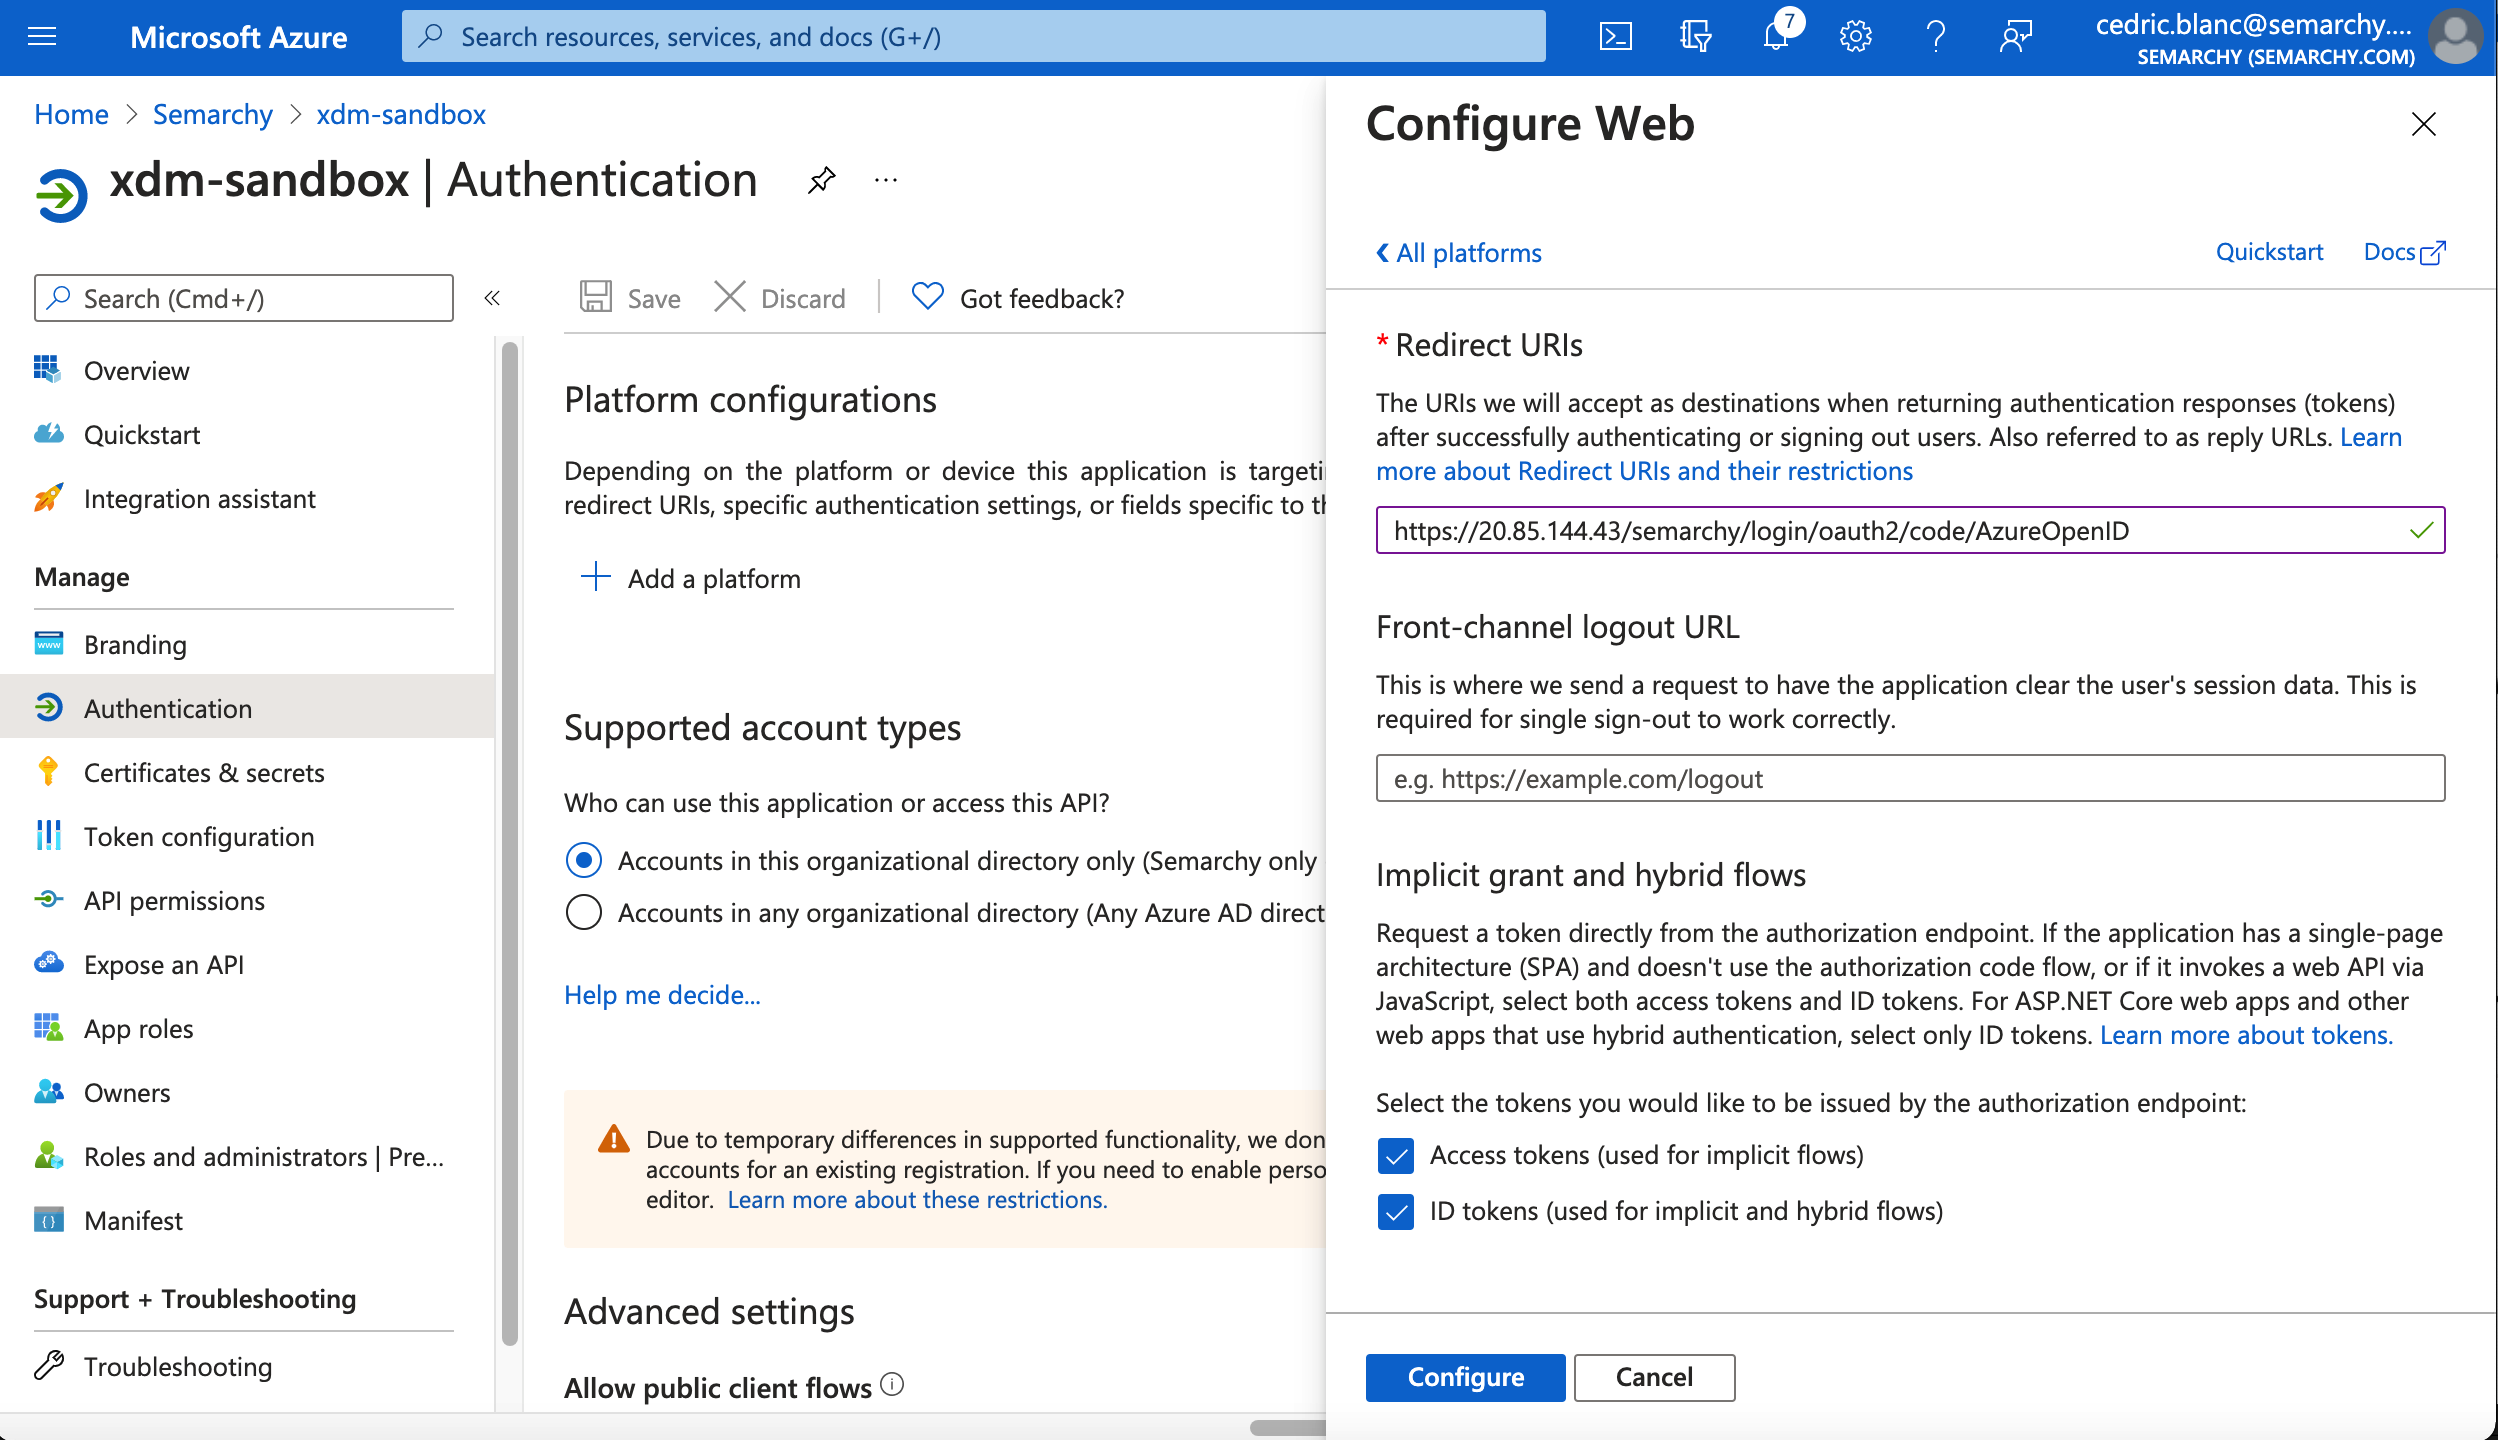
Select Add a platform and then select Web.
-
Under Redirect URIs, enter the Redirect URL from the identity provider’s configuration in Semarchy.
-
Leave the Front-channel logout URL empty.
-
Select Access Tokens and ID Tokens in the Implicit grant and hybrid flows section.
-
Click Configure to apply your changes.