Install Semarchy xDI Analytics
This page details how to install, configure, and run Semarchy xDI Analytics.
Installation process
Before the installation, make sure to understand the xDI architecture and review carefully the System requirements.
Semarchy xDI Analytics is a web application that must be deployed on a Java Web Application Server and that requires a database to store its data.
The xDI Analytics installation process is as follows:
After deployment, further configuration will happen in the Analytics Web interface.
| Depending on the Java Web Application Server you are using, the steps to install xDI Analytics will be slightly different. However, the following process should be the same for most applications, aside from locations and small details. |
Download xDI Analytics
xDI Analytics is shipped as an archive containing a Web Application Archive file.
Review security and password requirements
Before moving forward with installing xDI Analytics, review your organization’s policies and take note of any security requirements.
In addition, you should use strong passwords for all current or future services and accounts. Strong passwords help protect your data from unauthorized access and potential security breaches.
|
Here are some general recommendations regarding passwords:
These recommendations may change. Make sure all passwords align with your organization’s password policies. |
Prepare the infrastructure
You need:
-
An account with administrative rights on the application server to deploy and configure the Analytics application.
-
A database user account, which will be used by xDI Analytics to store its data in a database.
Create the database schema
Before installing xDI Analytics, you must create a database schema it can use. The schema is used to store all Analytics data. You can create the schema manually, or use your database administration interface.
We provide sample creation scripts in this section. Adapt this script based on your database configuration.
CREATE USER <analytics_db_user> IDENTIFIED BY <analytics_db_password>
 DEFAULT TABLESPACE USERS TEMPORARY TABLESPACE TEMP;
GRANT CONNECT, RESOURCE TO <analytics_db_user>;

-- The following command should be used for Oracle 12c and above
GRANT UNLIMITED TABLESPACE TO <analytics_db_user>;/* Create a database */
CREATE DATABASE <postgresql_database_name> WITH ENCODING 'UTF8';
/*
* Disconnect and then reconnect using:
* the JDBC URL: jdbc:postgresql://<host>:<port>/<postgresql_database_name>
* or using psql with the following command: psql -U postgres <postgresql_database_name>
*/
CREATE SCHEMA extensions;
GRANT USAGE ON SCHEMA extensions TO PUBLIC;
ALTER DEFAULT PRIVILEGES IN SCHEMA extensions GRANT EXECUTE ON FUNCTIONS TO PUBLIC;
ALTER DATABASE <postgresql_database_name> SET SEARCH_PATH TO "$user",public,extensions;
/* Create the user and schema */
CREATE USER <analytics_db_user> WITH PASSWORD '<analytics_db_password>';
/* Use the following syntax for PostgreSQL 9 */
-- CREATE USER <analytics_db_user> WITH UNENCRYPTED PASSWORD '<analytics_db_password>';
/*
* The following command is required only for PostgreSQL running on Amazon RDS.
* It grants access to the storage to the RDS superuser.
*/
-- GRANT <analytics_db_user> TO <rds_superuser_name>
CREATE SCHEMA <analytics_db_user> AUTHORIZATION <analytics_db_user>;/* Create a database */
CREATE DATABASE <analytics_db_database_name>
GO
/* Configure the database */
ALTER DATABASE <analytics_db_database_name> SET READ_COMMITTED_SNAPSHOT ON;
GO
ALTER DATABASE <analytics_db_database_name> SET QUOTED_IDENTIFIER ON;
GO
/* Create a login to connect the database */
CREATE LOGIN <analytics_db_user> WITH PASSWORD='<analytics_db_password>', DEFAULT_DATABASE=<analytics_db_database_name>
GO
/* Add a user for that login in the database */
USE <analytics_db_database_name>
GO
CREATE USER <analytics_db_user> FOR LOGIN <analytics_db_user>
GO
/* Make this user database owner */
ALTER ROLE db_owner ADD MEMBER <analytics_db_user>
GOSave what you put in for <analytics_db_user>, <analytics_db_password>, and <analytics_db_database_name> (for SQL Server), as you need them to configure the datasource.
Configure the environment
xDI Analytics stores configuration files, temporary data, logs, and additional drivers in a directory on the server. This directory is set by the XDI_ANALYTICS_WEBAPP_HOME environment variable.
The user running the application server process must have read and write permissions for this directory. The application server log will return a warning in case of permission errors.
It is recommended to set XDI_ANALYTICS_WEBAPP_HOME to a different directory in than the application server folder, to keep xDI Analytics configuration files separate from the application server.
|
The following examples illustrate how to set the variable in different environments.
# Set environment variable: Unix/Linux
export XDI_ANALYTICS_WEBAPP_HOME=/usr/analytics/
# See the variable value
# echo $XDI_ANALYTICS_WEBAPP_HOMErem Set environment variable: Windows
set XDI_ANALYTICS_WEBAPP_HOME=C:/analytics/
rem See the variable value
rem echo %XDI_ANALYTICS_WEBAPP_HOME%Apache Tomcat must have this environment variable set. Otherwise, the folder will be created in a temporary work folder which will be removed by the application server.
When running Tomcat as a service on Windows, it is recommended to set the startup configuration using environment variables. You can do this in one of two ways:
-
By configuring the service using the Tomcat tooling.
|
Environment variables set in the Control Panel must be set as System Variables when Tomcat runs as a service. |
tomcat9 //US//Tomcat9 ++Environment XDI_ANALYTICS_WEBAPP_HOME=/usr/analytics/Configure the database connection
xDI Analytics connects to its database via a datasource managed by the application server. You must install a JDBC driver and configure a datasource in order for the connection to work.
Install the database JDBC driver
Prior to configuring the datasource, install the JDBC driver corresponding to the storage database in the application server.
For Apache Tomcat, install JDBC drivers by copying the appropriate files to the Tomcat lib directory.
Different application servers may need extra steps to make this driver visible to the application server or the datasource.
Configure the datasource
A JNDI datasource configures the connection to the storage database and schema. xDI Analytics looks for a datasource resource named jdbc/xdi-analytics-datasource-tomcat for Apache Tomcat, or jdbc/xdi-analytics-datasource for other application services.
You can configure the datasource in Tomcat by adding a resource to the Apache Tomcat Context configuration file (context.xml). The following example is for a PostgreSQL database named analytics_db on the localhost server using port 5432:
<Context>
  ...
    <Resource name="jdbc/xdi-analytics-datasource-tomcat"  (1)
    auth="Container" type="javax.sql.DataSource"
        driverClassName="org.postgresql.Driver" (2)
        url="jdbc:postgresql://localhost:5432/<analytics_db_name>" (3)
        username="<analytics_db_user>" (4)
        password="<analytics_db_password>" (4)
        maxTotal="100" (5)
        maxIdle="30" (6)
        maxWaitMillis="10000" (7)
    />
  ...
</Context>| 1 | Datasource Name. |
| 2 | JDBC Driver classname. |
| 3 | JDBC URL to connect the database. |
| 4 | Username and password defined when you created the database schema |
| 5 | Maximum number of database connections in pool. Make this value large enough to handle all of your connections. Set to -1 for no limit. |
| 6 | Maximum number of idle connections kept in the pool at all times. Set to -1 for no limit. |
| 7 | Maximum time to wait for a database connection to become available in ms. Set to -1 to wait indefinitely. |
| See the Apache Tomcat documentation for a full list of datasource configuration properties. |
Other application servers use different configuration formats. Refer to their documentation for more details, and make sure to use the jdbc/xdi-analytics-datasource resource name.
Configure the users
Users accessing xDI Analytics authenticate with the application. They receive a set of roles that control access to features in Analytics.
Configure the users who will access Analytics, and their roles, in the application server.
To add users and roles, edit the tomcat-users.xml file and add or modify user nodes as shown in the following template.
<tomcat-users>
  <user
    username="youruser"
    password="yourpassword"
    roles="admin-gui, manager-gui, analyticsAdmin, analyticsConnect" (1)
  />
</tomcat-users>| 1 | analyticsAdmin and analyticsConnect roles from Analytics, and admin-gui and manager-gui roles from Tomcat. |
Analytics comes with the following roles, and their associated privileges:
Role |
Description |
analyticsConnect |
Grants login permissions. This role is required for all users connecting to xDI Analytics |
analyticsAdmin |
Grants full access to all the features with no restrictions. This role overrides other ones. |
analyticsParameterConsult |
Grants access to view parameters. |
analyticsParameterAdmin |
Grants access to modify parameters. |
analyticsSessionConsult |
Grants access to view the Sessions Reports. |
analyticsSessionAdmin |
Grants access to administer Sessions Reports. |
analyticsSessionAction |
Grants access manage delivery sessions. |
analyticsRuntimeConsult |
Grants access to view runtimes. |
analyticsRuntimeAdmin |
Grants access to operate and control runtimes. |
analyticsRepositoryConsult |
Grants access to view Delivery Repositories and their configuration in the administration interface. |
analyticsRepositoryAdmin |
Grants access to administer Delivery Repositories and their configuration in the administration interface. |
For other applications servers, refer to their documentation for configuration steps.
Configure extra settings
Change the error messages
Apache Tomcat, and other application servers, displays their own HTTP error pages by default. For example, a 404 error would show the following:
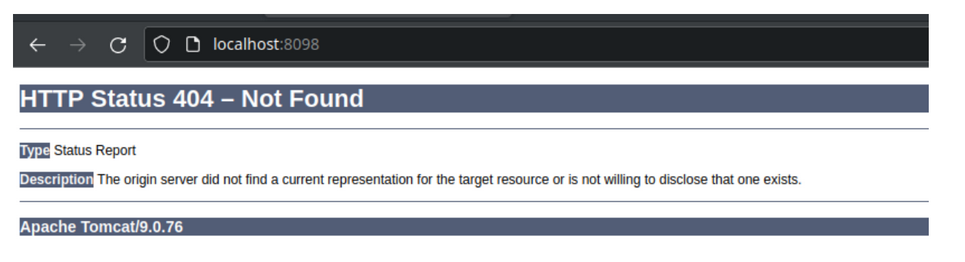
You can change these error pages if you want to display your own messages, or to hide web server information that is considered a security risk in some environments. xDI Analytics comes with generic, minimal error pages you can use.
To change error pages for Tomcat:
-
Open the
conf/server.xmlfile. -
Find the node that starts with
<Engine name="Catalina". -
Find its `<Host>`subnode.
-
Add or find a
<Valve>node with the attributeclassName="org.apache.catalina.valves.ErrorReportValve", as shown in the following example:
<Server port="8005" shutdown="SHUTDOWN">
  <...>
  <Service name="Catalina">
    <...>
    <Engine name="Catalina" defaultHost="localhost">
      <...>
      <Host name="localhost"  appBase="webapps" unpackWARs="true" autoDeploy="false">
        <...>
        <Valve className="org.apache.catalina.valves.ErrorReportValve"
               errorCode.404="<path-to-file>" (1)
               errorCode.0="<path-to-file>" (1)
               showServerInfo="false" />
        <...>
      </Host>
    </Engine>
  </Service>
</Server>| 1 | Replace <path-to-file> with a path to an HTML file. |
To use the error pages that come bundled with Analytics, use the <Valve> node with the following file references:
<Valve className="org.apache.catalina.valves.ErrorReportValve"
        errorCode.404="${catalina.base}/webapps/semarchy-xdi-analytics/WEB-INF/error404.html"
        errorCode.0="${catalina.base}/webapps/semarchy-xdi-analytics/WEB-INF/error.html"
        showServerInfo="false" />
More information about the Tomcat Error Report Valve is available in the Tomcat documentation.
Change the session timeout
You can change how long the Analytics web session stays active until it times out. The default is 30 minutes.
To change the session timeout, open the web.xml configuration file, and look for the elements named <session-config> and <session-timeout>. Uncomment these elements if needed, and change the value of <session-timeout> to your own value, in minutes.
<session-config>
    <session-timeout>120</session-timeout>
</session-config>
If this block is commented out, the default is 30 minutes.
Deploy Analytics
The final step is to deploy the xDI Analytics web application (the semarchy-xdi-analytics.war or semarchy-xdi-analytics.ear file) in your application server. Make sure that you have performed all the previous steps first.
To deploy Analytics in Apache Tomcat, copy the semarchy-xdi-analytics.war file to the Apache Tomcat webapp folder. Tomcat will recognize the file and complete deployment.
For other applications servers, refer to their documentation for detailed instructions.
Connect to Analytics
When you are finished, you can access xDI Analytics application at the following URL:
http://<host>:<port>/semarchy-xdi-analytics/semarchy
The URL may vary depending on how the application server was configured.
After logging in with a user who has the necessary roles, the xDI Analytics main page opens.
The Apache Tomcat startup log file and console will show the following message once xDI Analytics storage is initialized:
Analytics datasource successfully initialized