Getting started with the Snowflake database
This page contains information to help you get started with Snowflake in Semarchy xDI.
Connect to your data
The database structure can be entirely reversed in metadata and then used in mappings and processes to design and adapt your business rules to meet user requirements. The instructions on the Connect to your data page explain the general process to reverse engineer the metadata.
When connecting to Snowflake, you can use three different kinds of authentication:
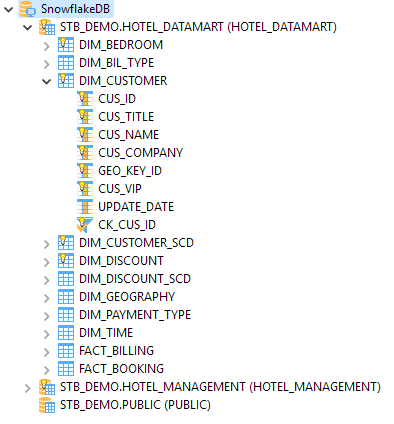
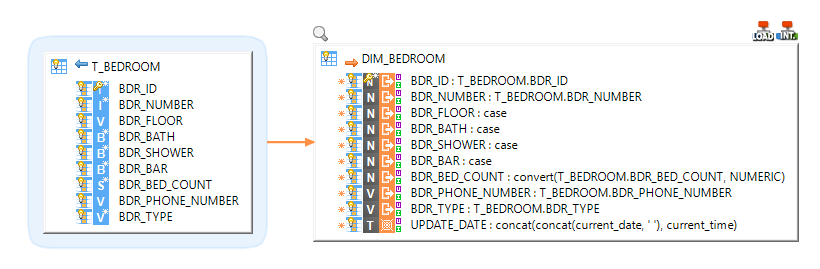
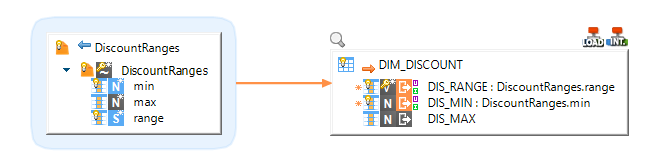
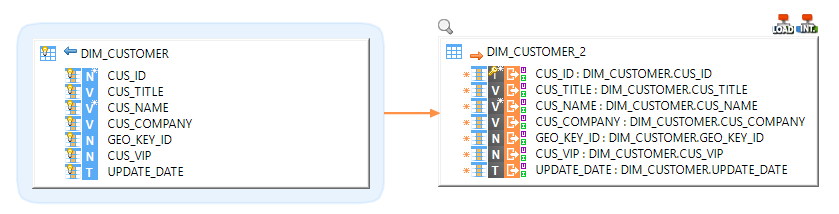
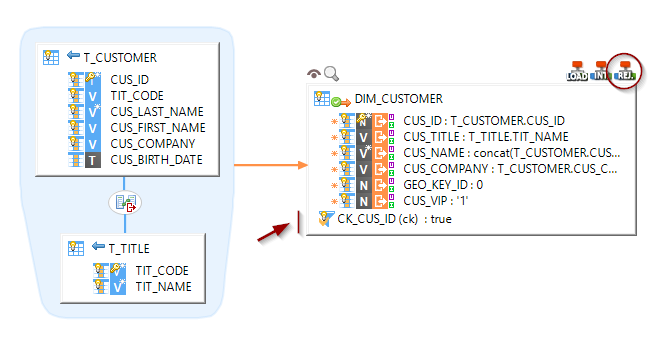
Below is an example of reverse engineered Snowflake metadata.
Use passwords with multi-factor authentication
When using a regular username and password in Snowflake metadata, Snowflake enforces the use of multi-factor authentication (MFA). No extra configuration is required in xDI.
Semarchy xDI supports Snowflake MFA using the Duo application, in one of two ways:
-
Using the Duo application as a direct MFA method. This is the default.
-
Using a Duo-generated passcode in the connection. Add the text
passcode=<passcode_string>to your JDBC connection string, replacing<passcode_string>with the generated passcode.
To reduce the number of MFA prompts during authentication, Snowflake supports MFA token caching. To turn token caching on, set the ALLOW_CLIENT_MFA_CACHING parameter for your Snowflake account.
| MFA is not supported for Snowpipe REST API calls (Streaming). These require key pair authentication using JSON Web Tokens (JWT), signed with an RSA public/private key pair. |
Use key-pair authentication
The Snowflake JDBC driver supports key-pair authentication. This feature allows you to connect to Snowflake without using a password.
To authenticate using key-pair authentication, follow these steps:
-
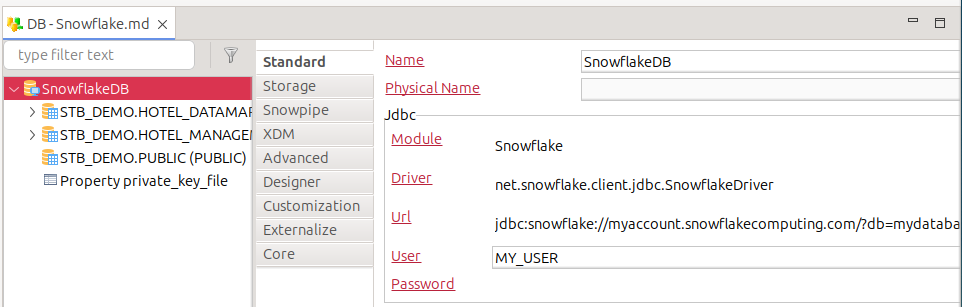
When creating your Snowflake metadata, define the JDBC URL and username but leave the password field empty.
-
Open the server node’s context menu.
-
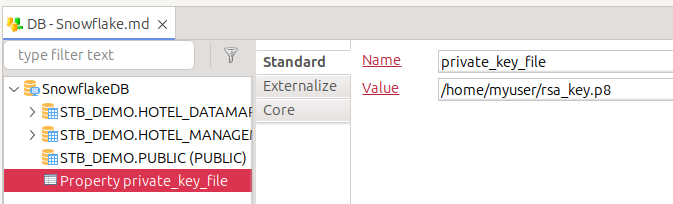
Create a new Property node, and name it
private_key_file.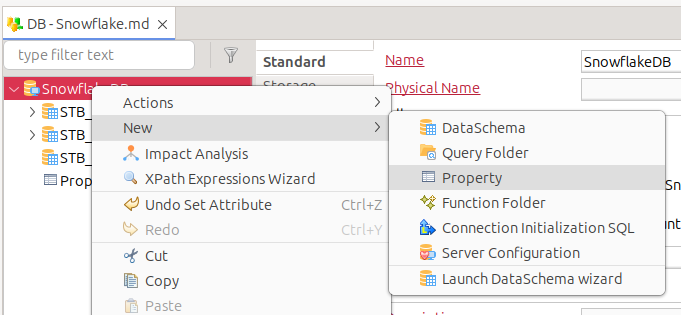
-
Set the value of this property to the path of the private key file you generated for your Snowflake account. xDI Designer and xDI Runtime must be able to access this file.
For more information, see the documentation for Snowflake’s JDBC driver.
Use OAuth2 authentication
The Snowflake JDBC driver supports OAuth2 authentication. When configuring your Snowflake metadata in Semarchy xDI, you must use the OAuth 2.0 Client Credentials flow.
To authenticate using OAuth2 authentication, follow these steps:
-
Configure your Oauth2 provider for accessing Snowflake.
-
Open your Snowflake metadata in xDI Designer.
-
Configure your Snowflake metadata with the OAuth2 parameters defined in the Snowflake documentation. You can add these parameters in one of two ways:
-
Add them as JDBC URL parameters.
-
Add them as individual properties under the top-level metadata node. +
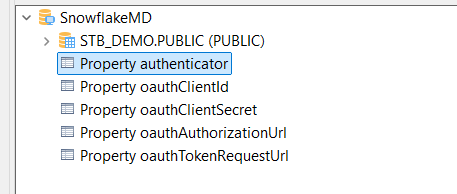
-
Temporary storage
Overview
To optimize data loading into Snowflake, Semarchy xDI uses a temporary storage location to store temporary files before loading them into Snowflake.
When necessary, source data is first extracted to temporary files which are sent into this temporary storage location, before being loaded into Snowflake using the dedicated Snowflake loaders.
Currently, Semarchy xDI supports the following storage locations:
-
Internal Snowflake Stage
-
External Storage
-
Amazon S3
-
Google Cloud
-
Microsoft Azure Storage
-
Storage definition
The storage information is defined in the Snowflake metadata.
On the Snowflake metadata server node:
-
Select the Storage tab.
-
Define the Storage Method property.
-
Define the External Storage property if you are using external storage.
-
(Optional) Change the Compression Behavior.
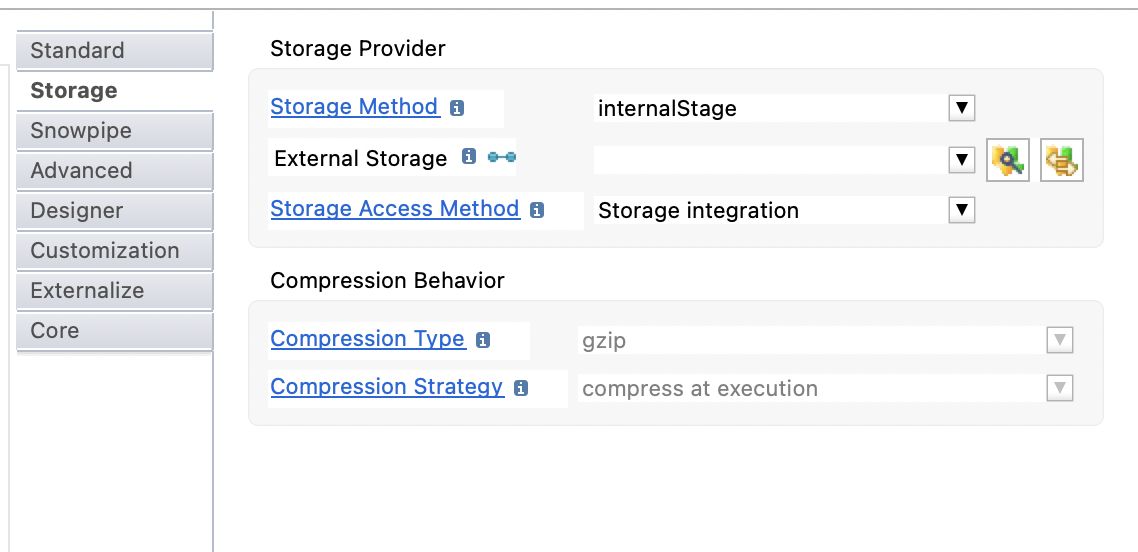
The following properties are available:
| Property | Description | ||
|---|---|---|---|
Storage Method |
Storage method used as default in mappings loading data into Snowflake.
|
||
External Storage |
Metadata link of the external storage container to be used when using external storage method. Choose in the list the external storage, or drag and drop it inside the property.
|
||
Storage Access Method |
Defines the method that should be used to access the storage. Possible options are:
When this parameter is empty, it uses the value of the parent. On the server node, as there is no parent, it uses the Credentials mode as default, for compatibility purposes. |
||
Storage Integration |
Only available when Storage Access Method is set to Storage Integration. Free text field that allows defining the name of a snowflake integration storage. |
||
Compression Type |
Defines the compression type used when loading files (source files or temporarily generated files) into this database. |
||
Compression Strategy |
Defines the compression behavior when loading files (source files or temporarily generated files) into this database.
|
|
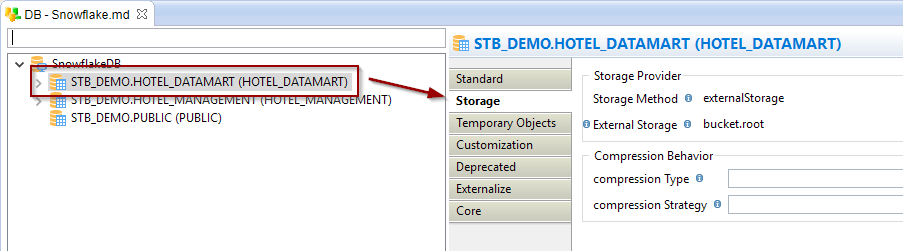
Those attributes can be overridden per schema and per table: for this, go on the desired schema or table node, then go inside the 'Storage' tab where you’ll find the same attributes, which will override the value set on the parent nodes. |
| 'External Storage' is not linked to the 'Storage Method'. You can decide to use 'internalStage' storage method but provide an External Storage link for specific cases where you’ll override the default storage method. |
Definition of an external storage
As indicated in the above properties documentation, you can define the external storage location by selecting the related location, or by dragging and dropping it directly on the property.
To define an external storage, the prerequisite is to have the corresponding metadata existing in your workspace.
Example through a drag and drop:

| Refer to Getting started with the Microsoft Azure component and Amazon component to learn how to create this metadata. |
Override of storage configuration
The storage configuration that is defined on the server node can be overridden on schema, on table, and directly in mappings.
This offers the ability to have a common default behavior and override it when it is required for some specific developments or use cases.
Example of an override on a schema node:
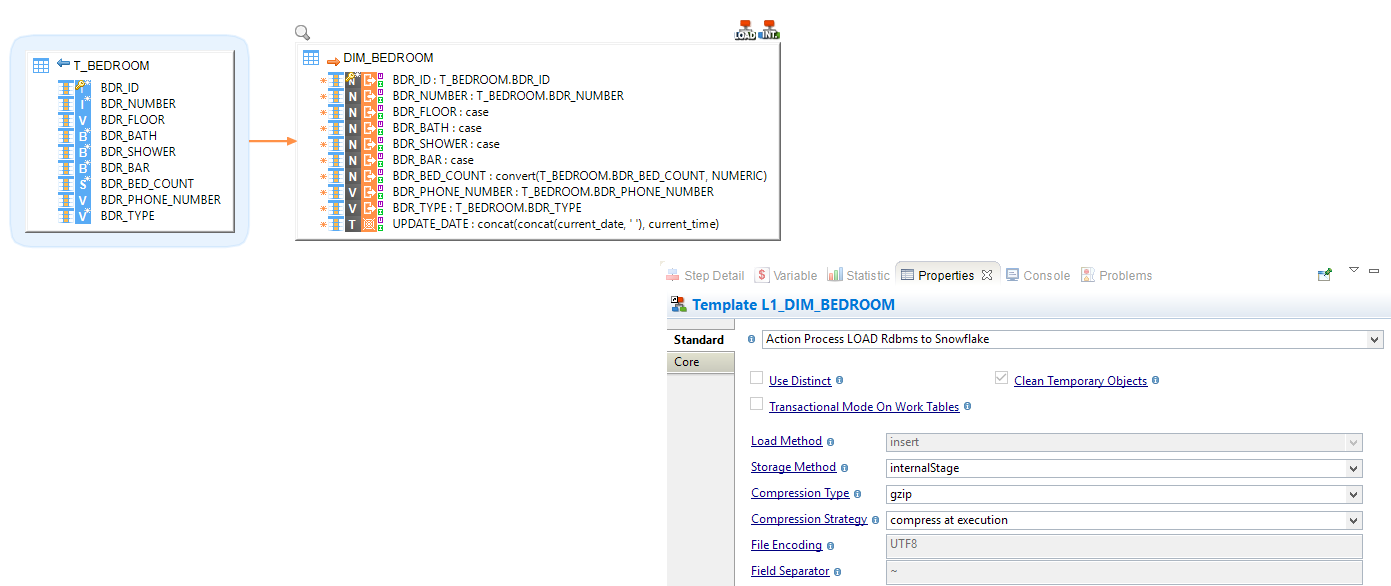
Example of an override in a mapping:
VARIANT data type
Overview
The VARIANT data type allows storing structured data such as JSON, AVRO, or XML.
Semarchy xDI supports reading and writing data inside columns with this data type.
Read data in a VARIANT
To read and manipulate structured data contained in a VARIANT column, use a Deserializer. See Deserialize source data.
Write data in a VARIANT
In a Mapping, map any source data to the target Snowflake VARIANT column. Depending on the source data type, you may need to use Snowflake’s conversion functions to convert the source data to a format matching Snowflake’s VARIANT data type. See Create mappings.
Additionally, Semarchy xDI also provides a feature to seamlessly write JSON or XML data in a VARIANT column. To do this:
-
Create a JSON or XML Metadata:
-
Define the expected data structure. See Metadata and reverse engineering.
-
Right-click the JSON or XML node representing the data structure add choose New > Property Field.
-
Give a Name to the property field and select stringContent in the Property attribute. See JSON property fields and XML property fields
-
-
Create a mapping:
-
Add the JSON or XML data structure as the source.
-
Add the Snowflake table as the target.
-
Map the source stringContent property to the target Snowflake VARIANT column.
In addition to mapping the stringContent property to the VARIANT column, you can also map any of the JSON or XML fields to the other columns of the Snowflake table.
-
-
Run the Mapping.
The source data is written in the target Snowflake table.
Create your first mappings
Your metadata is ready and your tables reverse engineered, you can now create your first mappings.
The Snowflake technology can be used like any other database in Semarchy xDI.
Drag and drop your sources and targets, map the columns as usual, and configure the templates accordingly to your requirements.
Loading data from a database into Snowflake
Loading data from a Delimited File into Snowflake
Loading data from Snowflake into another database
Performing Reject detection while loading a Snowflake Table
Loading structured data contained in a VARIANT field into another database
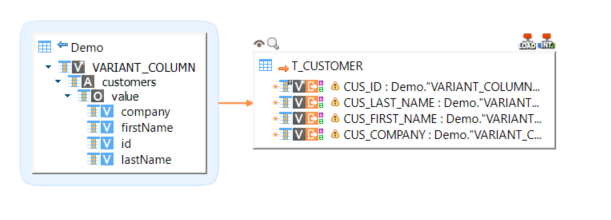
| The warnings on the target fields are displayed because of the hierarchical structure that is currently unknown by the expression parser. They can be ignored. |
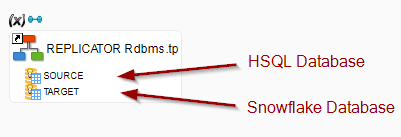
Replicating a source database into Snowflake
Fetching results using the JDBC driver
As of Snowflake JDBC driver version 3.11.0, Snowflake returns query results in the Apache Arrow data format by default. In order to properly fetch results when using the Snowflake JDBC driver, you need to either change the result format to JSON, or make sure the Apache Arrow library is working.
Using JSON results
To have Snowflake return data in the JSON format, open the database connection in Designer, and add a new property. Give the property the following name and value:
-
Name:
jdbc_query_result_format -
Value:
json
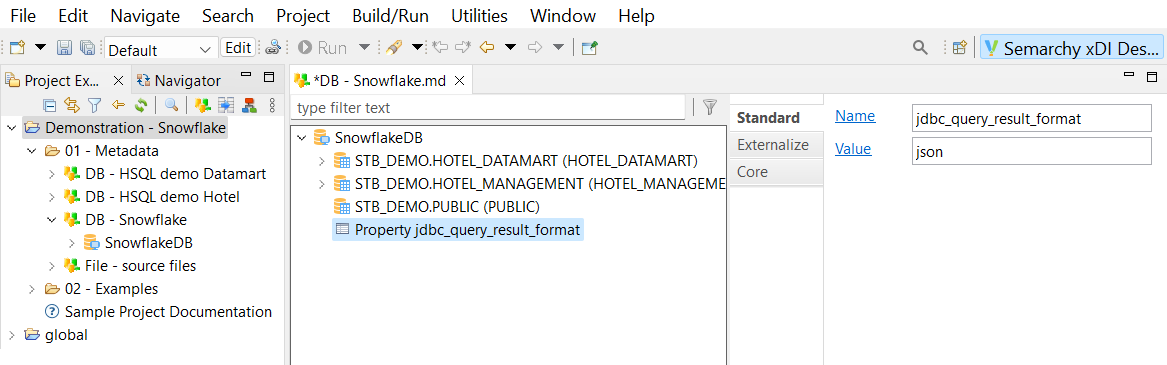
Save the connection information. Snowflake now returns all its results in JSON format.
Using the Arrow library
Apache Arrow has not yet been updated to work with Java versions 16 and higher. On those platforms, Apache Arrow will fail with an exception. You need to set up a workaround to make it work.
-
Download the Arrow library from the Apache Arrow website.^
-
Add the library to the Snowflake module.
-
Add the Java command line option
--add-opens=java.base/java.nio=ALL-UNNAMEDin one of the following places:-
For the Designer, in the INI file with the startup settings.
-
For the Runtime, in the
XDI_RUNTIME_OPTSenvironment variable. -
A command line script used to launch the applications.
-
For more information, refer to this article on the Snowflake community website.
Sample project
The Snowflake component is distributed with sample projects that contain various examples and files. Use these projects to better understand how the component works, and to get a head start on implementing it in your projects.
Refer to Install components in Semarchy xDI Designer to learn about importing sample projects.