| This is documentation for Semarchy xDI 2024.1, which is no longer actively maintained. For more information, see our Global Support and Maintenance Policy. |
Getting started with the Azure SQL Database database
This page contains information to help you get started with Azure SQL Database in Semarchy xDI.
Read on to find how to reverse your first Metadata, configure it to use Azure Blob Storage, and use it to produce mappings and processes.
Prerequisites
A master key must exist in the target Azure SQL Database.
This is required for Azure SQL Database to access Microsoft Azure Blob Storage, which is used as a temporary place to load data for performances purposes.
Refer to Microsoft Azure Documentation to learn how to create a master key.
Connect to your data
Azure SQL Database metadata
The first step is to create the Azure SQL Database Metadata.
For this, simply create a new Metadata for the Azure SQL Database as you would usually do for any other database.
You can refer to Connect to your data page which explains the procedure.
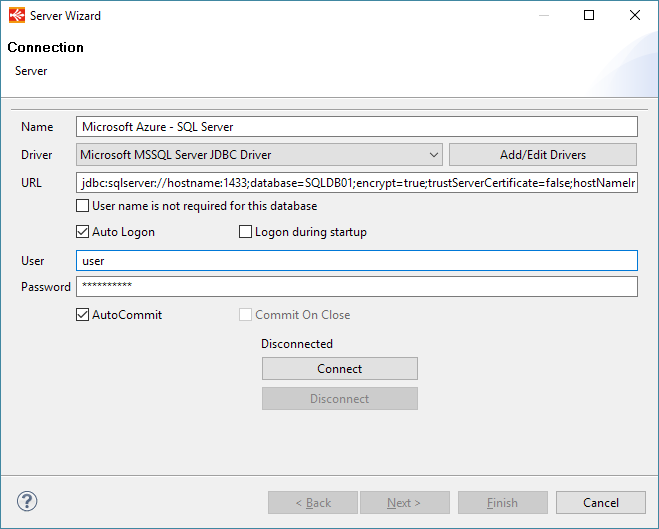
|
The Microsoft MSSQL Server JDBC Driver must be used. The complete JDBC URL of the Azure SQL Database must be used. You can find it on the Azure portal. |
Below, an example of configuration:
Azure Blob Storage link
Overview
For performances purposes, Azure Blob Storage is used as temporary location to extract source data and then load it into Azure SQL Database through BULK INSERT statement.
This offers better performances when loading large sets of data than using direct JDBC loading.
Therefore, Semarchy xDI Templates are using this method to have good performances.
Configure the link
This section explains how to configure Azure SQL Database Metadata to work with an Azure Blob Storage container.
You can jump to the next section if you prefer configuring this later.
The first step is to create an Azure Blob Storage Metadata and define a container for temporary files. You can refer to Getting started with the Microsoft Azure component to do this.
Below, an example of an Azure Blob Storage Metadata:

| The container doesn’t have to exist on the storage, the Templates allow to create it automatically in case it doesn’t. |
Next step is to create the Link between the two Metadata.
To do this, drag and drop the Azure Blob Storage container from the Project Explorer in the SQL Database Metadata.
Depending on if you want to re-use it on several tables or schemas, drag and drop it on the desired node.
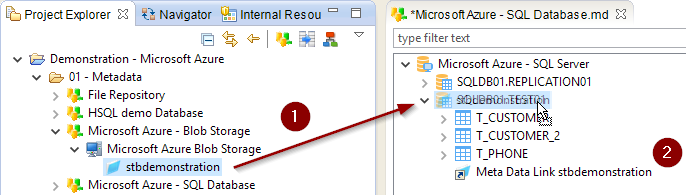
| In this example, we want it to be available for all tables so we put it on the schema. |
Finally, rename the Metadata link that is created to TARGET_AZURE_CONTAINER:
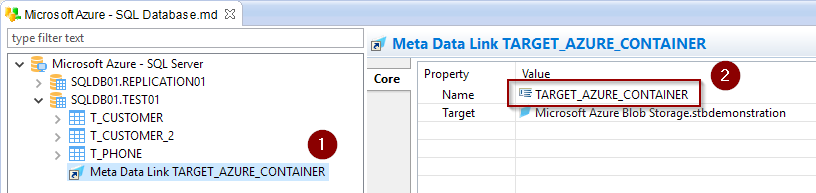
This is required as the Template will search for a Metadata Link named as this on the target Azure SQL Database, to know where to store the temporary file.
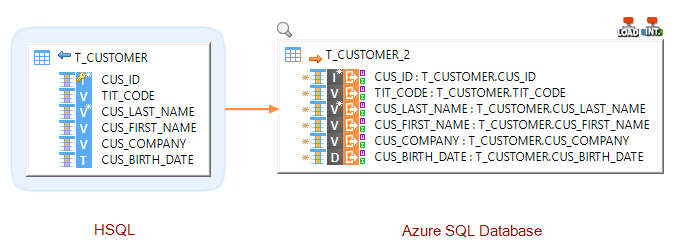
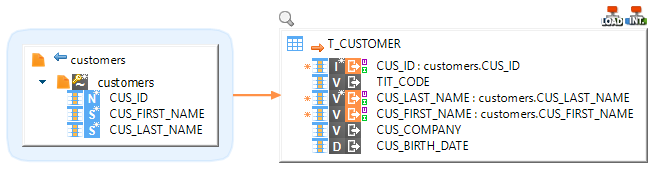
Work with mappings
Your Metadata being ready and your tables reversed, you can now start creating your first Mappings.
The Azure SQL Database technology can be used like any other database in Semarchy xDI.
You can refer to Work with mappings page which explains the procedure.
Loading data from a database into Azure SQL Database
Loading data from a file into an Azure SQL Database
Sample project
The Microsoft Azure component is distributed with sample projects that contain various examples and files. Use these projects to better understand how the component works, and to get a head start on implementing it in your projects.
Refer to Install components in Semarchy xDI Designer to learn about importing sample projects.