| This is documentation for Semarchy xDI 2023.1, which is no longer supported. For more information, see our Global Support and Maintenance Policy. |
Filters
Filters applied on datastores allow filtering the data used in mappings.
Create a Filter
Add a Filter to a Mapping
To create a filter:
-
Select a column from a source datastore in the mapping editor.
-
While keeping the mouse button pressed, drag this column onto an empty zone of the mapping editor.
-
Release the mouse button.
-
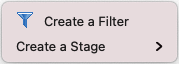
A menu opens to select an action. Select Create a Filter.
-
A
 filter is added to the diagram.
 -
In the Expression Editor view, edit the filter’s expression.
A filter expression must use the language and functions from the engine that will process it, which depends on the filter’s Execution Location property (Source or Staging Area). Drag and drop columns from datastores onto the Expression Editor to add them to the current expression. When editing a join or a filter, think of it as a conditional expression from the
WHEREclause of a SQL statement.Examples of valid filter expressions:
-
CUSTOMER_COUNTRY LIKE 'USA' -
COUNTRY_CODE IN ('USA', 'CAN', 'MEX') AND UCASE(REGION_TYPE) = 'SALES'
-
-
Select the filter in the mapping diagram.
-
In the Properties view, set the following Standard Properties:
-
Enable: Enables or disables the filter.
-
Aggregate: Select this option if this filter is an aggregate and must generate a
HAVING`clause. -
Set the Execution Location. The filter may be executed by the Source datastore or in the Staging Area.
To set the Execution Location property directly from the mapping diagram: select the filter on the diagram and then click the  icon to execute the filter on the source or the
  icon to execute it in the Staging Area.
Selecting Source as Execution Location reduces the volume of data transferred from the source datastore. -
Qualify: Select this option to generate a
QUALIFYclause for this filter (if supported by the Execution Location’s engine). -
Description: Free form text.
-
-
Press CTRL+S to save the mapping.
Select the Target for a Filter
By default, a filter defined on a source datastore applies to all the target datastores the source datastore is mapped with. To apply the filter to only one target:
-
Right-click the filter on the mapping diagram.
-
Select Activate > For <datastore name>. To apply the filter to all target datastores, select Activate > Always.
Filter Joins
To add a filter to a specific join:
-
Drag and drop the source column you want to use as filter onto this join. A default filter clause is added to the join expression.
-
Update the join expression.
Exists / Not Exists Filters
Semarchy xDI allows performing Exists / Not Exists operations in mappings to filter datasets:
-
An Exists filter selects only the rows from a source datastore that exist in another datastore.
-
A Not Exists filter selects only the rows that do not exist in another datastore.
|
In this section:
|
To add an Exists / Not Exists filter:
-
Select the column from the source datastore in the mapping diagram.
-
Drag this column onto a column of the target datasource.
-
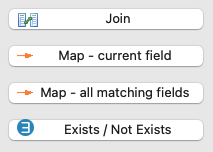
Release the mouse button. Select Exists / Not Exists.
-
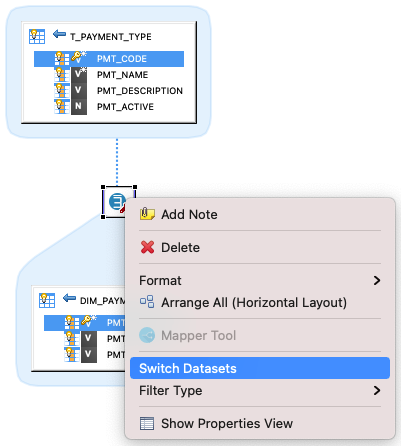
An
 Exists / Not Exists filter is added to the diagram.
A dotted line between the Exists / Not Exists filter and the target datastore allows identifying which datastore is used to filter data.
To switch the source and target datastores, right-click the Exists / Not Exists filter and select Switch Datasets in the contextual menu.
-
In the Properties view, select the Exists or Not Exists Operation depending on the expected behavior.
-
In the Expression Editor, edit the expression to use to identify matching records between the source and target datastores.